Fix: Synaptics Fingerprint Reader ‘Device Cannot Start (Code 10)’
Your fingerprint reader may show the code 10 error due to an outdated, corrupt, or incompatible fingerprint driver. Moreover, conflicting system devices like cameras may also cause error under discussion.
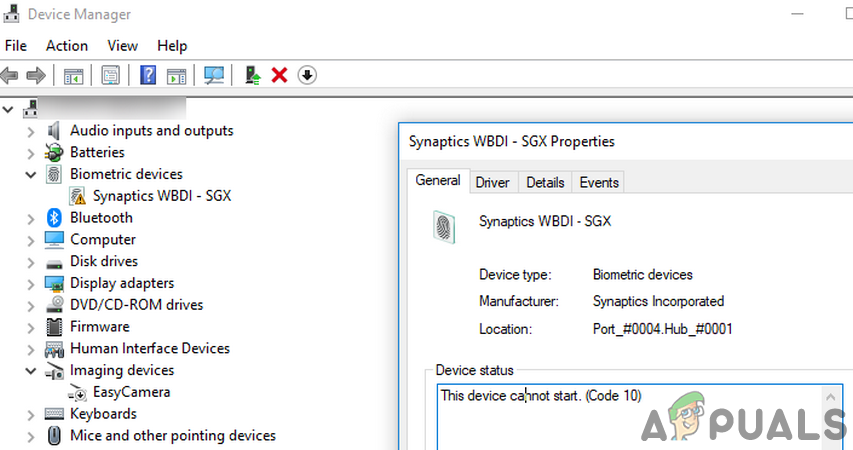
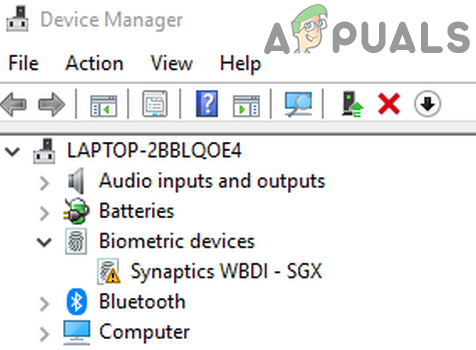
The affected user encounters the error when he tries to use the biometric device but fails to do so (although the device works intermittently) and when checked in the device manager, the device shows the “Device cannot start (Code 10)” error. The fingerprint issue is reported on nearly all makes and models of PCs (having fingerprint reader) usually after a system/driver update.
Before proceeding with the troubleshooting process, make sure no USB device is attached to your system. Moreover, try to give a few light knocks where the fingerprint reader is located as the current fingerprint issue can be a result of loose cabling. Furthermore, try to run “msdt.exe -id DeviceDiagnostic” in an elevated command prompt to run the hardware troubleshooter. Additionally, check if the corrupt user profile is creating the issue by creating a new user profile.
Solution 1: Disable Power Management of the Fingerprint Device
You may encounter the error under discussion if the power management of your system is hindering the operation of the fingerprint device (especially if your system is having issues after waking from sleep). In this scenario, disabling the power management of the fingerprint device by your computer may solve the problem.
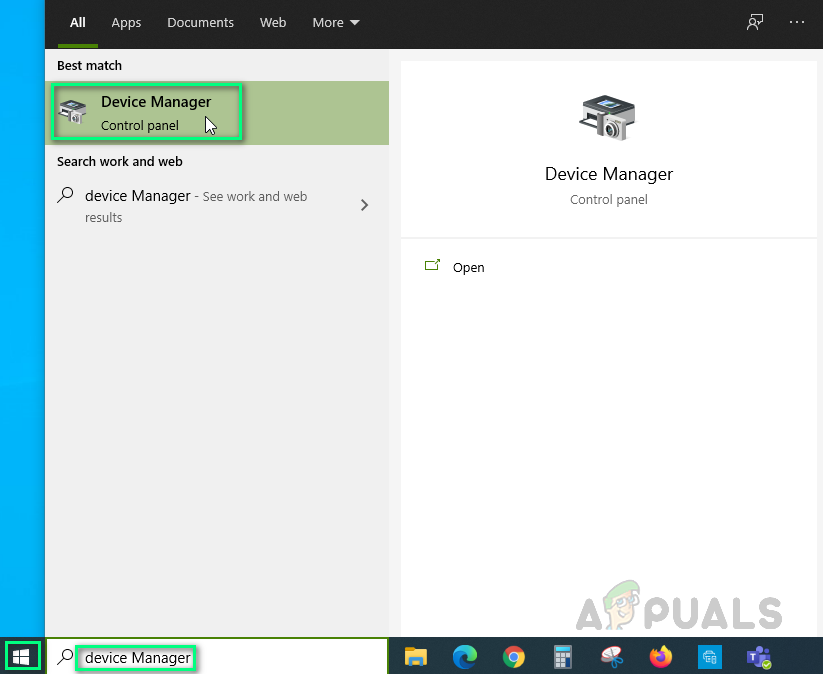
- Right-click on the Windows button and in the menu displayed, choose Device Manager. Now, in the results shown by the search, choose Device Manager.
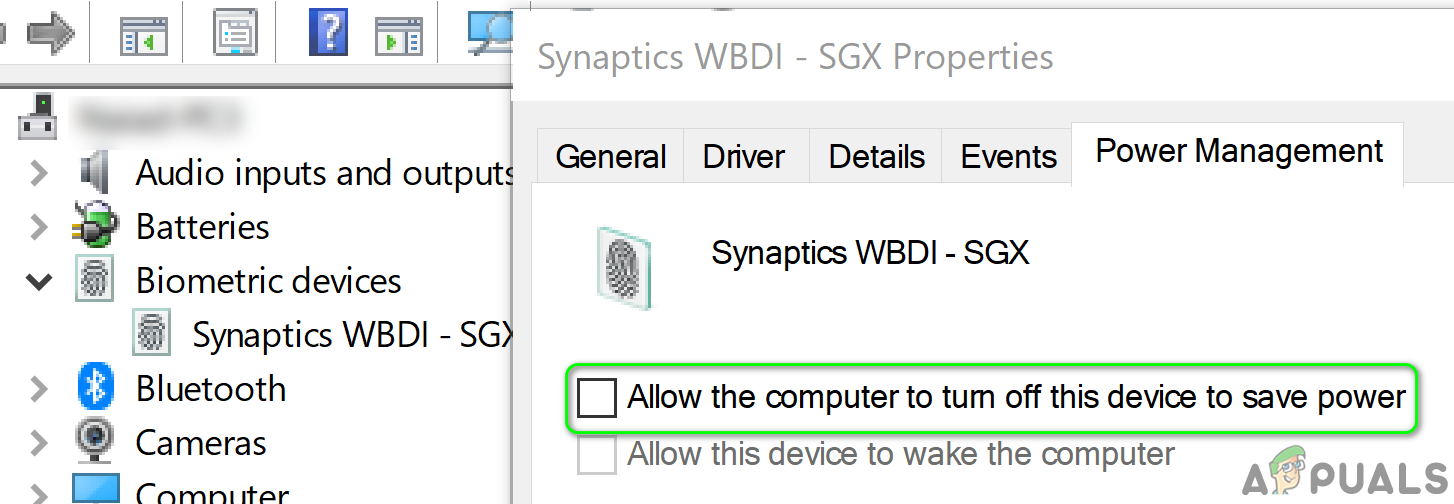
Opening Device Manager - Now, expand the Biometric Devices and right-click on Synaptics WBDI device.
- Then, in the menu shown, choose Properties and then navigate to the Power Management tab.
- Now, uncheck the option of ‘Allow the Computer to Turn Off This Device to Save Power’ and then click on the Apply/OK buttons.
Allow the Computer to Turn Off This Device to Save Power for SGX Device - Then restart your computer and check if the fingerprint scanner issue is resolved.
- If not, then reinstall the driver and restart the machine.
- Upon restart, check if the fingerprint scanner issue is resolved.
Solution 2: Disable the USB Selective Suspend Feature
The USB selective suspend enables a hub driver to suspend an individual hardware port without affecting the other ports on the USB hub. You may encounter the error at hand if the USB Selective Suspend feature is hindering the operation of the biometric device. In this context, disabling the USB Selective Suspend may solve the problem.
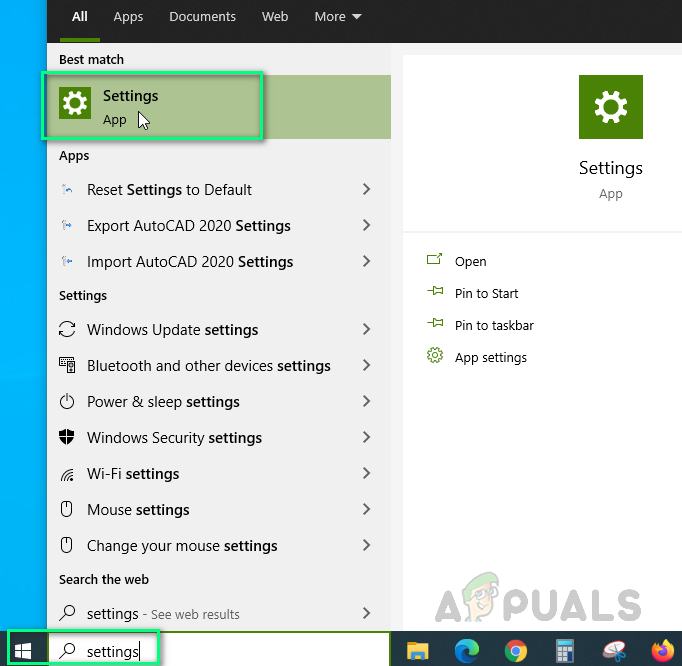
- Open the Windows menu by pressing the Windows key and then click on the Gear/Settings icon.
Opening Windows Settings - Now, open System, and then, in the left half of the window, choose Power & Sleep.
- Then, in the right half of the window, click on Additional Power Settings (under Related Settings).

Open Additional Power Settings - Now, click on Change Plan Settings (in front of the selected plan) and then click on Change Advanced Power Settings.

Change Advanced Power Settings - Now expand USB Settings and then USB Selective Suspend Settings.
- Then disable the said option for both On Battery and Plugged-in options.

Disable USB Selective Suspend - Now reboot your PC and upon reboot, check if the fingerprint device is working fine.
Solution 3: Allow the Use of Biometric Device Through the Group Policy
You may fail to use the biometric device if your group policy bars it from operation (the policy may have triggered after a system update). In this context, allowing the use of a biometric device through the group policy may solve the problem.
- Open the Run command box by pressing Windows + R keys and execute the following:
gpedit.msc

Open gpedit.msc - Now, in the left pane of the window, expand Computer Configuration and then Administrative Templates.
- Then expand Windows Components and click on Biometrics.

Open Windows Component in the Group Policy Editor - Now, in the right pane of the window, double-click on Allow the Use of Biometrics to open it.

Open the Allow the Use of Biometrics - Then, in the Settings Edit window, select Enabled and click on the Apply/OK buttons.
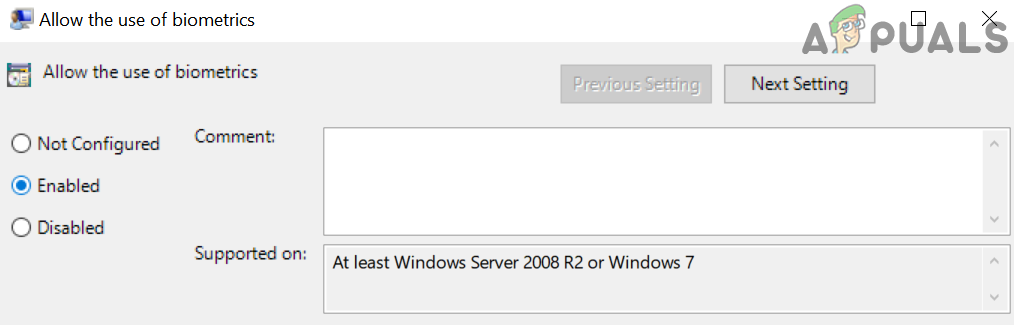
Enable the Setting of Allow the Use of Biometrics - Now, restart your system and upon restart, reconfigure your Sign-in options and then check if the Fingerprint scanner is operating fine.
Solution 4: Disable/Reenable the Camera Driver
You may encounter the error at hand if any of the other system components are hindering the operation of the fingerprint reader. One such reported incident is on Lenovo Yoga 720-13IKB where the system’s camera was interfering in the operation of the fingerprint reader. In this case, disabling the problematic device may solve the problem.
- Launch the Windows Search by pressing Windows + S keys and then search for Device Manager. Now, click on Device Manager (in the results shown by the search).
- Then expand Imaging Devices and then right-click on the Camera.
- Now, select to disable Camera and then confirm to disable it.
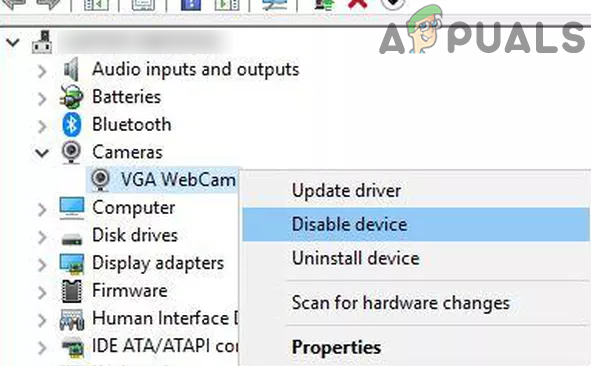
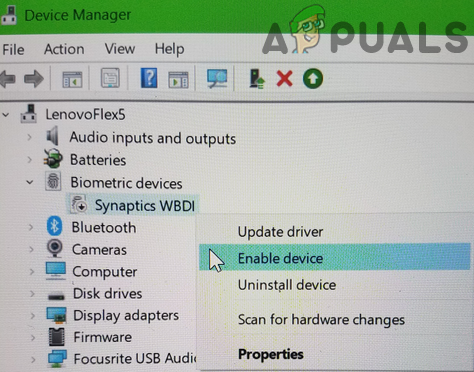
Disable the Camera in Device Manager - Repeat the same to disable the WBDI Device (under Biometric Devices) and reboot your system.

Disable WBDI Device - Upon reboot, enable the WBDI device and check if the fingerprint issue is resolved.
Solution 5: Update/Reinstall the Fingerprint Reader Driver
Your fingerprint reader may not work if its driver is corrupt, outdated, or incompatible. In this case, reinstalling the fingerprint reader driver may solve the problem. Before moving on, make sure all the system drivers especially your mouse driver and Intel chipset drivers are installed and up-to-date.
- Update the Windows of your system (make sure no optional/additional updates are pending) and your system drivers to the latest build.
- If your system manufacturer has an update utility (e.g. Dell Support Assistant or Lenovo Vantage), then use that application to update system drivers. Otherwise, visit your system manufacturer’s website and check if an updated version of your system drivers is available, if so, download and install the latest version of system drivers.
- If not, press the Windows key on your keyboard and type Device Manager. Now, in the results, select Device Manager.
- Now, expand the Biometric device and then right-click on the WBDI device and select Disable Device.
- Then, confirm to disable the device and then again right-click on the WBDI device.
- Now, in the menu shown, click on Update Driver and select Search Automatically for Drivers.
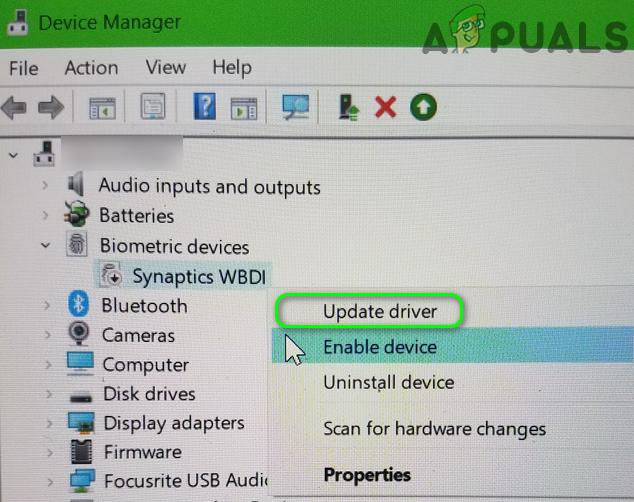
Update Driver of Synaptics WBDI Device - Then wait for the completion of the update process and then reboot your system.
- Upon reboot, re-enable the WBDI Device and check if the fingerprint reader is working fine.
Enable Synaptics WBDI Device - If not, launch a web browser and open the system manufacturer’s website.
- Then, find and download the latest fingerprint driver of your system.
- Now open Device Manager (step 3).
- Then expand Biometric Device and right-click on WBDI device (if it is not there, then check under System Devices).
- Now, in the menu shown, choose Uninstall Device and then select Delete the Driver Software for This Device.
Uninstall the WBDI device - Then click on the Uninstall button and follow the prompts on your screen to uninstall the driver.
- Now reboot your system and upon reboot, launch the downloaded file with administrative privileges to install the latest driver.
- Upon completion of the installation, reboot your PC and upon reboot, open the Windows Search by pressing Windows + S keys.
- Now, search for Sign-in Options, and then, in the list of results, choose Sign-in Options.
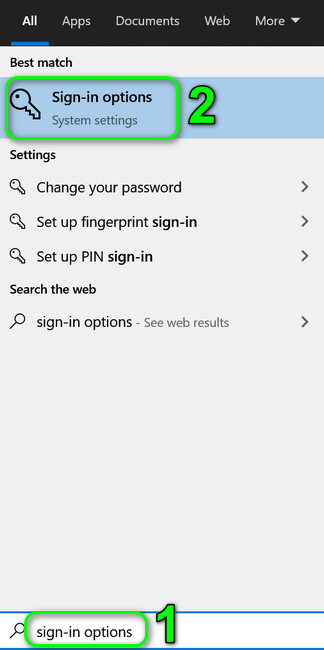
Open Sign-in Options - Then, try to add a fingerprint to Windows Hello and check if the fingerprint reader issue is resolved.
- If not, repeat steps 3 to 7 to uninstall the driver.
- Then open the Windows Update Catalog website and search for the relevant driver.

Windows Update Catalog - Now, download the driver file and then launch it using the administrator privileges to install the driver. If the file is a cab or zip file, then extract it and proceed to step 13.
- Then reboot your PC and upon reboot, check if the fingerprint reader issue is resolved.
- If not, locate the downloaded file location of the driver (step 11).
- Now open Device Manager (step 3).
- Now, expand the Biometric Device and then right-click on the WBDI device.
- Then, select Update Driver and select Browse My Computer For Drivers.
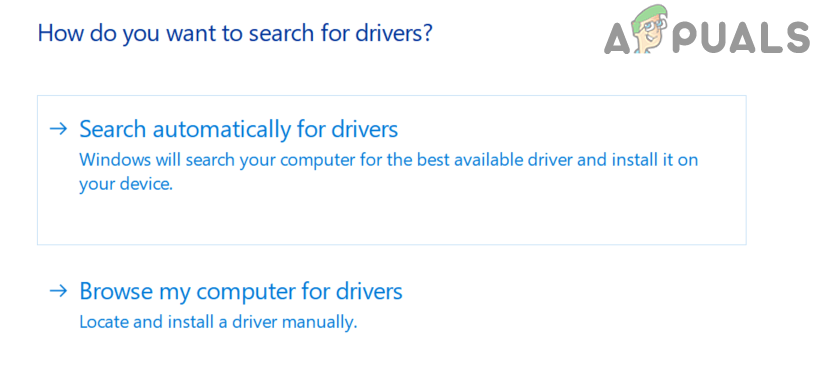
Browser My Computer for Drivers - Now select the option of Let me pick from a list of available drivers on my computer and then click on Have Disk.
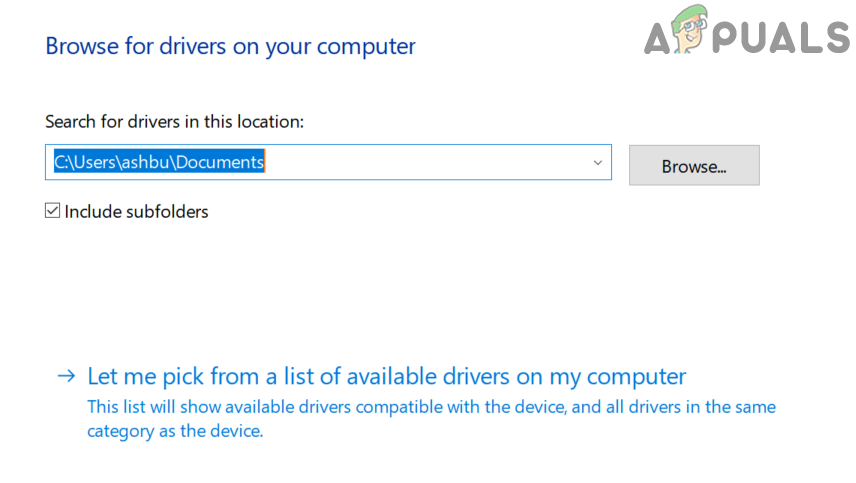
Let me pick from a list of available drivers on my computer - Now, click on the Browse button and then navigate to the driver’s file location (noted at step 13).
- Then select the appropriate .inf file of the driver and then click on the Open button.
- Now, complete the installation of the driver and then reboot your PC.
- Upon reboot, check if the fingerprint reader is working fine (steps 8 to 10).
- If not, visit the Intel Download Center and download the driver of your fingerprint reader (you can also try Intel Driver & Support Assistant).

Search for the WBDI Driver or Use Intel Driver & Support Assistant - Now, repeat step 11 to 23 to check if the fingerprint reader issue is resolved.
- If not, then try to revert to an older version of the driver and check if the fingerprint is working fine.
Solution 6: Change the BIOS Settings of Your System
BIOS of your system is updated regularly to satiate the ever-evolving technological advancements and patch its known bugs. You may fail to use the fingerprint reader if the BIOS of your system is not updated to the latest build as it can cause compatibility issues between the OS modules. In this case, updating the BIOS of your system to the latest build may solve the problem.
Warning:
Proceed at your own risk as updating BIOS requires a certain level of expertise and if done wrong, you may brick your system and cause everlasting damage to your data and system.
Update your system’s BIOS by following the instructions related to your system’s make and model.
After updating the BIOS of your system and then check if the fingerprint reader is working fine.
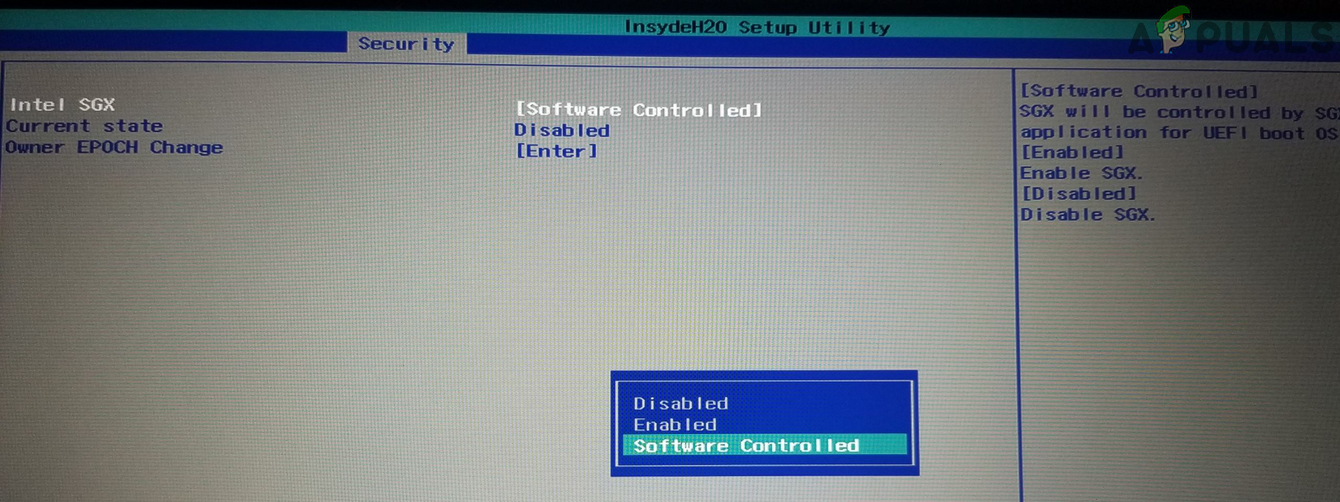
If not, then enable the SGX BIOS settings by following the instructions mentioned below:
- Boot your system into BIOS and navigate to the Security tab.
- Now change the SGX settings to disable and exit the BIOS after saving the changes.
Disable SGX in the BIOS - Then reboot your system and upon reboot, open the Windows Search by pressing Windows + S keys.
- Now, search for Sign-in Options and then, in the list of results, choose Sign-in Options.
- Then, try to add a PIN again to your Windows machine (if the PIN is already added, then remove the PIN and then re-add it) and reboot your system.

Re-add the PIN to Windows Hello - Upon reboot, open the Sign-in Options (step 4) and check if you can set up a fingerprint in Windows Hello.
- If not, repeat steps 1 to 6 but at step 3, change SGX to Enabled (or to Software Controlled) and check if the fingerprint reader is working fine.
- If not, then boot your system into BIOS and navigate to the Security tab.
- Now, in the fingerprint section, enable Predesktop Authentication and then Reset Fingerprint Data.

Enable the Predesktop Authentication and Reset Fingerprint Data in the BIOS - Save/exit BIOS and boot your system into Windows, then repeat steps 3 to 6, and hopefully, the Fingerprint reader is working fine.
If the issue is still there, then open the Registry Editor and navigate to the following path:
Computer\HKEY_LOCAL_MACHINE\SOFTWARE\Policies\Microsoft\Windows\System
Now, add the DWORD (32-bit) value, named AllowDomainPINLogon, and check if the fingerprint reader is working fine. If not, then you may have to either reset your system to factory defaults or perform a clean install of Windows. If the fingerprint issue is even there after the Windows reinstallation, then you may have to get your system checked for any hardware issues.


Actually mine was none of above. after thoroughly googling and reading microsoft’s own documentation, it seems that one of USB Controller driver was causing that problem (WUDFrd or winusb, but it’s more likely WUDFrd), but I since I didn’t know which is which, I ended up uninstalling all of my Universal Serial Bus Controller section in Device Manager. And after clicking “scan for hardware changes, it’s working again.
After restart, the USB controller driver section was reinstalled, but with the fingerprint reader working.