Fix: Steam Store not Loading
After updating Steam, users may experience Steam’s in-game browser or store not working properly or missing essential elements. There may be several reasons behind this such as your internet connection might be slow or there may be a problem with your HTML cache. One effective way is to delete Steam and re-install it again. However, before we resort to more technical and tedious methods, we will try troubleshooting for smaller problems.
Solution 1: Clearing the HTML cache
The most common reason for a slow in-game browser is because of the HTML cache. In principle, you should clear it once every 2 or 3 weeks so it doesn’t conflict with your browser.
- Exit Steam client.
- Press ⊞ Win + R button. This should pop-up the Run
- Type in the dialogue box write “control’’. This should bring up the control panel in front of you.

- In the control panel, search for “Folder Options” in the dialogue box located in the upper right corner.

- Click the “Folder Options” which returned in the search. Then click the “View” tab and here you will check a line that says “Show Hidden files, folders and drives”. Mark it, apply the changes and close the window.

- Once again press ⊞ Win + R button. This should pop-up the Run application.
- In the dialogue box write “C:\Users\<Username>\AppData\Local\Steam\htmlcache’’. Here the <Username> is your windows account username.
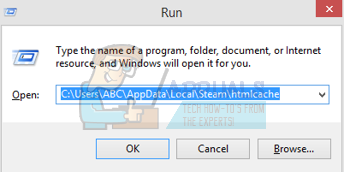
If you don’t know your windows account username, you can browse to the file location by opening windows file explorer.
Open Your C drive and search for a folder named “Users”.
Later on, you will be seeing a window consisting of all the names of the Users who use this computer. Click on your user name and advance to find a folder named “AppData”. Here will find a folder named “Local”. Locate a folder named “Steam” in it. Finally, you will be seeing a folder named “htmlcache”.
Once you are in the cache folder, select all the items and delete them.
- After you are done with the deletion, press ⊞ Win + R button again to bring up the Run application.
- In the dialogue box type “steam://flushconfig”.

- After you press “Ok”, a window will pop up to confirm your action. Please note that after clearing the cache, Steam will prompt you to re-login using your credentials. Only perform this action if you have your Steam username and password at hand.

- Launch Steam using the client and hopefully, the in-game browser and store will work as expected.
Solution 2: Adding “–no-cef-sandbox” in your Steam shortcut
This method involves making a shortcut in your Steam directory and renaming it. Follow the steps below and make sure to write the exact address which is listed.
- Create a shortcut of steam in your steam folder.
The default location for your steam folder should be “C:\Program Files (x86)\Steam”.
Press ⊞ Win + R button. This should pop-up the Run application.
In the dialogue box write “C:\Program Files (x86)\Steam”.

Or if you installed Steam in another directory, you can browse to that directory and you will be good to go.
![]()
- Now to ensure nothing bad happens to your default Steam.exe file, we will make a shortcut of your steam.exe file and paste it into your steam folder. It should look something like this:

- Now that you’ve got your shortcut set up, you’re going to right-click it, go to properties and you’ll be seeing this.

- In the target textbox, add:
-no-cef-sandbox
To the end of the file path
So it becomes:"C:\Program Files (x86)\Steam\Steam.exe"-no-cef-sandbox
The pathway could be different if you have a different location where Steam is installed.

- Press OK to save the properties and run the shortcut you have just created.
If you followed all the steps correctly you should now have two steam applications that can be used to access Steam. One of them will work for this particular while your original steam file will be left unchanged.
Solution 3: Deleting Steam Web Browser Cache
It is possible that the steam web browser’s cache has been corrupted. If the web browser cache is corrupted the store might not load properly. Therefore, in this step, we will be deleting the cache from the web browser used by steam. For that:
- Open steam and click on the “Steam” tab on the top left.
- Click on the “Settings” option from the list.
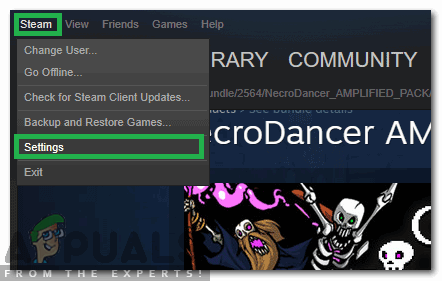
Clicking on the “Steam” option and selecting “Settings” from the list - Click on the “Web Browser” option in the left pane.
- Click on “Delete Web Browser Cache” and “Delete Web Browser Cookies” options.
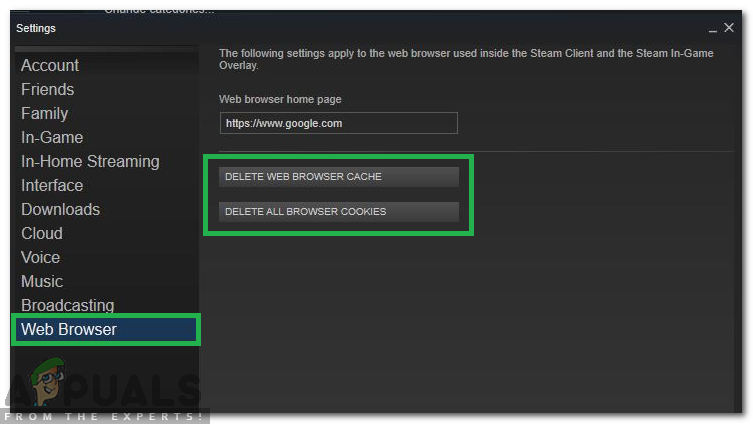
Clearing Cache and Cookies - Restart Steam and check to see if the issue persists.
Solution 3: Reinstalling Steam after deleting its files
Exit all Steam applications before starting this solution. Please note that this won’t delete your gameplay data.
- Launch your Task Manager by pressing ⊞ Win + R button. This should pop-up the Run
In the dialogue box write “taskmgr”. This should open up the task manager.
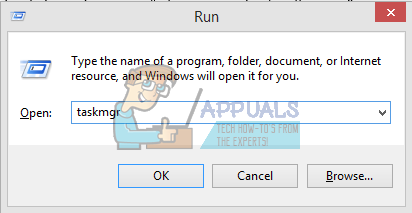
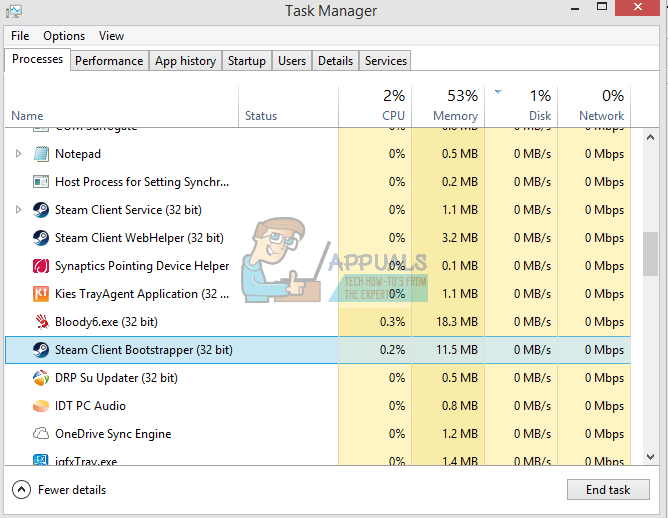
- End all Steam related processes starting from the process ‘Steam Client Bootstrapper’.
- Press ⊞ Win + R button.
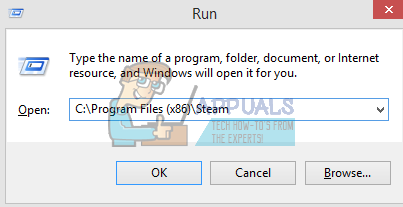
In the dialogue box write “C:\Program Files (x86)\Steam”.
Or if you installed Steam in another directory, you can browse to that directory and you will be good to go.
![]()
- Locate the following files and folders:
- Steamapps Folder (This is where all your games are located)
- Userdata Folder (This is where the progress of your games is saved)
- Skins Folder (This is where your steam skins are located)
- Steam.exe Application (This is the launcher for Steam)
- Ssfn files They may be more than one and each one may have a number in front of it (Keep it so you don’t have to wait 7 days for trade cooldown).
- Delete all the other files except the ones mentioned above and launch steam from the launcher. Steam will download some files and update itself. After completing the installation, it will prompt you to enter your credentials. After you successfully log in, the in-game browser will work as expected.