How to Fix Sea of Thieves Marblebeard Error Code?
Some Sea of Thieves players is reporting that they are encountering the ‘Marblebeard Error Code‘ when they attempt to connect to the game’s servers. This is known to happen during a failed attempt to rejoin a session and is likely tied to a server problem.
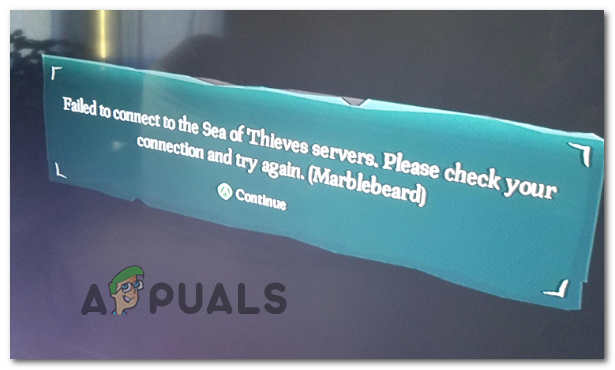
This problem is reported to occur on both PC and Xbox One. Some uses get this error with every server they attempt to connect to while others say the problem only occurs occasionally.
As it turns out, there are several different causes that might end contributing to the apparition of the ‘Marblebeard Error Code‘:
- Xbox Live or Game Server issue – It’s possible that you’re encountering the problem due to a server issue with the Xbox Live infrastructure or due to a widespread issue with the game’s servers. In this case, there is no viable fix that will resolve the issue other than waiting or the developers to fix the problem.
- Sea of Thieves port is not forwarded – Another common problem that will cause this problem is a router’s inability to forward the port that is being used by the game. If this scenario is applicable, you should be able to fix the issue by enabling UPnP (if your router supports it) or by forwarding the game’s port (3074) manually from your router settings.
- IP / TCP Network Inconsistency – As it turns out, this problem can also be facilitated by a common network inconsistency that is preventing your platform of choice (Xbox One or PC) from establishing a stable connection with the game’s server. In this case, restarting or resetting your router should fix the issue for you.
- Inconsistent MAC Address on Xbox One – If you’re seeing this error code on Xbox One, the problem might occur due to an inconsistent MAC Address that is making it hard for your console to maintain a connection with the game server. In this case, clearing the alternate MAC address from the Networking menu of your console should fix the issue for you.
- System File Corruption – In case you have only started to experience this problem after an unexpected console shutdown or after a failed update, you can assume that some type of system file corruption is causing the connectivity problems. To fix this, perform a hard reset on your Xbox One console.
Method 1: Checking status of Sea of Thieves servers
Before you start following any other potential fixes, you should start by investigating whether the issue is widespread or it’s only occurring locally (for you). It’s possible that you’re encountering the Sea of Thieves MarbleBeard Error due to a server issue that is preventing you from connecting/reconnecting to a server.
In the past, affected users have reported that they ended up seeing this error code whenever the Xbox Live infrastructure is down or Sea of Thieves is having server problems.
Before trying any of the other fixes below, start by visiting DownDetector and IsTheServiceDown to see if other users are currently encountering the same problem.
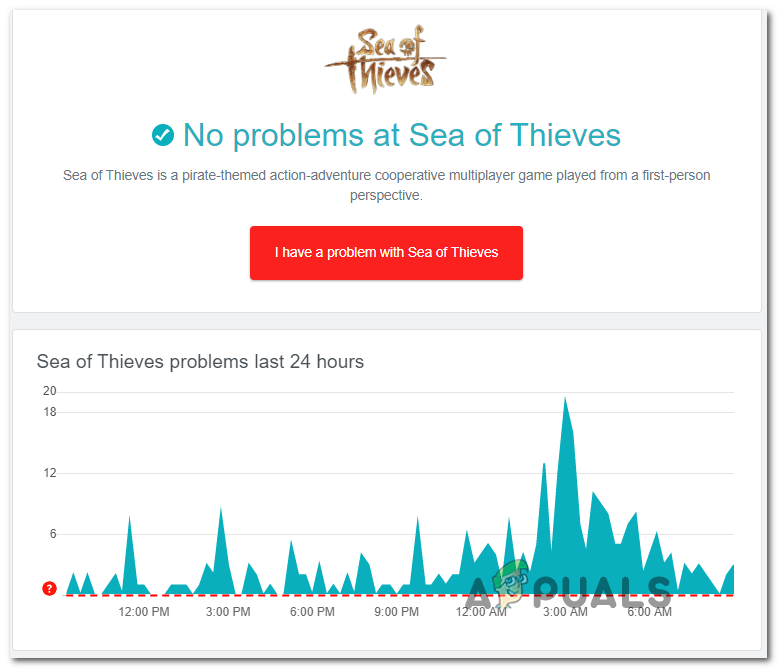
If you discover that other users are encountering the same problem, you should check the official Twitter account of SeaofThieves for announcements of the status of the issue.
Also, keep in mind that this game is built around the Xbox Live infrastructure, so if that is down, the multiplayer component of Sea of Thieves will stop working. To verify if this is the case, check out the Xbox Live Status page and see if there are currently any problems with the Xbox Live Core Services and if Sea of Thieves is mentioned under Games & Apps.
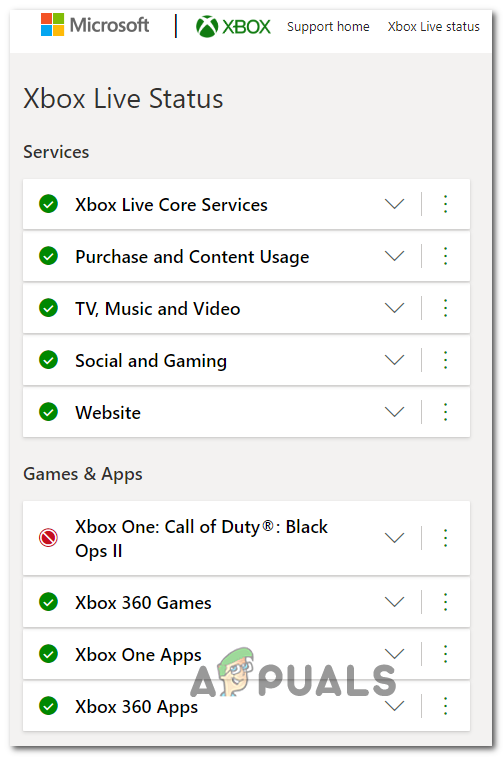
In case you discovered that the problem is indeed caused by a widespread server issue, none of the potential fixes below will fix the ‘Marblebeard Error Code‘ with Sea of Thieves. In this case, you need to wait for the developers to fix the problem.
However, if the investigation you just did didn’t reveal any server problems, move down to the next potential fix below.
Method 2: Ensuring that NAT is OPEN
As it turns out, the most common problem that will spawn the Sea of Thieves MarbleBeard Error on both Xbox One and PC is an inconsistency with the Network Address Translation (NAT). This metric is absolutely essential in determining how easy it is for your machine to connect with other players when playing a game.
If your NAT is Closed, you can expect to see the Marblebeard Error code every time you want to establish a connection with a game server.
However, there is one Universal fix (enabling UPnP) that will allow you to keep your NAT opened. But before we get to that guide, you should check to see the status of your NAT.
In the event that your NAT is already Open, enabling UPnP (Universal Plug and Play) will not resolve the issue for you.
Depending on your platform of choice, follow one of the two guides below to see if your NAT Type is Open.
A. Checking NAT Type on Xbox One
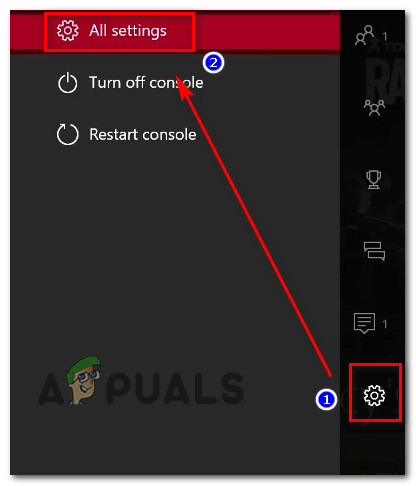
- On your Xbox One console, press the Xbox button on your controller to bring up the guide menu.
- From the Guide menu, go to the System tab and access the All Settings menu.
Accessing the Settings menu on Xbox One - Once you’re inside the Settings menu, go to Network and access the Network settings menu.
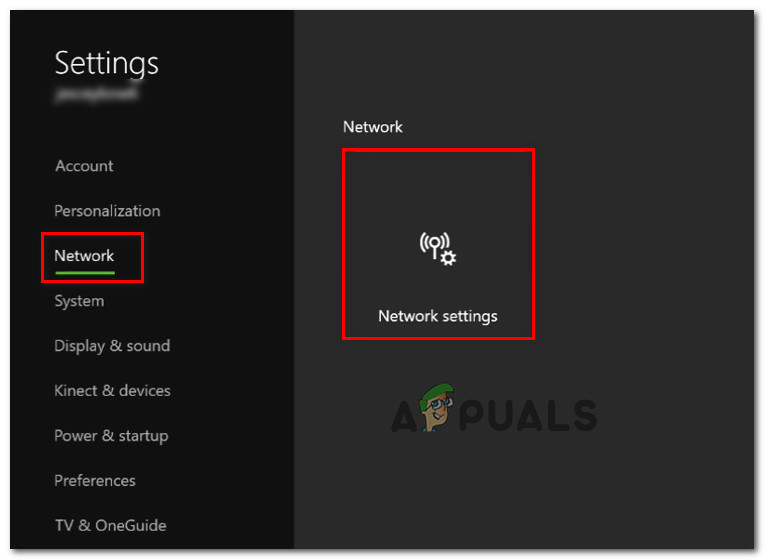
Accessing the Network settings menu - Inside the Network settings menu, look under Current Network Status and see if the NAT Type field displays as Open or Closed.
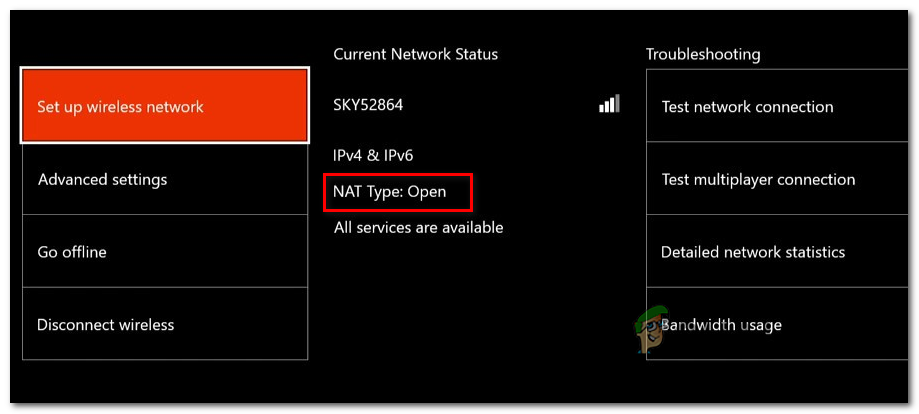
Checking the NAT Type status on Xbox One - If your investigations revealed that the NAT type is set to Closed, move to the ‘How to Open NAT‘ section and follow the instructions there.
B. Checking NAT Type on PC
- Press Windows key + R to open up a Run dialog box. Next, type ‘ms-settings:gaming-xboxnetworking’ inside the text box, then press Enter to open up the Xbox Networking tab of the Gaming Settings app.
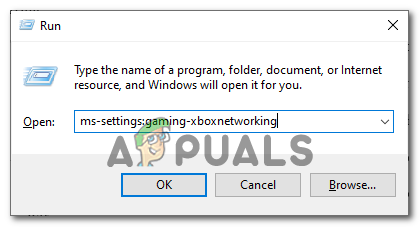
Opening the Xbox Networking tab of the Settings app - Once you’re inside the Xbox Networking tab, wait for the initial investigation to complete. Once it’s finished, check out the NAT Type. If it shows ‘Closed’ or ‘Teredo is unable to qualify’, the issue is indeed related with your NAT. If the Nat Type is showing as Open, move directly to Method 2.
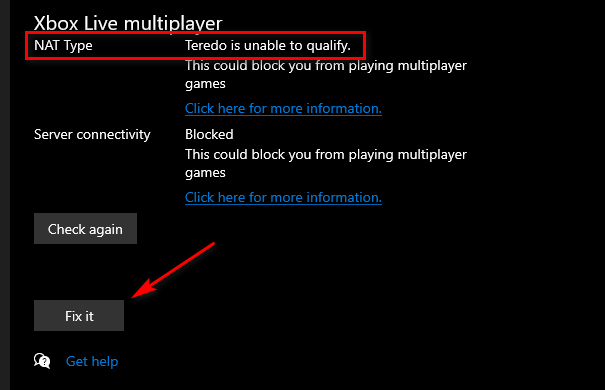
Investigating the NAT type Note: You might attempt to fix the problem automatically by using the Fix it button, but if the issue is router-related, this will not fix it.
- If you confirmed that the NAT type is Closed or inconclusive and the Fix it utility didn’t help, follow the instructions below to force open NAT from your router settings.
Opening NAT via your Router Settings
- First things first, make sure the platform where you’re encountering the error on is connected to this particular router.
- Next, pop open a browser window and type ‘192.168.0.1′ or ‘192.168.1.1′ and press Enter to open up your Router’s Settings page.

Typing in the IP address for the router Note: These generic addresses should work for the majority of routers. But in case they don’t search online for specific steps of accessing your router settings.
- Once you’re inside the login page, insert your router credentials and to move forward. If you haven’t changed the default login credentials, use ‘admin’ and ‘1234’ as username and password.
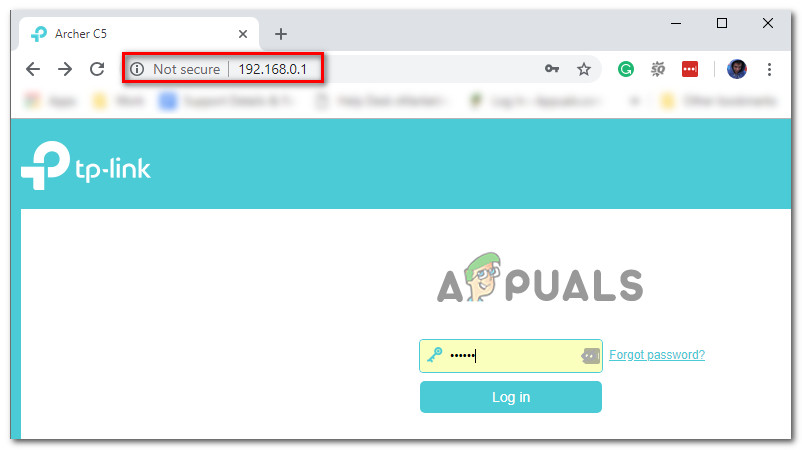
Accessing your router settings Note: If these default credentials don’t work, perform a router reset or search online for the default credentials that are specific to your router settings.
- Once you’re finally inside your router settings, look for the Advanced settings menu. Next, go to the NAT Forwarding tab and look for an option named UPnP. When you find it, enable it and sav the changes
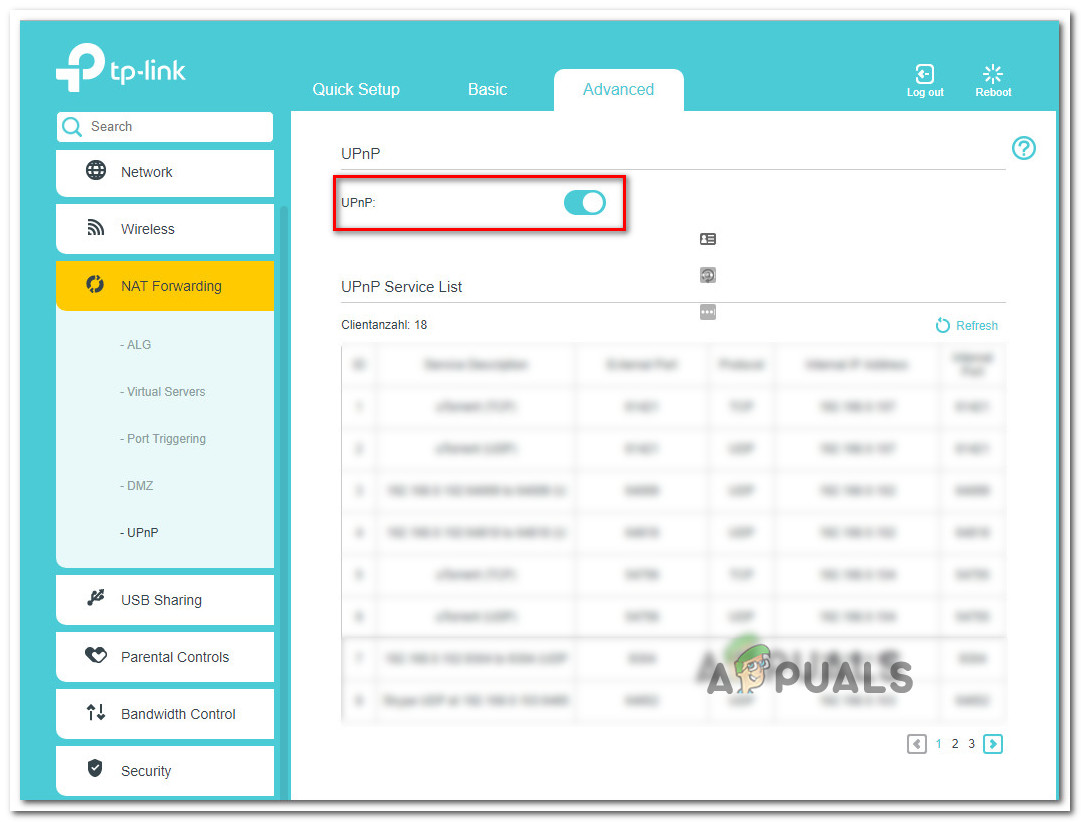
Enabling UPnP from your Router settings Note: These instructions were performed from a TP-Link router – Depending on your router model, the exact name of the settings you have to click through might be different.
- After you have successfully enabled UPnP, restart both your router and the console / PC to force open the necessary ports that Sea of Thieves needs in order to connect to game servers.
In case you’re using a router that’s too old to support UPnP, follow the instructions below to open the forward the ports manually
Method 2: Forwarding the ports manually
In case your router is too old to support the Universal Plug n Play technology, you will need to open the port used by Sea of Thieves manually. Fortunately, since Sea of Thieves is built on the Xbox Live infrastructure, the same port is being used on Xbox One and PC.
If you’re using an old router and you are forced to open the Sea of Thieves ports manually, follow the instructions below:
- Open your browser and insert the address of your router. One of these two generic addresses should work: 192.168.0.1 and 192.168.1.1.

Accessing your router settings Note: If none of these two addresses work, search online for the default IP address that allows you to access your router settings. You can also press Windows key + R, type ‘cmd’ and press Enter to open a CMD prompt, then type ‘ipconfig’ and hit Enter again to get an overview of your network connection. You can find the address of your router listed as the Default Getaway.

Finding the IP address of a router - Once you get the login page of your router, use these default values to log in:
Username: admin
Password: admin or 1234
Note: These default credentials should work with more router manufacturers. But in case they don’t, reset your router (Method 3) or search online for the exact default login credentials according to your router model.
- Once you have successfully signed in into your router settings, access the Advanced menu, and look for an option named NAT Forwarding or Forwarding.
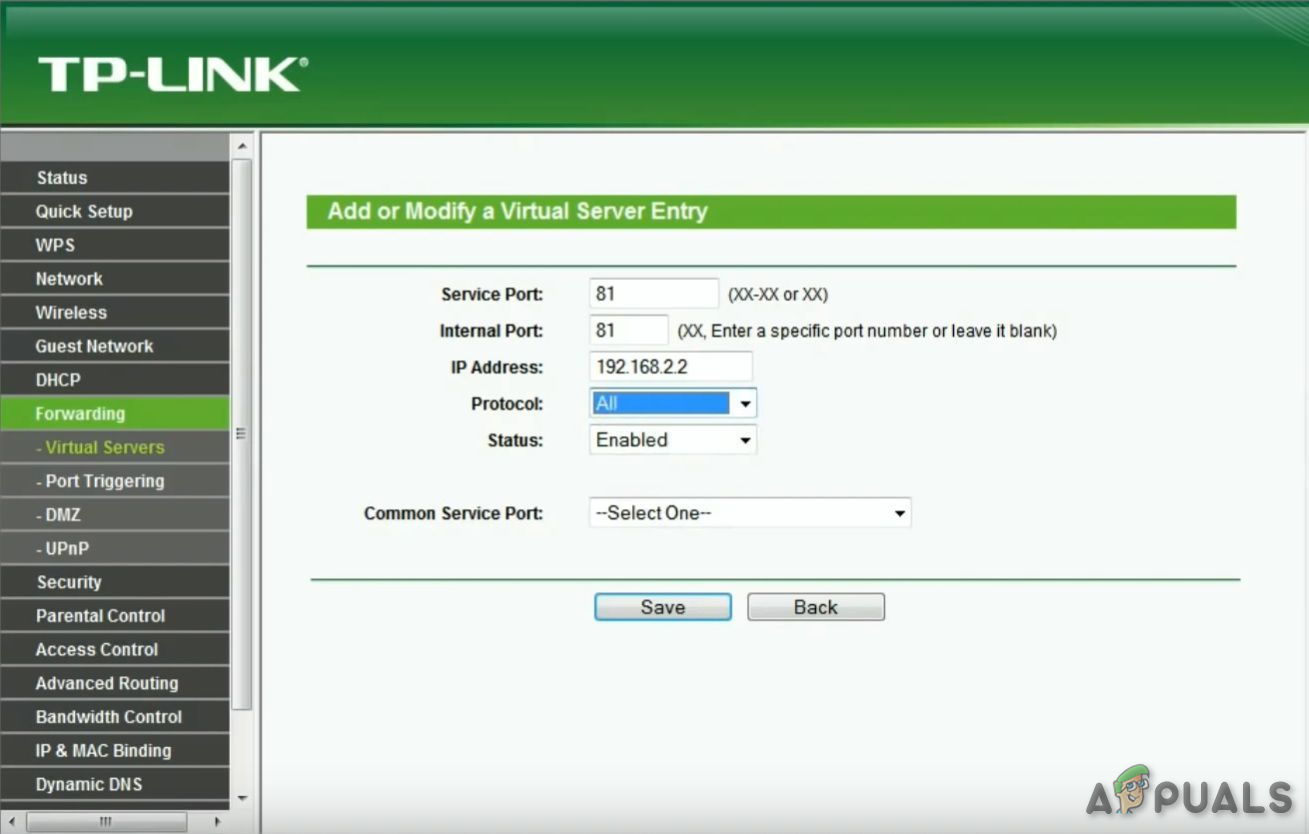
Port Forwarding - Next, go ahead and open the standard Xbox Live port required by Sea of Thieves: 3074
- After you successfully manage to open the required port, restart both your router and your console / your PC and see if the issue is fixed once the next startup is complete.
In case you still end up seeing the Sea of Thieves MarbleBeard Error, move down to the next potential fix below.
Method 3: Resetting Router
If you previously made sure that the port required for Sea of Thieves to run is opened (either through UPnP or you forwarded the 3074 manually) and the problem is still not resolved, you might be dealing with an IP / TCP networking inconsistency that can be resolved with a simple router reset or restart.
Some users that were previously dealing with the same problem have confirmed that the problem has been fixed after they forced a router reboot or reset.
Start with a simple router reboot in order to avoid overriding any custom network settings that you have previously established. To do a simple router reboot, press the dedicated power button on the rear or disconnect the power cable from your networking device. After you do this, wait for a full minute before powering on the router once again.
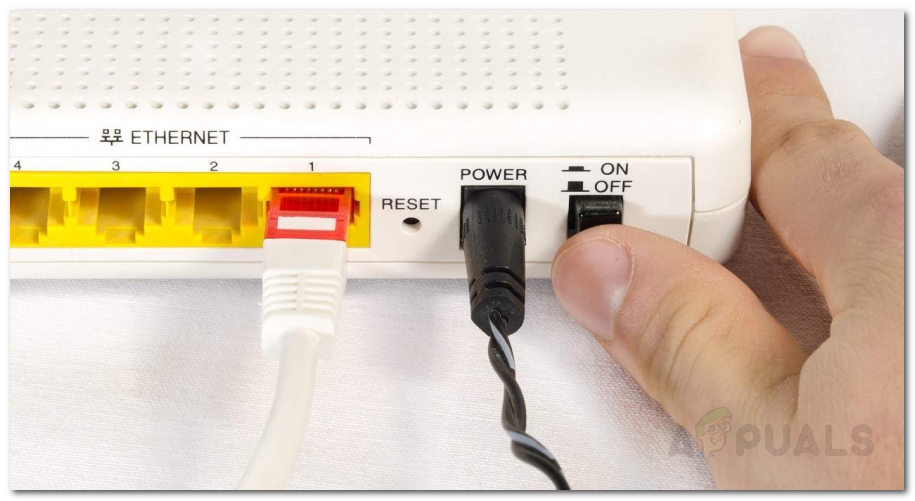
Once the network connection is re-established, see if you’re still encountering the same ‘Marblebeard Error Code‘ in Sea of Thieves. In case the error persists, move forward to a router reset procedure.
Note: Keep in mind that a router reset procedure will reset any personalized settings that you previously established from your router settings – this includes forwarded ports, custom login credentials, and any security preferences.
To perform a router reset, use a sharp object (like a needle or a toothpick) to press and hold the reset button on the back of your router. Keep it pressed until you noticed that all the front LEDs start flashing concurrently, then release the reset button and let your router restart.
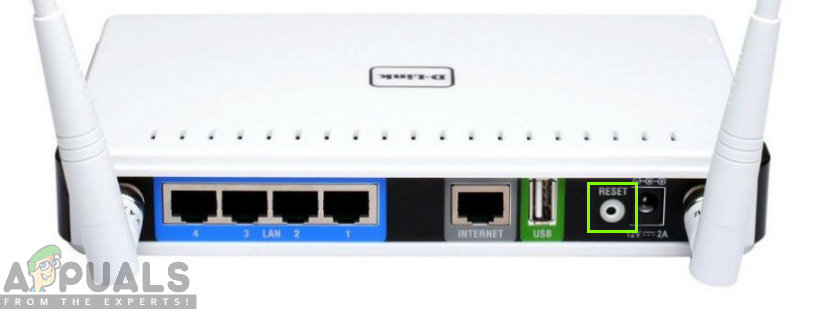
Once the Internet connection is re-established, restart the platform you use to play the game (Xbox One or PC) to force your router to assign it a new IP and see if the problem is persisting.
In case you still end up seeing the ‘Marblebeard Error Code‘ when you attempt to join a multiplayer game, move down to the next potential fix.
Method 4: Clearing MAC Address (Xbox One Only)
In case you are seeing the ‘Marblebeard Error Code‘ on an Xbox One console, you should also attempt to clear the Alternate MAC Address to ensure that you’re not dealing with a network issue that’s preventing your console to communicating with Rare’s servers.
Some users that were also dealing with this error code have confirmed that the disconnects have stopped once they cleared the Alternate MAC address from the Network menu of Xbox One.
If you’re not sure how to do this, follow the instructions below to clear the alternate MAC address on Xbox One:
- Power on your Xbox One console and press the Xbox One button on your controller to bring up the guide menu. Next, from the newly opened menu, select the Settings menu, and access the All Settings menu.

Accessing the Settings menu on Xbox One - Once you manage to get inside the Settings menu, select the Network settings tab from the vertical menu on the left.

Accessing the Network Settings tab - Inside the Network menu, access the Advanced Settings menu.
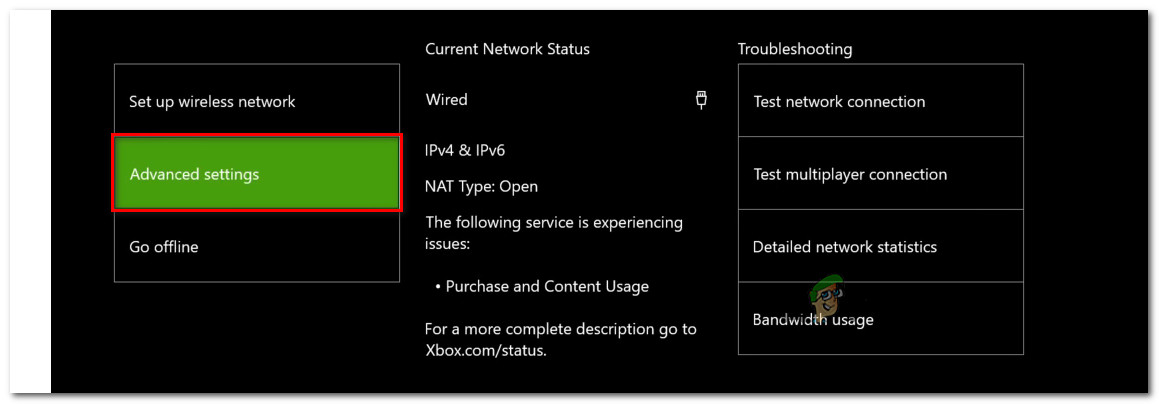
Accessing the Advanced settings menu of the Network tab - From the Advanced Settings menu, select the Alternate MAC Address option.
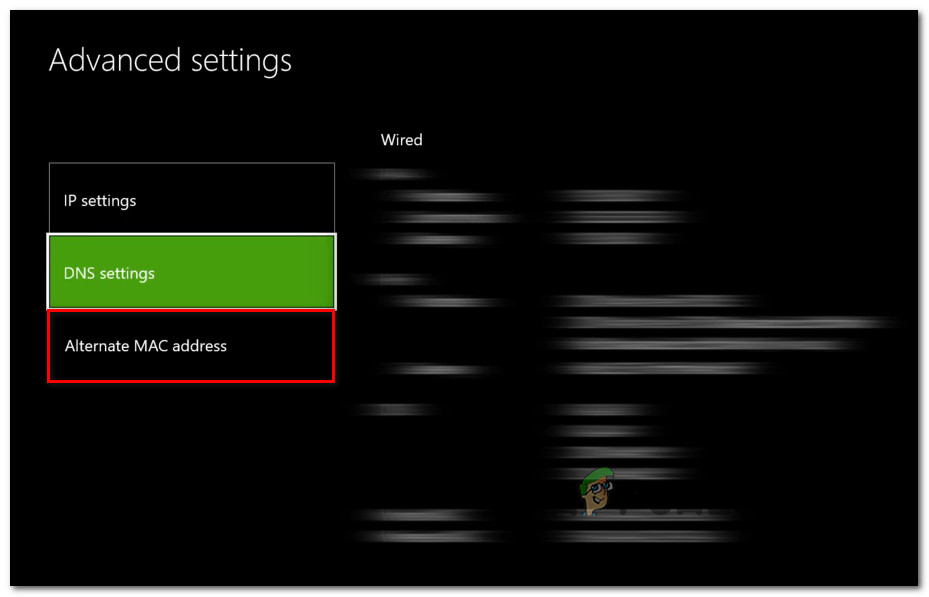
Accessing the Alternate MAC address menu - In the Alternate Wired / Wireless MAC Address menu, use the Clear button to initiate the clearing of your MAC address. When you get asked to confirm, use the Restart button to start the operation.
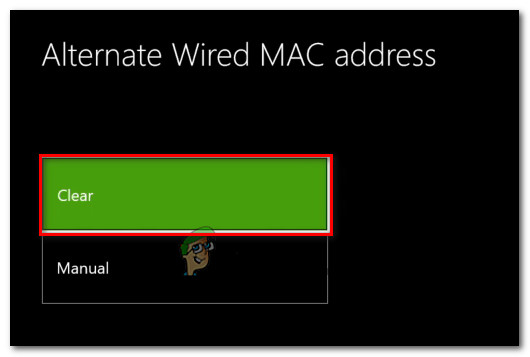
Clearing the Alternate Wired MAC address - Once the operation is complete, reboot your Xbox One console and see if the problem is fixed once the next startup sequence is complete.
In case you still end up seeing the ‘Marblebeard Error Code‘ when you attempt to join a multiplayer game in Sea of Thieves, move down to the final potential fix below.
Method 5: Hard Resetting the console (Xbox One Only)
If none of the potential fixes above have worked for you on Xbox One, it’s likely that you’re having these issues due to some type of system corruption that is affecting your console ability to communicate with game servers.
In this case, the last resort should be reset every OS file and game-related file to ensure that you have no local components that might cause this problem.
Note: This process will ultimately reset your console to the factory state, so it’s recommended that you back up any saved data to the cloud or to a flash USB drive in order to avoid any progress loss.
Follow the instructions below to perform a hard reset on your Xbox One console:
- From the main dashboard of your Xbox One console, press the Xbox button once to bring up the guide menu.
- Once you’re inside the guide menu, access the Settings menu.
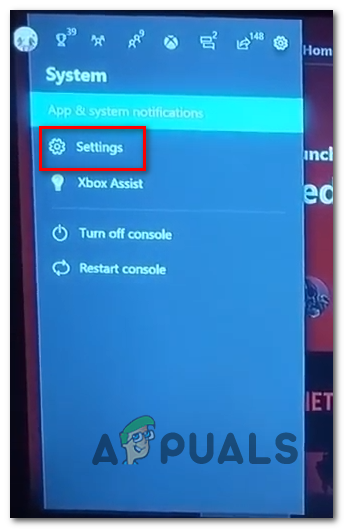
Accessing the Settings menu on Xbox One - From the Settings menu, access the Console Info menu and access the Reset Console menu from the left-hand side section of the screen.
- Next, from the next menu, select Reset and remove everything to perform a factory reset or Reset and keep my games & apps to perform a soft reset.
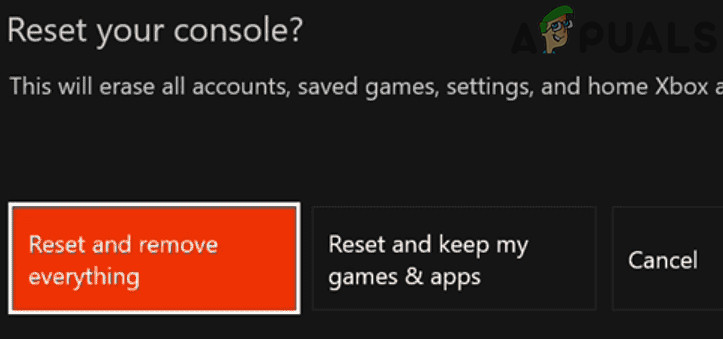
Reset and Erase Everything Xbox Note: For the maximum efficiency, we recommend that you go for a factory reset.
- Once the operation is complete, wait for your console to reboot itself. Once it boots back up, reinstall Sea of Thieves and see if the ‘Marblebeard Error Code‘ problem is fixed.


