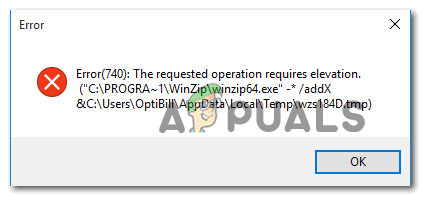
Fix: The Requested Operation requires Elevation
This error occurs when you don’t have enough permission to do that specific operation. There are two possible scenarios, first is that the user account you are using doesn’t have enough permissions, or the file you are trying to modify has more permissions than the account you are using. It might be a system file or being used by programs running on your computer.
This was experienced by users on different occasions such as when accessing their external hard drive or running some utility or program which required administrative access. We have listed a series of steps on how you can troubleshoot what is causing the problem and fix it accordingly.
As it turns out, there are several different causes that might end up causing this particular issue:
- Privilege issue – As it turns out, one of the most common instances that will spawn this error code is a permission issue. If this scenario is applicable, you should be able to fix the problem by forcing the application executable to launch with admin access and modifying the default behavior if this fix proves to be successful.
- Over-Strict UAC Rules – If you’re seeing this error on Windows 10, it’s also possible that the User Account Control ends up creating this problem if you previously set it to operate with maximum strictness. In this case, you can fix the swiftly by relaxing or disabling the UAC behavior.
- Strict Security Policy is enforced – If you’re using a Pro version of Windows, you can also see this error due to a Local Group Policy that dictates how administrator accounts function in Admin approval mode. In this case, you will need to use the gpedit.msc utility to modify this policy so that administrator accounts are allowed to elevate without prompting.
- 3rd party interference – If you’re using an overprotective AV suite, you can also expect to see this error due to a false positive that ends up tricking your AV into believing that your system is dealing with a security threat. If you’re certain that the executable you’re trying to launch is 100% safe, you can fix the issue by disabling the real-time protection or by uninstalling the 3rd party antivirus suite altogether.
- Corrupted Windows accounts – Under certain circumstances, you can also expect to see this error due to some type of corruption that is currently affecting your main windows account. In this case, you should be able to fix the issue by creating a new admin account (either via cmd or via the Settings app on Windows 10).
1. Use Administrator Privileges
One of the most common instances that will ultimately spawn the “Error 740 – The Requested Operation Requires Elevation” is when you don’t have enough privileges to run the application on Windows 10.
If this scenario is applicable, you will be able to fix the issue by forcing the app to run with administrative access.
To force an application to run with admin access, you need to modify the behavior of its main executable. So navigate to the program launcher/setup installer, right-click on it and choose Run as Administrator from the newly appeared context menu.

In case this operation allows you to fix the 740 error, you can force the app to use admin rights at every startup by modifying the default behavior from the Properties menu. Here’s a quick guide on how to do this:
- Right-click on the executable that’s dealing with the admin access issue and click on Properties from the context menu.
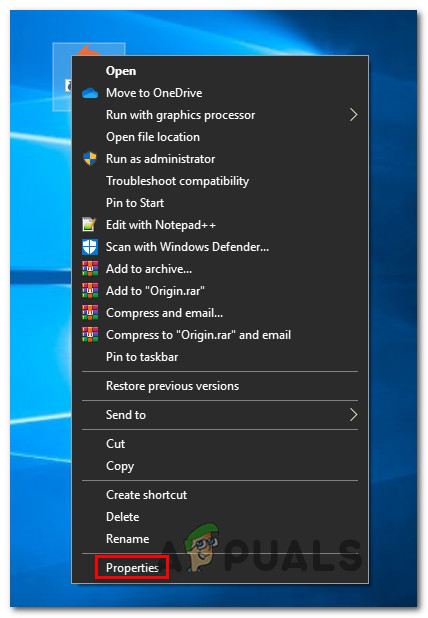
Accessing the Properties screen of the application encountering the issue - Inside the Properties screen, select the Compatibility tab from the horizontal menu at the top.
- From the Compatibility tab, move down to the Settings menu and check the box associated with Run this program as an administrator, then click Apply to save the changes.

Run this program as an administrator Note: In case you’re encountering this issue with WinZip and the box associated with Run this program as an administrator is checked, uncheck it to fix the problem. Since the context menu is controlled by Windows Explorer (explorer.exe), you can expect to see the error because Windows Explorer is unable to elevate the permissions.
- Launch the application once again and see if the issue is now resolved.
In case the same problem is still occurring, move down to the next potential fix below.
2. Disable UAC (User Account Control)
User Account Control is a security mechanism that’s designed to inform the end-user that the operation he/she’s about to perform will make changes that will require admin privileges. This typically occurs when installing new software or when changing important system settings.
If this scenario is applicable and the first potential fix didn’t work for you, you should be able to prevent the “Error 740 – The Requested Operation Requires Elevation” from appearing by disabling or modifying the current behavior of the User Account Control.
Note: Disabling the UAC component means that you will not get a notification when installing new software, which might leave your system exposed to other security risks if you end up installing questionable applications.
Here’s a quick guide on how to relax or disable UAC:
- Press Windows key + R to open up a Run dialog box. Inside the text box, type ‘control’ and press Enter to open up the classic Control Panel Interface.
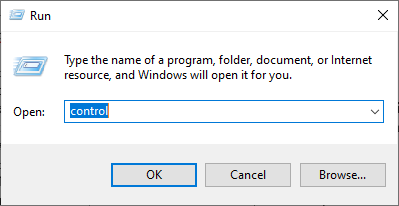
Accessing the Classic Control Panel interface - Inside the Control Panel menu, use the search function (top-right corner) to search for ‘uac’. Then, from the list of results, click on Change User Account Control settings.
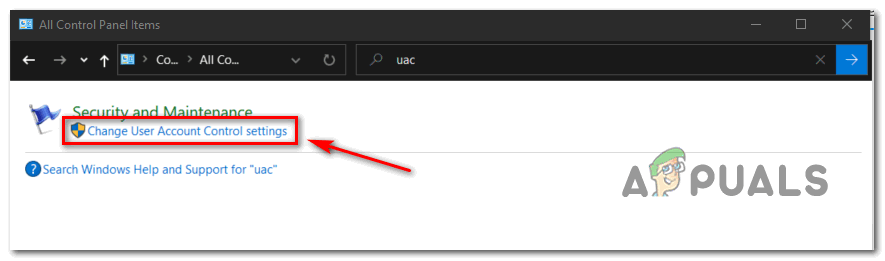
Accessing the UAC settings menu - Inside the User Account Control Settings, slide the vertical slider all the way to Never notify and click Ok to save the changes.
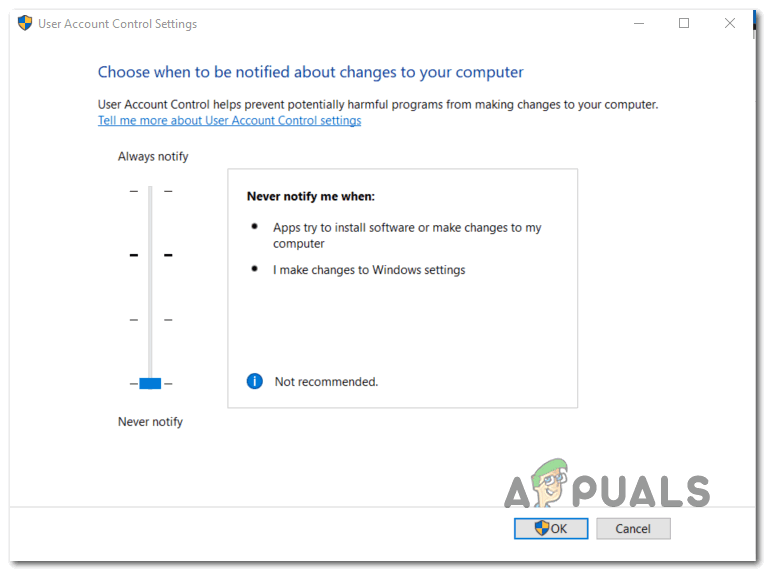
Modifying UAC behavior - At the confirmation window, click Yes to confirm the operation.
- Repeat the action that was previously causing Error 740 and see if the problem is now fixed.
3. Modify Security Options via gpedit.msc (if applicable)
If the method above didn’t work for you, you can also try elevating access without prompting by using the Group Policy Editor to fix the ‘The requested operation requires elevation: Error 740’ issue.
But keep in mind that not every Windows version has the Group Policy Editor installed by default. Typically, only PRO versions will include this built-in utility, while Home editions typically don’t.
Note: If you are using Windows 10 Home, there is a way to install the gpedit.msc utility.
If this scenario seems like it could be applicable, follow the instructions below to disable ‘elevate without prompting’ inside the Group Policy Editor. Here’s a quick guide on how to do this:
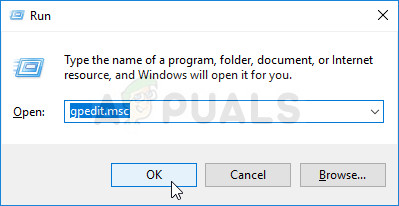
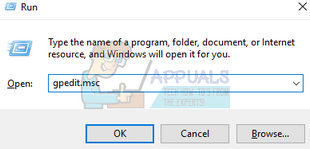
- Press Windows key + R to open a Run dialog box. Next, type ‘gpedit.msc‘ inside the Run dialog box and press Enter to open up the Local Group Policy Editor.
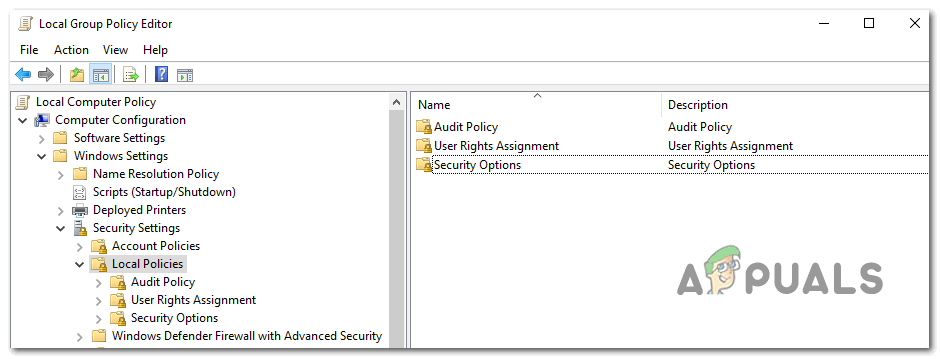
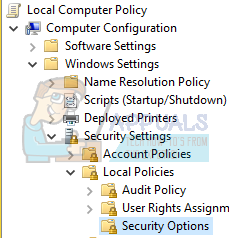
Running the Local Policy Group Editor - Once you’re inside the Local Group Policy Editor, use the menu on the left to navigate to the following location:
Computer Configuration > Windows Settings > Security Settings > Local Policies > Security Options
- Once you arrive at the correct location, mover over to the right-hand side section and double-click on Security Options.
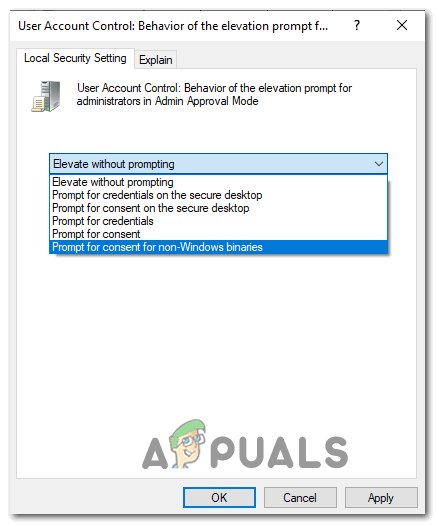
Accessing the Security Options menu - Once you’re inside the Security Options menu, scroll down through the list of Policies and double-click on the entry named User Account Control: Behavior of the elevation prompt for administrators in Admin Approval Mode

User Account Control - Once you’re inside the next policy menu, select the Local Security Settings tab, then set the appropriate drop-down menu to Elevate without prompting. Next, click on Apply.
Elevate without prompting - Reboot your computer and see if the issue is resolved at the next computer startup.
In case you still end up seeing the Error 740 when performing the same action, move down to the next potential fix below.
4. Disable 3rd party AV interference (if applicable)
As it turns out, you can also expect to see this error if the program is unable to obtain admin access due to the fact that your AV suite ends up blocking it due to a false positive.
If you’re using a 3rd party suite and you’re certain that the application you’re trying to open or install doesn’t pose a security threat, you should be able to resolve the issue by disabling the real-time protection while launching or installing the program that’s triggering the “Error 740 – The Requested Operation Requires Elevation”.
Even though the steps of doing so will be different depending on the 3rd party suite you’re using, most antivirus programs will allow you to disable the real-time protection directly via the taskbar menu.
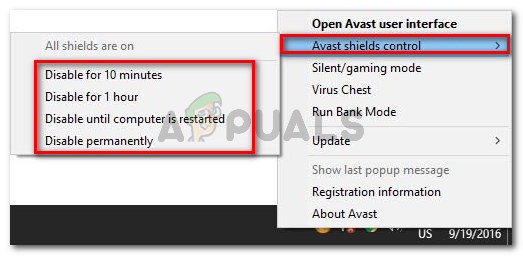
Once you manage to disable the real-time protection, retry the operation that was previously causing the Error 740 and see if the problem is now fixed.
If the error is still occurring or you’re now getting a different error code and you’re 3rd party AV suite includes a real-time firewall, you should also try uninstalling the security suite since firewall rules will remain in place even after you disable the 3rd party protection.
This is why you should also try uninstalling the security program and remove any remnant files that might still enforce the same security rules.
In case the same problem is still occurring, move down to the next potential fix below.
5. Create a new admin account
As it turns out, you can also expect to see the Error 740 in a situation where your computer simply doesn’t have an administrator account that it can use to elevate the operation that’s causing this error code. It’s possible that you might have recently deleted the admin account or it has become corrupted to the point where your OS can no longer use it.
Note: This problem is quite common with admin accounts that were migrated from an older Windows version to Windows 10.
If this scenario is applicable, you should be able to fix the issue by creating a new administrator account. When doing this, you have two ways forward:
- Via the Windows 10 Settings menu – Exclusive for Windows 10
- Via Command prompt – Can be used for older Windows versions
Follow the guide that is closer to your preferred way of deploying Windows modifications:
Option A: Create a New Admin Account via Settings app
- Open up a Run dialog box by pressing Windows key + R. Next, type ‘ms-settings:otherusers’ in the text box and press Enter to open up the Family & other people tab of the Settings app.
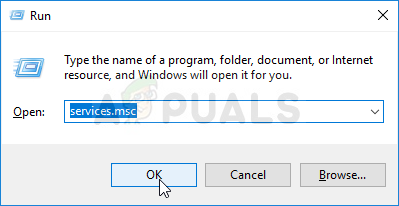
Running Services in the Run dialog box - From the Family & other users tab, scroll down to the Other users tab and click on Add someone else to this PC.
- Once you ger to the next screen, proceed to add the email and phone that you want to associate with the Microsoft account.
Note: If you want to create a local account, click on I don’t have this person’s sign-in information. - Add a username and password for the new administrator account that you plan to create. On top of this, you will need to set up a couple of security questions for recovery purposes. Once you’ve finished with them, click Next.
- After you manage to create the new account, return to the Family & other people window, locate the newly created account and click on Change Account type.
- Inside the Change account type screen, use the drop-down menu to select Administrator, then click Ok to save the changes.
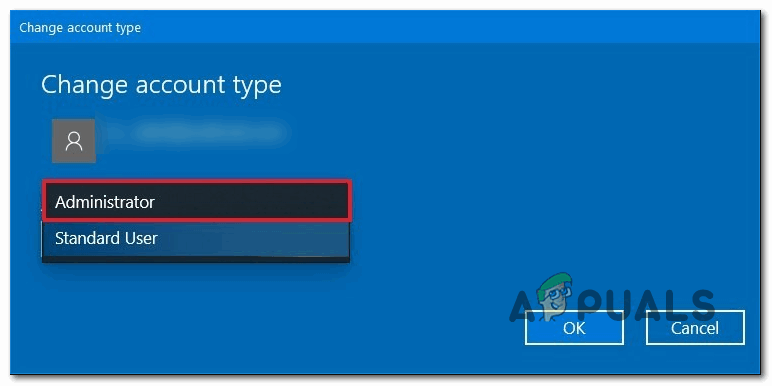
Granting admin rights to the newly created Windows account - Restart your computer and sign in with the newly created admin account during the next sign up screen.
- Repeat the action that was previously causing the “Error 740 – The Requested Operation Requires Elevation” and see if the problem is fixed.
Option B: Create a New Admin Account via CMD
- Press Windows key + R to open up a Run dialog box. Next, type ‘cmd’ inside the text box and press Ctrl + Shift + Enter to open up an elevated Command prompt.
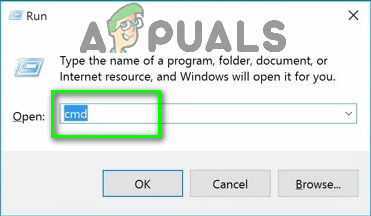
Type “cmd” into the Run dialog Note: When you get to the UAC (User Account Control), click Yes to grant admin access.
- Inside the elevated Command Prompt window, type the following commands and press Enter after each one to create a new Windows account and assign it admin rights:
net user /add ReplaceME
new localgroup administrators ReplaceME /add
Note: *ReplaceMe* is a placeholder that you need to replace with the name of the new Windows account that you want to create and grant admin access.
- After running these two commands successfully, reboot your computer and see if the problem is fixed after the next startup is complete.
6. Add Domain admins group to the Local Administrators group
If the above method doesn’t work for you if you are having the error message in any domain (such as work, home, etc.), we can try adding the domain administrators group to the local administrator’s group and check if our error gets fixed.
Note: This solution is targeted at individuals who are having the error message when they registered their computer to any domain. If this is not the case for you, please refer to the solutions down below.
Firstly, we would have to define a security group in AD computers and users. In this tutorial, we will call our security group as IT_Appuals
- Log onto your Domain Controller.
- Right-click on Users and select New from the list of options available. Then click on Groups and then Security. Rename the new group as IT_Appuals.
- Now add valid and proper members. I will add Kevin, Alan, and Indigo.
Next, we need to create a group policy. There is also a workaround for this by using the Default Domain Policy but we don’t recommend it. In this tutorial, we will create a new policy called “Local Administrators”.
- Launch your Group Policy Management Console.
- Once it is opened, right-click on your OU or domain.
- Select Create a GPO and also link it here.
- Name that group policy as Local Administrators.
- If the policy was successfully created, you should be able to see it in the tree.
Now we will edit the policy to contain the IT_Appuals group. You can also put them into groups you wish to use.
- Right-click on the “Local Administrators” policy and expand the following
Computer Configuration \ Policies \ Windows Settings \ Restricted Groups
- Now at the right side of the window of Restricted Groups, right-click on any empty space and select “Add Group…”.
- Type the name of the group as “IT_Appuals” and press Ok to save changes.
- Now click Add under the subheading of “This group is a member of:” and add the “Administrators” and “Remote Desktop Users”.
- Press Ok to save changes.
Note: When you are adding groups, you can add whatever you want. The GPO will automatically match the group on your PC and link it. If you type “Pencil”, it will search all the local groups for a group named “Pencil” and place IT_Appuals in that group.
Also, if you change “Members of this group:” it will automatically overwrite the accounts you set up in the initial stages.
Now we can test if this process was successful.
- Wait 10-15 minutes and log onto a PC.
- Type “gpupdate /force” and check the local administrator’s group. If you performed the steps correctly, you should be able to see IT_Appuals in that group.
- Now all the members of the group i.e. Kevin, Alan, and Indigo can access the PCs.
7. Disable the Admin Approval Mode for built-in Administrator
If you encountered a problem after updating your Windows to the latest version, it is possible that the system automatically enabled the option of “Admin Approval for built-in Administrator”. This means that your computer will ask permission when you want to perform administrative tasks even if you are an administrator yourself. This policy is located in the group policy editor and we can try changing it.
- Press Windows + R to launch the Run application. Type “gpedit.msc” in the dialogue box and press Enter. This will launch the local group policy editor. Note: Local group policy editor is a powerful tool and requires extreme care if you are handling it for the first time. Don’t change items that you don’t know about and stick to the instructions.
- Once in the editor, navigate to the following file path using the navigation pane present at the left side of the screen:
Computer Configuration > Windows Settings > Security Settings > Local Policies > Security Options
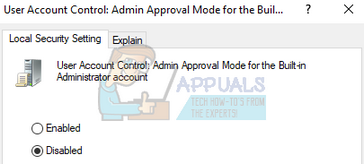
- Now on the right side of the window, you will be able to see a number of items. Scroll to the bottom and look for “User Account Control: Admin Approval Mode for the Built-in Administrator account Local Security Setting tab”. Double-click it to open its properties.
- Navigate to the and set the option as Disabled. Press Ok to save changes and exit the item.
Restart your computer for the changes to take effect and check if the problem went away.
8. Change Ownership of Files
If you are experiencing the error while accessing some files, either on your computer or your hard drive, we can try changing the ownership of those files. Changing the ownership of any file/folder makes you the owner and the computer lets you access the files and perform any action which may require administrator access.
This solution is also suitable for people who have backed their data up on an external hard drive and after changing computers, they saw the error message whenever they tried to access it. In this case, you can change ownership of the external hard drive by right-clicking on it, selecting Properties, and navigating to the Security tab. Then you can follow the instructions of how to normally change ownership and you will be good to go.
You can change ownership manually while there is also an option to add a “change ownership” button to your context menu if you stumble about this problem often.
9. Run the Program as Administrator
If you are experiencing the error message when executing some command on command prompt or you are opening some system file, it is possible that the computer isn’t allowing you access because you don’t have administrative rights.
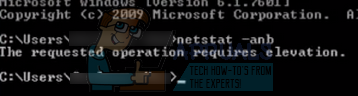
You can try re-launching the application using the option “Run as administrator” and check if you still receive the error message. In this case, we would press Windows + S and type “command prompt” in the dialogue box. When the search results come, we will right-click on the command prompt and select “Run as administrator”. Now you can easily execute commands like “netstat –anb” etc. without any hurdles.
This solution also applies to all applications which give you the error message. Right-click on the application and select “Run as administrator”.
i could use any of these and i was jus trying to run java.