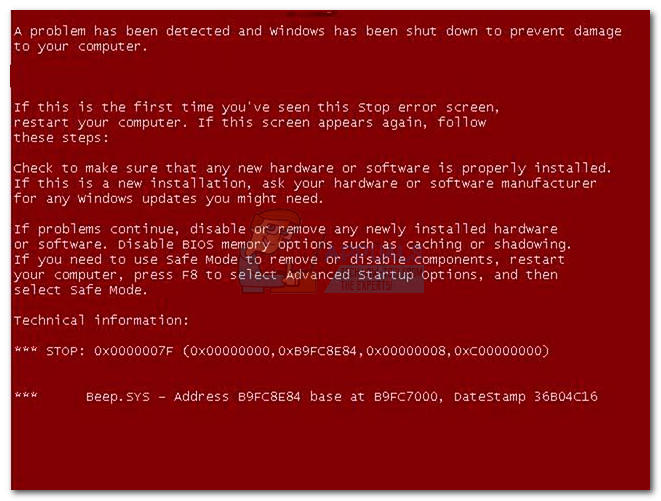
How to Fix Red Screen of Death (RSOD) in Windows
Microsoft has a long and painful relationship with critical errors such as the so-called “red screen of death“. The main thing that steered me away from Xbox was the “red ring of death” error that ruined a three-month-old console. But as I’ve come to learn, some variation of this issue will also be encountered on Windows running PCs.
However, don’t be quick to put the blame on Microsoft. They are guilty of a lot of things, but the “red screen of death” error on PC is usually a sign of hardware malfunctioning or your own wrong-doing. Red screen error doesn’t occur as frequently as the blue screen error. But if I were to choose between the two colors, I’d choose blue. A red screen error is extremely rare, but it’s usually a sign of a critical issue that might make your PC unusable.
In latest versions of Windows (8 and 10), the red screen error was replaced with other variations of the blue screen, but if you’re using XP or Vista you might still encounter it. Unfortunately, pinpointing the cause of the RSOD error is a daunting task. Even worse, you might not be able to fix it yourself without replacing some hardware.
But before we get to the potential fixes, let’s understand the issue better by taking the look at the most common causes:
- By far, the most common culprit will be your graphics card. Typically, users get the RSOD error when playing video games or doing another hardware stressing activity.
- Another fairly common is outdated BIOS / UEFI firmware that isn’t compatible with some of your hardware.
- If you overclocked your GPU or CPU, you should start by looking into this first. If you overclock key components carelessly, overclocked hardware might ask more power than your power source is capable of offering, which will trigger this issue.
- New hardware can also be a cause for the apparition of this error. This is usually the case with new hardware that doesn’t have the proper drivers.
Now that we know the causes, let’s see what can be done to fix the issue. Follow each guide in order until you find a solution that works for you.
Note: If the red screen error appears before your system boots up, you can’t follow some of the methods below. If that’s the case, only follow Method 1, Method 3, and Method 4.
Method 1: Booting up in Safe Mode
Booting up in Safe Mode is the first logical thing to do. Safe Mode will allow us to start the PC without most device drivers and 3rd party software. This stripped version of Windows can help us figure out if software or driver is the root cause of the red screen error.
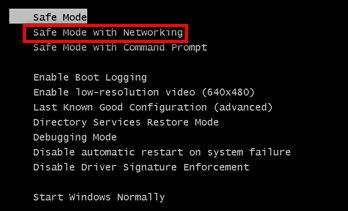
To start Windows in Safe Mode, keep pressing the F8 key as soon as your computer is powered on or restarted. Once the Advanced Boot Options menu shows up, use the arrow keys to navigate to Safe Mode with Networking and press Enter.
If you are able to start up your PC in Safe mode, try browsing and doing some resource demanding activities. Try to recreate the conditions in which you first encountered the red screen error.
If the error refuses to show up while in Safe Mode, you can begin to assume that the issue is caused by a software or driver. In that event, start uninstalling software you installed around the time the error first started appearing. Also, consider rolling back drivers that you recently updated. If you can’t pinpoint the cause, the sure fix would be to reinstall or repair your Windows version.
In the event that you encounter this issue while in Safe mode, there is a high chance that your problem can’t be fixed without replacing hardware components. However, you can still try to update your BIOS / UEFI (Method 2) and remove any overclock you might have on your computer (Method 3). Another probable fix in this situation is Method 4.
Method 2: Update your BIOS or UEFI
If you have a fairly new motherboard, your BIOS menu might already be replaced with the new Unified Extensible Firmware Interface (UEFI). Your graphics card might not play well with the motherboard if you haven’t updated your BIOS / UEFI to the latest version. The RSOD error is fairly common with users who have recently upgraded to a new GPU card without making the necessary motherboard updates.
Another possibility is that your GPU card suffers from a pre-existing condition that was fixed with a motherboard update. Just a few years ago, I remember reading about an entire batch of AMD R9 cards that displayed RSOD errors on outdated BIOS versions. Either way, updating your BIOS UEFI driver is a good place to start.
Warning: Keep in mind that updating your BIOS/UEFI is a delicate operation that might brick your PC if done incorrectly. If you haven’t done it before, do not attempt without proper guidance.
Since almost all manufacturers have proprietary reflashing technologies, we can’t really provide you with a definitive guide. To make things easier, below you have some steps that will point you in the right direction:
- Make sure that your laptop has enough battery. If you’re on a desktop, connect it to a stable charging point.
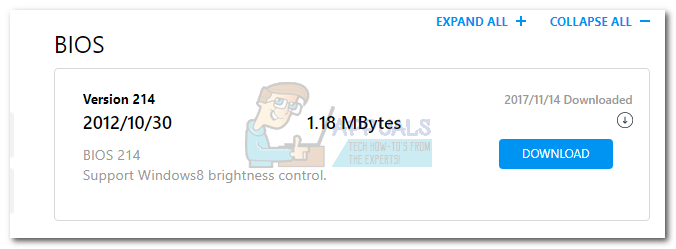
- Visit the official web page of your laptop/motherboard (on desktop) manufacturer and search for your particular model. Then navigate to the download section and download the bios update file.
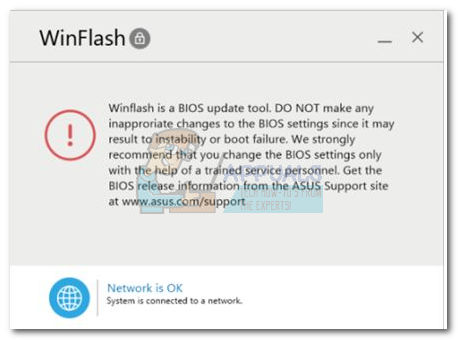
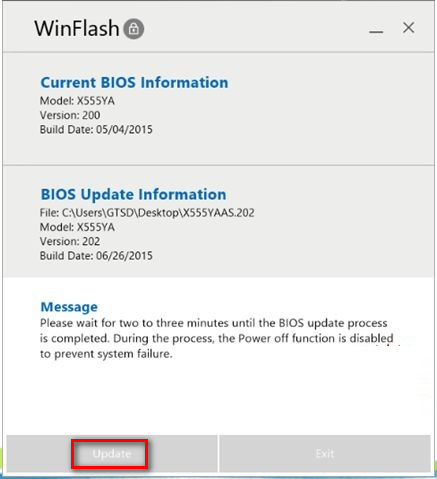
- Either open the update file you downloaded directly or use the proprietary software to open it. Some manufacturers prefer to pack their BIOS / UEFI updates in an executable while others use a dedicated software like WinFlash or EZ Flash. But as I’ve said, it all depends on your manufacturer.
 Note: If you’re unsure how to open the file, follow the documentation on the manufacturer’s website.
 - Follow through with the on-screen instructions to update your driver.
- Do not power your device off while the update is in progress. You run the risk of bricking your PC.
Method 3: Remove Overclocking from your components
Overclocking is not something you do in a couple of minutes. It requires constant tinkering and experimentation in order to strike the perfect balance. But even if you don’t skip any steps, you might still cause instability that might lead to the red screen error.
If your system is overclocked and it briefly displays the RSOD error before doing a thermal shutdown, you should definitely tone down your overclock. To eliminate overclock from the list of culprits, return to your BIOS / UEFI menu and reset all settings to default. Then, use your computer normally and see if the red screen returns. If it doesn’t, consider working with lower frequencies the next time you overclock key components.
Method 4: Make sure your power supply can provide enough power
If you’re experiencing red screen errors while playing games or doing any other resource-demanding activity, it’s entirely possible that your power supply is incapable of providing enough electricity to key components. If you tried the fixes above without a result, let’s cross an insufficient power supply off the list.
A quick way to verify this theory without buying a new power source is to open the case and unplug the power cable from components that you don’t necessarily need. Consider cutting the power from the DVD drive or a secondary HDD. After you removed them, repeat stressing activities and see if the RSOD error repeats. If the error is gone, go ahead and buy a bigger power supply.
Method 5: Investigating hardware malfunctions
If you’ve come this far without a result, it’s almost certain that you’ll need to replace some hardware. As with all things, hardware components will age and become less and less efficient. Even though hardware failure is the number one cause of the RSOD error, the faulty component can be hard to diagnose.
However, you can use Event Viewer to investigate the crash report from your error. Here’s a quick guide on how to do it:
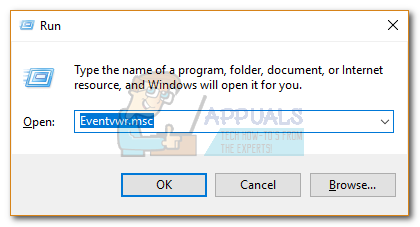
- Press Windows key + R and type Eventvwr.msc. Press enter to open Event Viewer.
- In the left column, click on Custom Views, then double-click on Administrative Events to populate the list on the right.

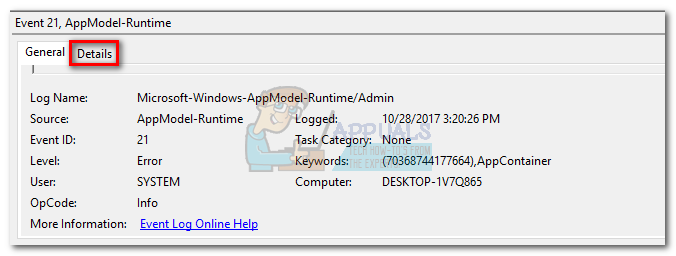
- Identify the RSOD error and click on it to select it. With the error selected, go down to the General tab and investigate the error. You can either copy the error message and search online for more information or click on Details and search for the name of the device that malfunctioned.
- Once you identified the malfunctioning hardware, try updating the drivers. If that doesn’t work, consider a replacement or take it to a technician for further investigations.
Conclusion
We certainly hope that one of the fixes above helped you remove the error message. Although we enumerated the most common causes of the red screen of death error, your situation might be entirely different. If none of the methods above worked, do a clean Windows install and hope for the best. If that doesn’t work, send your computer in for a detailed hardware investigation.