How to Fix “Error Code: H505” on QuickBooks ?
The QuickBooks error code H505 occurs when something is not allowing the connection between you and the server. The error message happens when trying to access a company file outside your computer. Several things can trigger the blockage of the multi-user connection. More often than not, the problem revolves around the hosting settings of your QuickBooks application.
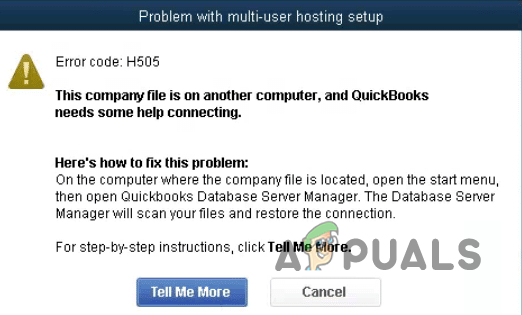
The problem affects your ability to access company files served to a network via a server. In this article, we will walk you through a handful of methods you can use to circumvent the error message.
However, before we start with the solutions, we must dive into the various causes of the error code. We have listed the most common causes below:-
- Windows Defender Firewall is blocking the connection — One of the reasons the error message in question can appear is when the Windows Firewall does not allow it to establish a connection with the server. If this case is applicable, you will have to manually allow the QuickBooks app through the firewall or add a new rule to the Windows Firewall configuration that allows the user of specific ports for QuickBook.
- Multiple workstations are hosting multi-user connections — The error code H505 can occur when you have multiple workstations in your network acting as the server. This can happen when the Host Multi-User Access option is enabled on multiple computers instead of the server. To fix this, you will have to disable the option in question on every workstation other than your server.
- The server is unreachable or down — If the server you are trying to establish a connection with to access a company is unreachable or down, that can also cause an error message. In such a scenario, you must ensure the server is up and running before connecting again.
- QuickBook services not running on the server — Finally, the QuickBook application uses some specific servers to facilitate the connections between itself and other workstations on the network. If these services are not running in the background when trying to access a company file on the server, it can trigger the H505 error code. Therefore, you must ensure the services run in the background before proceeding.
Now that we have gone through a possible list of causes of the issue in question, we are ready to get on with the multiple methods you can implement to fix the problem. Let us start right away.
1. Use QuickBooks File Doctor
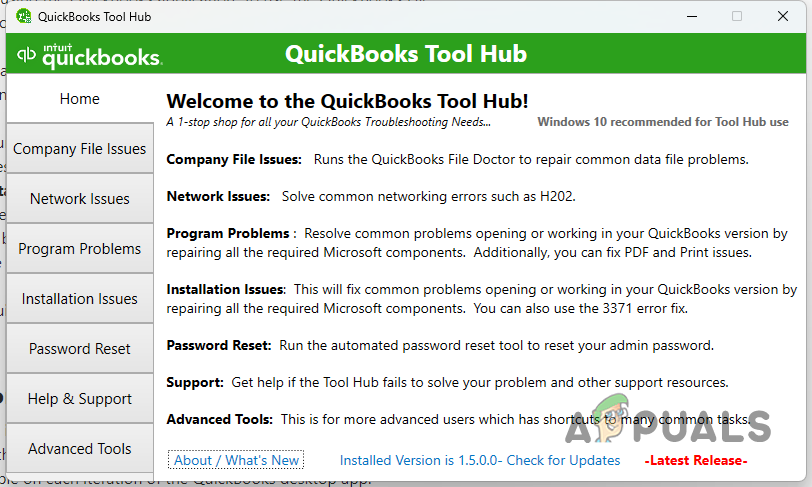
We would recommend starting with using the QuickBooks File Doctor. QuickBooks offers a tool hub that allows you to detect and fix any issues any common errors. The QuickBooks Tool Hub has several utilities that can help you in various scenarios.
You can use the QuickBooks File Doctor utility for the error message in question. This allows you to fix file and network issues you might be experiencing while using the QuickBooks application. To use the QuickBooks File Doctor utility, you will need to download QuickBooks Tool Hub. Follow the instructions down below to do this:
- First, you will have to download and install QuickBooks Tool Hub. You can either head to the website and download it from there or click on this link that automatically downloads the setup from the official source.
- Once you download QuickBooks Tool Hub, launch the installation wizard to install the application. The installation process is straightforward and does not require any configuration.
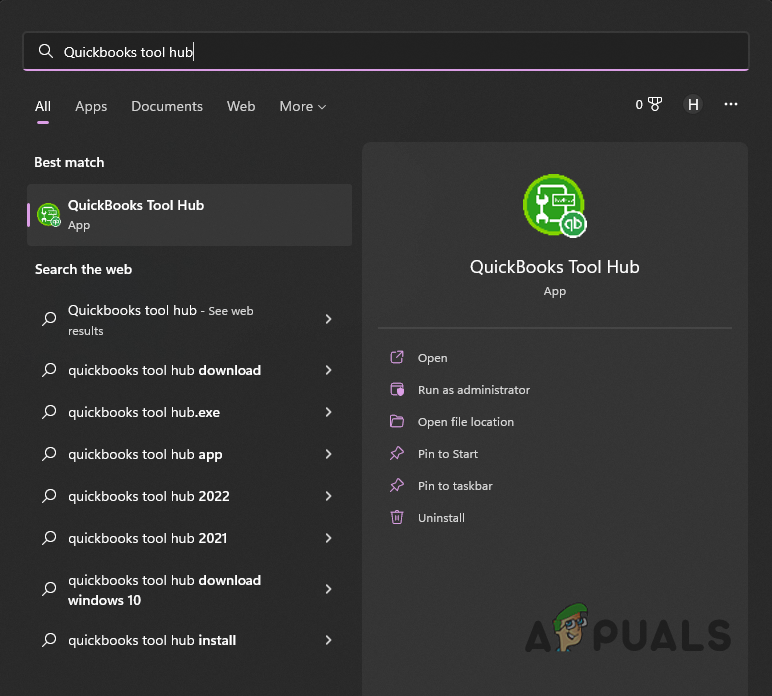
- After installing the application, open up the Start Menu and search for QuickBooks Tool Hub. Open it up.
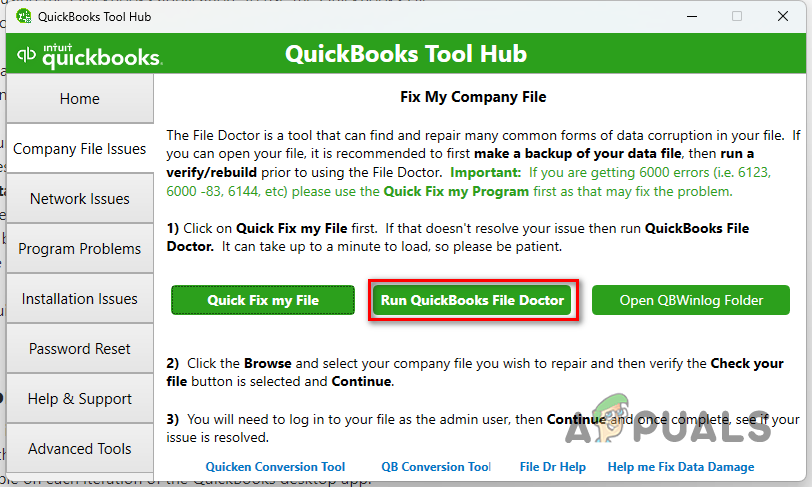
Opening up QuickBooks Tool Hub - On the QuickBooks Tool Hub window, click the Company File Issues tab on the left-hand side.
QuickBooks Tool Hub - There, click the Run File QuickBooks Doctor button to start the utility.
Running QuickBooks File Doctor - Wait for it to finish and see if that resolves the problem.
2. Enable Multi-User Hosting on the Server only
QuickBooks offers the ability to allow multiple users to work on a company file. This is done by creating different users through the dashboard and allocating them apposite permissions. The multi-user hosting option is available on each iteration of the QuickBooks desktop app.
If you want to utilize the multi-user functionality on your network, you will have to make sure only the server has the Host Multi-User Access option. In case there are various workstations with the said option enabled, you are bound to run into the error message in question. As such, you will have to enable the option only on the server, i.e., the computer containing the company files.
To disable multi-user mode on other workstations in the network, follow the instructions down below:
- First, open up the QuickBooks application on each computer encountering the problem.
- Once the QuickBooks app is open, navigate to File > Utilities > Stop Hosting Multi-User Access.
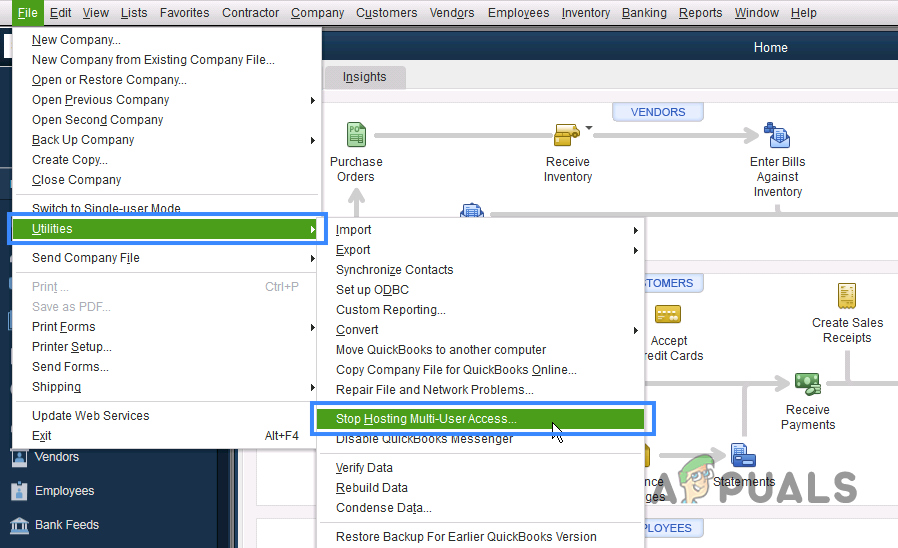
Disabling Host Multi-User Access Feature - Do this for all of the workstations with the error. If you do not see the Stop Hosting Multi-User Access option in the Utilities menu on your workstations, leave it as it is.
- After you do that, open up the QuickBooks application on your server.
- On the server, enable the Host Multi-User Access option. You will find it in the File > Utilities menu.
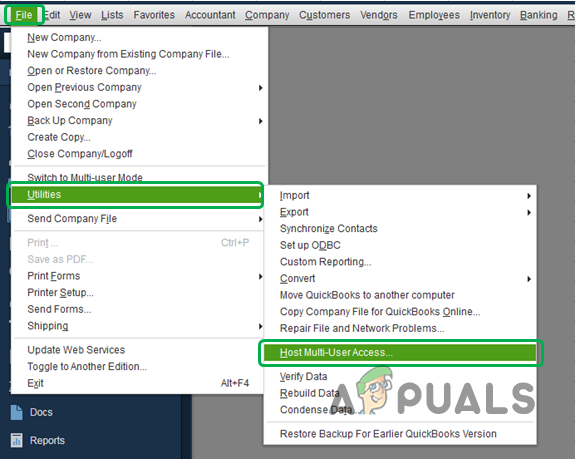
Enabling Host Multi-User Access Feature
Once you do all that, see if the error message still appears. Move to the following method in case it does.
3. Check QuickBooks Services
QuickBooks uses services, like any other application, to perform its operations. When these services are not running in the background while you are trying to access a company file on the server, it can trigger the error message in question.
If this case is applicable, you will have to ensure that the services run in the background. In addition, you will also have to change the startup type of the services so they can start automatically. All of this needs to be done on the server since it contains the files and not on the workstations.
To do this, follow the instructions down below:
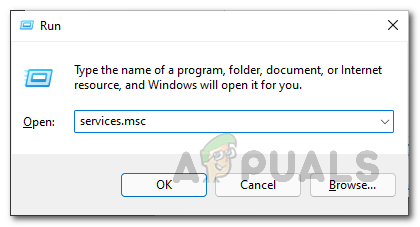
- To start, open the Run dialog box by pressing the Windows key + R on your keyboard.
- In the Run dialog box, type in services.msc and press Enter
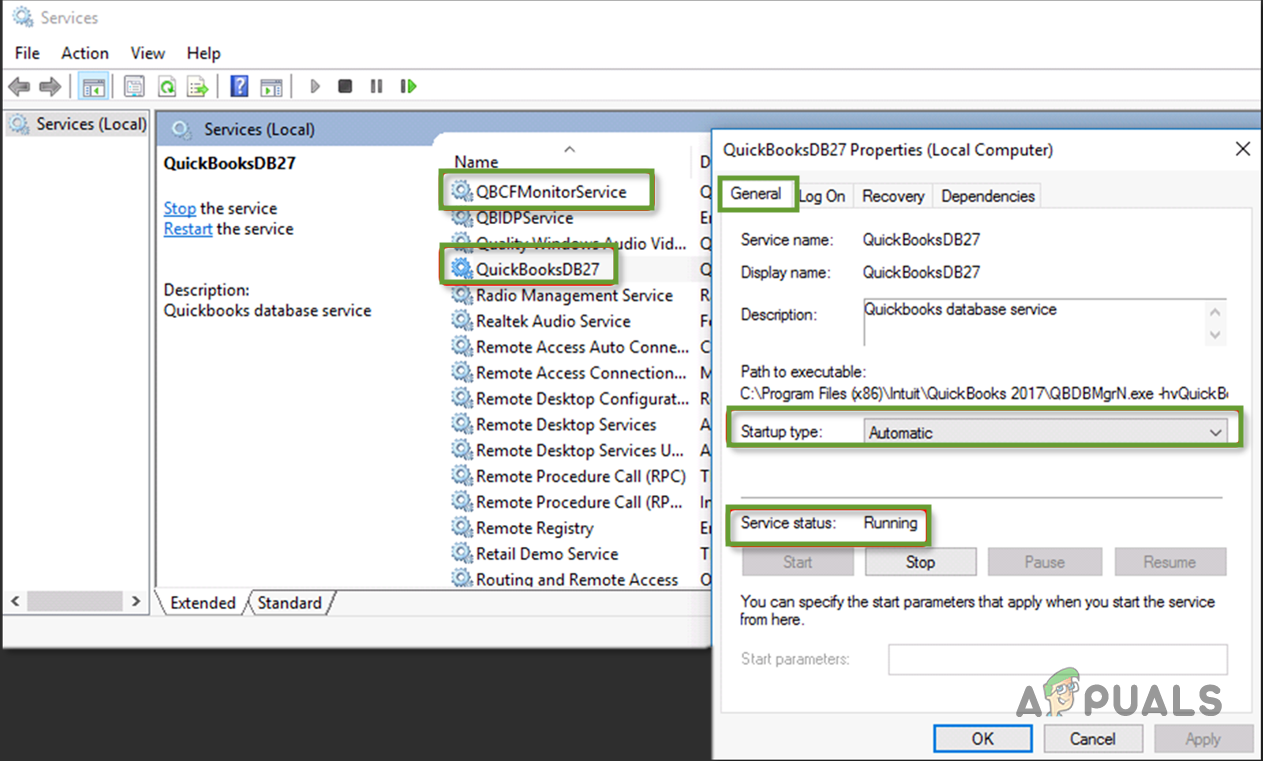
Opening up Services - On the Services window, look for the QBCFMonitorService and QuickBooksDBXX services. XX in the latter can be any two numbers.
- After that, double-click each service and select Automatic from the drop-down as the Startup type. Make sure the service is running by clicking the Start button.
Editing QuickBooks Services - Once you do that, switch to the Recovery tab.
- You can change the computer’s response to the service when it fails.
- Choose the Restart the service option for First failure, Second failure and Subsequent failures.
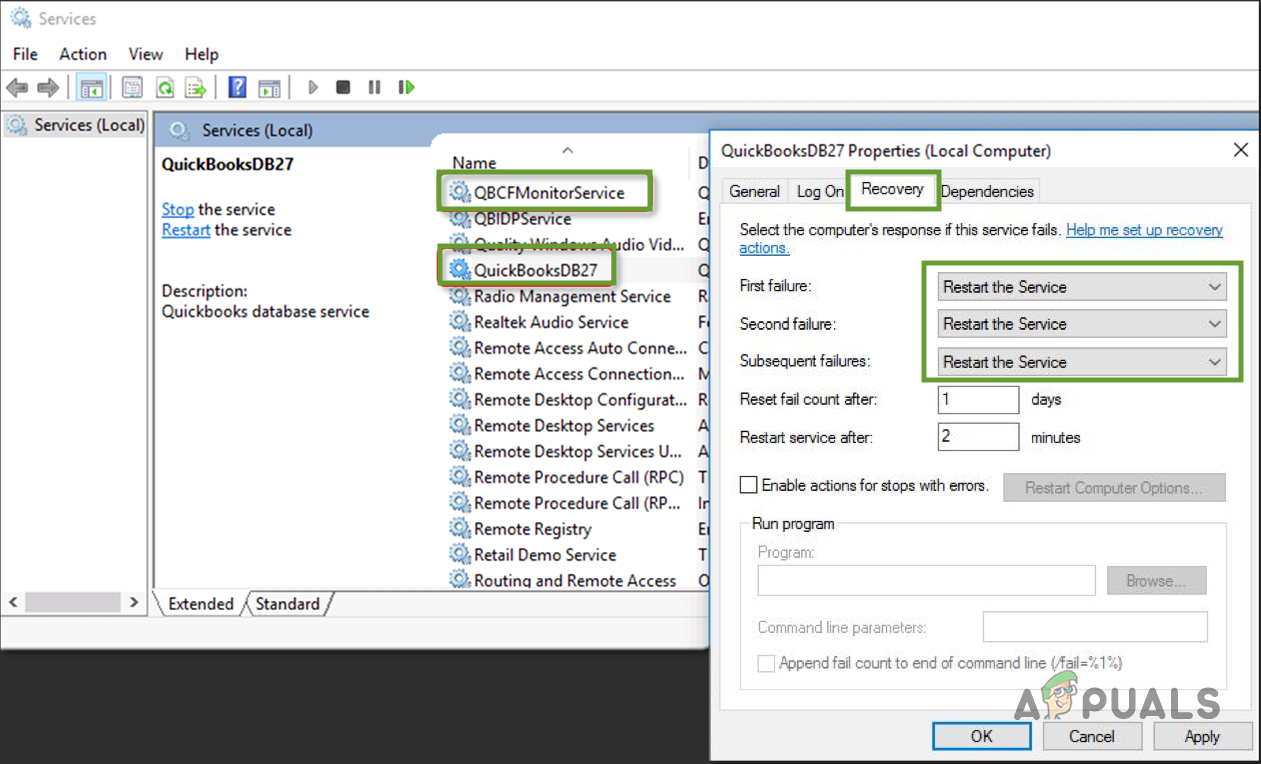
Changing Recovery Actions of QuickBooks Services - Finally, click Apply and then hit OK.
- Do this for both of the services. After that, see if the issue goes away.
If there is no issue with the services or it does not fix the problem, move to the following method below.
4. Disable Windows Defender Firewall Temporarily
In some cases, the problem can also arise when the Windows Defender Firewall is not allowing the connection. As it turns out, Windows Firewall is responsible for overlooking all of the connections on your computer, both incoming and outgoing. If the firewall is blocking the connection, you will not be able to access the files.
If this case is applicable, you will have to temporarily disable Windows Firewall to see if that resolves the issue. Doing this is plain and simple. Follow the instructions down below to do this:
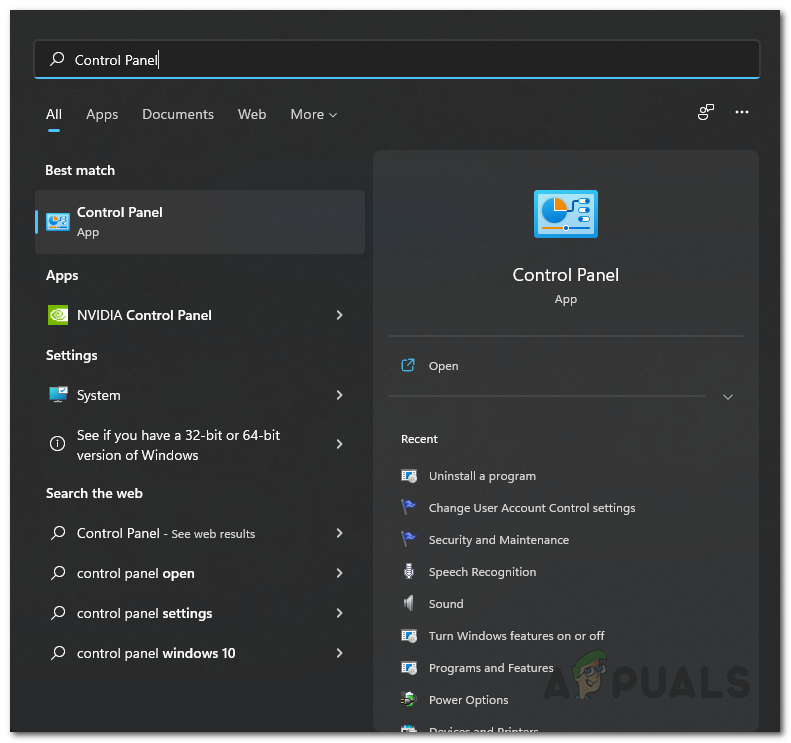
- First, open the Control Panel by searching for it in the Start Menu.
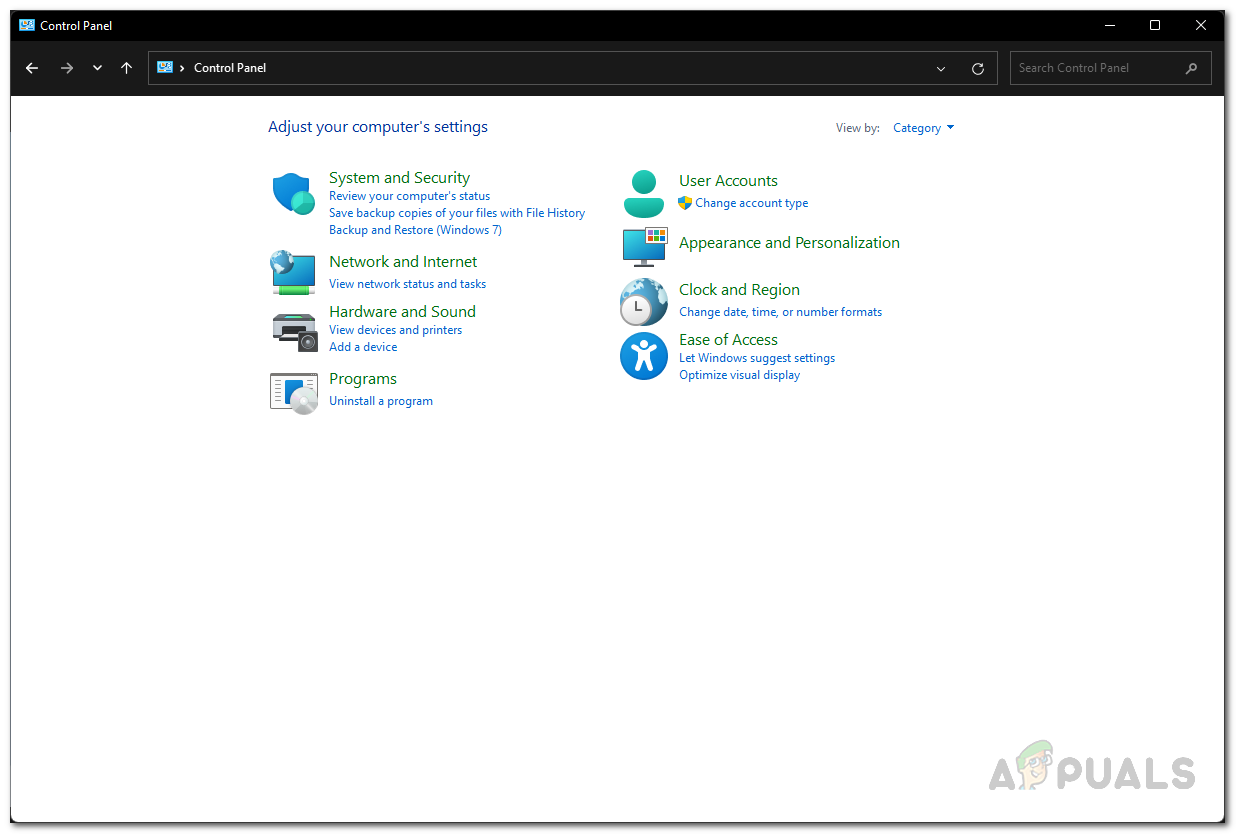
Opening up Control Panel - On the Control Panel window, click on the System and Security option.
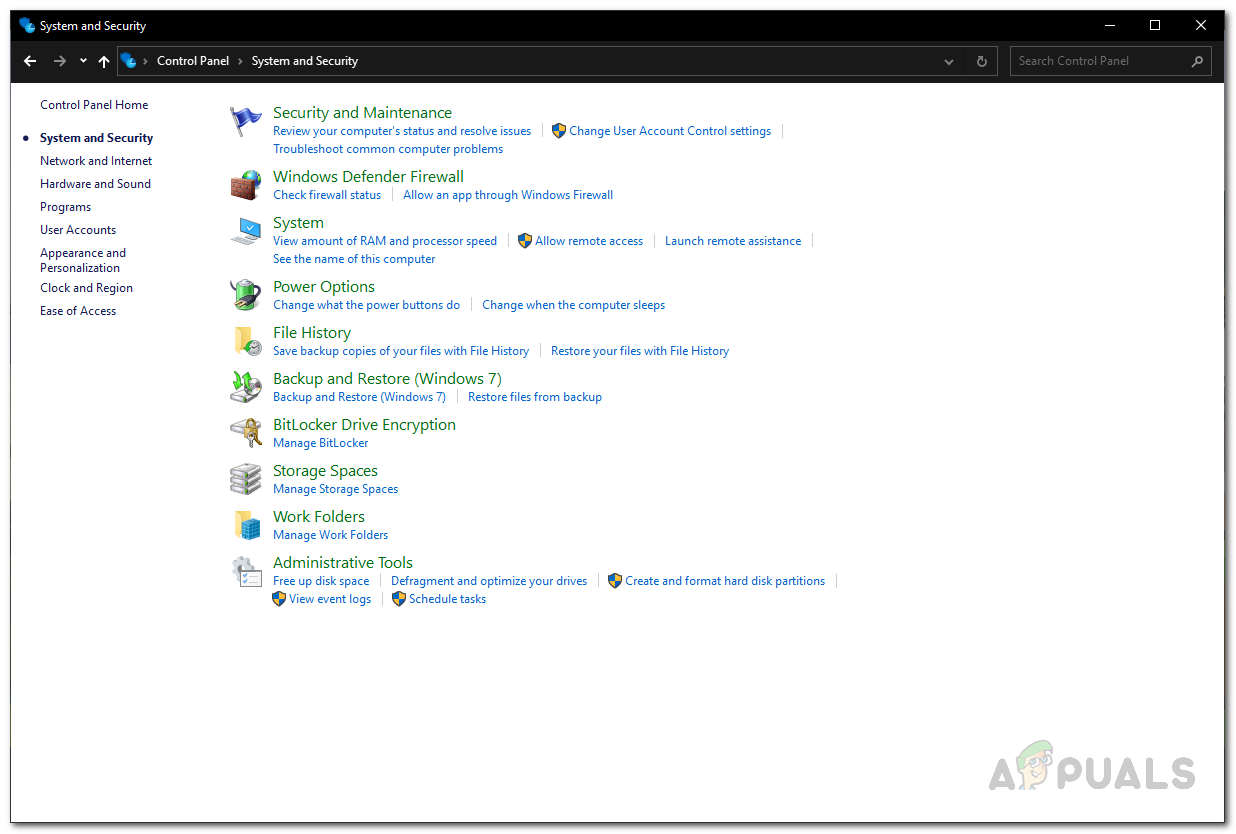
Control Panel - Once there, click on Windows Defender Firewall.
Navigating to Windows Defender Firewall - Inside Windows Defender Firewall settings, click on the Turn Windows Defender Firewall on or off option on the left-hand side.
- After that, choose the Turn off Windows Defender Firewall option for both Public and Private networks.
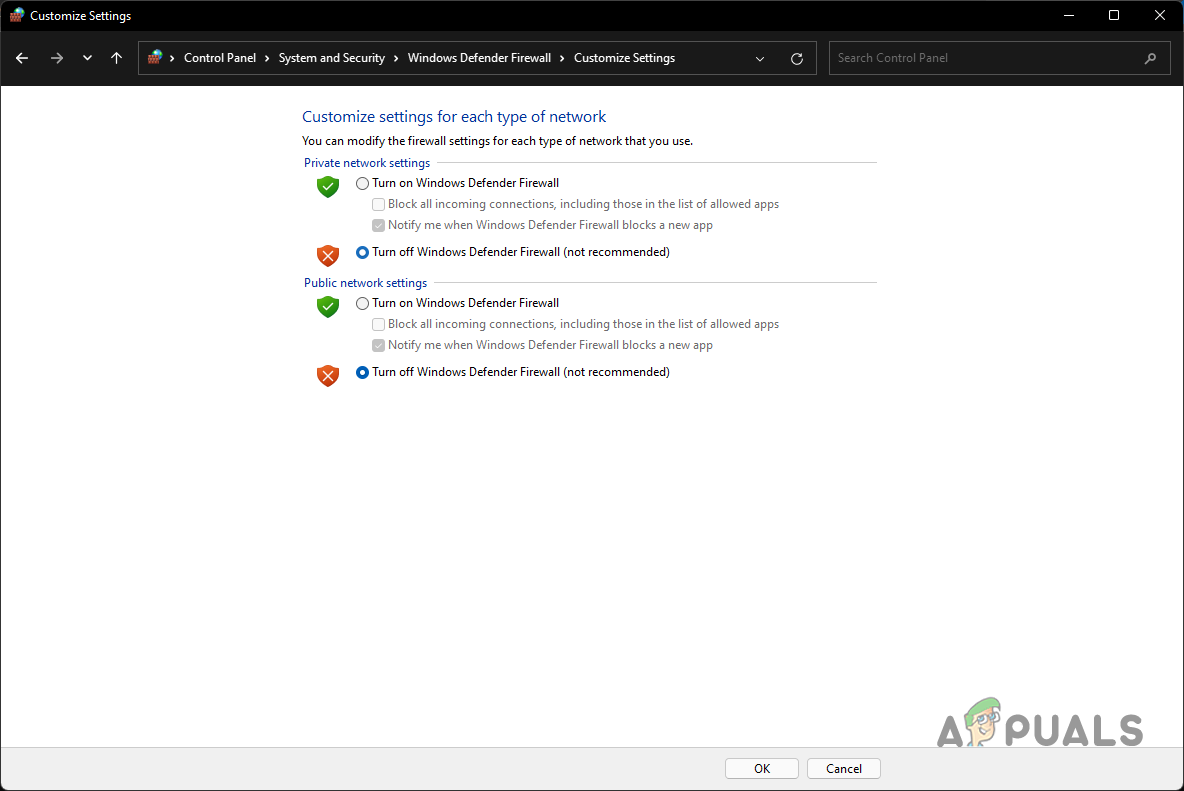
Turning off Windows Defender Firewall - Click OK. See if the issue persists after this.
If the problem goes away after disabling the Windows Defender Firewall, you can allow the QuickBooks app through the firewall by adding it to the whitelist. This way, you will be able to enable Windows Firewall. Follow the instructions down below to do this:
- In the Windows Defender Firewall settings, click the Allow an app or feature through Windows Defender Firewall option on the left-hand side.
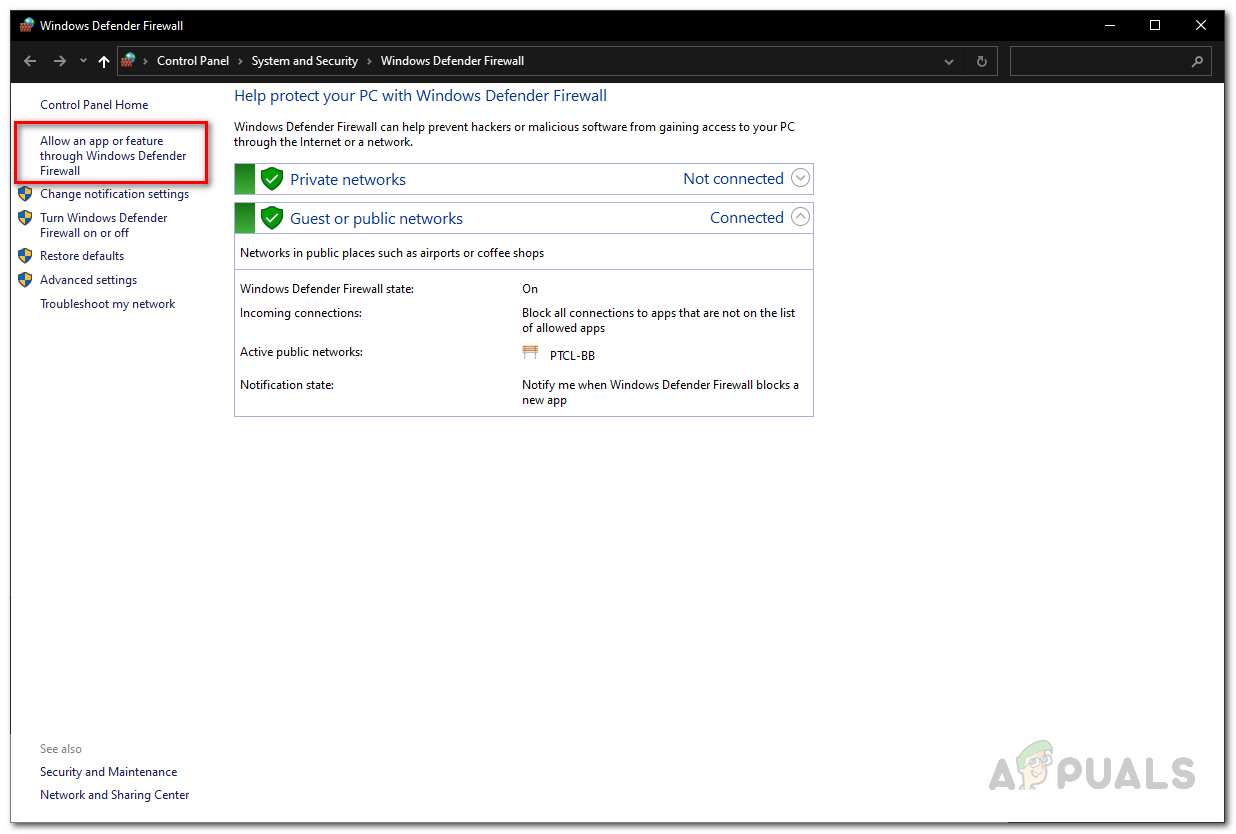
Navigating to Windows Defender Firewall Whitelist - After that, click on the Change settings button.
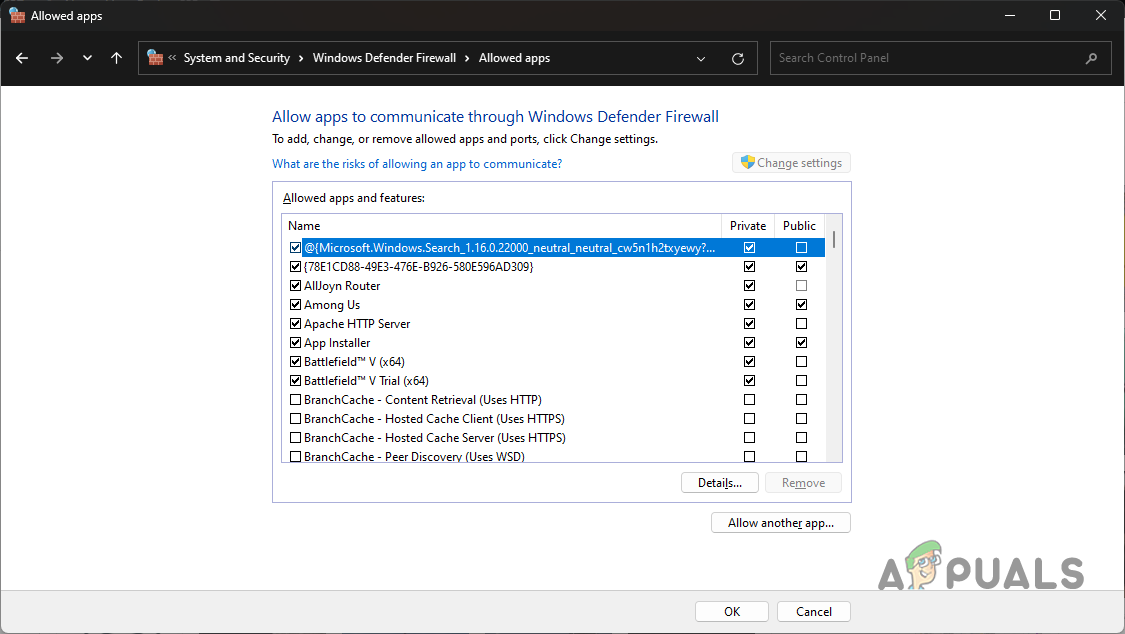
- Follow this by clicking on the Allow another app button.
Windows Defender Firewall Whitelist - On the follow-up dialog box, click the Browse button and navigate to the QuickBooks installation directory. Select the QuickBooks executable file.
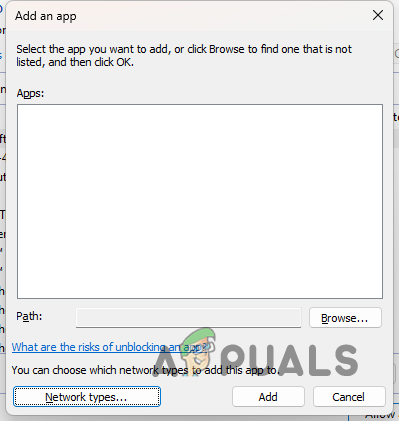
Adding QuickBooks to Windows Defender Firewall Whitelist - Once you do that, click on the Network Types button. There, tick both the Public and Private checkboxes.
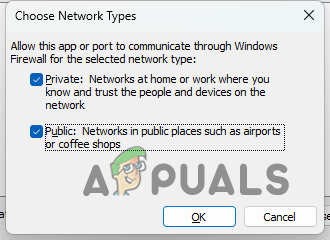
Editing Network Types - Finally, click the Add button and hit OK to save your changes.
5. Edit Windows Hosts File
The host file in your Windows installation directory is a system resource that maps hostnames to IP addresses. This is helpful when trying to find a host in an IP network. In addition, you can also block websites on your system via the hosts file. You will be editing the hosts file on your computer to map the server’s IP address to its hostname in the network.
You will have to add the IP address and hostname of the workstation facing the issue in the host file on your server. Both cases require you to have administrative privileges to edit the hosts file since it is a system resource. Follow the instructions down below to do this:
- First, you must find your local IP address and your computer’s hostname.
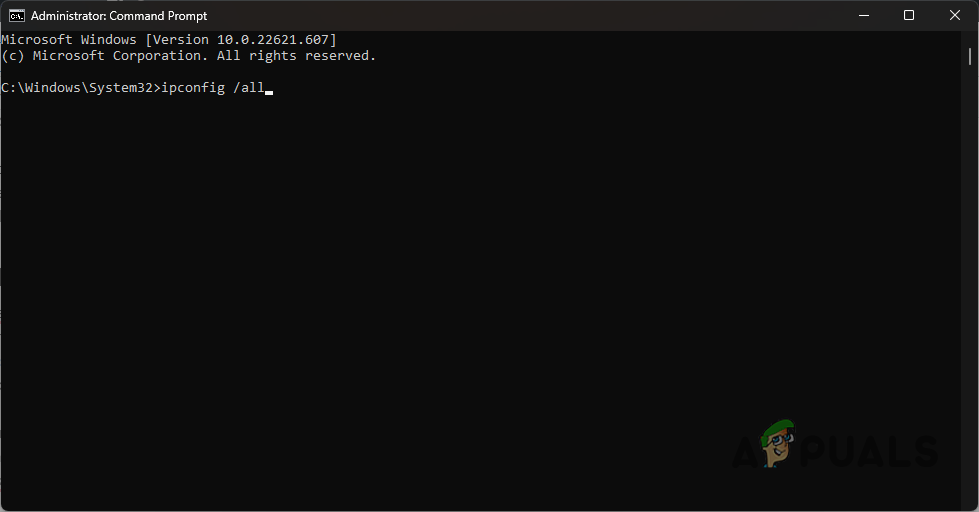
- To do this, open the Start Menu and search for the command prompt. Click the Run as administrator option on the right-hand side.

Opening Command Prompt as Admin - To find your IP address and hostname, type in ipconfig /all and then press Enter.
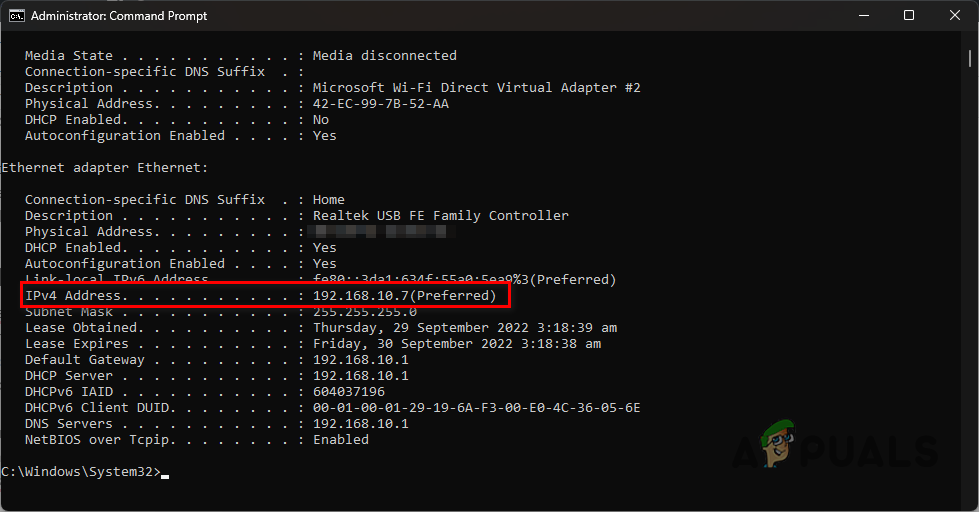
Accessing the IP Configuration - The IPv4 address is your local IP address. Note your IPv4 address and hostname.
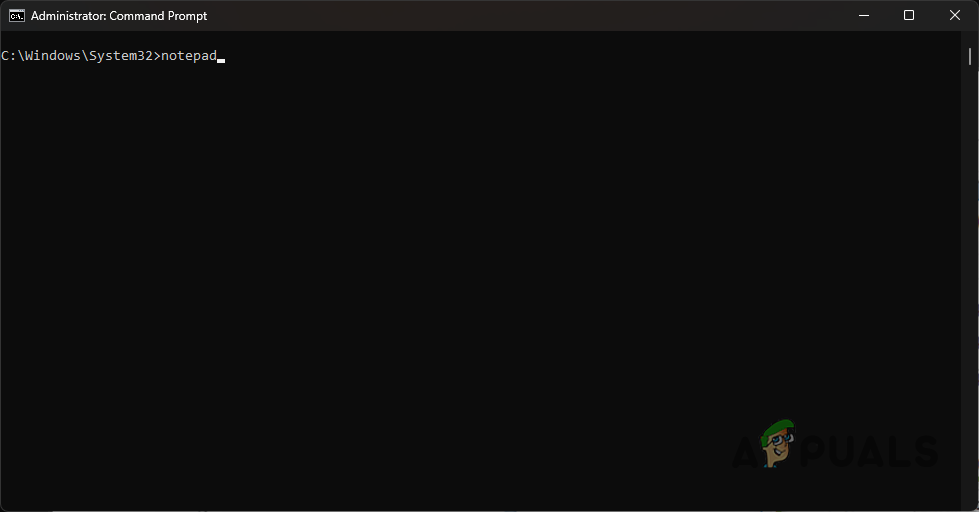
IPv4 Address - Afterwards, in the command prompt window, type in notepad and hit Enter.
Opening up Notepad as Admin - On the Notepad window, click on File > Open.
- Navigate to the C:\Windows\System32\drivers\etc directory.
- If you do not see any files, choose All files from the drop-down menu.
- After that, open up the hosts file.
- Inside the hosts file, enter your IP address followed by the hostname. You will have to enter your server’s IP address and hostname on your workstation and vice versa.
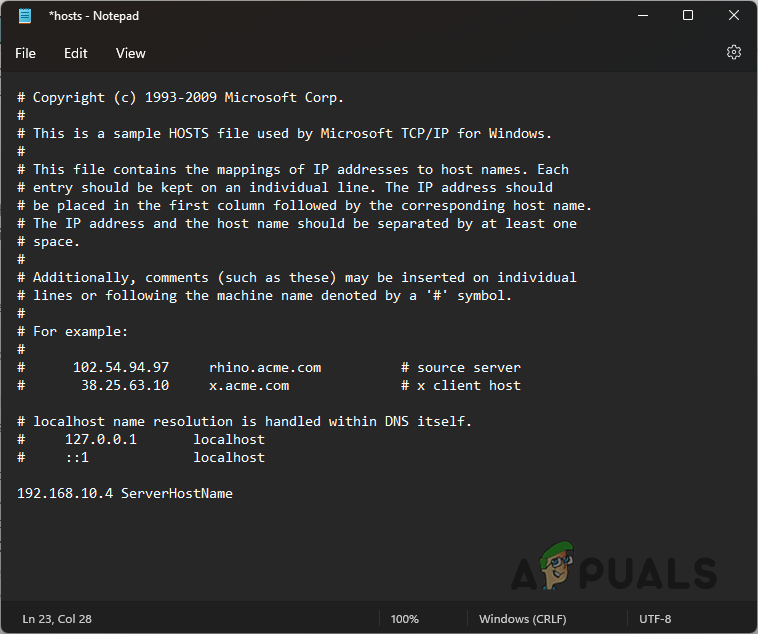
Editing Hosts File - Press CTRL + S on your keyboard to save the changes.
- After that, close the notepad window and see if the problem still occurs.
6. Check Server Status
Finally, if none of the methods above fixes the problem for you, then it is very likely the error message is occurring due to a problem with your server. The server may be down or unreachable, which is why your workstation cannot access the company file.
If this case is applicable, we recommend pinging your server via a command prompt window to see if there are replies. If there are no replies from the server, it will be evident the server is unreachable. In such a scenario, you will have to inform your IT department so they can resolve the issue.


