How to Fix iTunes could not restore the iPhone or iPad?
iTunes Could not Restore because the backup was corrupted or not compatible is usually caused by permissions preventing iTunes from restoring or a corruption with the backup database. It also affects almost every iPhone model (iPhone 5s / 6 / 6 Plus / 7 / 7 Plus / 8 / 8 Plus / X). iDevices like iPad, iPod Touch are not excluded as well. Whenever users try to restore, the following message pops up.
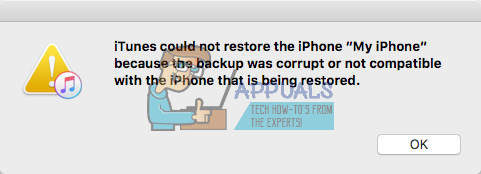
“iTunes could not restore the iPhone “User’s iPhone” because the backup was corrupt or not compatible with the iPhone that is being restored”
In this article, you can find how to fix this error happening while attempting restore on your iDevice.
Why does This Error Happen?
When you are making a backup of your iDevice with iTunes, it may happen a couple of errors but didn’t show you any messages. Then, you thought you have performed the backup successfully. However, when trying to restore your iPhone, iPad, or iPod Touch later, you may experience the error mentioned above. The reason why this error shows up because the backup that you have performed earlier wasn’t successful and it created a corrupted file.
iTunes could not restore the iPhone can also happen when you try to restore your iDevice with an incompatible backup. This may happen because of using different iOS versions on your devices. For example, if you updated your iPhone 7 to iOS 11.2 beta, and create a backup with iTunes, and then you downgrade to iOS 10.3.3, without doubt, you won’t be able to restore your iDevice with the iOS 11 backup. That is not a compatible backup file with your iPhone running iOS 10.
Besides these main reasons for experiencing an iTunes error when performing a restore on your iDevice, a couple other hardware incompatibilities might be a cause. So, before jumping in the solution section, make sure you check the following tips.
Tip #1: Try turning off your Mac (or PC) and the iPhone while they are connected via the original lightning USB cable, then turn it on back again. Restarting the devices 2-3 times helped in some cases.
Tip #2: Try swapping out the lightning cable you are using. And, make sure you are using an original certified USB lightning cable. It can make a huge difference.
Tip #3: If you are using a USB hub, try connecting your iPhone (or iPad or iPod Touch) directly to your computer. USB keyboards with built-in USB ports are also hubs. So, make sure you don’t use one while performing the restore.
Update / Downgrade Your iDevice’s iOS
The first thing you should try when experiencing this iTunes could not restore the iPhone “User’s iPhone” because the backup was corrupt or not compatible with the iPhone that is being restored, is upgrading or downgrading your iDevice’s iOS to the same iOS version that your backup is made on. For example, if your device is running on iOS 10.3.3 and your backup file is made on iOS 11.2, make sure you install iOS 11.2 on your device as well. Then try performing the restore process. If you don’t know how to downgrade or update your iDevice’s iOS to a specific release, check the following article How to Downgrade iOS.
If this doesn’t work on your current iTunes version, make sure you have downloaded the latest iTunes and try restoring the iDevice again.
This method should definitely help if the cause of the problem is the incompatibility in the iOS.
Note: The latest iTunes 12 release seems to no longer support the backup methods used for iOS 4 and lower. If you are trying to back up or restore an older iDevice (running iOS 4) iTunes 12 may be causing your problems. Try getting a lower version of iTunes (do NOT update iTunes if asked) then give it a try.
Create Another Backup
This one is pretty easy to perform, as long as you can use your iDevice to create another backup. However, to fix the issue you will need to do a couple of extra steps other than launching iTunes and pressing the Backup or Restore buttons. To speed up things, whenever you create a backup, iTunes uses your old backup files. And, just a straight creating a new backup file may still reslut with the same error you got before. So, here is what you need to do.
First, you need to delete your existing incompatible or corrupt backup from iTunes, create a new backup, and then restore your device with iTunes. Here are the steps explained.
- For Windows users, Go to Edit and choose Preferences. For Mac users, Click on the iTunes menu and choose Preferences.
- Now, select the Devices tab and choose your latest backup.
- Delete the file and try performing a backup again.
Can’t locate your backup files? Check the following section.
How to Locate Your iTunes Backups
For some users this may not be as simple as it looks. You go to Preferences > Devices > Backups but can’t find backup files for your particular iDevice in the list. Now you are stuck wondering how can you locate that invalid backup so you can delete it and backup your iDevice?
So here you can find the details how to locate the backup files.
The fastest way is to access them on your storage.
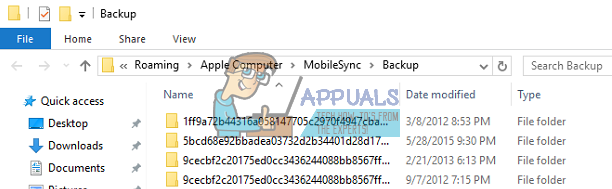
- On Windows, this is located here:
C:\Users\YOUR USER NAME\AppData\Roaming\Apple Computers\MobileSync\backup
- On Mac, it is located here:
~/Library/Application Support/MobileSync/Backup/
Inside the Backup library is a folder for each device you have backed up with iTunes. All the folders here are named with the unique identifier number (UDID) of each device. This UDID is a 40-character alphanumeric code that uniquely identifies your iPhone (or iPad or iPad Touch) from others. But What if the Backups Folder Doesn’t Exist?
If instead of the Backups folder, there is an alias to Backups (shortcut called Backup), your files are located in the different directory.
This happens if you have moved your iTunes library to external memory. The old alias now points to a nonexistent location and you get the error from above. To fix this, delete any alias. Now, perform a fresh backup with iTunes.
How to Find Your Device’s UDID?
- First, connect your iDevice to your PC or Mac via lightning cable.
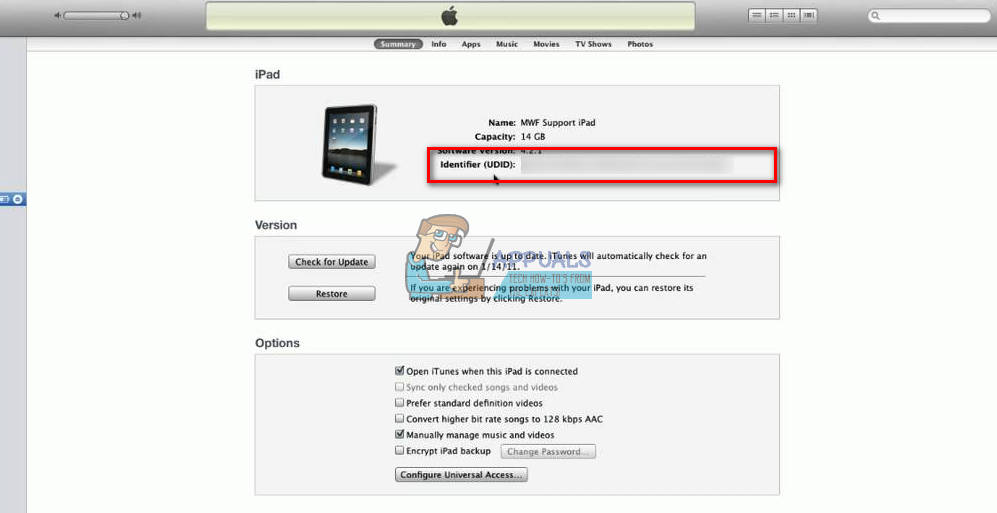
- Launch iTunes and select your iDevice.
- Click on the Summary tab if not already there.
- Click on your device’s serial number, and you can see your UDID. You can click on the serial number multiple times to also see your ECID and model identifier as well.
- Now, copy the UDID number by pressing Ctrl+C.
Once you locate the UDID for your iDevice, delete its corresponding folder. (You can also move it to a safe location like your desktop.) Then, restart iTunes and try creating a new backup file. When the backup finishes, try restoring your iDevice.
Disable Your Malware Detection
Some Windows users are experiencing problems while creating iDevice backups because Windows Defender detects some files from the backup as malware. They could not use their backup files until they fully disabled their malware and antivirus protection. So, if you are still getting the same error, try turning off your antivirus software while performing any backup or restore.
Try Using Third-Party Apps
When dealing with corrupted backups, there are a couple third-party apps that may help you. Go to Mac App Store or Google and search for backup repair tools. You can use Decipher Tools, Corrupt Backup Recovery, iPhone Back Up Extractor, Decipher Backup Repair, and a couple of others. We don’t have any specific recommendation, as we haven’t needed to use them. However, if you didn’t find the solution in the previous methods, feel free to try them as well. Many users report success while using these third-party apps.
Reset Your iDevice
When nothing works, try resetting your iDevice. This method will NOT erase any of your apps or data from your device’s memory. However, it will delete all your preference settings (Wi-Fi passwords, manually-configured networks, etc.)
I hope this article helped you in resolving the iTunes could not restore the iPhone problem. Now, be sure to leave a comment to let us know what worked for you!