How to Downgrade from iOS 15 to 14 Without Data Loss
The fifteenth major release of the iOS operating system by Apple i.e. iOS 15 has been in public beta for quite a while now. With tons of new features, many iOS users installed the beta version of iOS 15. The operating system is expected to release to the general public in the fall of 2021 and as that draws near, many intend on downgrading to the previous iOS version, i.e. iOS 14 to be able to easily upgrade to the newest and stable version of the iOS 15.
Any software in beta is neither targeted nor recommended for commercial use as it contains bugs that need to be squash and that’s something you wouldn’t want on your primary phone. Normally, when you are downgrading from a product in beta to a stable version, there are high chances of data loss. The same is the case here since the backup you create while running iOS 15 will not work on iOS 14. However, we have a solution for that so you don’t have to worry about losing any of your data. With that said, let us get started and show you how to downgrade from iOS 15 to 14 without any data loss.
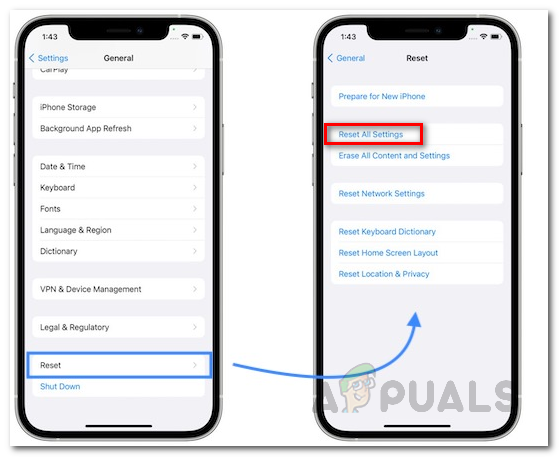
Reset All Settings
The first thing you need to do is reset all the settings on your phone running iOS 15. Now, don’t worry here as this does not delete any of your data but rather the general settings that includes network settings, home screen layout, and more. The reason we need to do this is that some of the iOS 15 settings cause issues with some of the apps on your phone when you go back to iOS 14. To do this, follow the instructions down below:
- On your phone, tap on the Settings icon.
- In your phone settings, make your way to General and scroll down to the Reset option.
- Tap on the Reset option and then finally tap Reset All Settings.
Resetting iPhone Settings - You will be prompted to enter your passcode. Once you do that, the reset shall begin. Wait for it to finish.
Download Latest Version of iOS 14
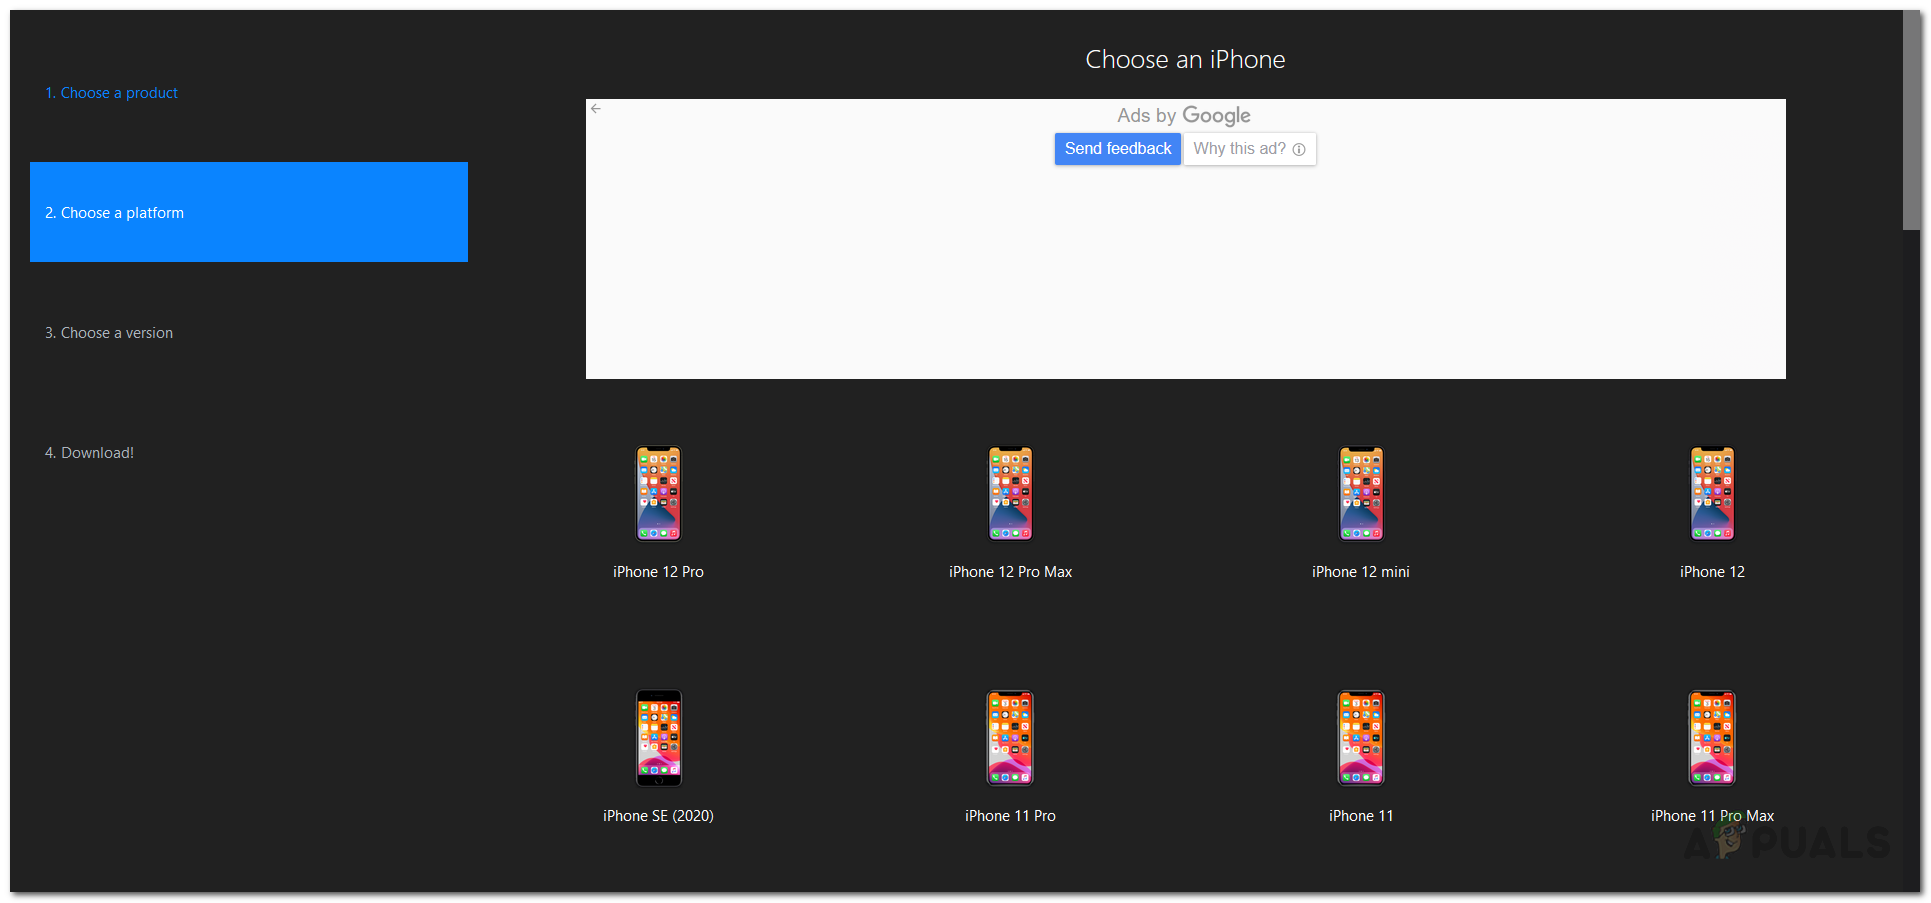
Now that you have reset your phone settings, you need to get a computer and plug your phone to the computer. In this guide, we will be using a Mac, however, you can follow through the steps in the same order by using iTunes on Windows. Now, for us to be able to downgrade to iOS 14, we are going to require a signed version of the operating system. For this, follow through the steps given down below:
- First of all, on your Mac, open up a browser and make your way to IPSW’s website.

IPSW Website - From here, we will be downloading the latest signed version of iOS 14.
- Choose your product first of all. After that, choose the model of your phone.
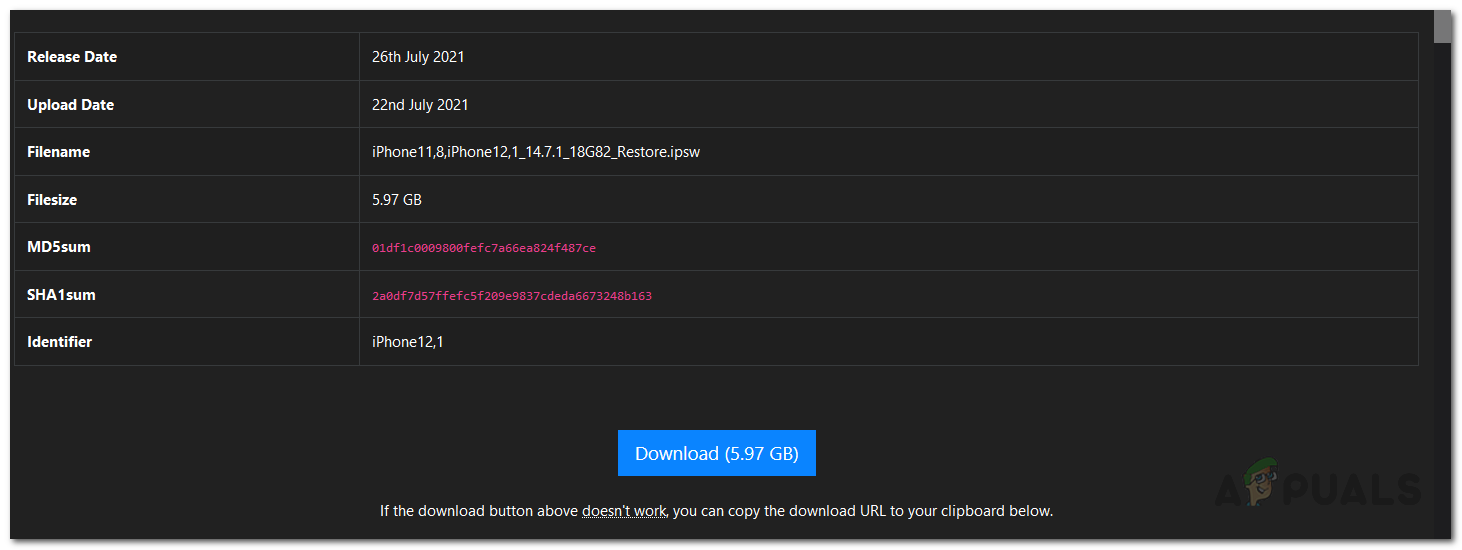
Choosing Product Model - Finally, you will be shown a list of IPSWs. Click the latest option under Signed IPSWs which is also represented by a green tick under Apple Signing Status (iOS 4.7.1 in our case) and then hit the Download button to begin downloading. This might take a while as the IPSW is usually around 6 GB. While this downloads, we’ll start backing up your phone’s data.
Downloading iOS
Backup your Phone Data
While the latest version of the iOS 14 is being downloaded, we will use the time to backup your phone’s data to your computer. This is really important as we’ll be using this backup later down the line to restore your data when you have downgraded to iOS 14. To do this, follow the instructions below:
- On your Mac, open up the Finder window.
- On the left-hand side, under Locations, click on your phone to be able to see more settings.
- Scroll down a bit, and then in front of Backups, make sure that Back up all of the data on your iPhone to this Mac option is chosen.
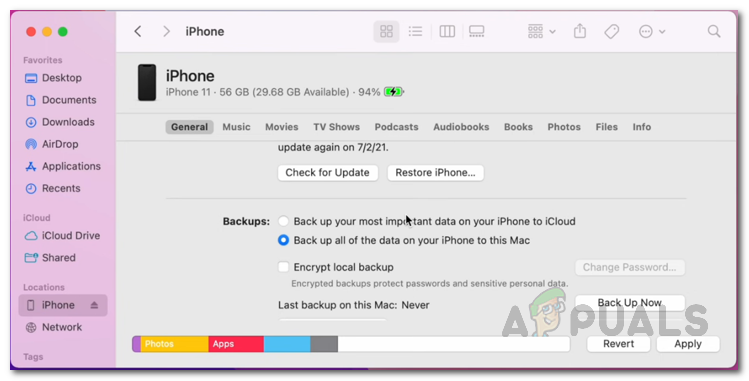
iPhone Backup - After that, click on the Backup Now button to begin the backup process.
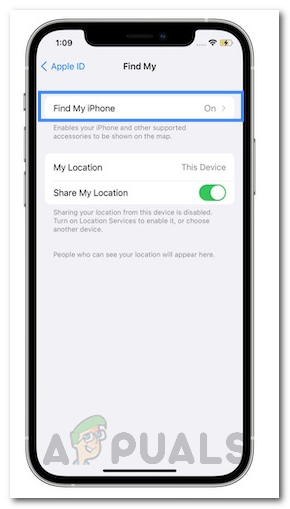
- Now, while this is happening, you will need to connect to your WiFi on your phone and disable the Find my iPhone feature since we reset all the settings earlier.
- Therefore, go ahead and connect to your WiFi first of all.
- Then, tap on your name and then tap on the Find My option.
From there, go ahead and disable Find my iPhone. This is important and make sure you do this before proceeding.
Downgrade from iOS 15 to iOS 14
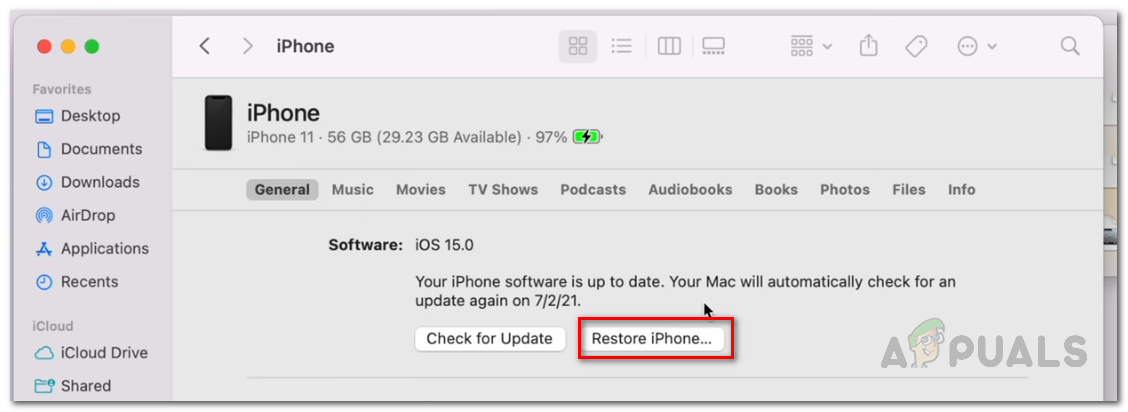
Once iOS 14 has finished downloading along with your backup process, it is time to downgrade from iOS 15 to iOS 14. To do this, follow the instructions down below carefully:
- First of all, open up the Finder window and click on iPhone under Locations on the left-hand side.
- There, click on the Restore iPhone button while holding down the Option key on your Mac. On Windows, this would be Shift.
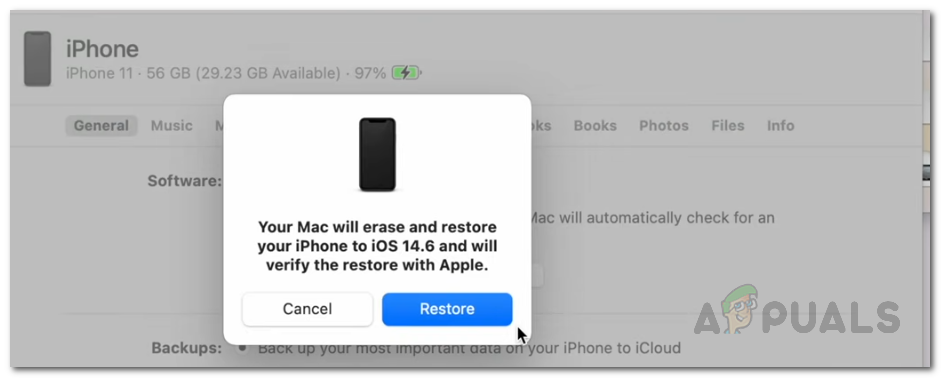
Restoring iPhone - From the window that pops up, choose the IPSW file that you just downloaded and then click the Open button.
- Finally, click on the Restore button for it to start the restoring process. Wait for your phone to finish downgrading to iOS 14.
iPhone Restore
iOS 14 Initial Setup
Once your phone has been restored to iOS 14, you will be taken to the initial setup screen where it takes you through the process of configuring your phone such as connecting to the WiFi, choosing a language, and more.
When you are taken to the Apps & Data screen, choose the Don’t Transfer Apps & Data option as we’re going to manually restore our data through the backup created earlier. After that, you can either choose to log in to your Apple ID or keep it for later.
Restoring the Data
Now that we have downgraded to iOS version 14 and gone through the initial steps, it is time to restore the data backup that we created earlier. For this, follow the instructions down below:
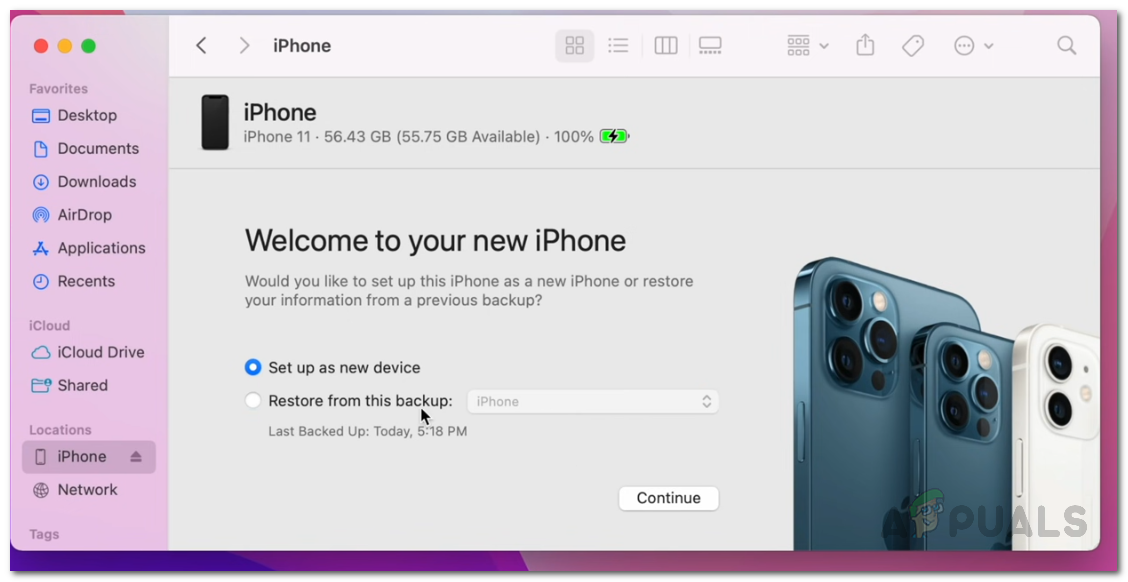
- First of all, open up the Finder window on your Mac, and then under Locations, choose iPhone.
- It should show you the Welcome to your new iPhone message. Choose the Set up as new device option and then click the Continue button.
iPhone Setup on Mac - After that, click on the Manage Backups button. This will show you the backup that we created earlier.
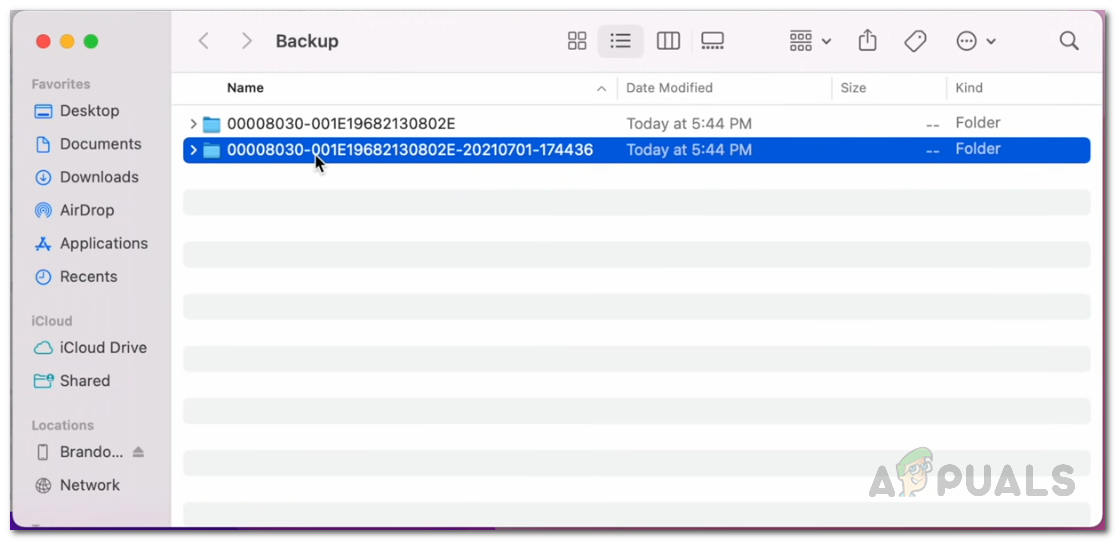
- Then, right-click on the backup and click the Show in Finder option.
- This will take you to the location where the backup is stored. Double-click on the folder and then scroll all the way down till you see the Info.plist file.
iPhone Backup Folder - Right-click on this file and open it up in a text editor by hovering over Open With > TextEdit.

Opening iPhone Backup Properties File - Once the file has opened, we will search it for “Product Version” without the quotations. To do this, press Command + F and then type it in.
- This will take you to a key value that is assigned to a string. Since we created the backup on iOS 15, the version should be set to 15. Here, just change 15.0 to 14.0.
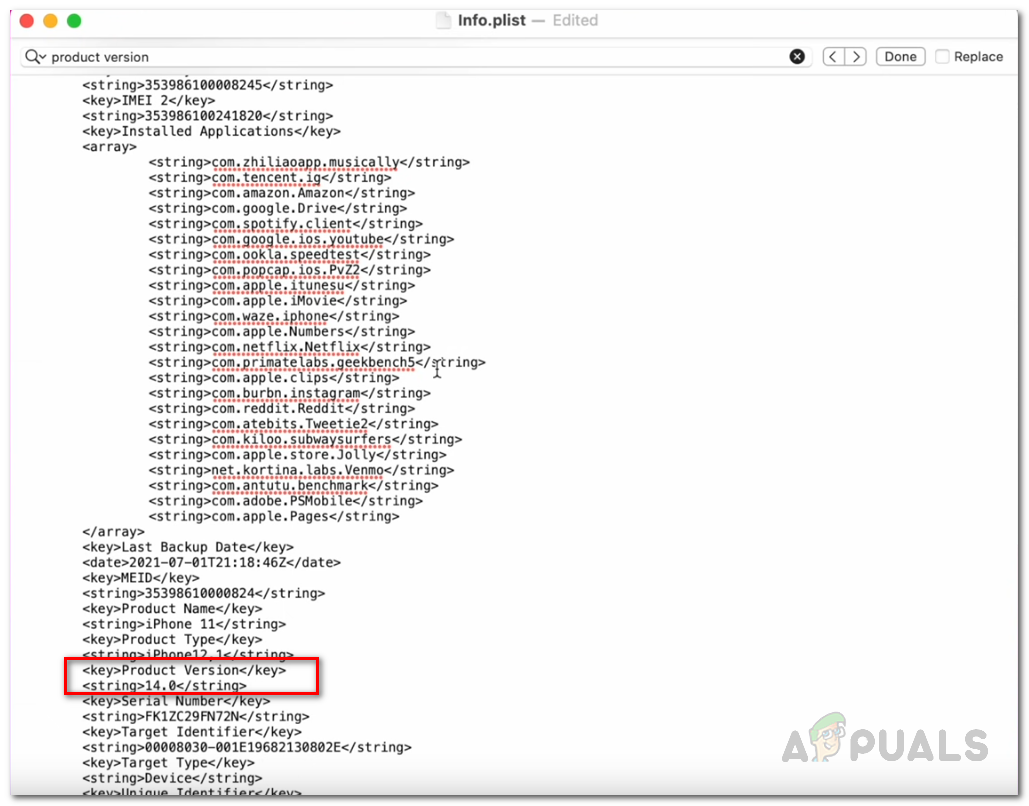
Editing iPhone Backup File - Save the file and then close it. Now, click the OK button on the menu that shows your backups.
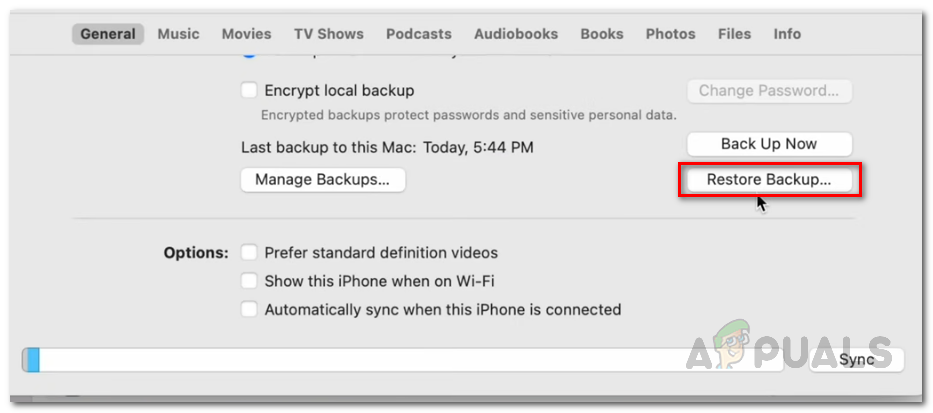
- Finally, click on the Restore Backup button and then choose your backup. Then, click on the Restore button.
Restore iPhone Backup - Once you do this, your data will start restoring to your iPhone. This process might take a while depending on the size of your backup, so make sure to wait for it. On your phone, you should see the Restore in Progress message.
Once you see the Apple logo on your screen, you can safely unplug your phone from your computer as your data has been successfully restored. You will also be shown the Restore Completed message when your phone starts. That’s it, you have now successfully downgraded to iOS 14 from iOS 15 without actually losing any of your data.