Fix: Input Not Supported
The error “Input not supported” occurs when the computer’s resolution doesn’t match with the monitor. This error usually comes forward when you plug in a new monitor with your computer or you change the resolution to some value which is not supported.
This error message also pops up when you are playing games on Windows or through some third-party clients such as Steam. Either the game doesn’t launch or an error pops up when you are playing it. The simplest solution to this error is to change your screen’s resolution. This can be done through a number of different ways listed below.
Solution 1: Using Base Video in MSConfig
MSConfig is a system utility present in Microsoft Windows which allows you to troubleshoot the operating system’s startup process. You can change a number of different startup parameters such as disabling services, drivers, etc. We will make use of this utility and try to make the computer boot at the lowest resolution. From here we may be able to log into the usual user account and then change the resolution manually. This method will be useful if you are unable to start the computer in normal mode. We will be using safe mode to execute these instructions.
- Boot your computer in Safe Mode. You can read our detailed guide on booting your computer in safe mode.
- Once in Safe Mode, press Windows + R, type “MSConfig” in the dialogue box and press Enter.
- Once in System Configuration, select the tab “boot” and check the option “base video”. Press Apply to save changes. This mode will ensure that your monitor is able to pick up the display signal when you are going to boot in your normal profile.

- Exit the safe mode and boot normally. You will be seeing extra-large icons and writings on your screen. Don’t worry and follow the steps below.
- Once in your normal profile, right-click on your Desktop and select “Display settings”.

- Change the resolution. You can try changing the resolution other than the recommended resolution if it wasn’t working. It is advised to choose a low resolution and work your way up in order to determine which one works best for you.

- After changing the resolution, press Windows + R, type “MSConfig” again and press enter. Uncheck the option base video. Press Apply to save changes and restart your computer.
- Your computer should now reboot with the resolution set. If the error still persists, repeat the method and set another resolution.
Solution 2: Booting in VGA/ Low-resolution mode
Another workaround which you can try is booting your computer in Low resolution or VGA mode. The name may vary according to the version of the operating system. Older systems use VGA mode while the newer iterations have a Low-resolution mode. This mode sets the resolution to 800×600 or 640×480 and in some monitors, the refresh rate is also lowered.
We will be selecting this boot option which is present in the Windows Recovery Environment. Once we boot on this mode, you can easily log into your normal account and change the resolution from there.
- Restart your computer. When your computer is just about to boot, press F8. We have listed the ways on how to select low video mode according to the OS in the steps below.
- If you own a Windows 7, you will see a menu like this. Select “Enable low-resolution video (640×480)”. Press OK to boot in this resolution.

- If you own a Windows 8 or 10, you might have to select the low-resolution video mode from a bunch of sub-menus. Navigate to troubleshoot and select Startup Settings from the menus. Here you will see an option to enable low-resolution video. After enabling it, let the computer boot.

- After the computer is booted, perform the steps mentioned in solution 1 to set the resolution to some lower value. Save changes and restart. Boot Windows normally and check if the problem at hand got solved.
Solution 3: Using another monitor
If you cannot access your computer even after following the above two methods, you can try connecting another high screen resolution monitor and see if this makes a difference. Most probably, you will be able to access your computer. Once you have access, change the screen resolution as shown in Solution 1. After the screen resolution is changed, plug your old monitor back and see if this solved the problem.

You should also make sure that there is no hardware fault in the monitor. See if the cables are connected properly or if the monitor is working without hardware faults. You can also plug it into another computer to make sure there is not any hardware issue.
Solution 4: Changing to Windowed Mode (for Games)
There were many cases seen where games fail to launch because the resolution settings set in the game were not supported by the monitor hardware. This issue can particularly arise if the game settings are set to a much higher resolution which your monitor cannot support.
A simple fix to this problem is to launch the game in Windowed mode and adjust the screen resolution manually by dragging the ends. If you do get inside the game, you can also navigate to Display settings and change the resolution accordingly.
There are two ways you can launch the game in Windowed mode:
- Either you can use Alt+ Enter to enter Windowed mode directly,
- Or you can add a ‘-windowed’ as a parameter in the shortcut and force it to run. This is also called launched options. You can see a detailed guide on setting launch options in Steam.
If you still cannot access the game settings, you can try deleting the configuration files of the game using File Explorer. Configuration files contain all your configuration settings which you have saved according to your preference. Do note that following this method might delete all your choices regarding the launching of the game.
There are different locations where each game’s application data is stored. Sometimes it is present in “%appdata%” or sometimes it may be present in the game’s configuration files. After deleting the files, you can relaunch the game change the settings from the menu.
Solution 5: Checking your Game for Wide Screen Fix
For some games, Solution 4 might solve the ‘Input not supported’ problem. For other games, it might be the case that the game itself doesn’t support the resolution of your monitor. Usually, this is the case for widescreen monitors. Some of these games include Manhunt, Cold Fear, Total Overdose, etc.
You can check online if this is also the issue for all the other users. If it is, you can search on Google for Widescreen fixes. These fixes are in the form of different patches. You need to integrate them into your game files before your game can successfully launch in your system.
Note: If all the above methods fail to produce any useful results, consider restoring your computer from a restore if you did a recent update or doing a fresh installation might also do the trick.
Solution 6: Update Graphics Drivers
It is also possible that your graphics card drivers might be outdated due to which this error is being triggered. Therefore, it is recommended that you try to update your graphics card drivers after uninstalling the older ones completely. This way, certain bugs/glitches might be fixed due to software patches by the Graphics provider.
Solution 7: Workaround
In some cases, the user might be unable to access the monitor due to which you might be blocked from changing any settings or employing any of the above fixes. Therefore, as a workaround, you can try to implement these changes by getting the monitor to work. For that:
- Disconnect the monitor completely from the computer.
- Remove your computer’s graphics card.
- Reinstall the GPU and then keep the monitor disconnected and boot up the computer.
- Wait for 5 minutes after booting up your computer and connect the monitor again without turning it off.
- Check to see if the monitor gives a display.
Solution 8: Booting into Compatibility Support Mode
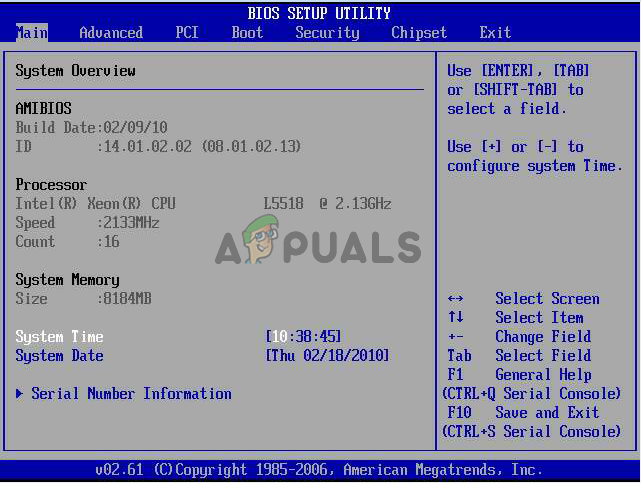
In certain situations, the monitor might not be properly recognized by the computer until the CSM mode is enabled from the motherboard’s bios. This was recently discovered by many users that somehow the monitors functioned correctly when this feature was enabled. Beforehand, make sure to connect your computer to another monitor to get the screen to work which is required for the following steps. Therefore, to enable it, follow the guide below.
- Restart your computer.
- As soon as the computer shuts down, start pressing the “F2”, “Del”, “F12” or “F10” keys on your keyboard to get into the Bios.
- Once in the Bios, go to advanced mode using “F7” or if you see the “Boot” tab go directly to it.
- Once in the Advanced mode, navigate to the “Boot” tab.

Navigate to the Boot tab - In here, make sure to enable the “Launch CSM/ Launch Compatibility Support Module”.
- After enabling this, connect the monitor to the computer and check to see if the issue persists.
Solution 9: Replacing CMOS battery
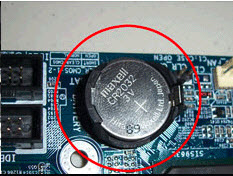
In some cases, taking out the CMOS battery from the motherboard temporarily and pressing the power button while the battery is out and the motherboard is disconnected from power can help discharge energy from the mobo and let it reset its basic load configs. This can also help in fixing this issue so make sure to take out the CMOS battery temporarily from your mobo and install it back in again. After that, check to see if the issue persists.
Note: For some very rare computers using an Intel GPU, go into the GPU control panel and set the Quantization Range to Limited Range and set the monitor to Extended Mode if you are using an Acer Monitor.


