How to Fix High CPU Usage by .NET Runtime Optimization Service?
When the .NET Runtime Optimization Service uses a lot of your CPU, your system might slow down, usually after a Windows update or when the system is idle. This service, known as mscorsvw.exe, helps make applications run better by preparing .NET assemblies. The high CPU usage occurs because the service uses available CPU power to finish these tasks quickly.
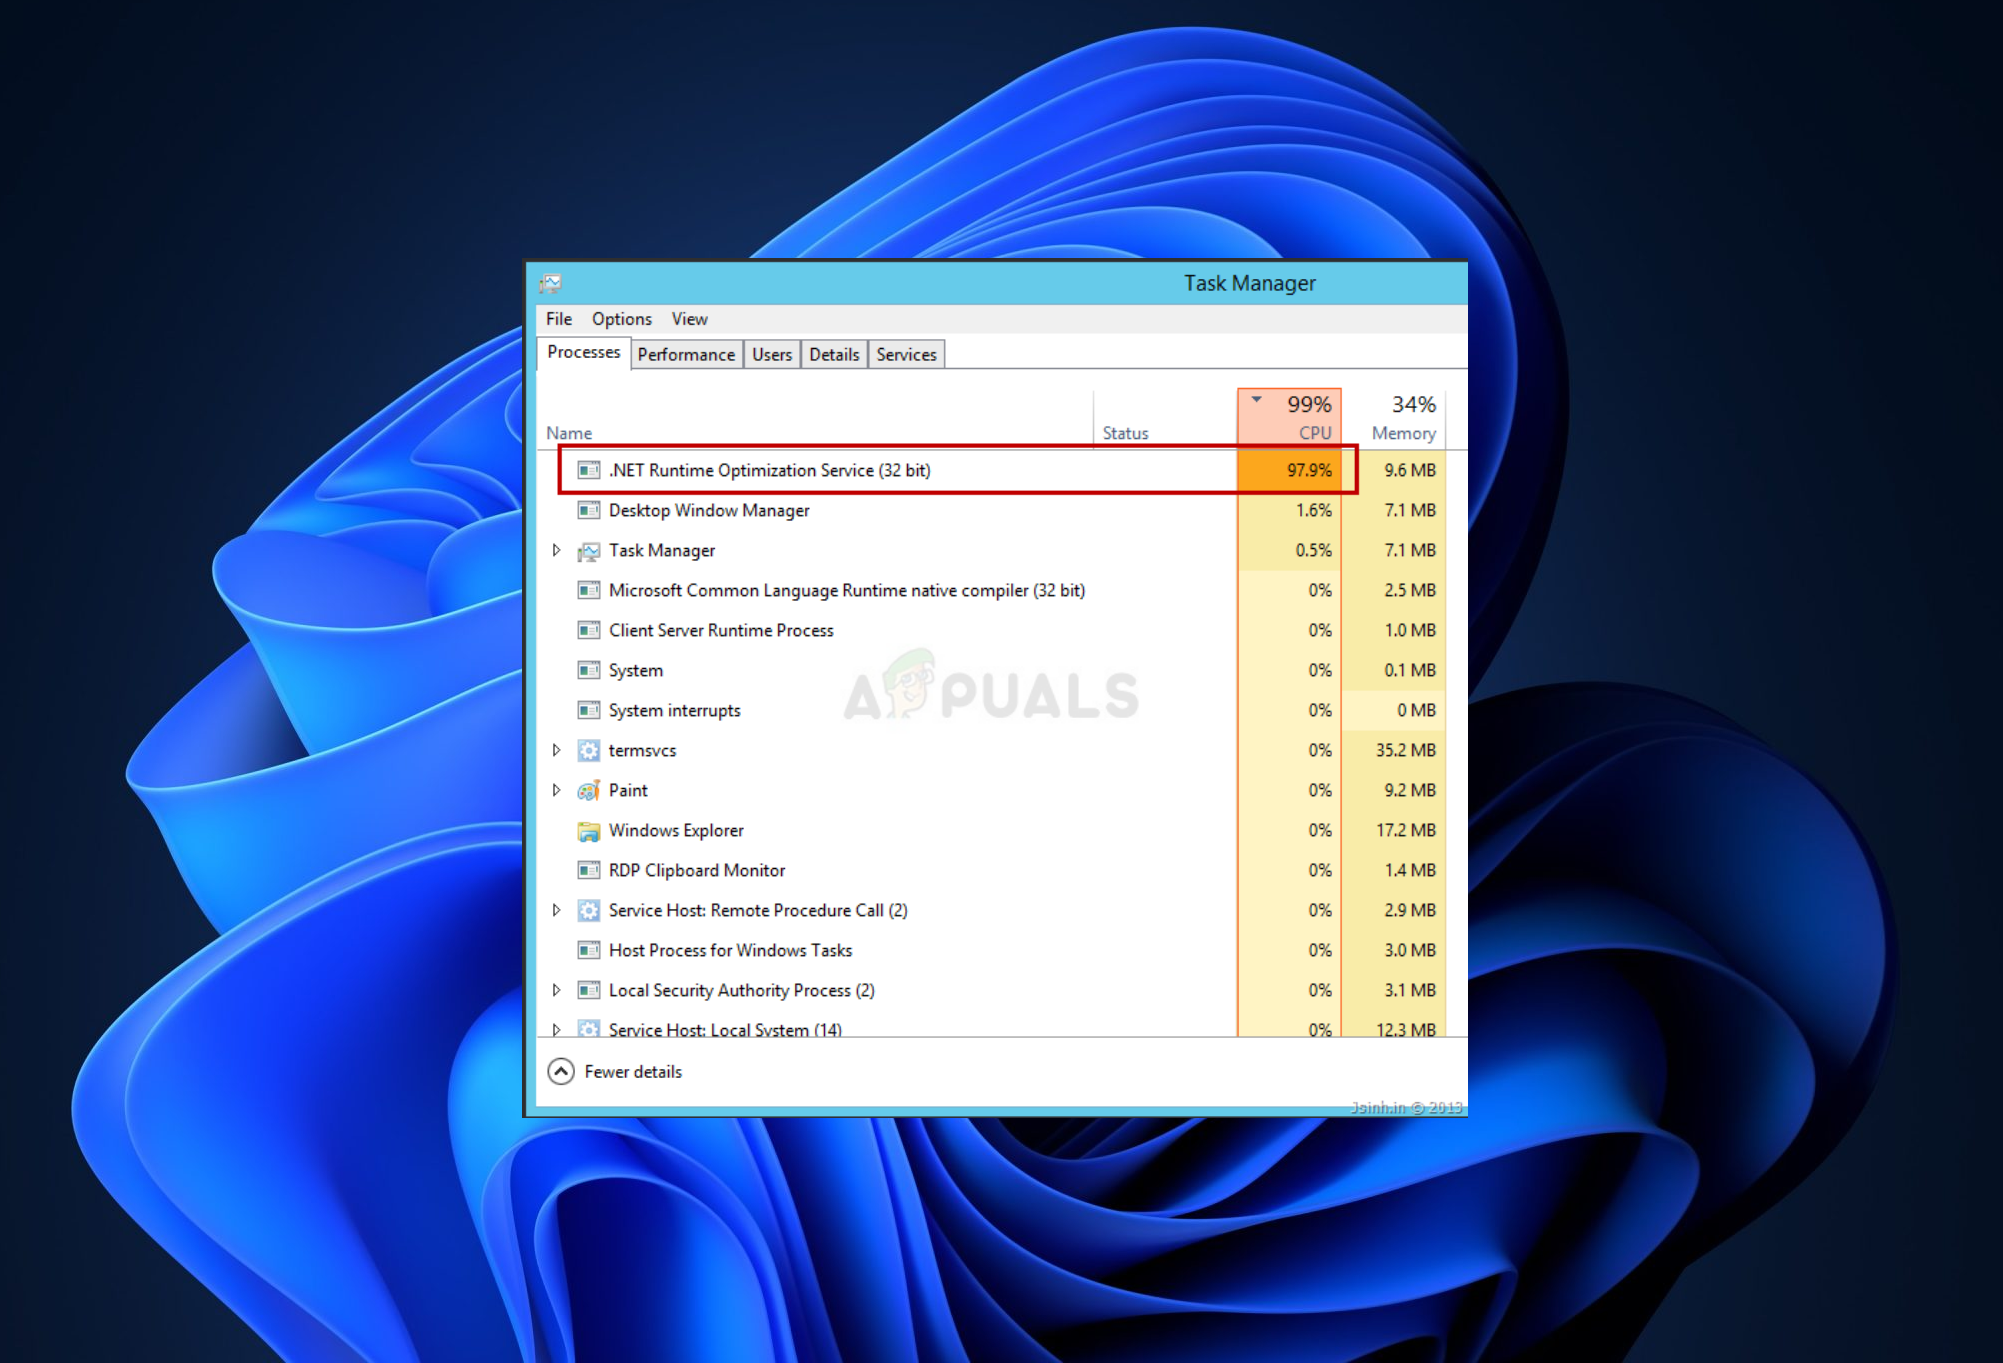
Common reasons for this issue include long-running background tasks or problems with the registry after a Windows update. Sometimes, malware pretending to be the service can also cause high CPU usage.
Now that you know the causes, lets discuss the solutions.
1. Optimize the Process Manually
Manually optimizing the .NET Runtime Optimization Service helps it finish background tasks more efficiently, reducing high CPU usage. This prioritizes pending tasks, speeding up processes that can otherwise slow down your system, and improves overall performance by completing operations without interruptions.
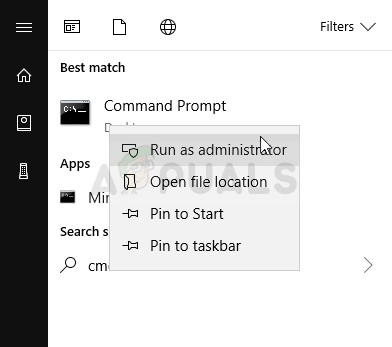
- Search for Command Prompt using the Search button, right-click the top result, and choose Run as administrator.
- Copy and paste the following commands, pressing Enter after each. Choose the command for your system architecture (use the first for 32-bit and the second for 64-bit).
cd c:\Windows\Microsoft.NET\Framework\v4.0.30319
cd c:\Windows\Microsoft.NET\Framework64\v4.0.30319
ngen.exe executequeueditems
- Check if the .NET Runtime Optimization Service CPU usage has returned to normal.
2. Scan Your Computer for Malware
Malware infections often cause this issue. Conduct a malware check since malicious software can hijack system resources and mimic legitimate files, reducing performance and risking data theft. Use updated antivirus software to scan and remove threats, and keep your system and programs updated to enhance security.
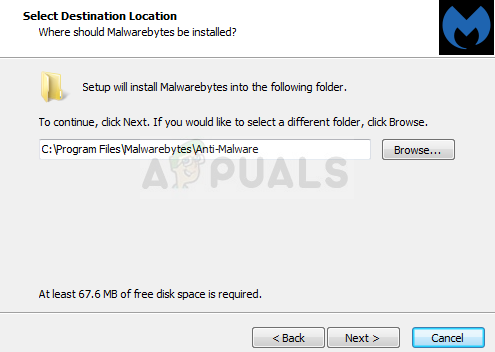
- Download Malwarebytes Anti-Malware from their official website by clicking here.

- Double-click the installer in the Downloads folder to start the installation and follow the prompts.
Installing Malwarebytes - Open Malwarebytes, select Scan, and wait for the scan and any updates to finish.
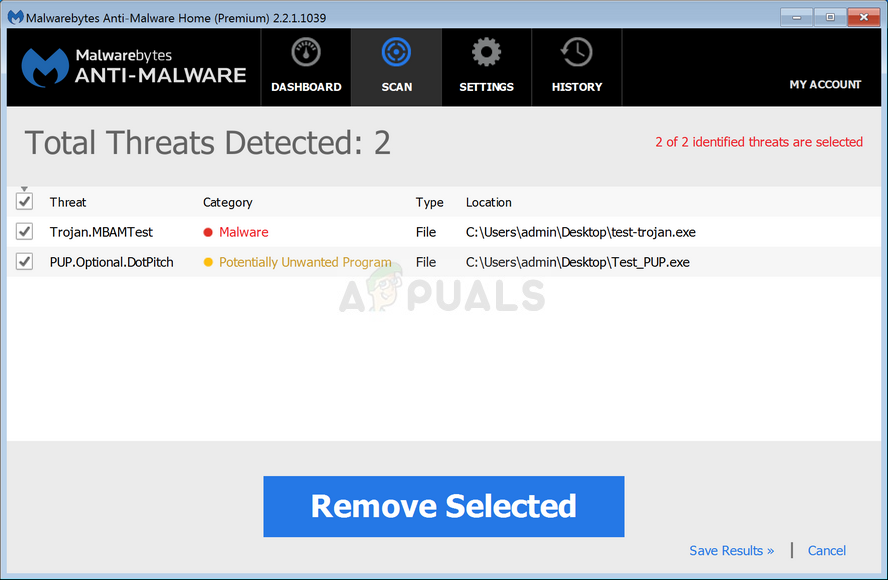
Running the scan in Malwarebytes - Reboot your computer after the scan to check if the .NET Runtime Optimization Service is working correctly.
3. Restart the Service
Restarting the .NET Runtime Optimization Service resets it, which can fix problems like high CPU usage if the service gets stuck. Restarting clears any issues, allowing the service to work better. This ensures it starts anew and finishes tasks without delays.
- Press Windows Key + R to open the Run utility, type services.msc, and press OK.

Running Services Manager - Locate Microsoft .NET Framework NGEN v4.0.30319_X86 (32-bit) or Microsoft .NET Framework NGEN v4.0.30319_X64 (64-bit), right-click, and select Properties.
- If the service is running, stop it, then click Start to restart.
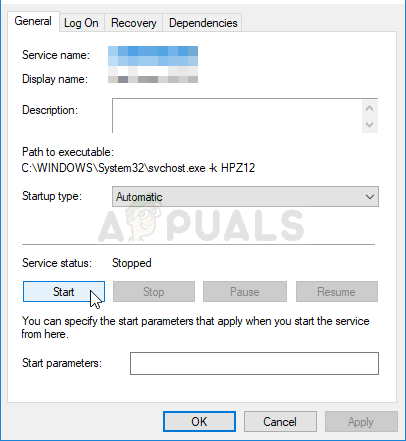
Starting the service - Ensure Startup type is set to Automatic and confirm any prompts.
An error message might occur upon attempting to start the service:
“Windows could not start the service on Local Computer. Error 1079: The account specified for this service differs from the account specified for other services running in the same process.”
If this issue occurs, follow these steps to resolve it:
- Access the service’s properties and go to the Log On tab. Click Browse….
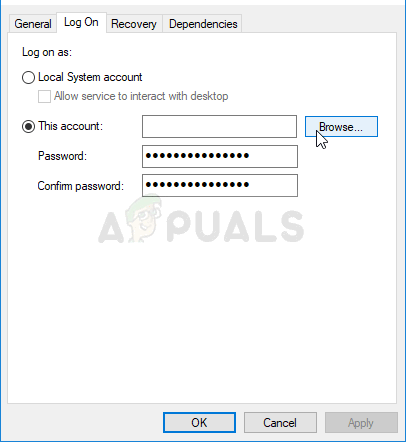
Log On >> Browse - Type your account name in Enter the object name to select, click Check Names to verify, and press OK.
- Enter your password when prompted to restart the service.
4. Perform a Clean Boot
Performing a Clean Boot can help resolve high CPU usage by starting Windows with a minimal set of drivers and startup programs, which eliminates software conflicts caused by multiple applications and services loading during startup.
Follow our clean boot guide, then check the CPU usage. If it has lowered, a third-party application was likely responsible. You can further isolate the problematic software by reactivating applications individually.


Windows 10, get ngen.exe not found