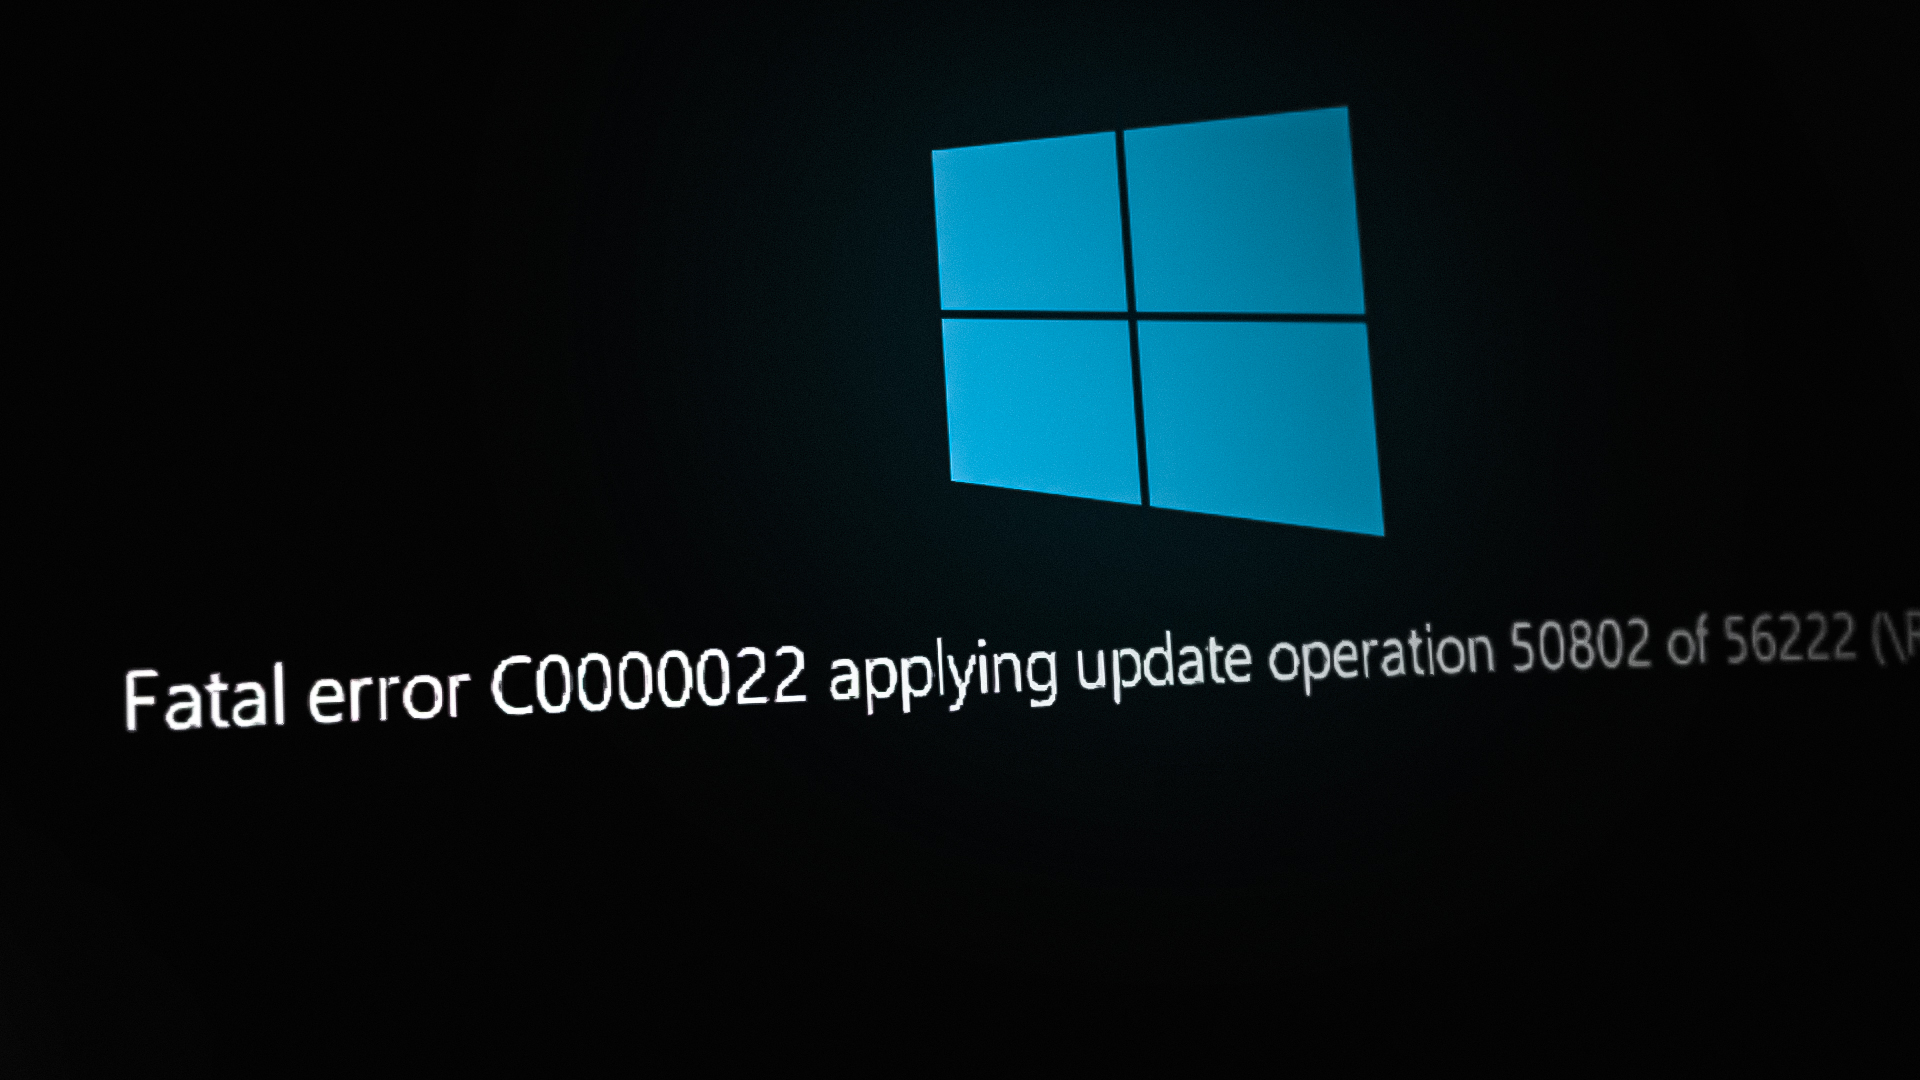
How to Fix “Error C0000022” Windows Update Error?
Error C0000022 occurs when Windows is trying to apply an update during boot section of Windows. This mainly happens when your computer was unexpectedly turned off during a Windows Update installation process beforehand. Unexpected shutdown during Windows Update process can cause update files to get corrupted which results in a faulty update, causing this error.
The issue can also occur if a recent Windows update didn’t update the Netlogon.dll. In this case, the solution is to boot your computer in Safe Mode and install the Microsoft Security Bulletin. We have listed some effective solutions down below to fix this error.
1. Perform a Hard Restart
Hard restart basically means to completely power-off your computer and turn it back on. Here’s a quick guide on doing a hard reset/restart on a notebook PC/laptop:
- Press and hold the power button for over 10 seconds. This ensures that the power capacitors are completely discharged.
- Remove any non-essential peripherals and accessories that are connected to the PC (printer, webcam, etc.).
- Press the power button again and see if the machine manages to start normally.
If the startup process is still hanging with a error C0000022 screen, move down to the next method below.
2. Investigate Hardware Issue
On certain Notebook models, this error is also linked with hardware failure. Even though the chances of this occurring are very slim, let’s start by investigating a hardware problem first. It will save you from going through unnecessary hoops.
The quickest and most efficient way to examine for a hardware issue is to run a System Test via the System Diagnostics screen. This procedure will check all the major hardware components for issues and inconsistencies. Here’s a quick guide on how to do this:
- If you have a laptop, start by making sure that it is plugged into the AC unit so that it doesn’t shut down during the test.
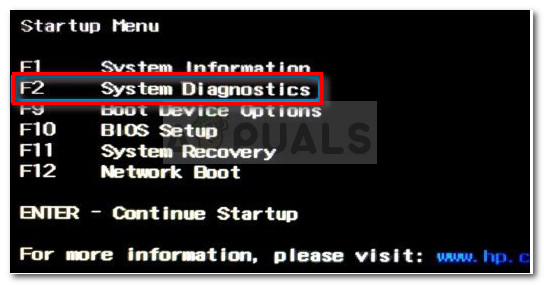
- Turn on the laptop/computer and press the ESC key repeatedly until you get t the Startup menu. Once you get there, press F2 to enter the System Diagnostics menu. Note: These steps might differ for your specific manufacturer, please refer to your system’s manual to know how to access System Diagnostics menu.
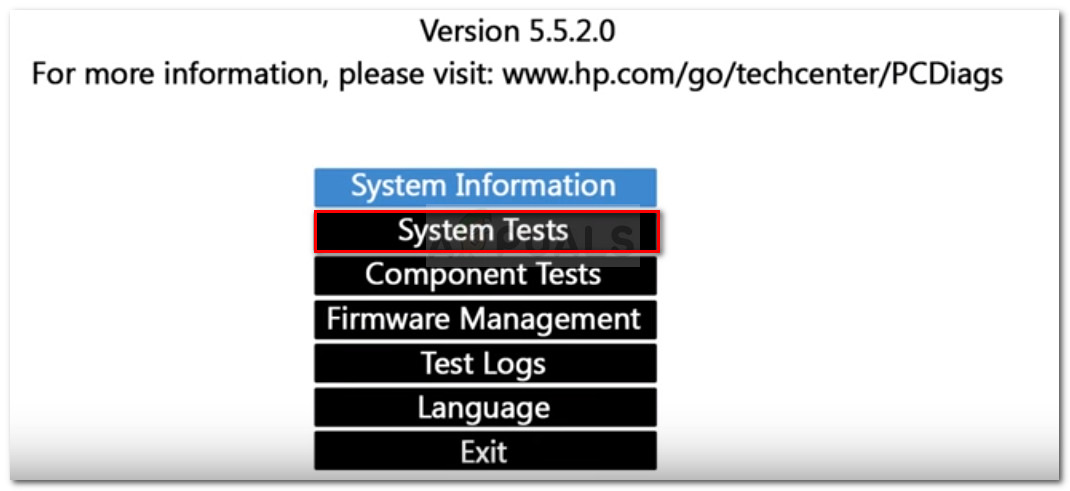
Accessing the System Diagnostics menu - Use the arrow key to select System Tests and press Enter to access the menu.
- Choose Quick test via the arrow keys and press Enter again.
Investigating for a hardware issue using System Tests - Wait until the utility checks the major components for any issues. Keep in mind that the process can take over half an hour.
Note: If no hardware issues have been identified, move over to the next method below to apply the first potential fix. - If the scan reveals a hardware issue, you can test that component specifically via the Component Tests menu, or better yet, take your machine to a certified technician for further investigations.
3. Use System Restore
Using System Restore we can revert our system our system to a point where it was working fine before the update process. Keep in mind, that this method requires you to create a restore point beforehand. If you never created a restore point, you can still get lucky if Windows automatically created a restore point.
Here’s a quick guide on how to do this on computer:
- Power up the laptop and press ESC repeatedly until you get to the System Diagnostics menu. Once you do so, press the F11 key to gain entry to the System Recovery menu.
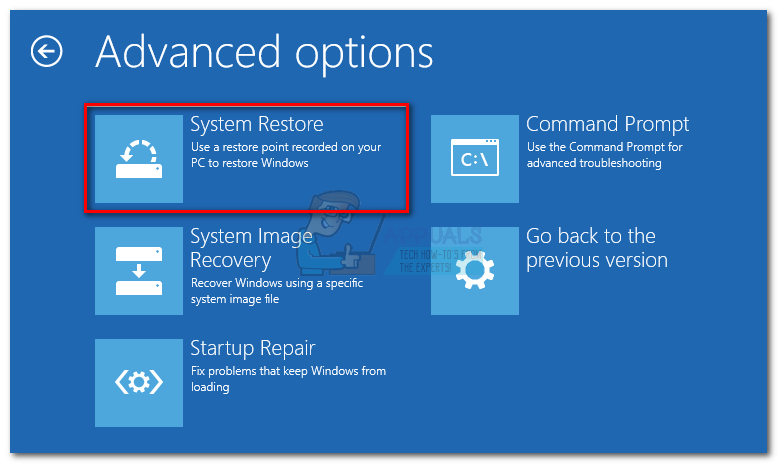
- Use the arrow keys to navigate to Troubleshoot > Advanced options > Troubleshooting menu.
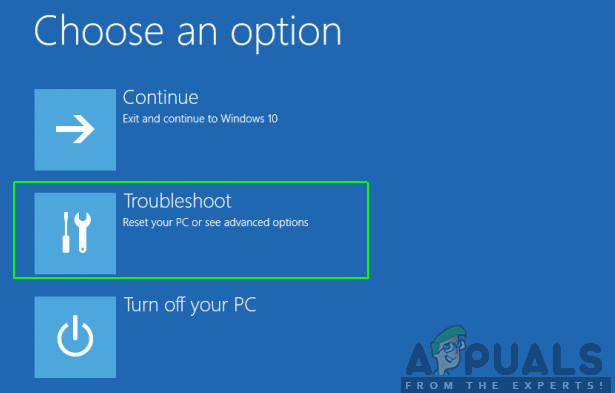
- In the Advanced options screen, Select System Restore and press Enter to open the System Restore wizard.
Access the System Restore menu - Inside the System Restore wizard, click Next at the first prompt to advance.
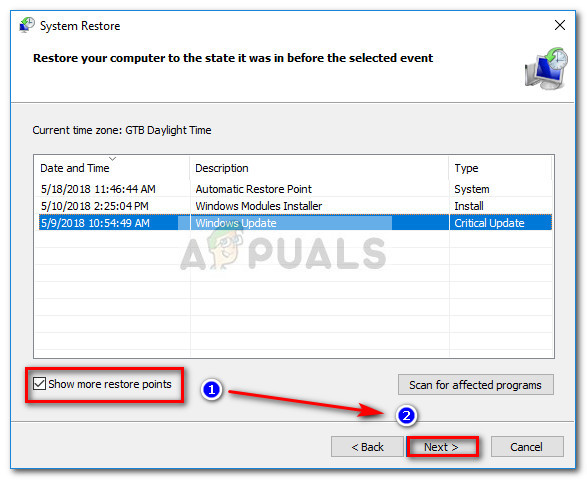
- In the next screen, start by enabling the box associated with Show more restore points. Next, select a restore point that is dated before you started seeing the error C0000022, and press Next to continue.
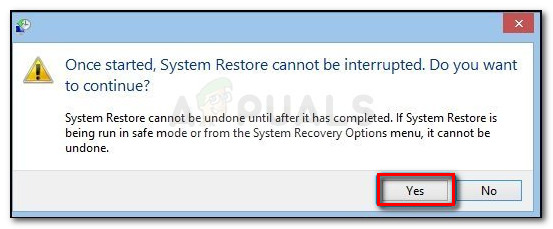
Enable Show more restore points box and click Next - Press the Finish button to start the process of restoring your computer to a previous point. You will be asked to confirm the process once again – click Yes when prompted.
Click Yes to confirm the System Restore process - Once the previous state was mounted back, restart your computer and see if it’s able to boot without triggering the error C0000022. If you’re still seeing the error, continue down with the next method below.
4. Install the update again using Safe Mode
There a lot of users have reported that the update was only partially installed and the Netlogon.dll dependency was not updated. This is what ends up creating the error C0000022.
Fortunately, you can start up your computer in Safe Mode and install the missing dependency update. Here’s what you need to do:
- Power up the laptop and press ESC repeatedly until you get to the System Diagnostics menu.
- Inside the System Diagnostics menu, press the F11 key to gain entry to the System Recovery menu.
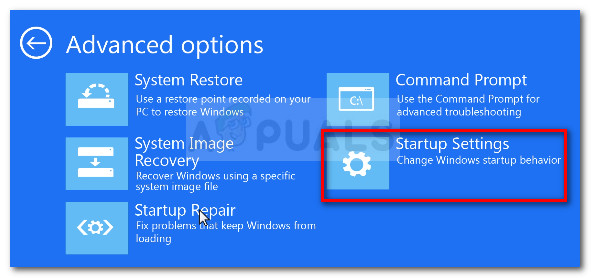
- Navigate to Troubleshoot > Advanced options > Troubleshooting menu.
- Click on Startup Settings
Access the Startup Settings menu - Click the Restart button to prompt your computer to restart in the Startup Settings menu.
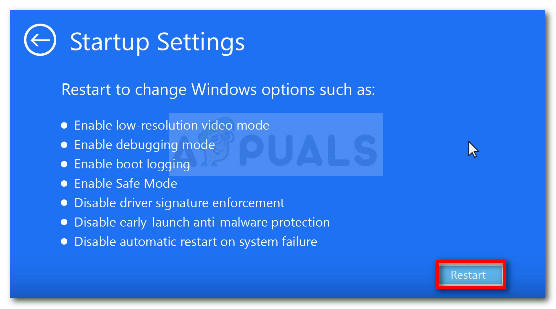
Restart your computer in the Startup Settings menu - Press the F5 key to open your computer in Safe Mode with Networking mode.

Boot computer in Safe Mode with networking - You’ll now that your computer is booted in Safe Mode

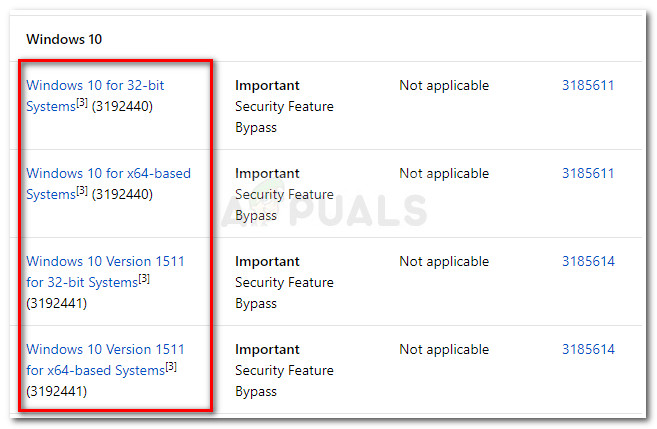
Safe Mode example - Navigate to this link (here) and click on the latest Security Bulletin MS16 – 10 update according to your Windows version.
Choosing the appropriate Windows Security Bulletin update - From the next screen, scroll down to How to get this update and click on Microsoft Update Catalog (under Method 2).

Click on the Microsoft Update Catalog Hyperlink - Download the appropriate update according to your OS architecture via the Download button.

Downloading the appropriate Windows Update - Open the installation executable, then follow the on-screen prompts to install it on your system. Once the update has been installed, restart your computer and see if you are able to get past the startup procedure without encountering the error C0000022.


