How to Fix ‘Failed to Start Streaming’ in OBS
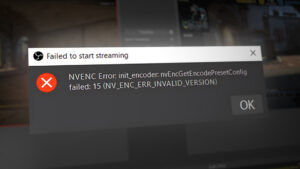
Some Windows users are reporting that they end up encountering the ‘Failed to start streaming‘ error with OBS when attempting to stream content on YouTube. The error message accompanying the error is “NVENC Error: init_encoder: nvEncGetEncodePresetConfig failed: 15 (NV_ENC_ERR_INVALID_VERSION)”
After investigating this particular issue thoroughly, it turns out that there are several different underlying causes that might be causing this particular error code:
- Missing / Corrupted C++ Redist – As it turns out, one of the most common instances that will cause this issue is a scenario in which you’re either missing the Microsoft C++ Redistributable 2017 package or the one that’s currently installed is corrupted. To fix this particular issue, you need to ensure that you install the latest version of the Microsoft C++ Redistributable 2017 package correctly.
- Outdated the graphics driver – Another potential situation that might cause this problem is a severely outdated GPU driver that makes it hard for the OBS software to maintain the streaming connection with YouTube. In this case, all you need to do is update to the latest graphic drivers available.
- Conflict with the In-Game Overlay – If you’re using some kind of DVR software that includes an overlay function, chances are it will conflict with the NVENC encoder feature used by OBS. In this case, you can resolve the conflict by disabling the in-game overlay feature or by uninstalling the conflicting software.
Now that you are intimately familiar with every underlying issue that might cause the ‘Failed to start streaming‘ error, here’s a list of underlying culprits that might be responsible for the apparition of this error code:
Method 1: Installing Microsoft C++ Redistributables for 2017
As it turns out, one of the most important dependencies with the potential of causing this problem is a missing or corrupted Microsoft C++ Redistributable 2017 package. Keep in mind that this Visual C++ package is extremely important to ensuring that OBS is able to establish and maintain a streaming connection with YouTube.
If this scenario is applicable and you suspect that you might be seeing the ‘Failed to start streaming‘ error occurring due to a Visual C++ issue, you should uninstall the current Visual C++ 2017 Reddit package (if it’s already installed) and do a fresh installation from the official Microsoft channels.
Here’s a quick step by step guide that will walk you through the entire process:
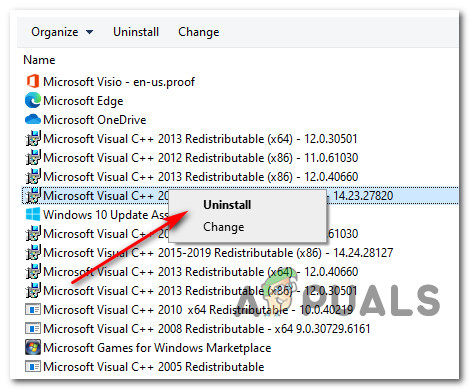
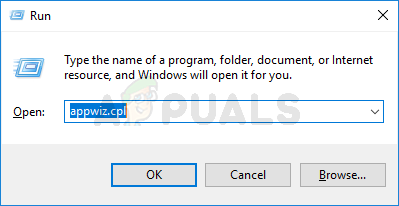
- Press Windows key + R to open up a Run dialog box. Next, type ‘appwiz.cpl’ and press Enter to open up the Programs and Features screen.

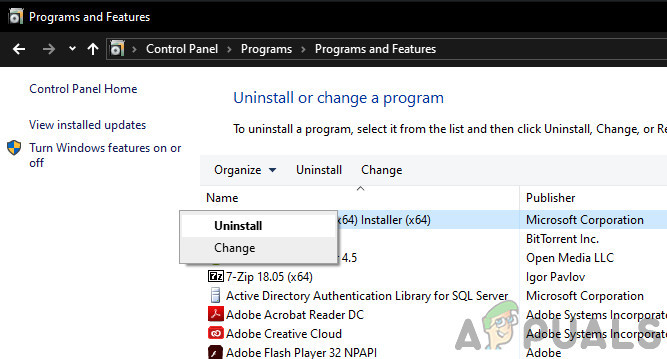
Opening the Programs and Features menu - Once you’re inside the Programs and Features menu, scroll down through the list of installed programs and locate the entry associated with Microsoft Visual C++ 2017 Redistributable.
- If you find that the Microsoft Visual C++ 2017 Redistributable is already installed, right-click on it and choose Uninstall from the context menu to get rid of it.
Uninstalling Microsoft Visual C++ 2017 Note: If you don’t have this Visual C++ Redistributable suite installed on your computer, skip this step and the next and move directly to step 5.
- Inside the uninstallation screen of the Visual C++ Redistributable 2017 package, follow the on-screen prompts to complete the installation, then restart your computer and wait for the next startup to complete.
- After your computer boots back up, download one of the Visual C++ 2017 redist packages below depending on your OS architecture (32-bit or 64-bit):
64-Bit Visual C++ 2017 Redistributable
32-Bit Visual C++ 2017 Redistributable - After the download is complete, double-click on the recently downloaded vc_redist installer and click Yes if you’re prompted by the UAC user account prompt. Next, follow the on-screen prompts to complete the installation of the latest version of Microsoft Visual C++ 2017 Redistributable.
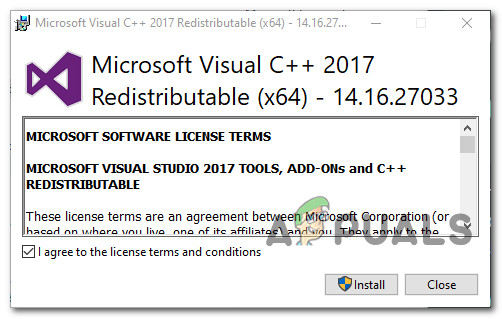
Installing Microsoft Visual C++ 2017
If this problem is still not fixed or you were already using the latest Microsoft Visual C++ version, move down to the next potential fix below.
Method 2: Updating the Graphics drivers
Once you’ve made sure that the ‘Failed to start streaming‘ error is not occurring due to a missing Visual C++ dependency, the next thing you should investigate is your graphical drivers.
As it turns out, some affected users are saying that in their case, the main reason why they were unable to establish a streaming connection with OBS on Youtube is a severely outdated instance of the GPU drivers.
In this case, you should be able to fix the problem by following the instructions below to update the current GPU driver to ensure that OBS has every required dependency to stream content on YouTube:
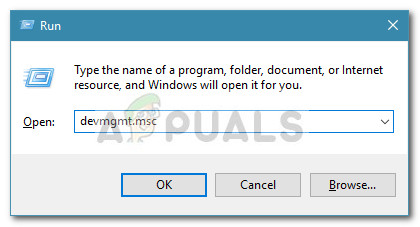
- Open up a Run dialog box by pressing Windows key + R. Next, type ‘devmgmt.msc’ and press Enter to open up the Device Manager utility. Once you are prompted by the UAC (User Account Control) prompt, click Yes to grant admin access.
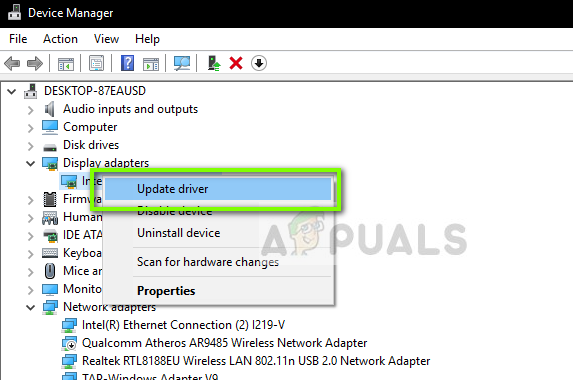
Opening the Device Manager utility - Once you’re finally inside Device Manager, scroll down through the list of installed devices, then go ahead and expand the drop-down menu that’s specific to Display Adapters.
- After you expand the correct menu, right-click on the GPU driver that you’re actively using for demanding rendering activities and choose Update driver from the context menu that just appeared.
Updating the GPU drivers via Device Manager Note: If you are encountering the issue on a laptop with both a dedicated and an integrated solution, our recommendation is to update both GPU drivers to the latest version available.
- Once you get to the next screen, click on Search Automatically for updated driver software.
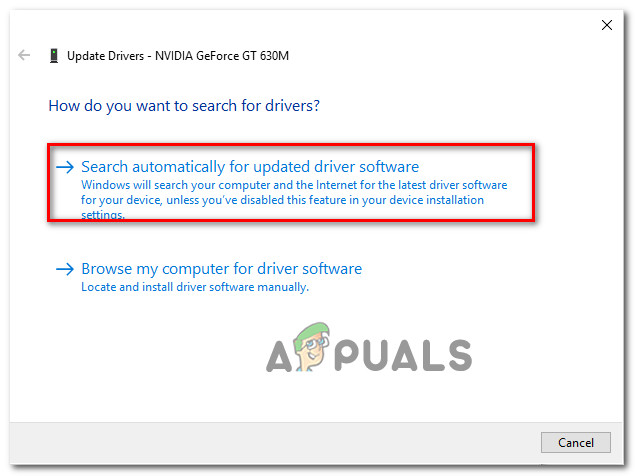
Search Automatically for updated driver software - Next, wait until the initial scan is complete. then go ahead and follow the on-screen instructions to complete the installation of the new driver version (if a new version is identified).
- If a new driver version is found and installed, reboot your computer and repeat the streaming action in OBS once the next startup is complete to see if the problem is now fixed.
Note: If Device Manager is not able to find a new version to replace the current one, you should also using the proprietary updating software release by your graphics card manufacturer to find, download and install the latest available version automatically:
GeForce Experience – Nvidia
Adrenalin – AMD
Intel Driver – Intel
If you already updated your GPU driver to the latest version and you’re still seeing the same problem, move down to the next potential fix below.
Method 3: Disabling the In-Game Overlay
Keep in mind that if you’re using some kind of DVR software that records the screen and uses some kind of an overlay over your gameplay, there’s a very high chance that the OBS will conflict with it when both of them will attempt to use the NVENC encoder.
If this scenario is applicable, you can fix the problem by disabling the in-game overlay that is conflicting with the OBS software. In most cases, the ‘Failed to start streaming‘ error is confirmed to be caused by the Discord in-game overlay or by Nvidia Overlay.
If you’re using Discord or Nvidia Experience, follow the sub-guides below to disable the overlay function on them.
In case you’re using a different 3rd party overlay tool, follow sub-guide C to uninstall the conflicting software completely from your computer.
A. Disabling the Overlay feature on Nvidia Experience
- Start by turning OBS off, then open Nvidia Experience. Inside the next menu, go to the General tab from the list of available options.
- Once you’re inside the next menu, move over to the left menu and turn off the toggle associated with the In-Game overlay.

Disabling the in-game overlay function - After the option is deactivated, save the changes and close the main Nvidia Experience window.
- Open the OBS software again, and initiate another streaming attempt to see if the problem is now fixed.
B. Disabling the overlay feature on Discord
- Open the Discord app conventionally and bring up the main interface from the tray bar icon.
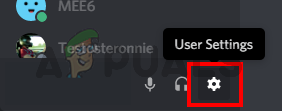
Note: If you can see the screen right-away, open the system tray, and double-click on the icon to bring the Discord window forward. - Once you’re inside the Discord app, look for the User settings (gear icon) in the bottom section of the window.
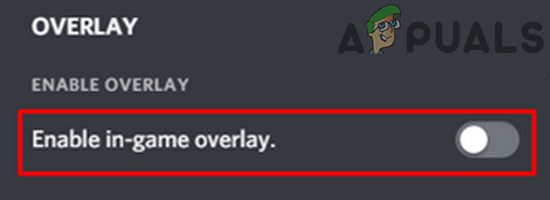
Accessing the user settings in discord - Once you’re inside the User Settings menu, click on Overlay tab from the vertical menu on the left (under App Settings).
User Settings menu - Once you’re inside the Overlay menu, disable the toggle associated with Enable in-game overlay.
Enabling In-Game overlay - Save the changes, then ODB once again and see if the problem is now fixed.
C. Uninstalling the overlay feature from Programs and Features
- Press Windows key + R to open up a Run dialog box. Next, type ‘appwiz.cpl’ and press Enter to open up the Programs and Features menu.
Opening the Programs and Features menu - Inside the Programs and Features menu, go ahead and scroll down through the list of installed programs and locate the overlay software that you plan on uninstalling.
- When you see it, right-click on it and choose Uninstall from the newly appeared context menu.
Uninstalling Nvidia Experience - Inside the uninstallation screen, follow the on-screen instructions to complete the uninstallation, then restart your computer.
- Once the procedure is complete, launch the game once again and see if the problem is now fixed.


