How to Fix Error Initializing Vulkan Renderer in CEMU?
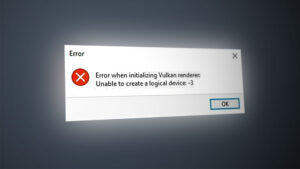
Some Windows users are reportedly seeing the ‘Error when initiating Vulkan renderer‘ when trying to emulate Wi-U games on their Windows computer using the CEMU emulating software. This particular issue is mostly reported to occur on Windows 10 computers.
After investigating this particular issue thoroughly, it turns out that there are several different underlying causes that might be the determining factor of the ‘Error when initiating Vulkan renderer‘ issue. Here’s a list of potential culprits:
- Minimum requirements aren’t met – Keep in mind that it’s possible to see this error if the PC you’re trying to use to emulate Wii-U games on your computer doesn’t meet the minimum requirements. If your components fall below the minimum threshold, the only viable fix is to upgrade your PC.
- An outdated version of CEMU – Over these past few months, the CEMU WII-U emulator has been receiving a lot of performance issues and bugfixes. If you’re not using the latest version, there’s a chance that upgrading to the latest stable released version should take care of the issue automatically.
- Missing Microsoft Visual C++ Installation – Even though CEMU doesn’t have many dependencies, the Microsoft Visual C++ X64 redist package is the most important one. If this redist package is missing from your computer, you should be able to fix the issue by manually downloading and installing the Visual C++ 2017 Redist package
- GPU drivers are outdated – Keep in mind that when a new version of CEMU is released, the community of devs will adapt the application to the latest driver releases from Nvidia, AMD, and Intel. In order to avoid issues produced by outdated hardware, ensure that your dedicated graphics card GPU is updated to the latest version compatible with your GPU model.
- Remnant corrupted GPU files – According to some affected users, you can also expect this problem to occur in situations where the target PC has remnants from older GPU driver installations that were uninstalled unsuccessfully. In this case, you need to use a utility like DDU to remove the remnant files before re-trying the driver installation.
- Missing Vulkan Runtime environment – If you’re using an Intel-based integrated GPU, there’s a very high chance that you’ll need to install the Vulkan Runtime environment before you’ll be able to emulate any Wii-U game via the CEMU emulator. Several affected users have confirmed that in their case, the issue was entirely resolved after they’ve installed the Vulkan Runtime environment via the official channels.
- PreCompiled Shaders are enabled in CEMU – With Nvidia GPUs, the most common issue that will trigger this particular error is a case where PreCompiled shaders are enabled for the game or for the entire application which will end up crashing most emulation attempts. In this case, you can fix the issue by disabling the precompiled shaders feature on both the game profile settings and the settings menu of CEMU.
Now that you know every potential scenario that might spawn this issue, here’s a list of methods that other affected users have successfully used to fix the issue in this particular case:
Method 1: Ensure that you meet the Minimum Requirements
Keep in mind that although this emulator is by no means demanding to regular PC configurations, there are still some minimum requirements that you need to meet in order to emulate Wii-U games.
Here are the minimum requirements for Windows computers:
- Windows 7 (x64) or above
- OpenGL 4.5 or Vulkan 1.1
- RAM: 4 GB minimum, 8 GB or more recommended
On top of this, you need to be mindful of your GPU configuration – Even though both Nvidia and AMD GPUs are almost entirely supported, you need to ensure that you have installed the latest driver versions (See Method 3)
However, Intel GPUs don’t work very well as limited support is offered for them. Vulkan is recommended as the alternative.
If you’ve made sure that you meet the minimum requirements, move down to the next potential fix below.
Method 2: Downloading the most Recent Version of CEMU
Keep in mind that the CEMU Wii U Emulator has been getting a lot of support from the gaming community receiving constant stability patches and hotfixes that are increasingly making Wii U games more stable and enjoyable.
So the first thing you should do if you’re dealing with the ‘Error when initiating Vulkan renderer‘ issue is to ensure that you’re using the latest version of the Wii U Emulator.
To do so, follow the instructions below to install or update your current Cemu version to the latest:
- Open your default browser and navigate to the official download page of Cemu Wii-U emulator.
- After you’re inside the download page, scroll down to the bottom of the page and click on the Download latest version button.
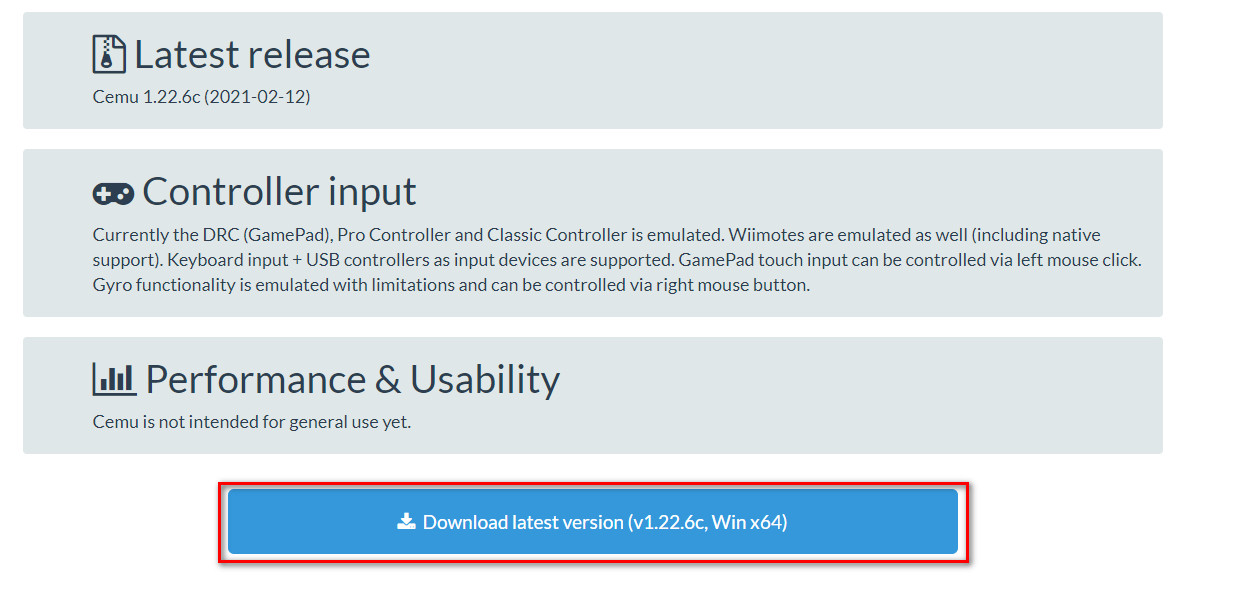
Downloading the latest version of CEMU - Once the download is complete, use a utility like WinRar, WinZip, or 7Zip to extract the contents of the Cemu archive in a standalone folder.
- Once the extraction process is complete, navigate to the location where you extracted the latest version of Cemu, right-click on Cemu.exe and choose Run as Administrator from the context menu.
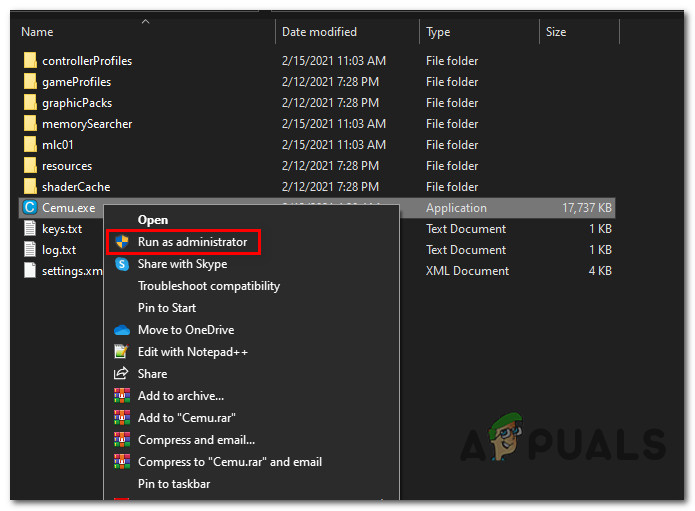
Running latest version of CEMU with admin access - Repeat the action that was previously causing the ‘Error when initiating Vulkan renderer‘ issue and see if the problem is now fixed.
If the same problem is still occurring, move down to the next potential fix below.
Method 3: Installing the Microsoft Visual C++ 2017 X64 Redistributable
Keep in mind that one major requirement that is often reported to be the underlying cause for the ‘Error when initiating Vulkan renderer’ issue is the missing of the Microsoft Visual C++ 2017 X64 Redistributable.
Unless you have this Visual C++ Redist package installed on your computer, you can expect to see the issue appearing every time you attempt to emulate a Wii-U game using Cemu.
Fortunately, a lot of affected users have confirmed that they finally managed to fix this issue after installing Visual C++ Redist. package using the official channels.
If you’re looking for step by step instructions on how to do this, follow the steps below to install Microsoft Visual C++ 2017 X64 Redistributable using the official channels:
- Open your browser and visit the official Microsoft download page to reach the page associated with the Visual C++ Redist 2017 download pack.
- Once you’re inside the correct page, scroll all the way down to the listing associated with Visual Studio 2015, 2017, 2019 section and click on vc_redist.x86.exe if your Windows version is on 32-bit or vc_redist.x64.exe if your Windows version is on 64 bit.
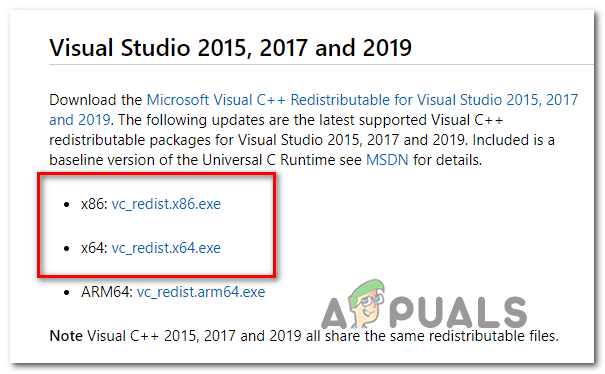
Downloading the correct Visual C++ Redist version - After the download is finally complete, double-click on the executable and click Install when prompted to do so, then follow the on-screen prompts to install the missing C++ Redist Package.

Installing the missing redist package - After the installation is complete, reboot your computer and see if the issue is fixed once the next startup is complete.
If you’re still seeing the same ‘Error when initiating Vulkan renderer‘ issue when attempting to emulate a Wii-U game using the Cemu launcher, move down to the next potential fix below.
Method 4: Update Drivers to the Latest Versions
Keep in mind that CEMU developers assume that you have already updated your GPU driver to the latest version available – Whenever they update the CEMU app, they optimizing for the latest stable release of Nvidia and AMD drivers (not beta releases) while indirectly unsupporting older versions.
If you’re not convinced that you’re using the latest version of your graphics card driver, follow the instructions below to uninstall your current GPU drivers before reinstalling the latest equivalents from the official channels:
- Open up a Run dialog box by pressing Windows key + R. Inside the text box, type ‘devmgmt.msc’ and press Enter to open up Device Manager. When you’re prompted by the UAC (User Account Control), click Yes to grant admin access.
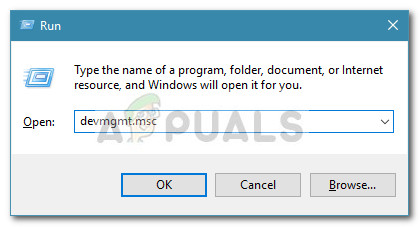
Opening Device Manager via Run box - Once you’re inside Device Manager, scroll down through the list of device types and expand the drop-down menu associated with Display Adapters.
- After this menu is expanded, right-click on the GPU driver that you’re currently using and choose Uninstall device from the context menu that just appeared.
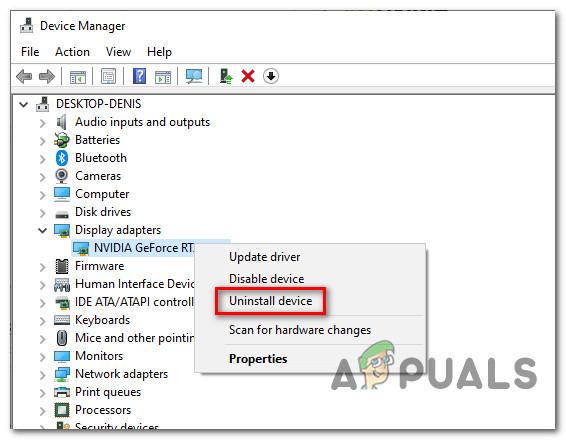
Uninstalling the current GPU driver - When asked to confirm, click Yes and wait for the process to complete before restarting your computer.
- Once your computer boots back up, the missing driver will be replaced with a generic equivalent.
- Next, use the proprietary software associated with your GPU manufacturer, install it and run it in order to automatically install the latest compatible driver version for your GPU model. Here’s list of proprietary driver updating tools for the most popular GPU manufacturers:
GeForce Experience - Nvidia
Adrenalin - AMD
Intel Driver - Intel
- Once your driver version is updated, restart your computer once again and repeat the action inside CEMU once the next startup is complete.
If this problem is still occurring in your case, move down to the next potential fix below.
Method 5: Running the DDU Utility
If none of the fixes above have worked for you, it’s likely that you’re dealing with some kind of corruption that is affecting your GPU driver or some associated dependency. This type of issue can keep occurring even after you try installing the GPU driver conventionally.
Several affected users that were dealing with the same kind of issue have reported that the issue was finally resolved after they used a 3rd party utility (Display Driver Uninstaller – DDU) capable of removing every remnant file of the GPU driver.
Running this utility will end up removing any type of file corruption associated with your graphics driver. Follow the instructions below to download and deploy the DDU freeware to fix the driver issue that might be contributing to the apparition of the ‘Error when initiating Vulkan renderer‘:
- Open up your default browser and visit the official download page of Display Driver Uninstaller. Once you get to the correct page, select a mirror that’s closest to your physical location and wait until the download is complete.
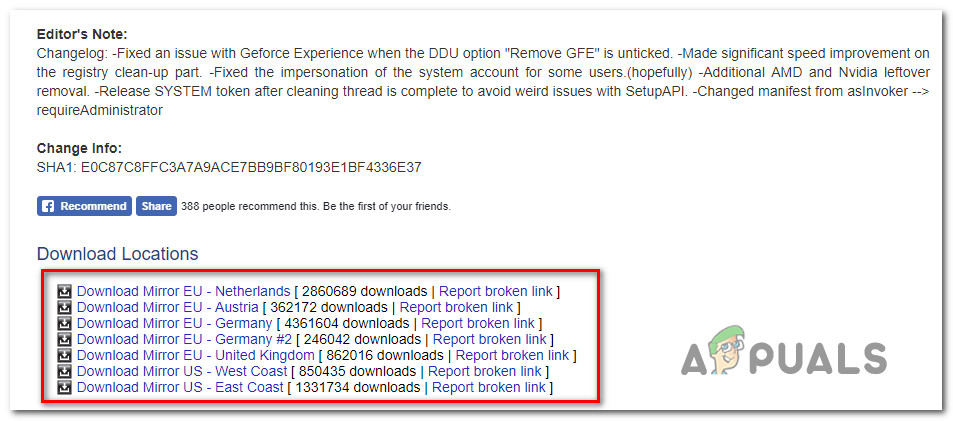
Downloading the DDU freeware - After the download is complete use a utility like 7Zip or WinZip to extract the contents of the DDU archive into an accessible folder.
- Once the extraction process is complete, right-click on the main installer executable of DDU and choose Run as Administrator from the context menu that just appeared. When you’re prompted by the UAC (User Account Control), click Yes to grant admin access.
- Inside the Display Driver Uninstaller interface, choose GPU from the Select device type from the drop-down menu. Next, click on Clean and restart to begin the GPU cleaning process.
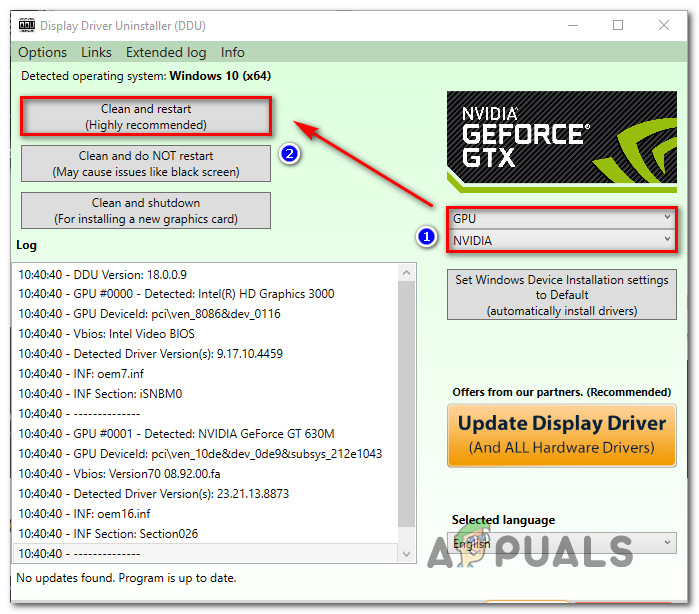
Cleaning up GPU remnant files - Wait until the process is complete, then reboot manually if the operation is not automatic.
- Use the compatible auto-updating software associated with your GPU manufacturer to install the latest version of the graphics card driver:
GeForce Experience – Nvidia
Adrenalin – AMD
Intel Driver – Intel
If the same problem is still occurring even after you used the DDU utility, move down to the next potential fix below.
Method 6: Manually install the Latest Vulkan Runtime Environment (if applicable)
In case you’re encountering this issue on an Intel-based GPU, you will likely need to install the Vulkan Runtime environment before you’ll be able to emulate any Wii-U game on your current configuration. Several affected users have confirmed that the issue was finally fixed after they installed the Vulkan Runtime environment on the affected computer.
Note: Keep in mind that even if you correctly installed the Vulkan Runtime environment, there’s still a good chance WII-U games will not run as well on the CEMU emulator as they would with an Nvidia or AMD graphics card. This has been consistently reported by a lot of affected users that were trying to get this emulator to work on an Intel GPU.
If this scenario is applicable (you’re trying to use an Intel’s GPU) and the Vulkan Runtime environment is missing from your computer, follow the instructions below to download it from the official channels and install it on your computer:
- Open your default browser and navigate to the official download page for the Vulkan Runtime environment pack.
- When you arrive at the correct location, click on the Windows icon inside the download button, then scroll down to the Windows section and click on the Latest Runtime/ZIp hyperlink to download the latest version of the Vulkan environment.
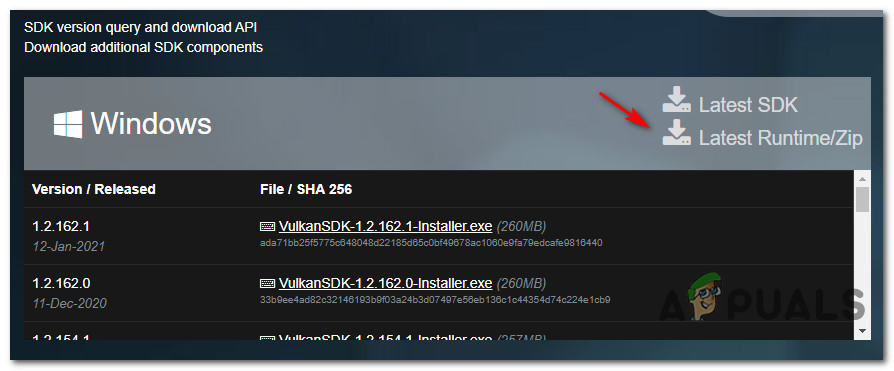
Downloading the latest version of the Vulkan Environment - At the next prompt, click on Download Latest Runtime to confirm the operation and download the latest runtime version of the Vulkan SDK.
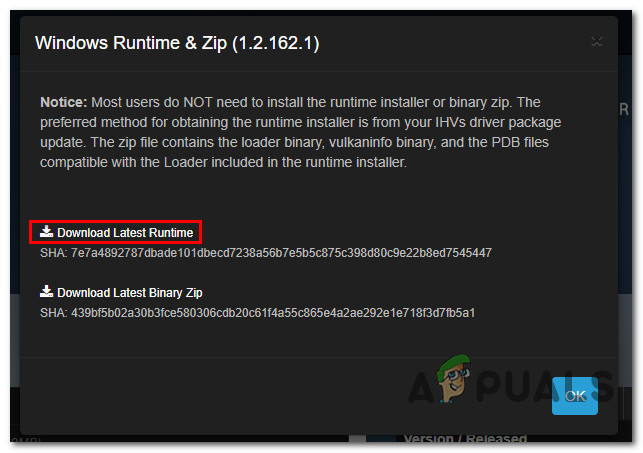
Downloading the latest version of the Vulkan SDK - Once the installer is successfully downloaded, double-click on vulkan_runtime.exe and click Yes when prompted by the UAC (User Account Control) prompt.
- Inside the installation window, start by clicking on I Agree to accept ToS, then wait for the installation to complete.
- Restart your computer and see if the problem is fixed once the next startup is complete.
In case you’re still encountering the same ‘Error when initiating Vulkan renderer‘ issue, move down to the final potential fix below.
Method 7: Disable PreCompiled Shaders (AMD GPU Only)
In some cases, this issue is caused due to a conflict in the debug settings of the CEMU application. If none of the methods above have worked for you and you’re using an AMD GPU, chances are you will be able to fix this particular issue by disabling the precompiled shaders option from your CEMU Settings menu.
Important: This particular fix is only reported to be effective for AMD-based GPUs. If you’re using an Nvidia or Intel graphics card, this fix will not be effective in your case.
This method has been confirmed to be effective by a lot of AMD GPU users that were encountering this issue while trying to emulate The Legend of Zelda: Breath of the Wild.
If this scenario is applicable, follow the instructions below to access the Settings menu of CEMU and disable PreCompiled Shaders for the game that’s causing this issue as well as making sure that this setting is not enforced at an application level:
- First things first, start by ensuring that the game causing this issue is completely closed and not running in the background.
- Open CEMU emulator and use the ribbon menu at the top to access the Debug menu, then click on Precompiled shader cache and set it to Disabled / Ignored.
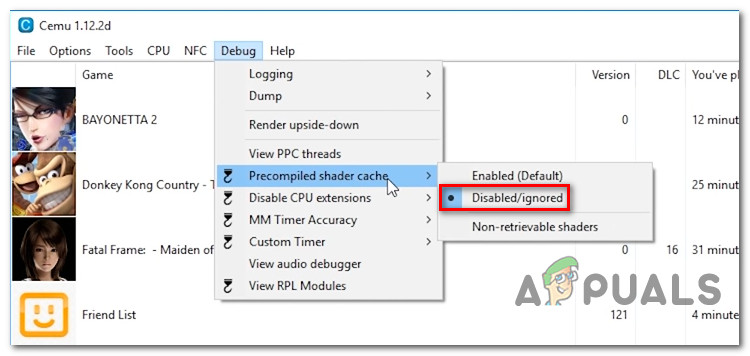
Disabling the Precompiled shader cache - Next, go to Options from the same ribbon bar menu, access the Experimental tab, and check the option named Disable precompiled shaders.
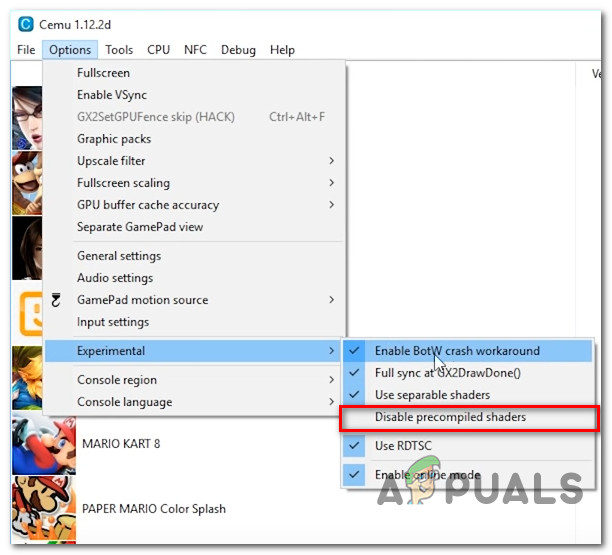
Disabling precompiled shaders - Next, right-click on the game that is causing the ‘Error when initiating Vulkan renderer‘ issue and click on Open game profile.
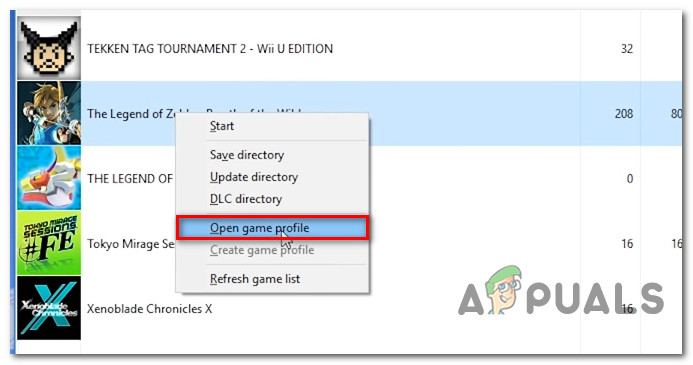
Accessing the game profile in CEMU - Inside the newly opened notepad file, add the following code line under the Graphics tab:
disablePrecompiledShaders = true
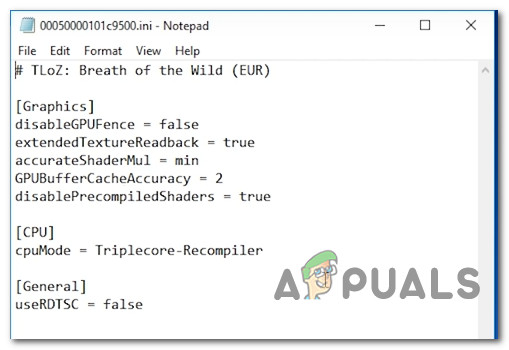
Disabling Precompiled Shades for Zelda: Breath of the Wild Note: Due to a bug in CEMU, you need to set this to true in order to prevent the application-wide setting from overriding the default behavior.
- Once the above changes have been enforced, launch the game once again and see if the issue is now resolved.


