Fix: Epson Printer Offline
Epson is a Japanese company and is one of the world’s largest manufacturers of computer printers. It has numerous types of printers available and is known to be one of the ‘big’ players in the printing industry.
There have been numerous issues reported with Epson where the printer seems offline even if it is started up and is printing the test page just fine. This issue might occur on a number of different occasions and the cause of this issue might vary from system to system. We have listed down all the workarounds; start with the first one and work your way down accordingly.
Solution 1: Resetting Printer Spooler
The spooler service is a software program which is responsible for managing all print jobs being sent to the computer printer. The print spooler service is usually visible to users and they can also cancel a print job which is being processed. It also allows them to manage jobs which are currently on the waitlist. By resetting this service, we will make sure that all the configurations get reset.
We can try restarting this service and check if this solves the problem.
- Press Windows + R to launch the Run application. Type “services.msc” in the dialogue box and press Enter.
- Locate the service “Print Spooler” present in the list of services. Double-click it to open its properties. Click the “Stop” button present underneath system status and press “Ok” to save changes.
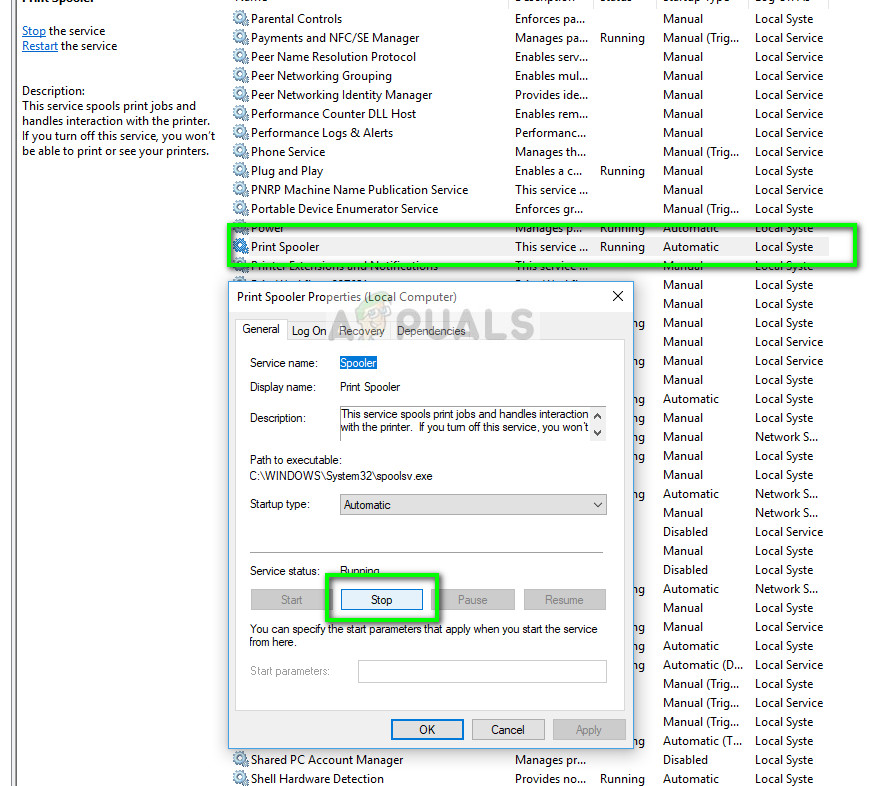
- Now open services again and start it once more and make sure that the startup type is set to automatic.
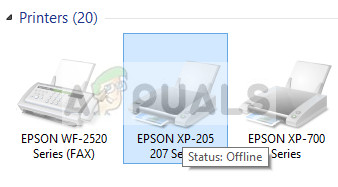
If this doesn’t fix the issue, access the printer using the login credentials and make sure that the printer is connected. If it isn’t connecting wirelessly, try plugging a wire and check again if this helps. Once this is done, navigate to printers, right-click on the device and select “Connect”.
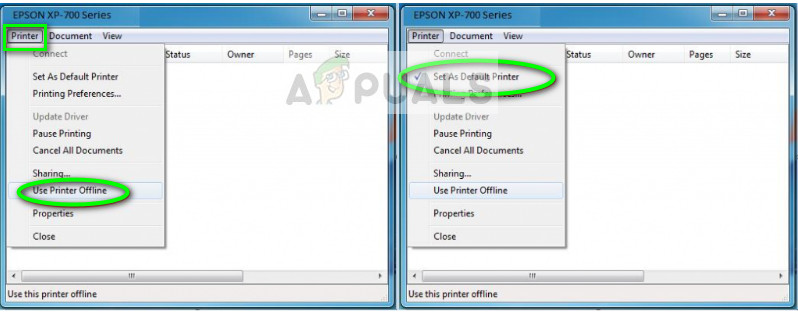
Note: Also make sure that the printer is set as the default printer and make sure that the setting “Use printer offline” is not checked.
Solution 2: Disabling SNMP Settings
SNMP stands for Simple Network Management Protocol and is used for a variety of different purposes on your computer. Almost every printer which uses a wireless connection to connect with your computer uses this protocol for some functionalities and tightening the security of the connection. There were several reports which indicated that disabling the SNMP protocol solved the problem for them. Take a look at the steps below.
- Open your control panel and click on Devices and printers. Once in the printers window, locate your device, right-click it and select Properties.
- Once in the settings, click on Ports, now with your IP highlighted, click on Configure ports and uncheck the option SNMP Status Enabled.
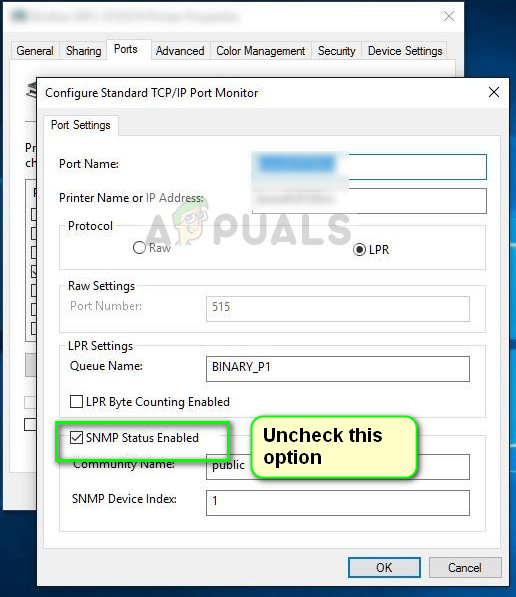
- Press OK to save changes and exit. Now right-click on the printer and try connecting. If possible, power cycle your printer properly before proceeding.
Solution 3: Adding the printer using IP address and port
Another thing you can try is adding the printer on your computer using its IP address and port number. There may be problems by the computer in adding the printer automatically. We will manually look up the addresses and try adding it to the computer.
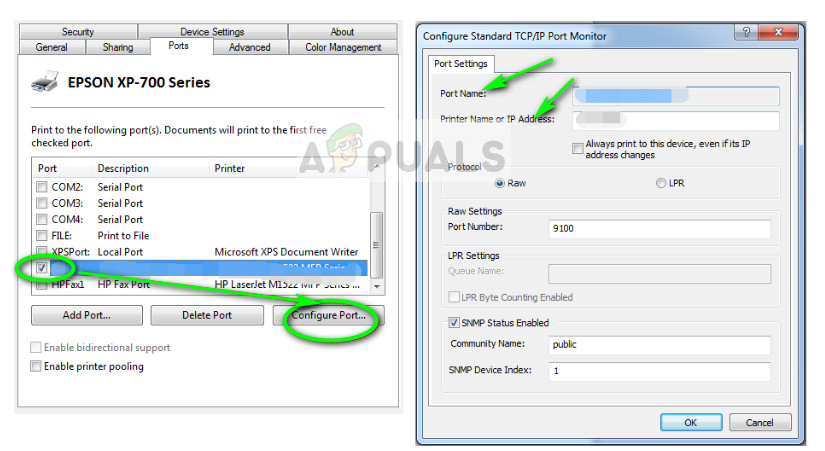
- Open the control panel and navigate to the printers section like we did earlier on. Select your device, right-click it and click Printer Properties.
- Now navigate to Ports, click on the checked entry and select Configure Port.
- A new window will pop up consisting of port name and IP address. Copy these so we can enter them later on.
- Now press Windows + R, type “control” in the dialogue box and press Enter. Once the control panel shows up, click on “Devices and printers” and select Add a printer.
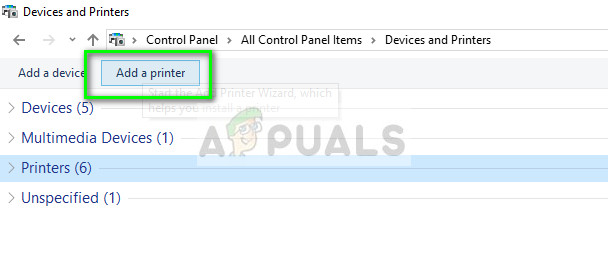
Note: You should delete the existing printer so we can add it again using the IP address.
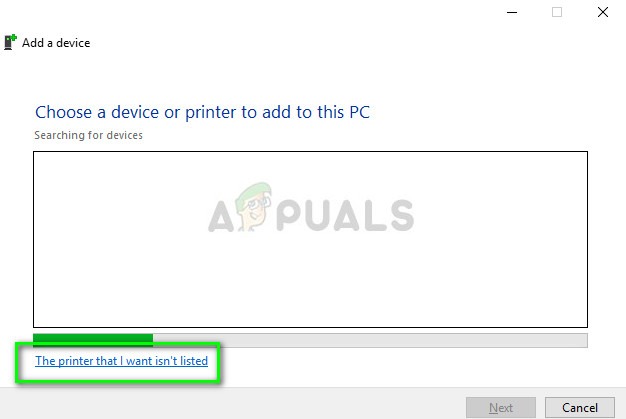
- The printer will not be detected most probably. If it does, just click on it and the computer will connect. If it doesn’t show up, select “The printer that I want isn’t listed”.
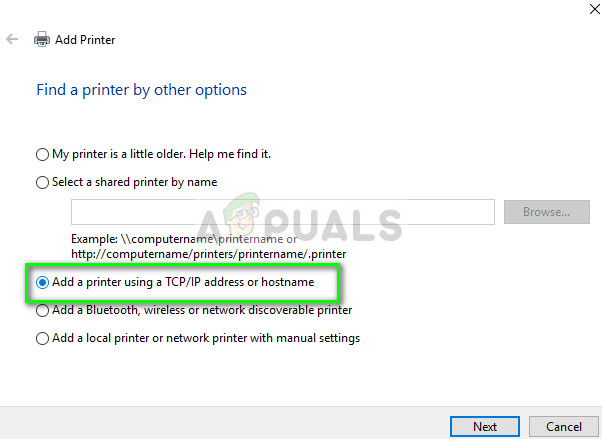
- Now select the option “Add a printer using TCP/IP address or hostname”.
- Enter the IP address and Port name of the printer and wait for it to connect.
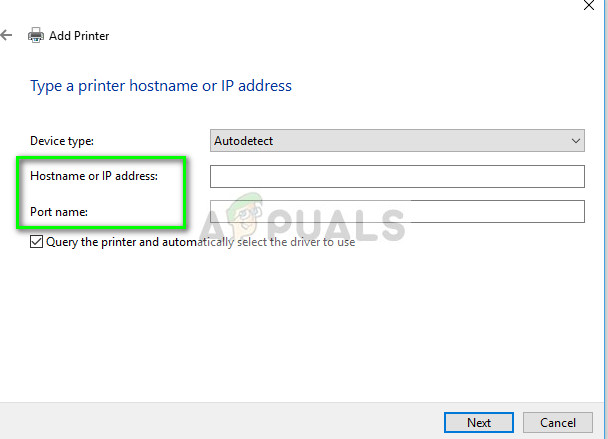
- Once the printer is connected, print out a test page and check if the problem is solved.
Note: This solution is meant to make sure that the IP address which your printer has obtained is the same which is inputted in the computer. If you are having trouble determining the IP address of the printer using the methods listed, you should check the printer manual and see if there is any way to confirm the IP and Port of the printer.
If this doesn’t work, you should allocate a static IP to the printer and try connecting to it again. Follow the steps mentioned in the article Fix: Canon Printer Offline.