How to Fix Google Chrome When It’s Taking Too Long to Load?
When Chrome takes too long to load, it often leads to freezing or unresponsive tabs. This problem usually comes from a full cache, too many cookies, or extensions that slow down the browser. Common reasons include too many open tabs, outdated software, or limited system resources.
Sometimes, Chrome’s hardware acceleration or conflicting add-ons can also cause delays.
In this article, we will discuss different s to solve this error.
1. Run the Program Compatibility Troubleshooter
Before trying specific fixes, run the Program Compatibility Troubleshooter to find issues preventing Chrome from running well. It checks for outdated settings or configurations causing delays or freezes, ensuring Chrome works smoothly on your current OS without manual changes.
- Press the Windows key, type “troubleshoot,” and select the top result.
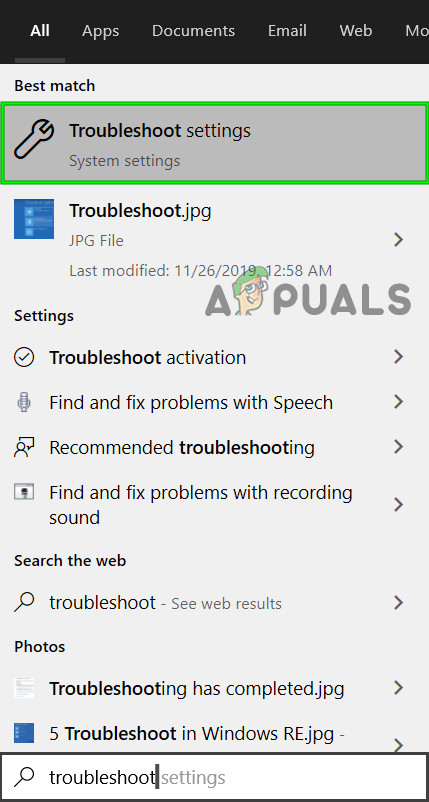
Open Troubleshoot Settings - In the right pane, scroll to Program Compatibility Troubleshooter.
- Click “Run this troubleshooter.”
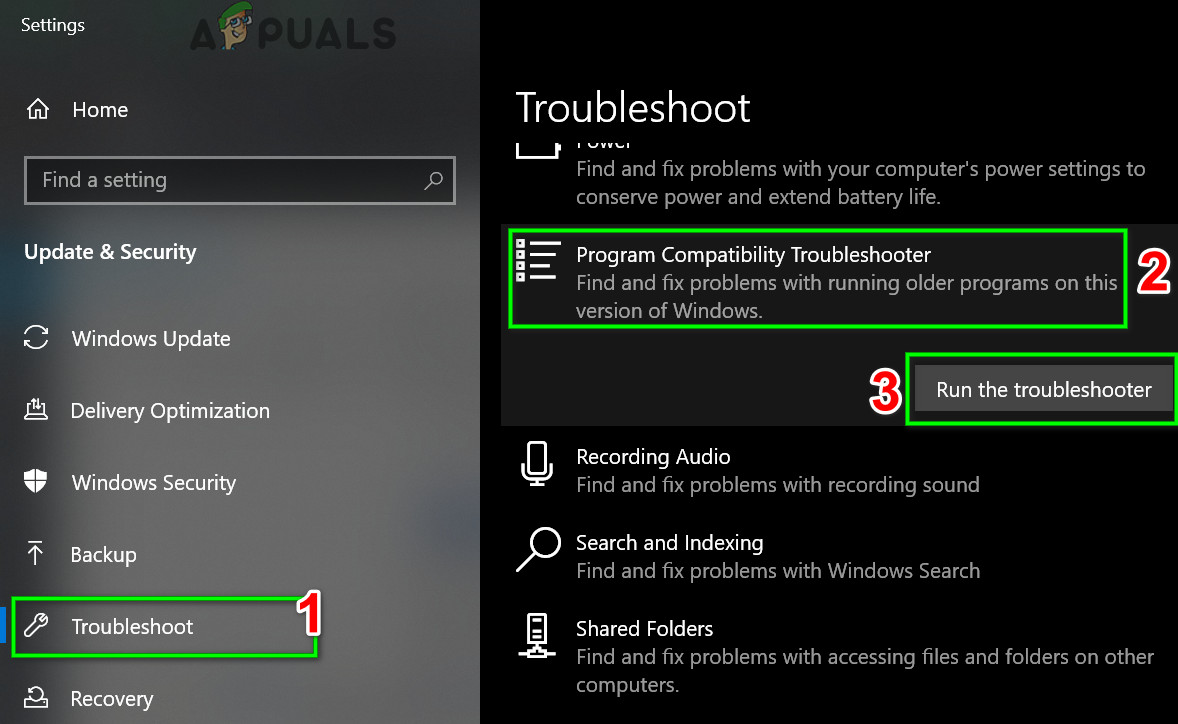
Run Program Troubleshooter - Select Google Chrome from the list and click Next.
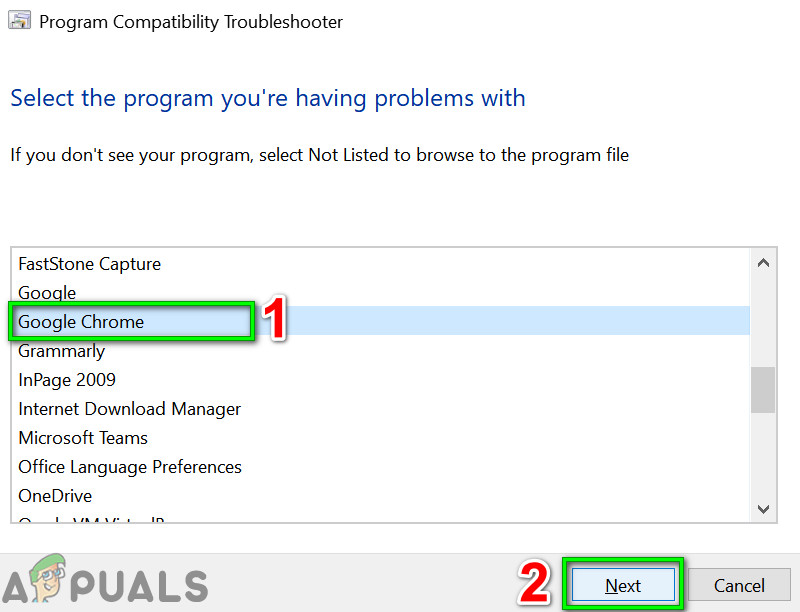
Select Chrome in Program Compatibility Troubleshooter - Follow the on-screen instructions to complete troubleshooting.
- Open Chrome to see if the issue is resolved.
2. Disable Extensions
Extensions use memory and resources in the background. Disabling them can fix conflicts or slowdowns, especially if they are outdated. Turning off extensions reduces background activity, leading to faster loading times. This step helps identify any problematic extensions without affecting browser performance.
- Navigate to your Chrome installation directory, usually:
C:\Program Files (x86)\Google\Chrome\Application\
- Right-click on chrome.exe and select Properties.
- Go to the Shortcut tab.
- In the Target field, add:
--disable-extensions
- Your entry should appear as shown:
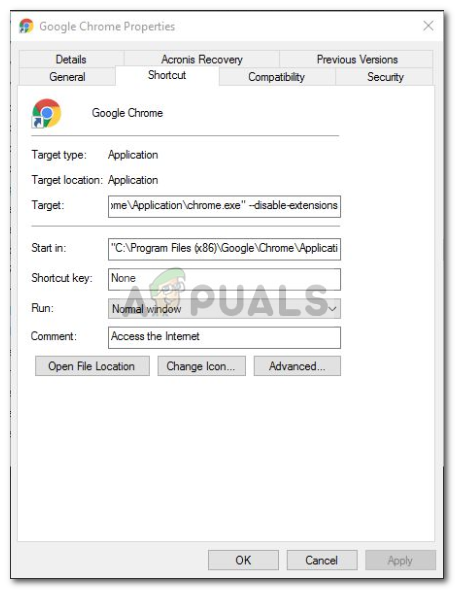
Disabling Google Chrome Extensions - Launch Chrome to check if the problem is fixed. If not, try disabling developer mode in Chrome’s Extensions Menu.
3. Turn Off Hardware Acceleration
If Chrome is slow, turning off hardware acceleration can help by easing the load on your GPU. This feature usually boosts performance by using the GPU, but it can cause issues if there are conflicts with hardware or outdated drivers. Disabling it makes Chrome use the CPU instead, which can fix crashes and improve stability where GPU use is a problem.
- Open Google Chrome.
- Click the menu (three dots) in the top-right corner and select Settings.
- Scroll down and click on Show advanced settings.
- In the System section, find and disable Hardware Acceleration.
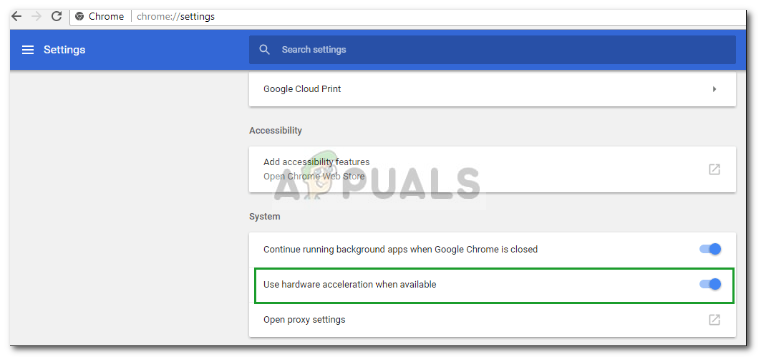
Turning Off Hardware Acceleration - Close and restart the browser.
4. Rename the Default Folder
Renaming the “Default” folder creates a new Chrome profile without deleting data, clearing issues from extensions and settings to improve performance. Users can switch back if needed, making it a quick troubleshooting step.
- Open Windows Explorer.
- Type the following path in the address bar:
%LOCALAPPDATA%\Google\Chrome\User Data\
- Locate the Default folder and rename it to Backup Default.
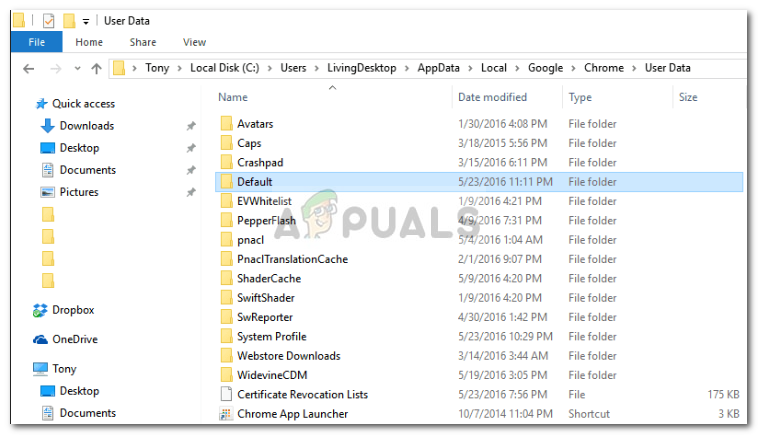
Google Chrome Default Folder - Restart Chrome.
5. Reset Network Adapter
Resetting the network adapter refreshes connection settings, removes outdated configurations, and helps Chrome load pages faster by eliminating network issues.
- Press Windows Key + X and select ‘Command Prompt (Admin)‘.
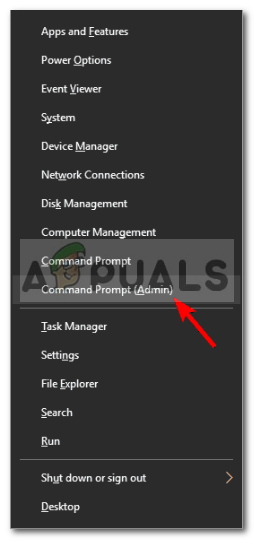
Opening an Elevated Command Prompt - Type the command:
netsh winsock reset

Network Adapter Reset – The Command Prompt - Restart your system.
- Open Chrome and check if the issue persists.
6. Clear Browsing Data
Corrupted or improperly configured browsing data, cache, cookies, and history can slow down Chrome. Clearing this data can free up space, improve browser speed, and enhance privacy by removing stored information.
- In Chrome, click the menu (three dots) and select Settings.
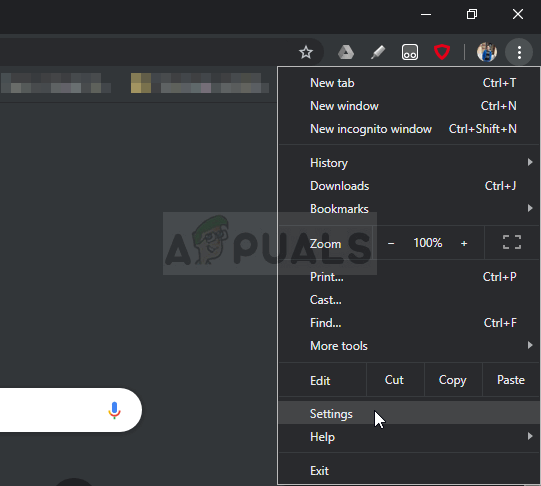
Settings in Google Chrome - Go to Privacy and Security and select Clear Browsing Data.
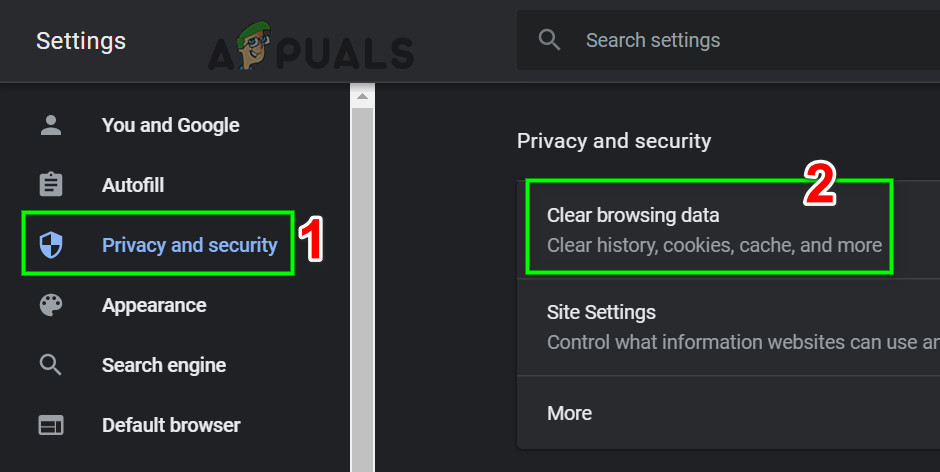
Clear Browsing Data - In the Advanced tab, select the time range and categories to clear, then click Clear Data.
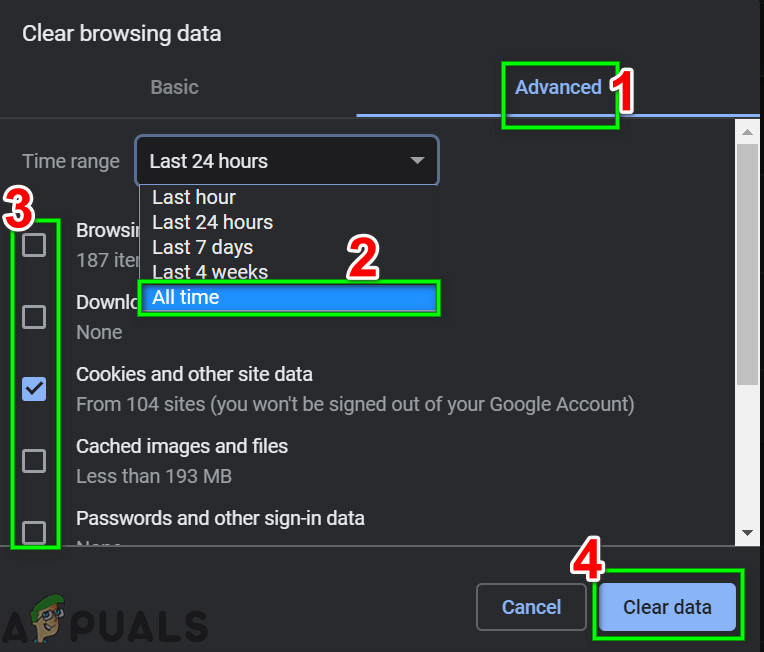
Clear Browsing Data of All Time - Relaunch Chrome to check if the issue is resolved.
7. Use Chrome Cleanup Tool
If Chrome is slow, the Chrome Cleanup Tool can help. It finds and removes unwanted software or hidden malware that might slow down your system. These programs can run without you knowing, using up resources and causing Chrome to lag. Using the tool clears these threats, making browsing smoother and letting Chrome work better.
- Open Chrome, click the menu (three dots), and select Settings.

Access Google Chrome Settings - Click Advanced, then select Reset and Clean Up.
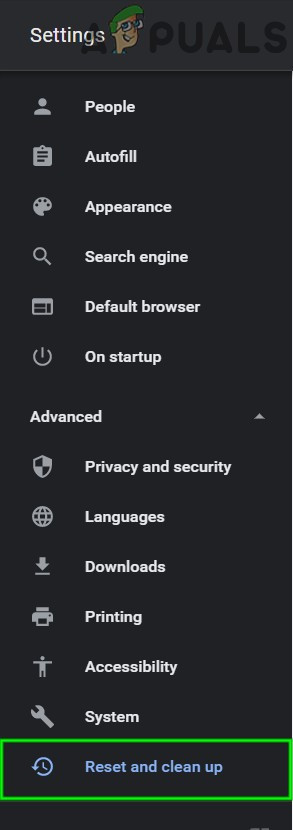
Click Reset and Clean Up in Chrome Advanced Settings - Select “Clean Up Computer.”
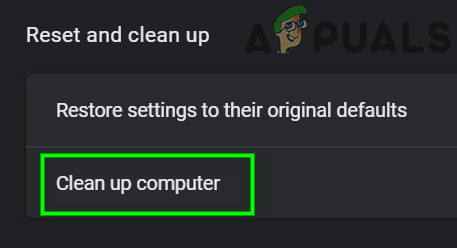
Select Clean Up Computer - Click Find to start the search.

Click on Find in Clean Up Computer - Wait for “Checking for harmful software…” to complete.

Checking For Harmful Software - If harmful software is found, click Remove.
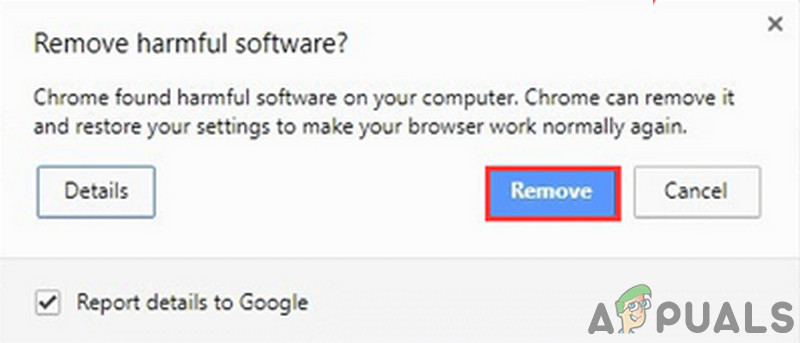
Remove Harmful Software - Relaunch Chrome to check if the issue is fixed.
8. Reset Google Chrome
Chrome has a reset option that clears temporary configurations and creates fresh files. It also removes any linked Google accounts. If files or settings are corrupt, they may cause Chrome to freeze. Resetting to factory defaults can fix the issue.
- Open Google Chrome and click the three-dots (Menu) in the top-right corner, then select Settings.
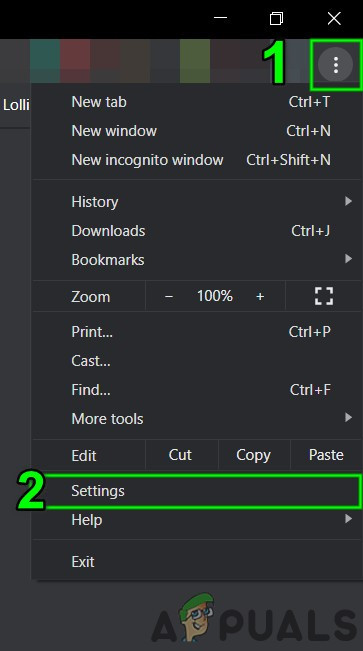
Open Chrome Settings - Click Advanced in the left pane, then select Reset and clean up.
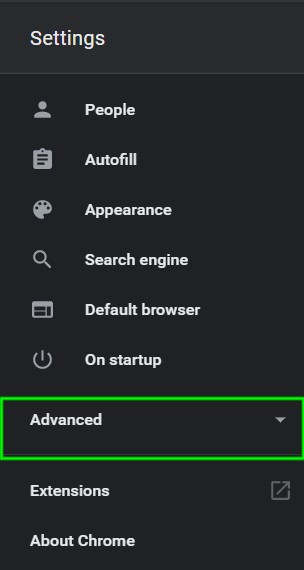
Open Advanced Chrome Settings - Click “Reset settings to their original defaults.”
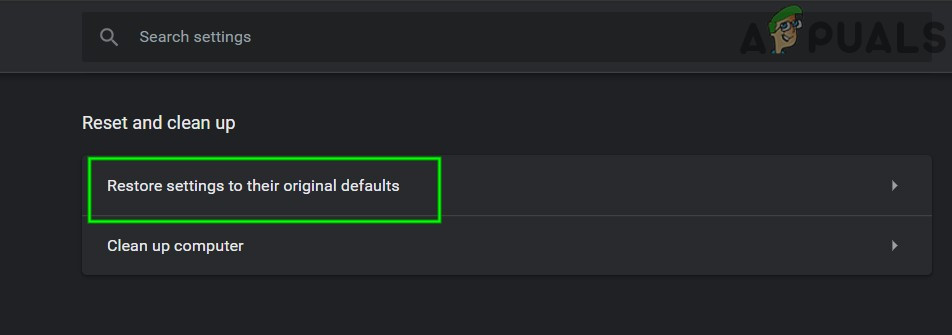
Restore Settings to Their Original Defaults - Confirm by clicking Reset Settings, and Chrome will relaunch.
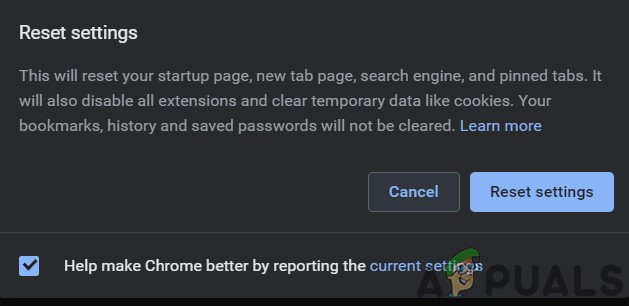
Confirm to Restore Settings
9. Reinstall Google Chrome
If none of the previous solutions work, reinstalling Google Chrome might be necessary. Corrupted files could be the problem, which uninstalling and reinstalling the browser can fix. Make sure the installation process is uninterrupted for proper installation.


