Fix: Can’t Uninstall Google Chrome
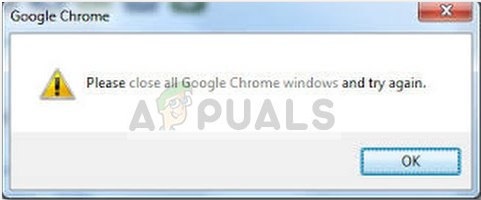
Please close all Google Chrome Windows and try again
Some users are reporting being unable to uninstall Google Chrome from their Windows computers. Most of the time, users report receiving the “Please close all Google Chrome windows and try again” error after trying to install Google Chrome conventionally.
Note: Some users have been experiencing other issues other than the inability to install Google Chrome. Common symptoms of this kind of issues include freezes, blank new tabs, and constant ads redirects.
From our investigations, it seems like the issue might be caused by a couple of different things. While this can easily be caused by a glitch, it could also be a sign of a malware infection that has hijacked your browser. To be sure that’s not the case, scan your system with a powerful security scanner.
Note: If you don’t have one at the ready, follow our in-depth guide (here) on using Malware bytes to remove any type of infection from our computer.
Once you’ve scanned your system and made sure that you’re not dealing with an infection, see if the issue has been resolved. If you’re still unable to uninstall Google Chrome, the methods below might help.
We have managed to identify quite a few methods that have managed to help users in a similar situation to finally remove Google Chrome from their systems. Please follow the potential fixes below in order until you encounter a method that resolves the issue in your particular scenario. Let’s begin!
Method 1: Uninstalling after closing all Chrome-related processes manually
Before you try anything else, let’s see if Google Chrome is failing to uninstall for the advertised reason. It’s entirely possible that a previously installed extension is refusing to close when Google Chrome does, thus preventing the uninstallation.
As a lot of users have reported, this particular cause can easily be treated by manually stopping all Chrome processes from Task Manager. With all the processes stopped, the uninstallation of Google Chrome should complete without issues. Here’s a step-by-step guide through the whole thing:
- Press Ctrl + Shift + Esc to open up Task Manager. In the Processes tab, scroll down to find Google Chrome. Then, select it and click the drop-down menu to make sure all the subprocesses are also selected. Next, right-click on the main Google Chrome task and click on End task.
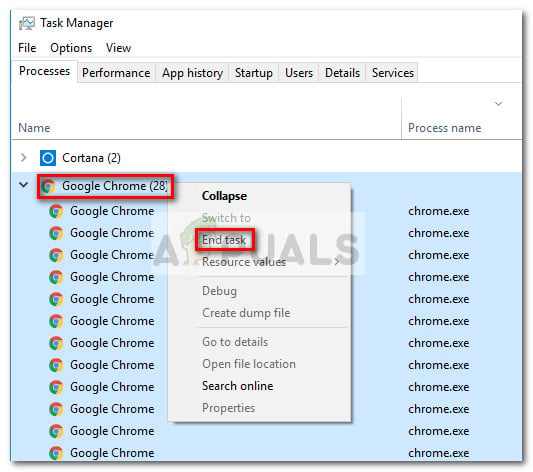
- Inspect the Processes tab of Task Manager once again to make sure there aren’t any leftover processes. If you find any, right-click each of them and choose End task. Once there are no processes belonging to chrome.exe left, you can safely close Task Manager.
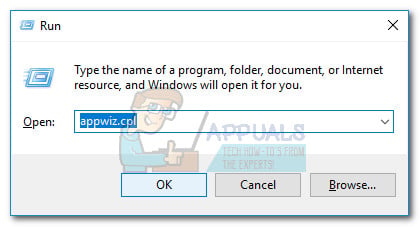
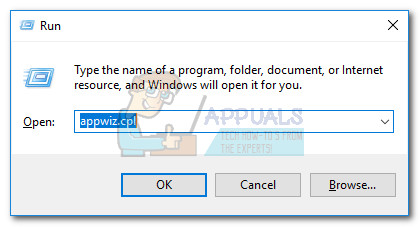
- Press Windows key + R to open up a Run window. In the newly opened Run window, type “appwiz.cpl” and hit Enter to open Programs and Features.
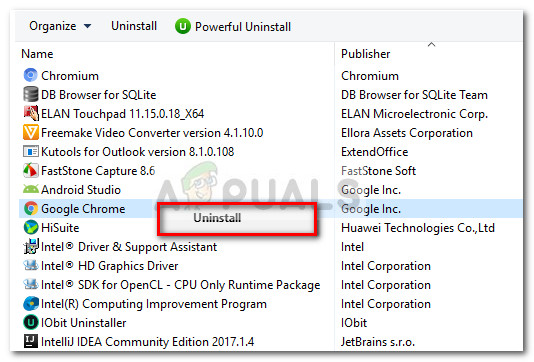
- In Programs and Features, scroll down through the application list and locate Google Chrome. Then, right-click on Google Chrome and choose Uninstall.
- Follow the on-screen prompts to remove Google Chrome from your system.
If this method wasn’t successful, proceed to the next method below.
Method 2: Preventing Chrome from running background apps
By default, Google Chrome is configured to run background processes even when Google Chrome is closed. This is precisely why a lot of users are having difficulties uninstalling the software from their computers.
Luckily, Google Chrome has included a setting that prevents background processes of Google-related apps from running when the browser is closed. But intentionally or not, the setting is quite hidden from the user’s view.
A lot of users have reported finally being able to uninstall Google Chrome after using this setting to prevent the browser from running background processes. Here’s a quick guide through the whole thing:
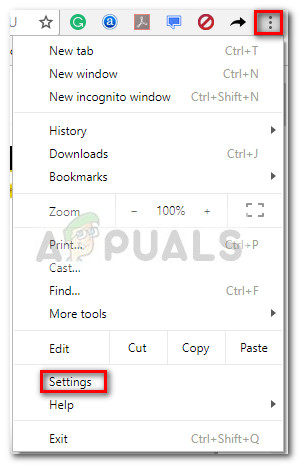
- Open Google Chrome, hit the action button (three dot icon in the top-right corner) and click on Settings.
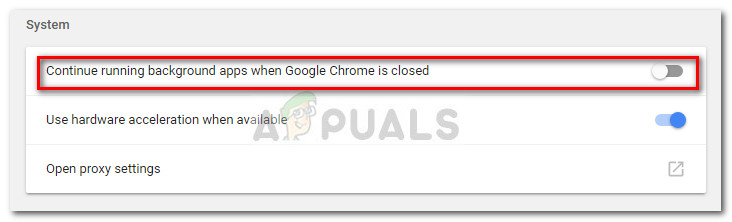
- In the Settings window, scroll all the way down to the bottom of the screen and click on Advanced.

- In the Advanced section, scroll down to the System section and uncheck the toggle associated with Continue running background apps when Google Chrome is closed. Once the setting is disabled, you can safely close Google Chrome.
- Press Windows key + R to open up a Run command. Then, type “appwiz.cpl” and hit Enter to open Program and Features.
- In Programs and Features, scroll down to find the Google Chrome entry in the application list. Then, right-click on Google Chrome and choose Uninstall.
- Follow the on-screen prompts to uninstall Google Chrome from your computer. The uninstallation process should no complete without issue since there’s no background process opened to prevent the procedure.
If this method wasn’t successful, move over to the method below.
Method 3: Disabling all extensions before uninstalling
Some users have been finally able to resolve the issue and uninstall Google Chrome after disabling all their installed extensions.
Keep in mind that some Google Chrom extensions operate in a gray legality area. Even if they aren’t picked up by your security scanner, that doesn’t necessarily mean that they don’t engage in less than honorable practices such as ad redirects and data mining.
Some of these above-mentioned extensions will have a direct interest to keep Google Chrome (or another Chrome-based browser) installed on your computer for as long as possible. Because of this, some extension processes will refuse to close along with Chrome, thus preventing the uninstallation process.
Let’s test and see if that’s the case by disabling all Google Chrome extensions and uninstall again. Here’s a quick guide on how to do this:
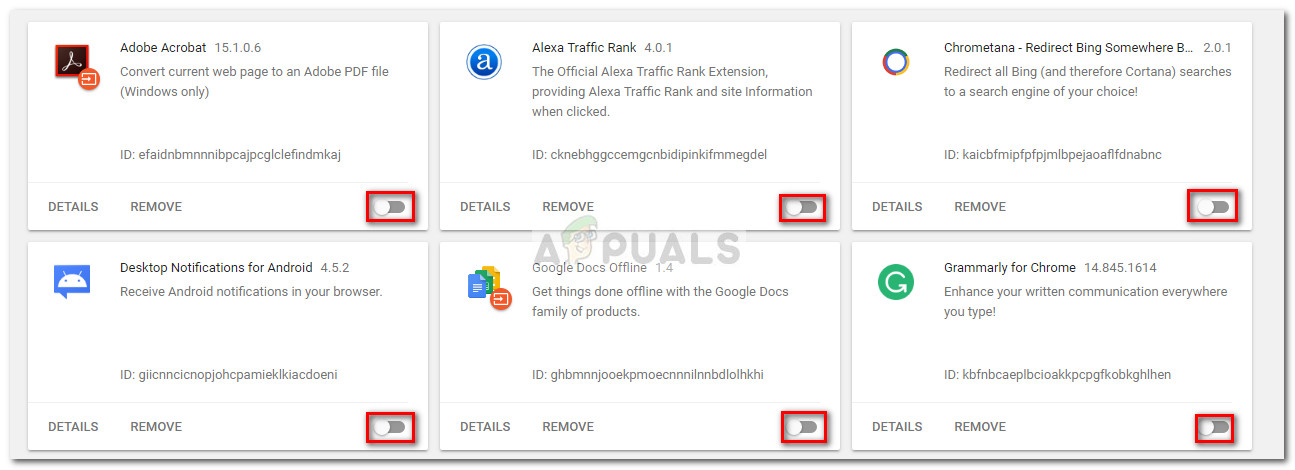
- Open Google Chrome and type “chrome://extensions/” in the Omni bar.

- In the Extensions window, turn the toggle associated with each extension to Off and disable them all.
- With all extensions disabled, open a Run window (Windows key + R), type “appwiz.cpl” and press Enter to open Programs and Features.
- In Programs and Features, locate Google Chrome in the application list, right-click on the entry and click on Uninstall.
- Follow the on-screen prompts to complete the uninstallation of Google Chrome and see if the process is successful. If it isn’t, move down to the final method.
Method 4: Using Revo Uninstaller
If the first two methods proved to be inefficient, a reliable alternative would be to use 3rd party application capable of performing a “powerful uninstall”.
Most users have reported being able to resolve the issue using either Revo Uninstaller or iOBit Uninstaller. Although both applications are free, we featured Revo Uninstaller because more people have reportedly manage to solve this particular issue with it.
Here’s a quick guide to using Revo Uninstaller to uninstall Google Chrome from your computer:
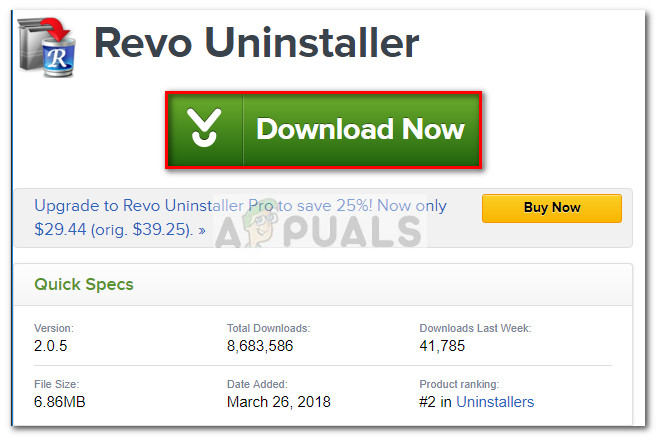
- Visit this link (here) and download the freeware version of Revo Uninstaller.
- Open the Revo’s installer and follow the on-screen prompts to install the uninstaller on your system.
- Launch Revo Uninstaller, scroll down through the application list to find the application that you wish to uninstall. Then, simply right-click on Google Chrome and choose to Uninstall to start the process.
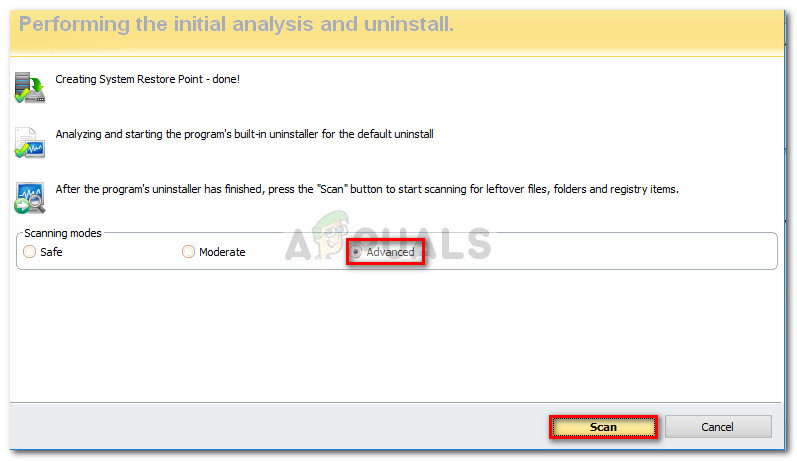
- The software will then create a System Restore Point ( in case things go bad). Once that’s finished, you will be prompted by the conventional uninstaller of Google Chrome. Hit Yes at the first prompt and then follow the on-screen prompts to uninstall Google Chrome from your computer.
- Once the uninstallation is complete, return to the Revo Uninstaller screen and choose Advanced under Scanning modes, then hit Scan.
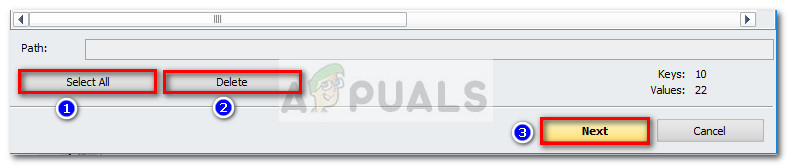
- Wait until the registry scan is complete, then click on Select all, then Delete and Yes at the prompt to delete all occurrences of Google Chrome. Once all keys related to Google Chrome are deleted, hit the Next button.
- Next, for the leftover files, repeat the same procedure. Once all leftover files have been selected and deleted, hit the Finish button to complete the uninstallation.


Thank you so much, this helped me a lot. Even if I had to get all the way to the fourth point!