Fix: Black Ops 3 has stopped working
Call of Duty is a hit video game played by gamers all around the world. Some CoD players and Battlefield 3 too with NVIDIA graphics card have experienced sporadic crashes while playing Call of Duty: Black Ops II. As the current cause of the issue isn’t fully known, the issue has greatly affected GTX580 users as is related to undervolted CPU cores. Additionally, other gamers have experienced unexpected crashes in BlackOps, even with everything functioning alright.
There are several causes of this issue but for NVIDIA users, we’ll focus on using an MSI utility called Afterburner to increase the core voltage and we’ll also try reinstalling the graphics drivers. There are tons of additional fixes for BlackOps to get the game running again. Let’s head over to the main article and get this fixed.
How to Get Blackops3.exe File to Launch?
Method 1: Reduce the Core Voltage
- Download Afterburner, go to the Download folder and extract it.
- Install the utility and launch it after installation.
- Go to Settings and check the Unlock Voltage Control option under the General Tab. Also, enable Start with Windows and Start Minimise and then click OK
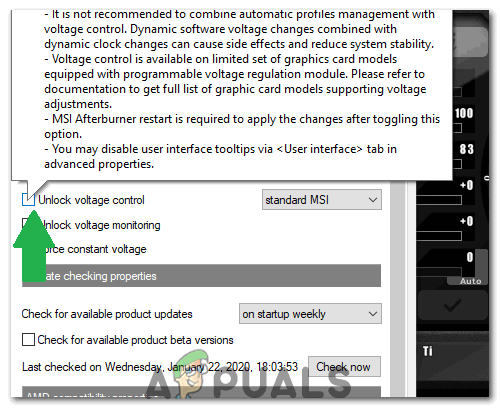
Unlocking the Voltage Control in MSI Afterburner - In the main Afterburner interface, adjust the Core Voltage to 1100mV(1.1V). You should also consider increasing the fan speed, as the processor would have a little increase in temperature.
- Select Apply and trying playing the Second Mission of Black Ops II and see if the issue stops.
Method 2: Reinstall NVIDIA Graphics Drivers
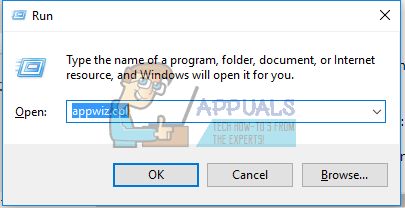
- Press Windows + R to open the command prompt, type appwiz.cpl and click OK.
- In the Programs window, look for Nvidia GeForce Experience from the list of installed applications, double-click on it and then follow the uninstallation instructions. You can also choose to remove additional NVIDIA applications but remember to reinstall them from the website.
- Visit this website and download GeForce Experience from there.
- Open the Download location of the application and launch it. Go through the installation process till the installation is completed.
- Try playing the Second Mission of Call of Duty: Black Ops II and see if the issue stops.
Note: If this doesn’t work, try to roll back your drivers to an earlier date.
Method 3: Verify the Cache
If you use Steam, you should try re-verifying the game cache. This will most likely be successful.
- Open the Steam application and go into your game library
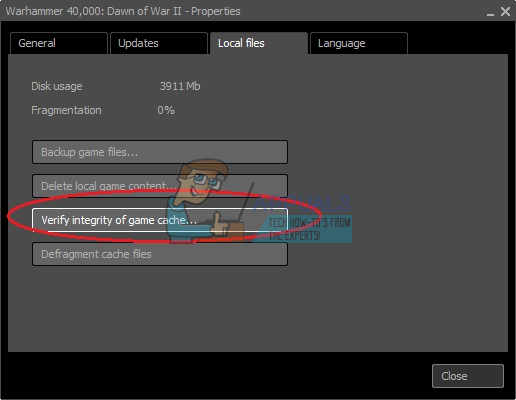
- Right-click the game, in this case BlackOps and then click on Properties.
- Click the Local Files tab and then click Verify Integrity of Game Cache.
- After this is done, try launching BlackOps again to verify if it works now.
Method 4: Reinstall the Game
If after you verified the game cache and nothing happened, then try reinstalling the game. You can do this buy launching the installer which came with the game disc or digital copy, and then following the installation prompts.
Method 5: Activate Developer Mode
This is a fix from Microsoft. It seems some games may not work on Windows 10 until Developer Mode is enabled. Here’s how you enable Developer Mode.
- Press the Windows + I keys to open Windows Settings.
- Navigate to Settings > Update and Security > For Developers and click the Enable Developer Mode
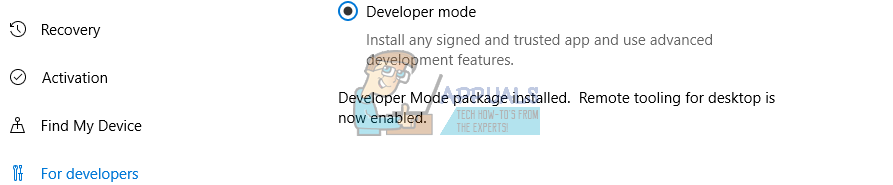
- Restart the computer once it’s checked and then try launching the game again. It should work this time round.
Method 6: Modify Game Startup Settings
If you’re using a 64-bit OS, note that Black Ops II is a 32-bit game and may have issues running it. Here’s what to do to get the game running in this case. Ignore the shortcut created by Steam. You can delete it if you want.
- Press the Windows + E keys to open Windows Explorer. Paste the following path in the address bar and hit the Enter key: C:\Program File (x86)\Steam\steamapps\common\Call of Duty Black Ops.
- In that folder, right-click on exe and click on Properties.
- Click on the Compatibility tab, check the “Run this program in compatibility mode for” box and select Windows 7 from the dropdown list.
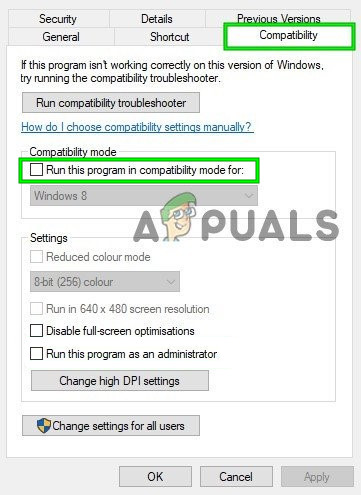
check Run this Program in Compatibility Mode - Back to the Settings tab, apply the following settings and click on OK.
- Check “Reduced color mode” and set it to 16-bit
- Check the “Disable display scaling on high DPI Settings” box
- Finally, right-click on the application icon and select New > Desktop Shortcut.
- Try running the game now and it should hopefully run this time.
Method 7: Install DirectX End-User Runtimes
- Visit this link and download DirectX End-User Runtimes.
- Visit the download folder and launch the DirectX 9.0c Redistributable installer with the filename:
directx_Jun2010_redist.exe.
- Follow the prompts to install and complete the installation.
- Try launching the game to confirm if the problem has been solved.
Method 8: General Fixes
If by now none of these fixes have worked, then try any of these additional fixes as they might work for you.
- Try playing multiplayer once. This may create additional files in the game which should make the game work normally.
- Turn off your firewall. You can do this by typing firewall in the Start Menu and pressing Enter, clicking Turn Windows Firewall on or off and then turning the firewall off. Notice you’ll be exposing your PC to threats if you do this.
- Turn off FRAPS. There seems to be some incompatibility betweens Black Ops II and FRAPS, so you can give that a try.
- In the NVIDIA Control Panel, go to Program Settings > Black Ops > Manager 3D Settings and then change the Power Management Mode to Prefer maximum performance.
- Press Ctrl + Shift + Del and try closing some background processes from there.
- Turn off all Antiviruses temporarily for at least 10 minutes.
- Close the Process Explorer and check to see if the game runs fine.
- Also, try running the computer in clean boot and then check to see if the issue still persists in that state.
Method 9: Disabling AVG Temporarily
Many AVG users have been facing this issue with Black Ops 3 and the game stops working for them sometime after launching. Therefore, in this step, we will be disabling the Antivirus temporarily but only for 5 minutes. Because that is reportedly the only option that works. In order to do so:
- Launch Steam but make sure that you don’t launch Black Ops yet.
- Click on the “Show Hidden Icons” button on the bottom right of the screen and right-click on the “AVG” icon.

Clicking on the “Show Hidden Icons” button - Select the “Disable AVG Protection Temporarily” option.
- In the dropdown menu, select the “5 Minutes” option and click on “OK”.
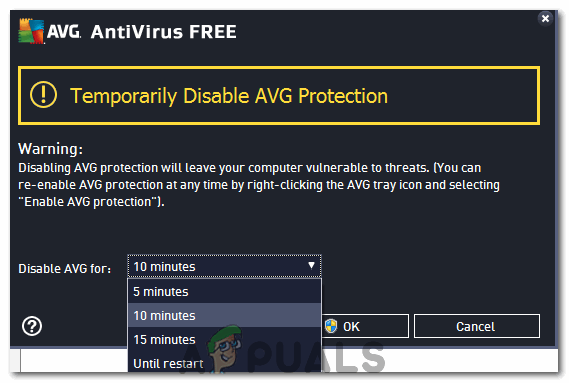
Selecting the “5 Minutes” option - Check to see if the issue persists.
- If the issue still persists, open AVG antivirus and click on the “Options” button on the top right.
- From there, select “Advanced Settings” and then click on “Exceptions”.
- Select the “Add Exception” button and select the Exception Type as “Application”.
- Click on “Browse” and then select “BlackOps.exe” from the main folder.
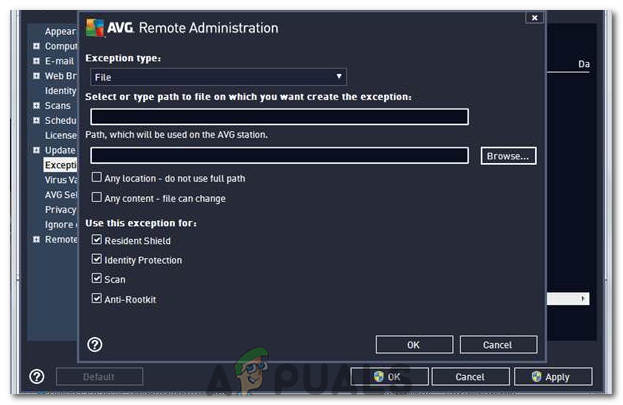
Clicking on the “Browse” option - Check to see if the issue persists now.