Fix: Avast Service High CPU Usage
Antivirus tools are usually resource-demanding because they perform plenty of real-time operations such as background scanning, virus removals, and computer cleanup. These processes are quite useful but they may become annoying after you discover that your antivirus tool is consuming almost all of your CPU power.
Avast was experiencing this issue and its users have reported that Avast was constantly experiencing this issue and the CPU usage was constantly over 50%. This can interrupt anything you are doing on your computer and it can become quite annoying after a while. There are quite a few different ways to solve this issue so make sure you follow the article in order to solve the problem.
How to Stop Avast Service from High CPU Usage?
1. Remove Avast Cleanup
It seems that the component most responsible for this problem is Avast Cleanup which acts in real-time in order to free some resources allocated by other background apps. Anything that does its job in real-time can be heavy on the processor so it’s sometimes the best to simply uninstall this component.
- Open the Avast user interface by clicking its icon at the system tray or by locating it in your Start menu entry.
- Navigate to Settings and click the Components tab which should be the second one.

- Click the downward-facing arrow next to the component that you want to remove (Avast Cleanup in this particular example), click Uninstall Component, and then click OK to confirm the uninstallation of the component.
- Restart your PC if Avast prompts you with that option in order to confirm the changes. Check to see if the CPU usage has gone back to normal.
Note: If this does not work for you, you can repeat the same process for the component named Behavior Shield. If this fixes the problem, you can try turning it on again and the CPU usage should remain unchanged.
2. Command Prompt Tweak
This solution is quite simple and it will actually change the Scan Frequency to the maximum value. This will disable the background checks and monitoring and it will only occur once in a while. This may cause some security issues but it’s guaranteed that the CPU usage will go back to normal.
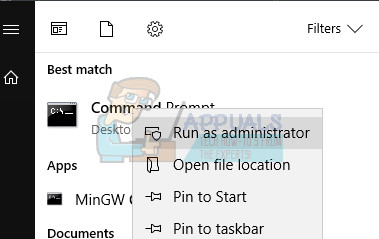
- Use the Windows Key + X key combination in order to open the menu where you should select the Command Prompt (Admin) option. Alternatively, you can right-click on the Start menu for the same effect or you can simply search for Command Prompt, right-click on it and select Run as administrator.
- Type in the following command in order to navigate to this following folder where you will be able to execute further actions:
C:\ ProgramData\AvastSoftware\Avast
- Open the avast5.ini file and insert the following command in line:
[GrimeFighter] : ScanFrequency=999
- Save the file, restart your computer and check to see if the error is resolved immediately.
3. Update Avast to the Latest Version
Certain old versions of Avast become unresponsive since it’s recommended that you always keep both the antivirus and the virus definitions database up to date in order to keep the antivirus tool running successfully. Updating Avast is easy and it’s simple to follow in the steps presented below.
- Open the Avast user interface by clicking its icon at the system tray or by locating it in your Start menu entry.
- Navigate to the Update tab and you will notice that there are two update buttons. One of these buttons is related to the update of the virus definitions database and the other one is related to updating the program itself.

- Most users have reported that updating their virus definitions has resolved the problem but it’s for the best to update both the database and the program by clicking on both of these update buttons, being patient while Avast checks for updates and follow the instructions on-screen in order to follow through the process.
- Check to see if the CPU usage has gone back to normal.
Note: In some cases, if Avast has been affected by malware you might not be able to update it properly and it might show an unknown error while updating.
4. Avast Screensaver Scanning Even Though it Shouldn’t
In some cases, it is related to the Avast Screensaver, which seems to continue the scan even though the screen saver is not running anymore. Even though it doesn’t happen consistently, but often enough, the problem is still there and it’s causing high CPU usage for nothing. The worst part is that it won’t show up in the Avast interface. Here is how to solve the problem:
- Right-click on a random file located on your computer and choose to scan the file with Avast in the context menu.

- A scan result window should pop up and you will be able to see a list of scans that are currently running.
- Locate the Avast Screensaver scan and click the Stop button next to it in order to stop and check to see if the CPU usage has gone back to normal.
5. Repair Avast From Control Panel
If something is wrong with the Avast installation, it’s best to simply repair it by navigating to the Control Panel and repairing it. This solution worked for plenty of people but consider the fact that you may need to readjust settings you may have changed in the meantime.
- First of all, make sure you are logged in with an administrator account as you won’t be able to delete programs using any other account.
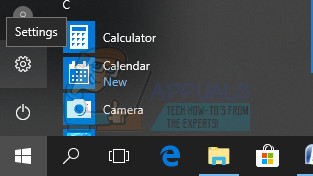
- Click on the Start menu and open Control Panel by searching for it. Alternatively, you can click on the gear icon in order to open settings if you are using Windows 10.
- In Control Panel, select to View as: Category at the top right corner and click on Uninstall a Program under the Programs section.
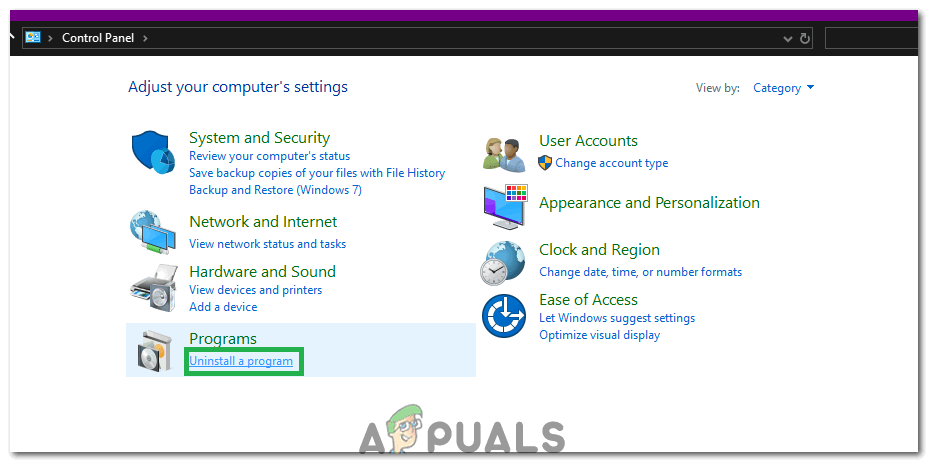
Clicking on the “Uninstall a Program” option - If you are using the Settings app, clicking on Apps should immediately open a list of all installed programs on your PC.
- Locate Avast in Control Panel or Settings and click on Uninstall/Repair.
- Its uninstall wizard should open with two options: Repair and Remove. Select Repair and click Next in order to fix the installation of the program.

Uninstalling Avast From the Control Panel - A message will pop up asking you to confirm the process. Avast will most likely be restarted with the default settings which worked before the error started to occur.
- Click Finish when the uninstalled completes the process and restart your computer to see whether errors will still appear.
6. Disable Mail Shield
Sometimes, the Mail Shield feature of Avast can hinder its performance and cause high CPU usage. Therefore, in this step, we will be disabling the Mail shield. For that:
- Launch Avast from the system tray and click on the “menu” button.
- Select the “Settings” option and click on the “Protection” tab.
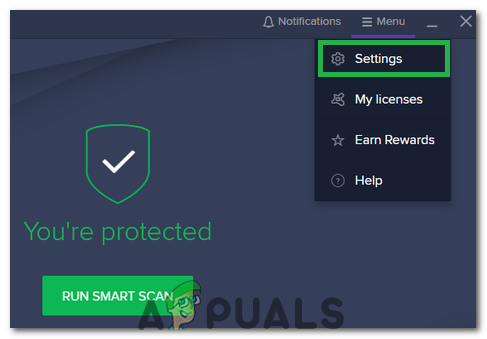
Clicking on the “Settings” option in the menu - In the protection tab, select the “Core Shields” option and scroll down to click on the “Mail Shield” tab.
- Uncheck every option in this tab and click on “Indefinitely” if Avast asks for a time period.
- After this, restart Avast and check to see if the issue persists.
Note: All the other “Shields” in the Core Shields menu should be on. It was reported that if affected by malware, the web shield might not turn on. Therefore, keep an eye out for vulnerability due to certain features being off.
7. Disable Updater Notifications
In certain cases, the high CPU usage might be triggered if the Avast Antivirus is trying to send an update notification but it is getting glitched out due to which this error is being triggered. Therefore, in this step, we will be disabling the updater notifications. In order to do so:
- Open Avast and wait for it to load completely.
- Click on the “Menu” icon on the top right side and select “Settings”.
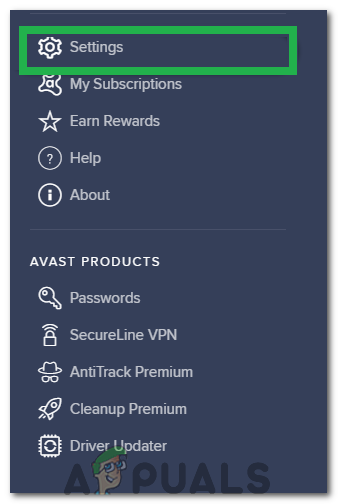
Clicking on “Settings” in the menu - In settings, click on the “Performance” tab from the left pane and then select the “Software Updater” option.
- In the software updater setting, uncheck the “Notifications about new Updates” button and then click on “X” to close the window.
- Now, check to see if the issue persists.
Note: It is also recommended to perform a complete reinstall of Avast after removing it from your computer completely.
8. Remove Un-necessary Avast Add-ons
Avast comes bundled with a lot of additional quirks and features that increase its functionality a lot. However, for most users, these additional features are not needed and they add to the resource usage by the antivirus. Therefore, in this step, we will be modifying the Avast installation by uninstalling some of these features. In order to do so, follow the guide below.
- Press “Windows” + “R” to open the Run prompt.
- Type in “Control Panel” and press “Enter” to open the classical control panel interface.

Accessing the Classic Control Panel interface - Click on the “View by:” option and select “Category”.
- Now, click on the “Uninstall a Program” button under the “Programs” heading.
- In here, right-click on the “Avast Antivirus” option in the list and select “Uninstall”.

Clicking on “Uninstall” - Wait for the request to process and in the window that opens up, click on the “Modify” option.
- In the next window, uncheck all the unnecessary options except for the following ones.
File Shield
Mail Shield
Web Shield
Behavior Shield - Click on the “Change” button and wait for the installation to process.
- After the process is completed, check to see if the issue persists.


