How to Fix Final Fantasy XV Crashing on PC?
It’s been more than 3 years since Final Fantasy XV was released on PC. And although the game has seen countless updates, DLCs, and improvements over the year, players are still experiencing unexpected crashes that take away from the experience. Frequent crashes are still reported to occur on Windows 10 and Windows 11.

We’ve looked into this issue and analyzed dozens of different user reports facing this very issue. As it turns out, there are actually multiple possible causes that might be the root cause of this problem. Here’s a list of culprits you should investigate:
- Outdated GPU drivers – One of the most common causes that are often overlooked is an instance where the GPU drivers and the physics module are outdated. This seems to be an issue on Windows 10 and older. If you haven’t updated your GPU drivers in a while, installing the latest versions might just fix the problem in your case.
- The current TRAM setting is unsustainable – This game has always been bad at managing Texture RAM (since the original launch). And although the developers alleviated the issue to some degree via the various patches released over the year, it’s still an ongoing reason for frequent crashes on low to medium PC configurations. If you are barely over the medium specification requirements, you’ll be better off to set the TRAM setting to Low and lock it to 30 FPS.
- Memory mismanagement during FullScreen mode – As it turns out, there’s a big chance you’ll make the game a lot more stable if you force the game to run in Borderless mode instead of full-screen mode. This is primarily reported to be effective on Windows 11, but you can try it on Windows 10 too.
- Nvidia Turf Effects and Hairworks are enabled – If you’re using a dedicated Nvidia GPU and you have Nvidia Turf Effects and Hairworks enabled, you might want to turn them off if you don’t want to see the game crashing constantly. Square Enix never implemented these features properly for FF XV and you’ll be better off keeping them disabled.
- Hardware full-screen mode is enabled – Another reason why you might see this behavior on Windows 10 is a scenario in which full screen is enforced at a hardware level from the game settings. In this case, you might be able to fix the problem by disabling the hardware full-screen mode from the game configuration menu.
- VSync is enabled on low-end PC – At the expense of seeing constant screen-tearing, you might be better off disabling Vsyns while playing Final Fantasy XV – especially if you’re on a low-end PC. This method is confirmed to be effective on both Windows 10 and Windows 11.
- A second monitor is connected – If you’re launching the game while you have a second monitor connected, you might be able to fix the crashes permanently simply by disconnecting the secondary monitor prior to launching the game. This is especially effective if you have a setup with two or more HDMI splits.
- Missing or corrupted 2017 Visual C++ dependency – One lesser-known scenario that might cause this problem is a scenario in which you’re missing a key Visual C++ dependency (released in 2017) that the game needs in certain scenarios. Another possibility is that the required dependency is corrupted and needs to be replaced. In this case, you should be able to fix the problem by uninstalling every Visual C++ dependency before reinstalling them again.
- GPU is not powerful enough to render the game – If you’re using a low-end GPU that is barely meeting the minimum requirements, you can try tweaking the GraphicsConfig file and toggle off a couple of settings that put a heavy load on your GPU. Additionally, if you have the budget for it, you should also think about upgrading to a more powerful GPU.
- Flow Guard (CFG) is Enabled – If you’re on Windows 10 and you’re using Windows Security as the default security suite, you should take the time to Disable Flow Guard (CFG) from the settings menu of Windows Security. This method seems to have helped a lot of FF XV players experiencing this issue on Windows 10.
- Antivirus interference – If Final Fantasy XV crashes every time the game tries to connect to the game server, it’s possible that your antivirus or firewall is interfering with communications between your local installation and the game server. In this case, you can prevent the problem from occurring by whitelisting the game files in your antivirus settings.
- Windows Page Filing mismanagement – Although this isn’t a recommended fix since it might cause other issues with native Windows components, other Final Fantasy XV players have reported that the crashes stopped occurring once they disabled the Windows Page filing feature.
Now that we went over every potential reason why you might be experiencing these types of crashes, let’s go over every fix that other Final Fantasy XV players have successfully used to get to the bottom of this issue.
1. Update GPU Drivers
The first thing you should do when troubleshooting this issue is to make sure that you’re running on the GPU drivers. Final Fantasy XV (especially the latest DLCs) uses a series of unique physics dependencies that will only get installed with certain driver versions (depending on your GPU).
The ideal way to do this is to use the dedicated utility (from AMD or Nvidia) to make sure that you’re installing the latest driver version according to your GPU model – from Nvidia or AMD.
Depending on if you’re on Nvidia or AMD side, follow one of the sub-guides below to ensure that you’re running on the latest GPU drivers:
Update Nvidia GPU
Nvidia recommends that you take the time to uninstall every remnant driver file first (before installing the latest version) if you’re under suspicion that your GPU driver fleet might be affected by corruption.
Do this in order to briefly switch to the generic driver and ensure that the installation of the new GPU drivers goes according to plan.
Follow the steps below to update to the latest Nvidia GPU according to your particular model:
- Start by opening a Run dialog box – you can do this by pressing Windows key + R.
- Type ‘appwiz.cpl’ inside the text box and hit Enter to open up the Programs and Features menu.
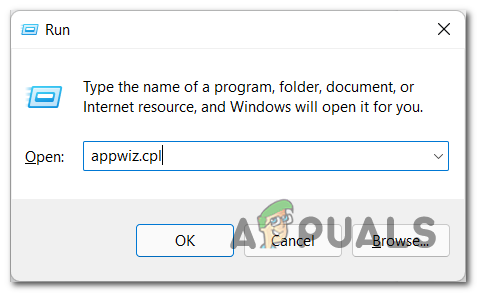
Open up a Programs and Features menu Note: If you see the User Account Control window, click Yes to grant admin access.
- In the Programs and Features menu, click on the Publisher button to order every item based on their publisher.
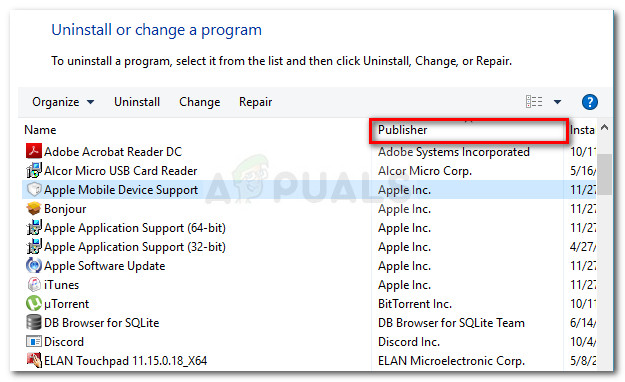
Clicking on the Publisher tab Note: This action will allow us to spot the entires belonging to Nvidia more easily.
- Next, move down and find the entries published by Nvidia Corporation.
- Right-click on every Nvidia item and choose Uninstall from the context menu.
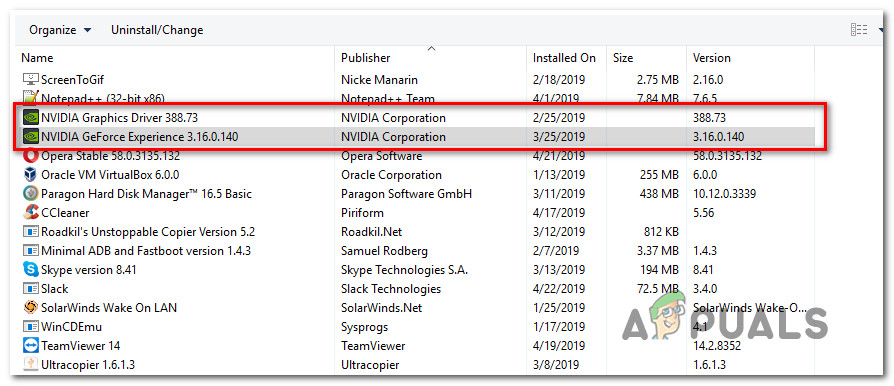
Uninstalling every Nvidia driver - Next, go ahead and uninstall every piece of software published by NVIDIA Corporation from your computer.
- Once the step above is completed, reboot your computer and wait for the next startup to complete.
Note: This action will force the generic GPU drivers to kick back into action. - Once your PC boots back up, visit the official download page of GeForce Experience.
- From the dedicated download page, click on the Download Now button to download the latest version of GeForce Experience.

Downloading GeForce Experience - Start following the outlined steps to install the latest version of GeForce Experience on your PC.
Note: At the confirmation prompt, click Yes to grant admin access. - Open GeForce Experience and navigate to the Drivers page to see if a new driver version is waiting to be installed.
- Next, click on Express installation and follow the remaining prompts to complete the installation of the driver.
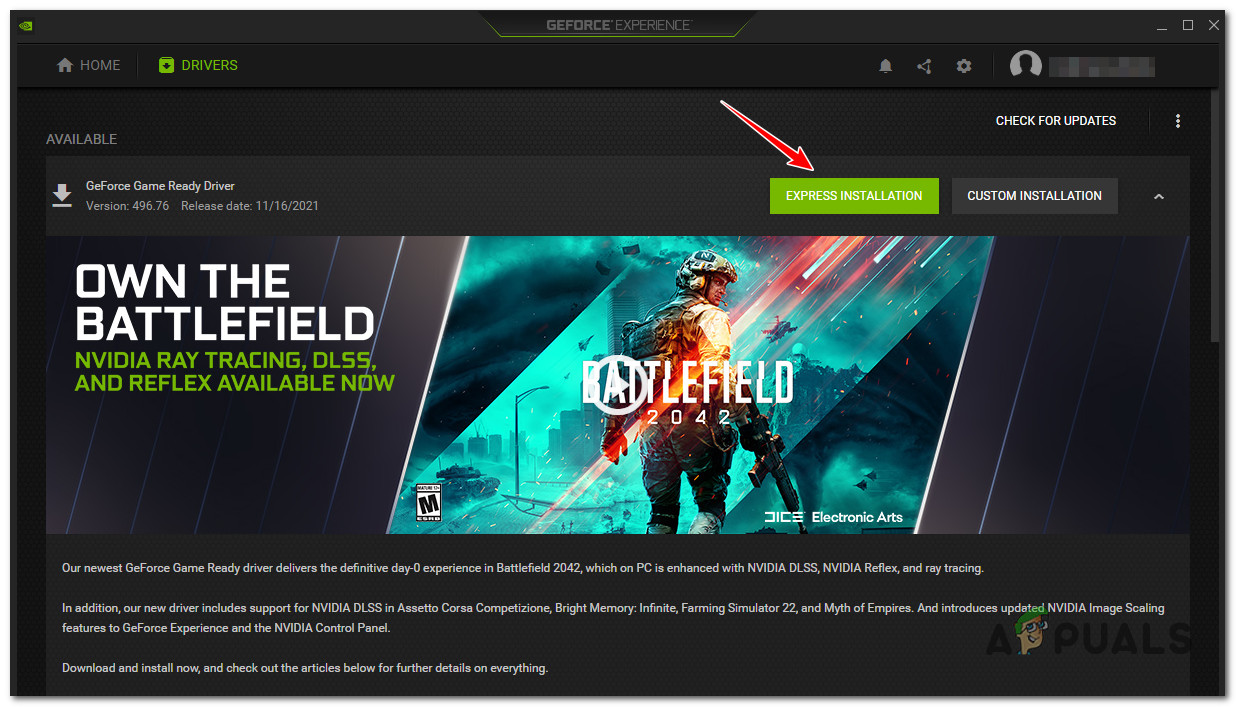
Downloading the latest driver version - Once the latest driver version is installed, reboot your PC in order to finalize the changes.
- Launch Final Fantasy XV once again and see if the crashing issue has disappeared.
Update AMG GPU
On the other hand, if you’re using an AMD graphics card, you should definitely use the cleanup utility before attempting to update your current driver – doing this will ensure that you remove every remnant file from the old driver installation and start from scratch.
Once you do this, you can safely download the latest GPU version using the Auto-Detect utility.
Here are the full steps of this process:
- Open the official download page of the AMD Cleanup Utility link. This should trigger an automatic download of the latest version of the AMD Cleanup Utility.
- Once the download is complete, right-click on the AMD Cleanup Utility and choose Run as administrator from the newly appeared context menu.
- Next, you should see a prompt asking you to boot in Safe Mode to make the utility more effective. Click Yes when this happens.
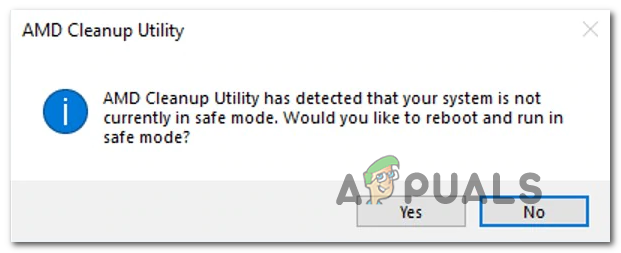
Deploying the cleanup utility Note: What this tool will do is it will uninstall the current AMD drivers, then deploy a system-wide scan that will look for remnant registry files and startup items that contain the AMD driver store signatures. If it finds any data that should no longer be on your system, it will remove it without any friction with other system components. The entire process is automated so there’s no further action on your part.
- To begin the process, click Ok to start the process and have it run in the background.
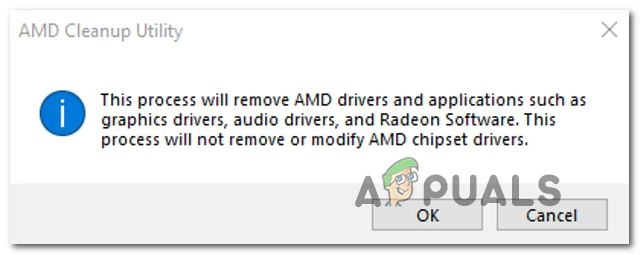
Removing the AMD cleanup utility Note: Once the utility starts, you can expect the display to start flickering before finally going to black for a few seconds. This is perfectly normal.
- After the operation is complete, click on Finish to reboot your computer normally and make the transition to the generic drivers.
- Once your PC boots back up, visit the official AMD page of the Auto-Detect and Install Graphics utility.
- On the Auto-Detect page, scroll all the way down to the Auto-Detect and Install Radeon Graphics Drivers for Windows section and click on Download Now.

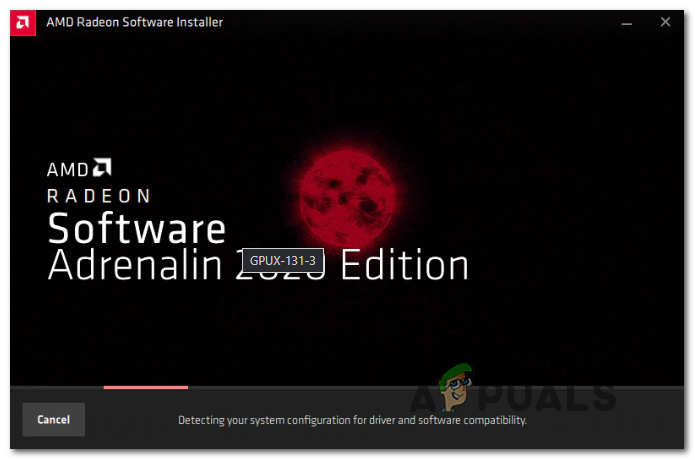
Downloading the latest version - Double-click on the executable that you’ve just downloaded and follow the remaining prompts to install Radeon Adrenalin.
- Once the installation is complete, you should see AMD Adrenalin automatically launching itself as it starts scanning for the latest compatible AMD graphic drivers.
- Wait patiently until the driver scan is complete.
- Next, you will be prompted to install the appropriate driver according to your model. Hit Install when the prompt appears.
- At the EULA (End User License Agreement), click on I agree to complete the procedure.
- Reboot your PC one final time to complete the operation, then launch Final Fantasy XV once again and see if the game is no longer crashing.
If the same problem is still occurring, move down to the next potential fix below.
2. Set TRAM to Low and lock it to 30 FPS
Once you’ve ensured that your current fleet of GPU drivers is not to blame for this problem. the next thing you should troubleshoot is a situation where the TRAM setting you’re using when playing Final Fantasy XV is unsustainable.
This is quite frequent with low PC configurations that are barely meeting the minimum requirements. If this scenario is applicable to you, our recommendation is to set the TRAM setting to Low and lock your FPS to 30.
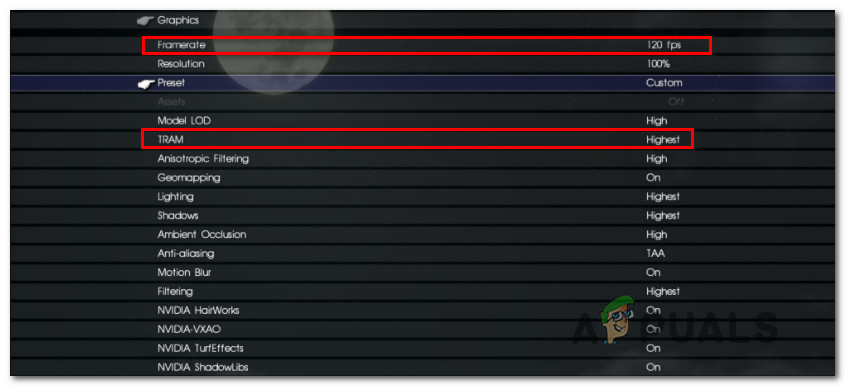
This action is vetted by a lot of community members that are stuck with low PC configurations. You can modify these settings by opening Final Fantasy XV and going to Settings > Graphics.
Once you’re inside, set the TRAM to Low and then change the Framerate to 30 FPS before saving the changes.
Once you make these changes, save the changes and restart the game before loading your save game and testing to see if you’re still experiencing constant crashes.
If the issue is still ongoing, move down to the next method below.
3. Disable Nvidia Turf Effects and Hairworks
If you’re using an Nvidia GPU, you’ll notice a couple of additional Nvidia-powered settings under the Graphics settings of Final Fantasy XV.
After testing with different configurations and after looking at various user reports, we recommend resisting the urge to enable them.
You can leave Nvidia-VXAO and Nvidia ShadowLibs enabled if you have a capable PC, but you should toggle both Nvidia TurfEffects and Nvidia Hairworks to Off.

You can do this by opening the game and going to Settings > Graphics.
Note: It looks like more than 3 years after the PC launch of Final Fantasy XV, Square Enix still didn’t make these options reliable, so you’re better off sacrificing some graphical bells and whistles in order to achieve stability.
After you disable these graphics settings, restart the game and see if the problem is now fixed.
If the same problem is still ongoing or you already had Nvidia TurfEffects and Nvidia Hairworks disabled, move down to the next potential fix below.
4. Switch from full screen to Borderless
As it turns out, a popular reason why you might be experiencing this problem while playing Final Fantasy XV on PC is a case in which there’s some kind of memory mismanagement happening while you play the game in full-screen mode.
This is entirely beyond your control as this problem happens due to the developer’s fault and it’s only reported to occur with certain PC configurations.
Fortunately, there is a way to fix crashes caused by this problem, but you’ll, unfortunately, have to move away from full-screen mode into borderless mode.
The game doesn’t have a menu toggle that you can just modify in order to achieve a borderless state, so you’ll need to do this by editing the GraphicsConfig.ini file of the game.
For step by step instructions on how to do this, follow the instructions below:
- Ensure that Final Fantasy XV, as well as Steam, are closed and not running in the background.
- Open File Explorer and navigate to the location where you installed Final Fantasy XV.
Note: If you got it through Steam, you’ll find the game in the following location:C:\Program Files\Steam\My Games\FINAL FANTASY XV
- Next, navigate through the following folders until you finally see the GraphicsConfig.ini file:
76561197985784977 > savestorage
- At this point, we recommend creating a backup of the GraphicsConfig.ini so you have a fail-safe in case you make a mistake when editing the file. To do this, right-click on the file and click Copy, then press Ctrl + V to make a copy of the file.
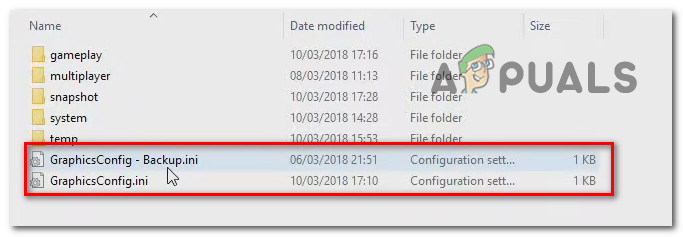
Creating a backup of the config file of Final Fantasy XV Note: This step will save you from having to reinstall the game in case you miss modifying the config file.
- Next, right-click on the original GraphicsConfig.ini (not the backup) and click on Open with > Notepad in order to be able to edit the values.
- Once you see the values inside the GraphicsConfig.ini file, scroll down and locate HardwareFullScreenMode. Once you find it, change the assigned value to 0.
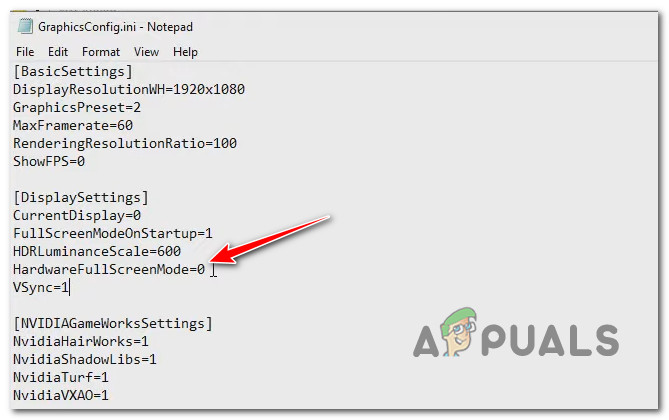
Modify the HarwareFullScreen value - After you made this modification, click on File > Save from the ribbon menu at the top to save the change and make it permanent.
- Once the changes have been saved, close the Notepad file and launch the game once again to see if the crashes stop.
In case Final Fantasy XV still crashes unexpectedly despite the fact that you’re playing in borderless mode, revert the change you did above and move to the next method below.
5. Disable Hardware fullscreen mode
If editing the config file didn’t fix the issue in your case, the next thing you should troubleshoot is a scenario where the full screen is enforced at a hardware level from the game settings. According to community members, this is typically a problem on PC rigs with a dual-GPU setup.
Fortunately, you can fix the problem if this scenario is applicable by opening the Graphics Configuration Tool of Final Fantasy XV and unchecking the box associated with Hardware fullscreen mode.
If you want to give this fix a try, follow the instructions below:
- First things first, ensure that Final Fantasy XV is closed and not running in the background.
- Open File Explorer and navigate to the following location:
C:\Program Files\Steam\My Games\FINAL FANTASY XV\tools\GraphicsConfigurationTool
- Once you’re inside the correct location, double-click on the GraphicsConfigurationTool executable.
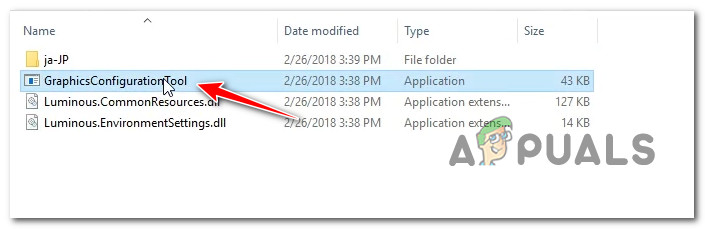
Opening the GraphicsConfigurationTool - Once you’re inside the Graphics configuration menu, go under Basic Settings and uncheck the box associated with Hardware fullscreen mode.
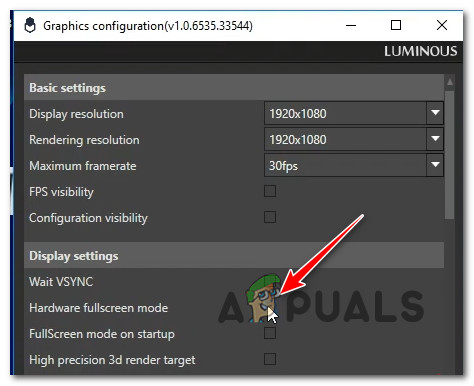
Disable the hardware full-screen mode - Save the changes, then launch the game once again and see if the problem is now resolved.
In case the same kind of issue is still occurring, move down to the next potential fix below.
6. Disable VSync (if applicable)
As it turns out, if you’re using V-Sync on a low-end PC using an Nvidia GPU, you might prevent these constant Final Fantasy XV crashes by disabling V-Sync via Nvidia Control Panel.
Sure, doing this will mean that you’ll notice some degree of screen tearing as you’re playing the game, but it’s still better than being constantly booted out from the game as it crashes.
We’ve managed to find a lot of users reporting that in their case the problem was fixed entirely after they used the Nvidia Control panel to change the Program Settings for Final Fantasy XV in order to ensure that Vertical Sync remains disabled.
If this scenario is applicable to you and you’re looking for step by step instructions on disabling VSync on Final Fantasy XV, follow the instructions below:
- Ensure that Final Fantasy XV is closed and not running in the background.
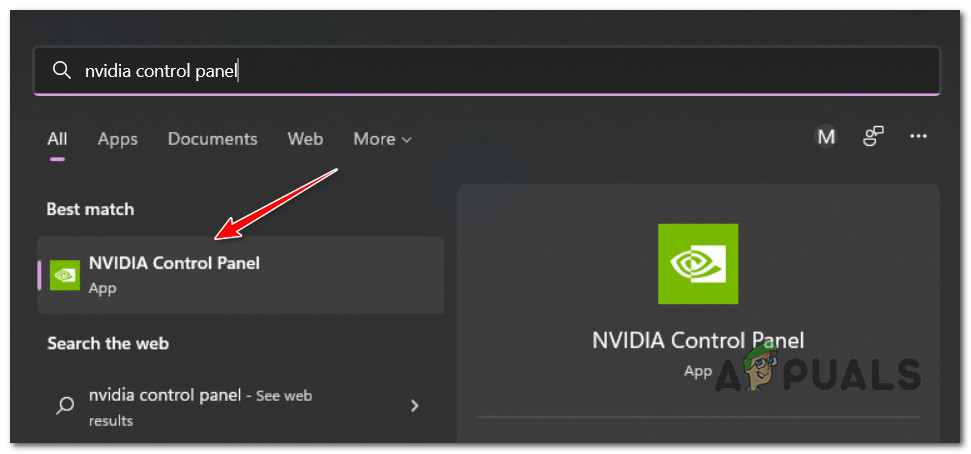
- Press the Windows key on your keyboard and type ‘Nvidia Control Panel‘.
- From the list of results, click on Nvidia Control Panel.
Accessing the Nvidia Control Panel - Once you’re inside Nvidia Control Panel, click on Manage 3D settings from the side menu on the left.
- Next, go over to the right-hand side menu and click on the Program Settings tab.
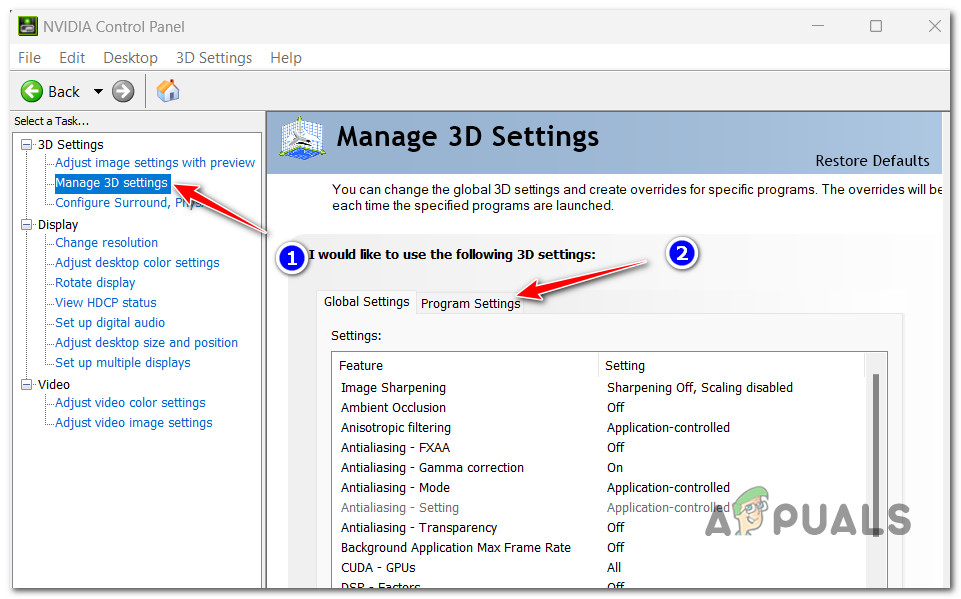
Accessing the Program Settings menu - From the Program Settings menu, select Final Fantasy XV under Select a program to customize.
- Scroll down and change the drop-down menu associated with Vertical sync to Off, then click Apply to save the changes.

Disabling Vertical sync for Final Fantasy XV - After this change has been operated and saved, launch Final Fantasy XV once again and see if the problem is now fixed.
If you’re still experiencing the same kind of crashes, move down to the next method below.
7. Disconnect the second monitor (if applicable)
If you’re using a dual monitor setup, you might be able to alleviate the Final Fantasy XV crashes by disconnecting the secondary monitor before launching the game.
The community reports that this fix is effective in scenarios where the dual monitor setup is achieved via an HDMI split.
So before launching the game, take the time to physically unplug the second monitor from your HDMI port.
After you do this, launch the game and see if the problem is now resolved.
In case this method is not applicable or unplugging the monitor didn’t alleviate the frequency of the crashes, move down to the next method below.
8. Reinstall every Visual C++ dependency
As it turns out, another potential reason why you might be experiencing this problem is a scenario in which a Microsoft C++ Redistributable released in 2017 is needed by Final Fantasy XV but cannot be located.
Note: Keep in mind that this Visual C++ package is extremely important to ensure that Final Fantasy XV is capable of utilizing the DirectX shaders that the game uses on Windows 11.
If you think that this method is applicable, you should start by uninstalling the Visual C++ 2017 Reddit package (if you already have it installed) and do a fresh installation from the official Microsoft channels.
Here’s a quick step by step guide that will walk you through the entire process:
- Press Windows key + R to open up a Run dialog box. Next, type ‘appwiz.cpl’ and press Enter to open up the Programs and Features screen. s

Opening the Programs and Features menu - In case the Microsoft Visual C++ 2017 Redistributable is already installed, right-click on it and choose Uninstall from the context menu to get rid of it.
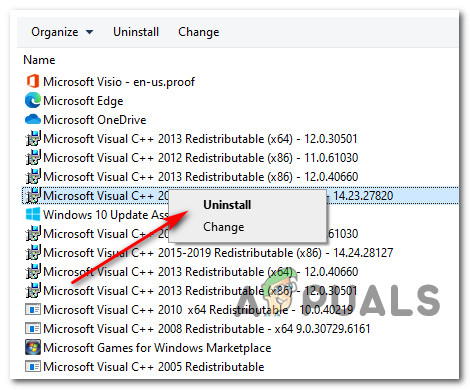
Uninstall the potentially corrupted Visual C++ dependency Note: If you don’t have this Visual C++ Redistributable suite installed on your computer, skip this step entirely.
- Next, inside the uninstallation screen, follow the on-screen prompts to complete the installation, then restart your computer and wait for the next startup to complete.
- Once you’re finished with the step above, download one of the Visual C++ 2017 redist packages below depending on your OS architecture (32-bit or 64-bit):
64-Bit Visual C++ 2017 Redistributable
32-Bit Visual C++ 2017 Redistributable - Double-click on the recently downloaded vc_redist installer and click Yes if you’re prompted by the UAC user account prompt.
- Follow the on-screen prompts to complete the installation of the latest version of Microsoft Visual C++ 2017 Redistributable.
- Restart your PC and launch Final Fantasy XV to see if the problem is now resolved.
In case you’re still experiencing the same indiscriminate crashes while playing the game, move down to the next method below.
9. Edit the GraphicsConfig file to force Window mode
In case you are stuck with a low-end graphics card that is just barely meeting the minimum requirements of Final Fantasy XV and you’re experiencing these crashing during heavily populated areas of the game, it might help if you modify the GraphicsConfig.ini file in order to force Window mode.
This will end up preventing the memory leakage problem that was mentioned above. A lot of affected users have confirmed that going this route finally made the game stable enough to play without worrying about constant crashes.
If you’re prepared for this trade-off (playing the game in window mode), follow the instructions below to learn how to edit the GraphicsConfig file of your Final Fantasy XV installation:
- Start by making sure Final Fantasy XV and Steam are closed and not running in the background.
- Next, open File Explorer and navigate to the location where you installed Final Fantasy XV.
Note: If you got it through Steam, you’ll find the game in the following location:C:\Program Files\Steam\My Games\FINAL FANTASY XV
- Navigate through the following folders until you finally see the GraphicsConfig.ini file:
76561197985784977 > savestorage
- At this point, we recommend creating a backup of the GraphicsConfig.ini so you have a fail-safe in case you make a mistake when editing the file. To do this, right-click on the file and click Copy, then press Ctrl + V to make a copy of the file.
Creating a backup of the config file of Final Fantasy XV - Right-click on the original GraphicsConfig.ini (not the backup) and click on Open with > Notepad in order to be able to edit the values.
- After you manage to open the GraphicsConfig.ini file with Notepad, scroll down under Basic Settings and change the value of FullScreenModeOnStartup to 0.
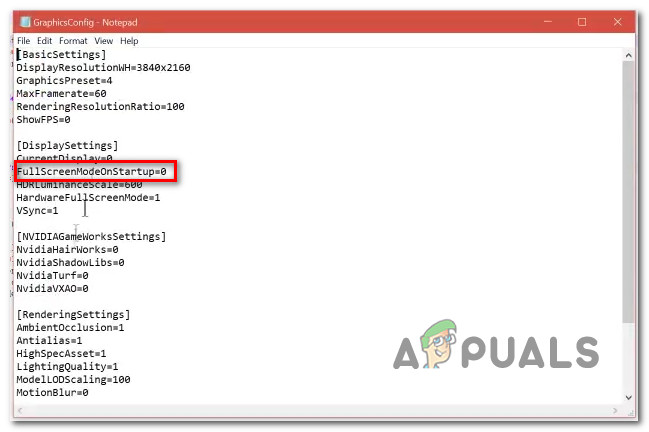
Changing the Fullscreen mode on startup to 0 - Go to File > Save to save the changes you just operated.
- Launch the game once again conventionally and play normally to see if the unexpected crashes stop.
If the problem is still not fixed or you were already playing in window mode, try the next fix below.
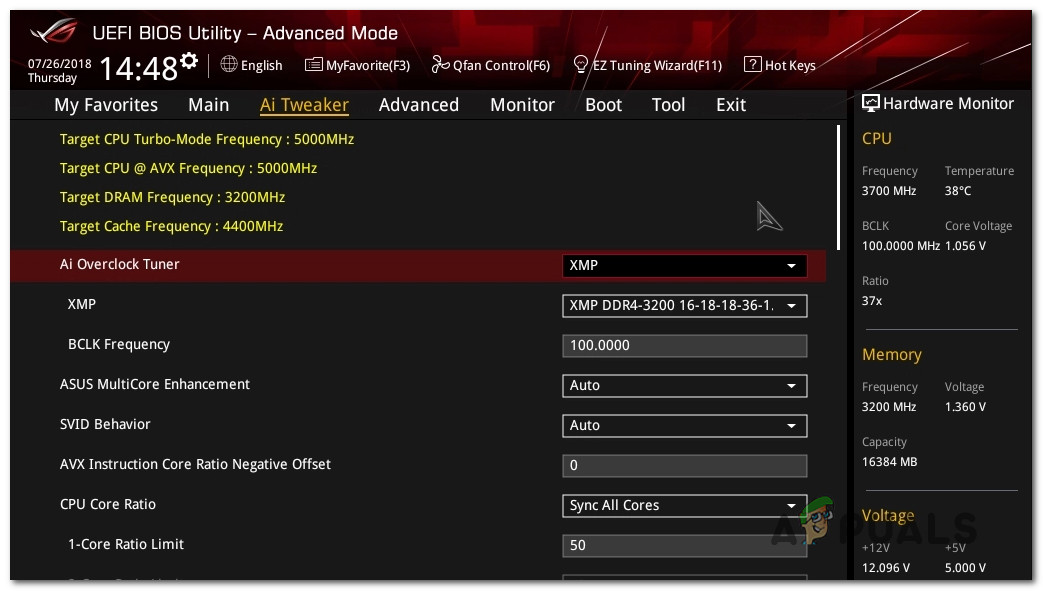
10. Disable overclocking or underclock your GPU (if applicable)
Instability while playing Final Fantasy XV on PC is also encountered in instances where you’re using an overclocked GPU card that is simply not stable enough to run the game.
Most cases will occur if you went overboard with your GPU frequencies and the voltages can’t keep up. Another possibility is that due to your overclocking, your PC is unable to supply enough power.
A couple of affected users that were also dealing with this problem have reported that Final Fantasy XV was finally running smoothly without crashesafter they reduced their overclocking frequencies for both their CPU and GPU.
If this method is applicable, we recommend reverting to the default values will allow you to figure out if the problem is indeed occurring due to overclocking.
After resetting the overclocked frequencies to the default, launch the game once again and see if you’re still dealing with the same kind of crashes.
If this method was not applicable or it didn’t improve your gaming experience in any way, try the next fix below.
11. Disable Flow Guard (CFG) in Windows Security (Windows 10 Only)
If you’re still on Windows 11 and you’re using Windows Security as the default antivirus + firewall solution, you should also investigate whether the Flow Guard (CFG) feature is actually causing these unexpected crashes when playing Final Fantasy.
As it turns out, the crash might occur as the CFG feature flags some code from the game as potentially malicious and terminates the app.
Note: This is is a security option meant to prevent apps installed under Windows from taking unwanted actions. However, in this case, it’s just a false positive that can simply be ignored.
If this scenario looks like it could be applicable, follow the instructions below to disable the Flow Guard (CFG) feature in your Windows Security to prevent this scenario from repeating when you’re playing the game in the future.
Here’s what you need to do:
- Press Windows key + R to open up a Run dialog box. Next, type ‘ms-settings:windowsdefender’ inside the text box and press Ctrl + Shift + Enter to open up Windows Security with administrative privileges.
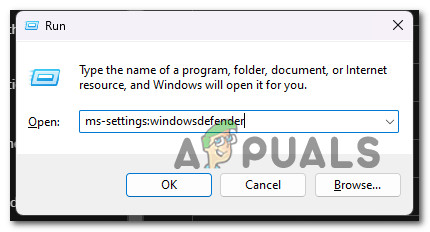
Accessing the Windows Security menu - From the Settings menu that just appeared, click on Windows Security.
- Once you’re inside the Windows Security menu, click on App & Browse control.

Accessing the App & Browser control menu - Next, scroll down to the Exploit protection section and click on Exploit protection settings.
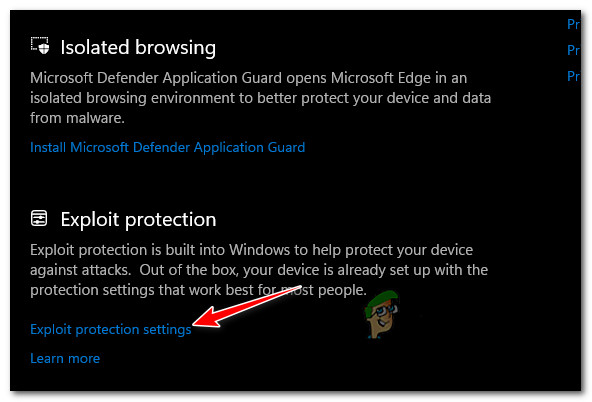
Accessing the Exploit Protection Settings - Next, access the System settings tab and change the drop-down menu of Control flow guard (CFG) to Off.Note: Additionally, you can go to Program Settings and create a custom rule for Final Fantasy XV that will only disable the CFG feature for Final Fantasy XV.
- Save the changes, then reboot your PC and launch Final Fantasy XV once again to see if the problem is now fixed.
If the crashes are still occurring, move down to the next method below.
12. Whitelist the game in AV settings
If you notice that the game crashes every time you attempt to connect to Square Enix servers, you should seriously investigate a scenario in which your activity is interfering with the connection between your local installation of Final Fantasy XV and the game server.
In this case, the only method that will spare you from having to uninstall the overprotective suite is to whitelist the game in order to prevent your antivirus or firewall from interfering with it and blocking the connection with the Square Enix servers.
Note: In case you’re using a 3rd party security suite, the instructions for whitelisting the game’s files will be different depending on which security tool you’re using. Since we can’t provide you with a definitive guide, the best thing you can do is search online for specific steps of whitelisting applications according to the antivirus or firewall that you’re using.
On the other hand, if you’re using Windows Security as the default antivirus suite, follow the instructions below to whitelist the Final Fantasy XV executable in your antivirus settings:
Note: The steps below will work for every recent Windows version (Windows 7, Windows 8.1, Windows 10 and Windows 11)
- Start by pressing Windows key + R to open up a Run dialog box.
- Type ”control firewall.cpl” and press Enter to open up the classic interface of Windows Firewall. At the UAC (User Account Control), click Yes to grant admin access.
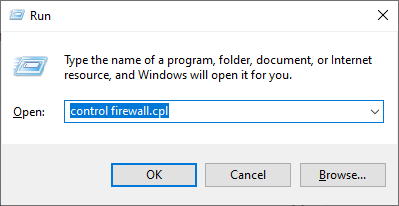
Accessing the Firewall settings - Next, use the menu on the left to click on Allow an app or feature through Windows Defender Firewall.
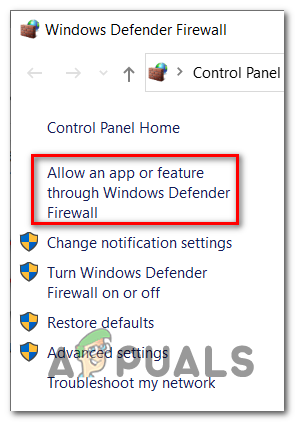
Allowing an app in Windows Defender - From the Allowed apps menu, click on Change settings button and allow admin access by clicking Yes at the UAC (User Account Control) prompt.
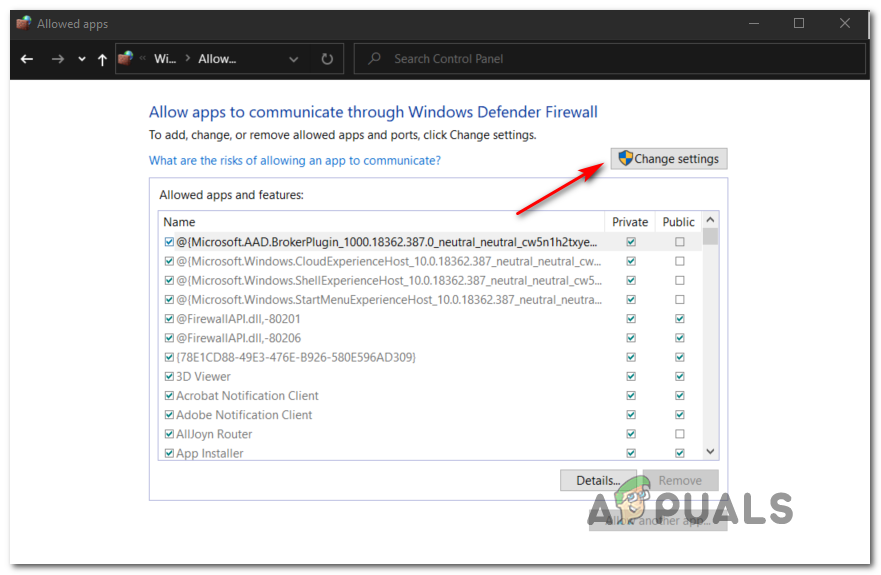
Changing the Settings - Once you have the necessary permissions, move down through the list of allowed applications and see if you spot the entries associated with Final Fantasy XV.
- If they’re missing, click the Allow another app button, then click Browse, navigate to their location, and add all the executables belonging to Final Fantasy XV from the game’s installation folder.
- Save the changes, restart your PC and launch Final Fantasy XV once again and see if you are still getting the crash while attempting to connect to Square Enix servers.
If the problem is still not fixed, move down to the next potential fix below.
13. Disable the Windows Paging File (Not Recommended)
If you’ve followed every step above and you still haven’t been able to stop Final Fantasy XV from crashing unexpectedly, the last thing you can do is disable the Windows Paging file feature.
This is by no means recommended as it might cause friction with other native Windows apps, but a lot of affected users dealing with this issue on low-end PC configurations have confirmed that this fix finally allowed them to play the game normally.
If you are prepared to go for this method, follow the instructions below to disable the Windows Paging file:
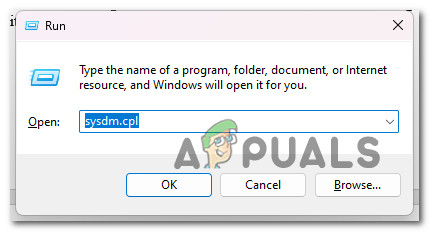
- Press Windows key + R to open up a Run dialog box.
- Next, type ‘sysdm.cpl’ inside the text box and press Ctrl + Shift + Enter to open up the System Properties screen with admin access.
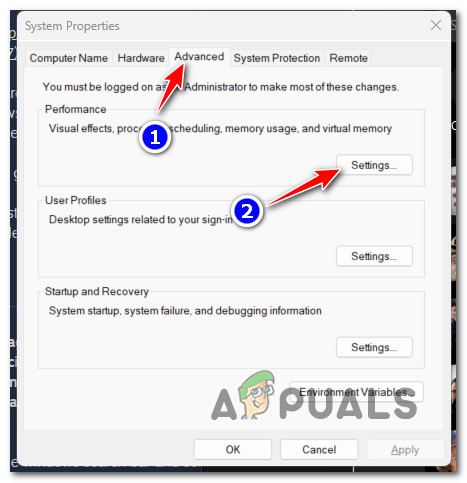
Accessing the System Properties menu - Once you’re inside the System Properties screen, access the Advanced tab from the menu at the top, then click on the Settings button associated with Performance.
Accessing the Performance settings - From the Performance Options menu, click on the Advanced tab at the top, then click on the Change button under Virtual Memory.
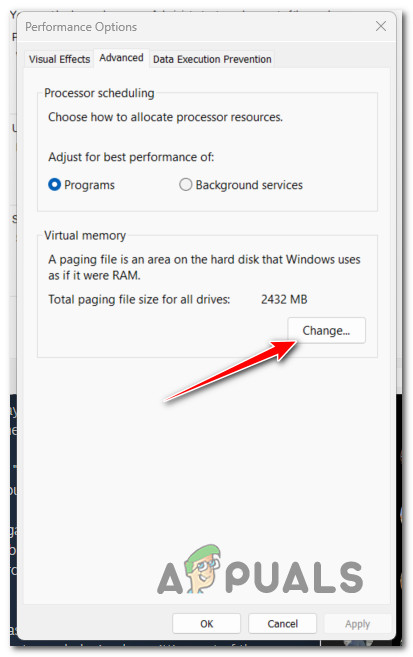
Changing the Default Memory behavior - Once you’re finally inside the Virtual Memory menu, uncheck the box associated with Automatically manage paging file size for all drives.
- Next, select the No paging file radio button and click Ok to save the changes.
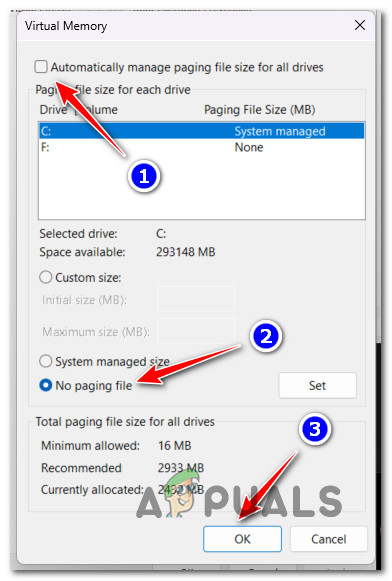
Disabling the Paging file - Restart your PC and see if the problem is fixed once the next startup is complete.


