How to Fix Final Fantasy XIV Error 90001
Some users seem to get the Error 90001 every 5 to 10 minutes when playing the Final Fantasy XIV Online despite being connected to a reliable internet connection. This problem is typically reported on Windows 7 and Windows 10.
After investigating the issue, it turns out that there are several different causes that might end up causing this particular error code. Here’s a shortlist of potential culprits:
- Game server issue – It’s possible that you’re seeing this error due to a server issue that is currently affecting the game mega servers in your region. If this scenario is applicable, all you can do is to confirm the server problem and wait for the developers to fix the problem on their side.
- Router inconsistency – In case you determine that you’re dealing with a local inconsistency, your first attempts are fixing this problem should be to restart and then reset your router. This fix is quite effective in instances where you’re using an older router working with limited bandwidth (especially if a lot of devices are connected to it at the same time).
- The Network Address Translation is closed – Another potential reason why this error will occur is due to the fact that your NAT is closed. If that’s the case, the exchange of data is inhibited, so the connection is not stable. To fix the issue in this case, you can either enable UPnP from your router settings or you can forward the ports required by the games manually.
- Network Interface Controller issue – The Network Interface Controller that you’re currently using can also be responsible for the apparition of this error code. It’s possible that it’s configured to kill power during idling periods, which might force the game server to disconnect you. In this case, you can fix the problem by disabling energy-efficient ethernet, disabling the setting that cuts power during idle periods, and update the drive firmware to the latest version.
- A firewall is blocking the connection – It’s also possible that the firewall you’re actively using end up causing the connection interruption due to a false positive. In this case, you should be able to fix this problem by whitelisting the game and the ports used by the game from your firewall settings. In the event that you’re using a 3rd party security suite, you can also fix the problem by uninstalling the 3rd party suite altogether.
- Using a GPN service – If your Internet connection is inherently bad and you’re experiencing connectivity issues with multiple games, you can also consider using a service like WTF fast to optimize your connection and improve Ping and Lag values.
Method 1: Checking for Server Issues
If this is very unusual for you (you’re not typically getting these types of disconnects), you should start this troubleshooting guide by checking whether the game is currently having some server problems that might cause the 90001 error.
Fortunately, there is one easy way of checking whether there are any sever problems that are currently affecting Final Fantasy XIV Online. Just open your default browser and check on the server status page of FFXIV to see if there are any issues with servers in your area.
Once you’re inside the status page, go ahead and select the Data Center associated with your region, then check on the status of the sever that’s triggering the 90001 error.
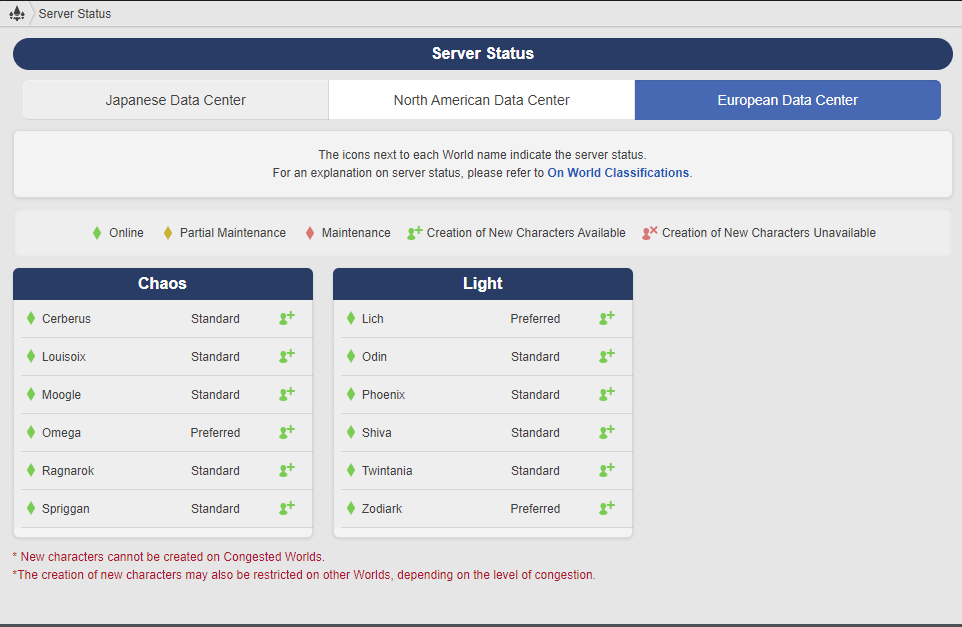
In case of the server you’re currently connected to shows as Partial Maintenance or Maintenance, the issue is certainly beyond your control. In this case, the only viable fix is to connect to a different server while this error is resolved or wait for the developers to fix the server problem.
However, in case you have confirmed that you’re not actually dealing with a server issue, move down to the next method below to deploy the first potential fix.
Method 2: Restarting or Resetting your router
Once you establish that the problem is not occurring for other issues, your fist choice at resolving your local issue is to troubleshoot for a network inconsistency. This problem is quite frequent with routers working with limited bandwidth, especially in situations where they end up flooded with data that they can’t handle.
If this scenario is applicable, start by connecting any non-essential device that’s currently connected to the network, then performing a router reboot or reset in order to clear any temp data that might be causing this problem.
Our recommendation is to start with the less intrusive procedure (router reset) and work consider a router restart in case the reboot doesn’t fix the problem.
A. Restarting your router
A router reboot will end up clearing most connectivity issues you have with games (including the 90001 error) by clearing the temporary TCP / IP data without causing any data loss.
Several affected users have confirmed that once they’ve restarted their router and re-established the internet connection, the problem went away automatically.
To go for a router restart, look to the back of your other and press the On / Off button once to cut off power. After you do this, disconnect the power cable from the power outlet to ensure that you also drain the power capacitors.
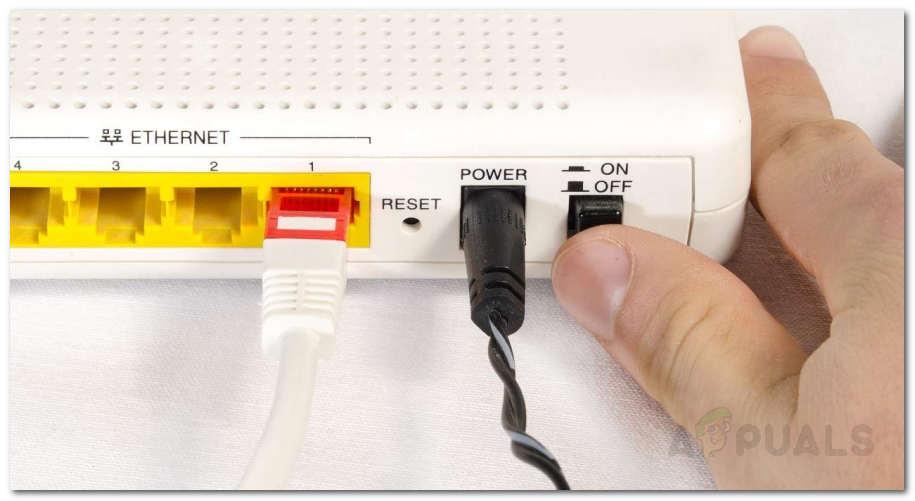
Once you completely manage to cut power, wait for at least 1 full minute before restoring power and waiting for Internet connection to be re-established.
After Internet access is back, return to Final Fantasy XIV Online and repeat the action that was previously causing the 90001 error to see if the problem is now resolved.
In case the same problem returns, move down to the next potential fix below.
B. Resetting your router
If the simple restart didn’t work, your next step should be to reset your router. But before you advance forward with this procedure, keep in mind that this operation will likely mean that any personal settings you’ve previously established for your router will be removed – This includes saved login credentials, whitelisted ports, forwarded ports and blocked IP ranges.
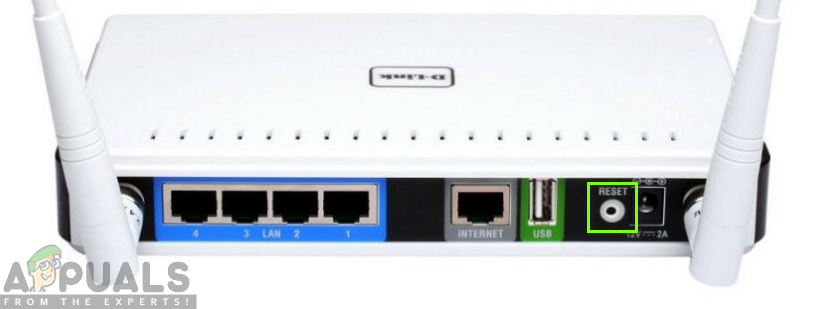
Once you understand the consequences, you can start the operation by pressing and holding on the reset button on the back of your router. But in most cases, you’ll need a sharp object like a small screwdriver or toothpick to reach the Reset button.
Initiate a router reset by pressing and holding on the reset button for 10 seconds or until you see the front LEDs flashing at the same time.
Note: Most manufacturers are making it inaccessible in order to prevent accidental presses.
Note 2: Before you press the reset button, make sure to have your ISP credentials at the ready in case you need to re-create the Internet connection.
Once the procedure is complete and Internet access is re-established, launch Final Fantasy XIV once again and attempt to recreate the scenario in which the error occurs.
In case you still end up seeing the 90001 error code, move down to the next potential fix below.
Method 3: Ensure that FFXIV ports are Forwarded
If you’ve previously eliminated a potential network inconsistency, your next quest should be to find out if the 90001 error is occurring due to a NAT (Network Address Translation) issue.
If your NAT is closed, the game server will have trouble exchanging data with your end-user computer, so you can expect to see these types of disconnects regardless of the server you are connecting to.
Fortunately, most routers nowadays are perfectly capable of keeping your NAT open with a feature called Universal Plug and Play (UPnP). What this essentially does is it will automatically open the ports needed by the game you’re trying to play so that your machine can connect to external servers without issues.
In case your router supports automatic port forwarding, access your router settings and enable UPnP.
However, if your router doesn’t support UPnP, you will need to forward the ports required by Final Fantasy XIV Online manually from your router settings. But keep in mind that the ports you need to open will be dependant on the platform where you’re playing the game.
If you’re planning to forward the ports manually, follow the instructions below:
- Open your default browser and type one the following generic addresses inside the navigation bar and press Enter to access your router settings menu:
192.168.0.1
192.168.1.1
Note: In most cases, one of these 2 generic addresses should allow you to access your router settings. But if none of them work, you should find the IP address of your router and use that instead.
- Once you finally arrive at the initial login screen, insert your custom login credentials if you previously established any. In case it’s the first time you’re visiting this page, it’s likely that you can use the default credentials that most routers have – admin as user and 1234 as password.

Accessing your router settings - Once you are finally inside your router settings, look for the Advanced Menu (Expert Menu) and see if you can find an option named NAT Forwarding (Port Forwarding or Virtual Servers).
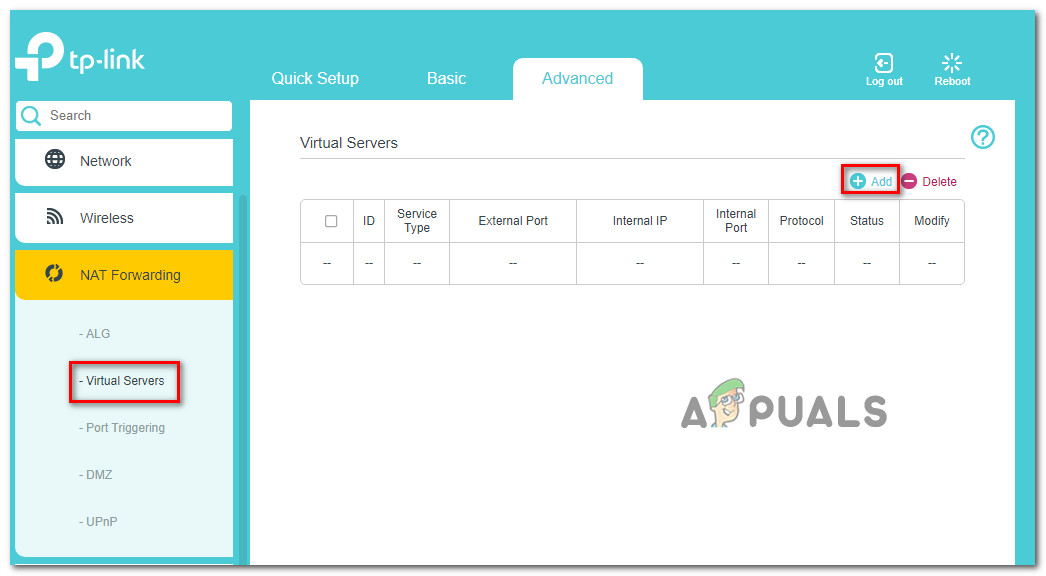
Adding ports to the Forwarding list Note: The exact names and locations will be different depending on your router manufacturer and model.
- Next, go ahead and open the ports required by Final Fantasy XIV Online manually according to the platform that you’re using, then save the modifications:
Final Fantasy XIV Online - PC
TCP: 54992-54994,55006-55007,55021-55040

Final Fantasy XIV Online - Steam
TCP: 27015-27030,27036-27037,54992-54994,55006-55007,55021-55040
UDP: 4380,27000-27031,27036

Final Fantasy XIV Online - Playstation 4
TCP: 1935,3478-3480,8080,55296-55551
UDP: 3074,3478-3479,55296-55551

Final Fantasy XIV Online - Playstation 3
TCP: 3478-3480,5223,8080,54992-54994,55006-55007,55021-55040,55296-55551
UDP: 3074,3478-3479,3658,55296-55551
- Once every port you need is successfully opened, save the changes then restart both the router and the PC or console you’re using to play the game and see if the problem is now resolved.
In case you’re still seeing the same 90001 error, move down to the next potential fix below.
Method 4: Tweaking the NIC settings
According to some affected users, the 90001 error can also occur because the connection with the game server is being broken up by something related to your particular NIC (Network Interface Controller).
This particular issue is quite common with high-end network cards that have the habit of killing power in order to preserve energy when the PC is idle. This is a useful feature, but as it turns out, it can create problems with Final Fantasy XIV.
Several affected users have confirmed that this problem was resolved after they access the Properties screen of your NIC (via Device Manager) and disabling Energy Efficient Ethernet and the setting that cuts out power during idle periods. On top of this, you’ll also need to force your operating system to update to the latest driver version available.
If this scenario is applicable, follow the instructions below to tweak the Network Interface Controller settings in order to stop the conflict with Final Fantasy XIV:
- Press Windows key + R to open up a Run dialog box. Next, type ‘devmgmt.msc’ inside the text box and press Enter to open up Device Manager.
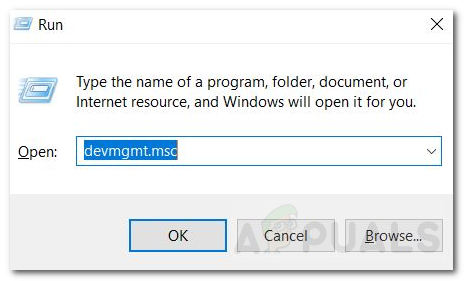
Device Manager - Once you’re inside Device Manager, scroll down through the list of installed devices and expand the drop-down menu associated with Network Adapters.
- Next, start by right-clicking on the Network Interface Controller that you’re actively using and click on Update Driver from the newly appeared context menu.
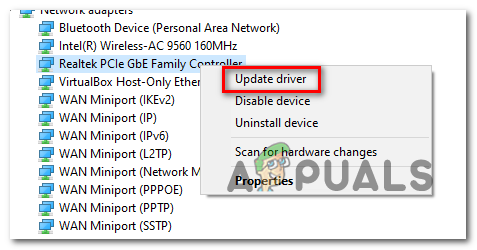
Updating the NIC driver - Once you get to the second screen, click on Search automatically for updated driver software and wait for the initial scan is complete.
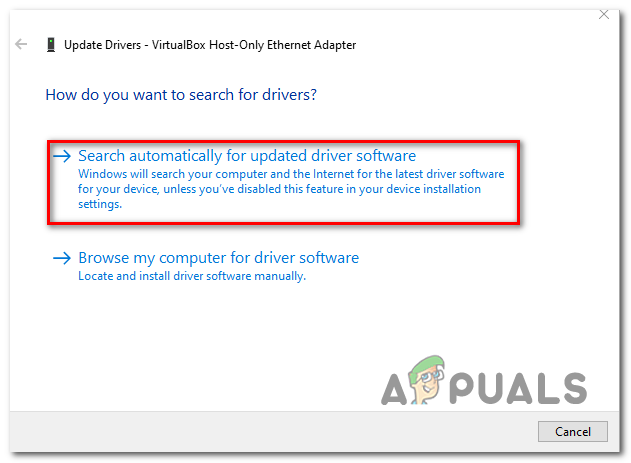
Updating the NIC driver via Device Manager - In case a new version of the NIC driver is discovered, follow the on-screen instructions to complete the installation of the new driver version.
- Once the new driver version is installed, right-click on the NIC Driver once again and click on Properties from the context menu this time.
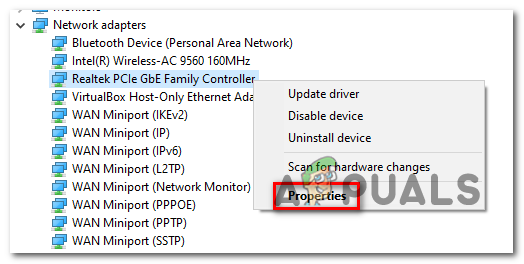
Accessing the Properties screen of the NIC device - Inside the Properties screen of your NIC device, go ahead and select the Power Management tab and uncheck the box associated with Allow the computer to turn off this device to save power.
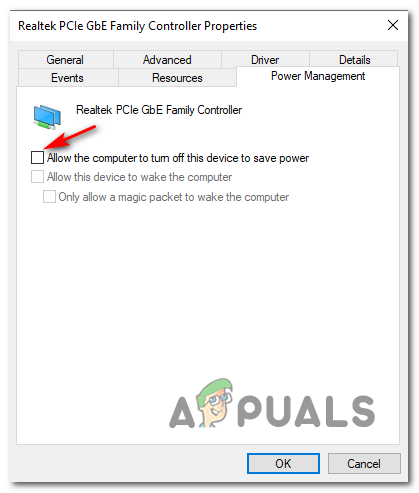
Disabling the ability to save power in NIC properties Note: If this option is available, go to the Advanced tab and set the value to Energy Efficient Ethernet to Disabled.
- Save the changes that you just did, then restart your computer and your router and see if the problem is resolved once the next startup is complete.
In case the same problem is still occurring, move down to the next potential fix below.
Method 5: Whitelisting the Game’s Executable & ports in Firewall Settings
If none of the fixes have worked for you so far, it’s also possible that your firewall is actively blocking the ports used by Final Fantasy XIV. And this is documented and confirmed to happen with the native firewall on Windows (Windows Firewall).
Note: In case you’re using a 3rd party firewall, search online for specific steps on whitelisting the game executable.
In case you’re using the native Windows Firewall, follow the instructions below to fix the 90001 error by accessing the settings menu of Windows Firewall and whitelisting the game’s executable and it’s used ports:
- Press Windows key + R to open up a Run dialog box. Inside the text box, type ‘control firewall.cpl‘ and press Enter to open up the Windows Firewall interference.
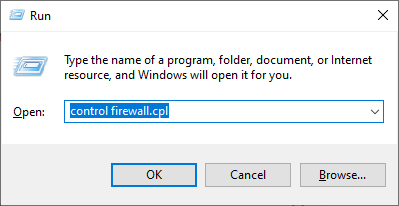
Accessing the Windows Defender Firewall - Inside the settings menu of Windows Defender, use the menu on the left to click on Allow an app or feature through Windows Defender firewall.
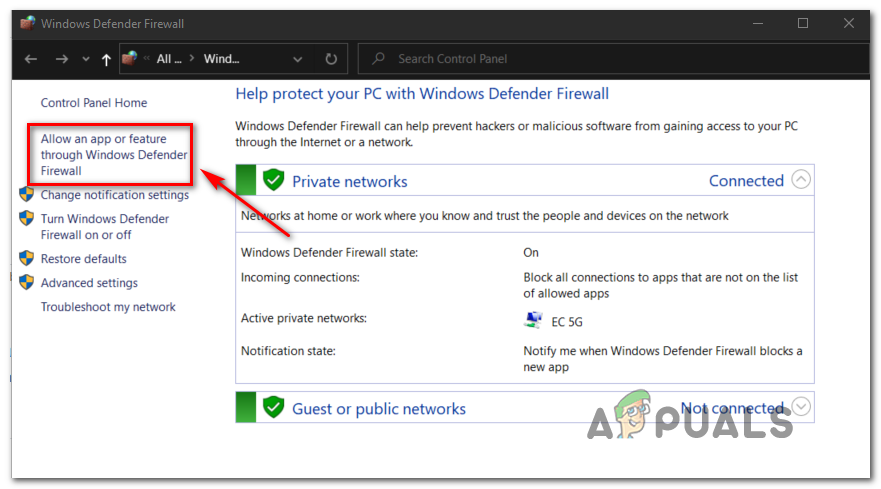
Allowing an app or feature through Windows Defender - Once you’re inside the allowed apps menu, start by clicking on Change settings button, then click on Yes at the User Account Control.
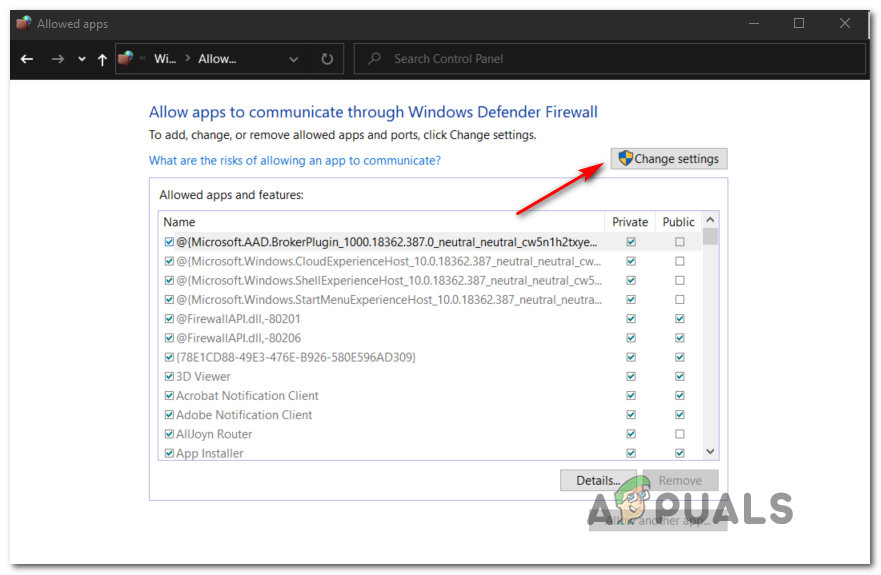
Changing the Settings of the Allowed Items in Windows Firewall - Once this list becomes fully editable, go under it and click on Allow another app, then click on Browser and navigate to the location where you installed your Final Fantasy game.
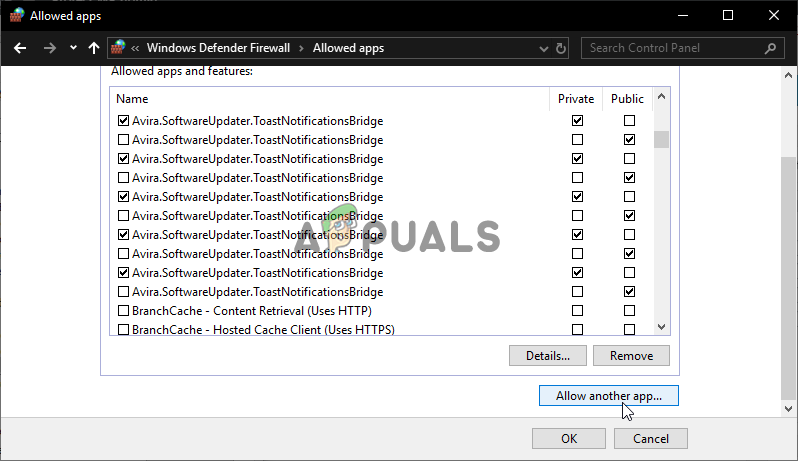
Allow another app - Once you have successfully managed to add the main game’s executable to the list of allowed items in Windows Firewall, find the entry inside the list and ensure that the boxes associated with Private and Public are both checked.
- Next, save the changes you just did, then follow step 1 again to return to the initial firewall menu. Once you’re back, click on Advanced Settings from the menu on the left. Once you’re inside the UAC (User Account Control), click Yes to grant admin privileges.
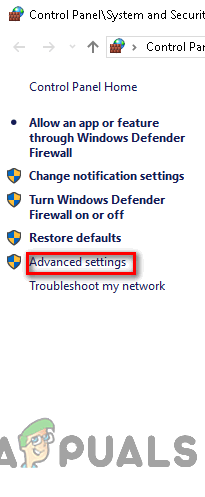
Click on advance settings option to open firewall rules - Once you get to the next screen, click on Inbound Rules from the menu on the left, then click on New Rule.
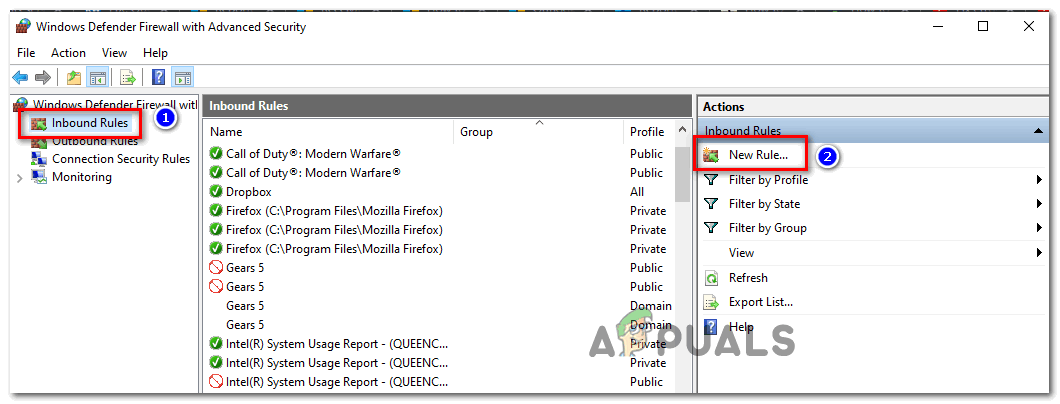
Creating New Rules in Windows Firewall - Once you’re inside the New Inbound Rule wizard, go ahead and click on Port when asked to select the Ryle Type, then click on Next.
- Next, choose TCP, then enable the Specific local ports toggle and paste the following ports (depending on if you’re launching the game directly or through Steam) before clicking next once again:
Final Fantasy XIV Online - PC
TCP: 54992-54994,55006-55007,55021-55040

Final Fantasy XIV Online - Steam

TCP: 27015-27030,27036-27037,54992-54994,55006-55007,55021-55040
UDP: 4380,27000-27031,27036
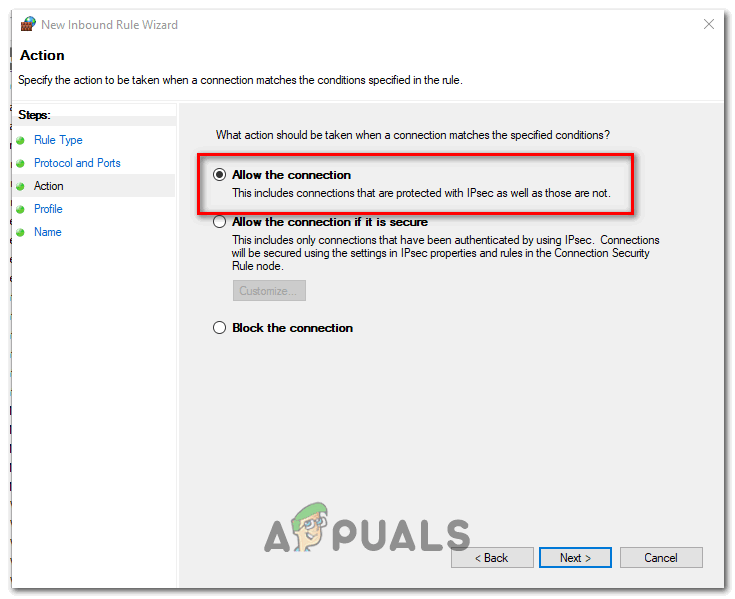
- Once you’re inside the Action prompt, click on Allow the connection and hit Next once again.
Allowing the connection - When you get to the Profile step, go ahead and enable the boxes associated with Domain, Private and Public before clicking Next once again to save the changes.
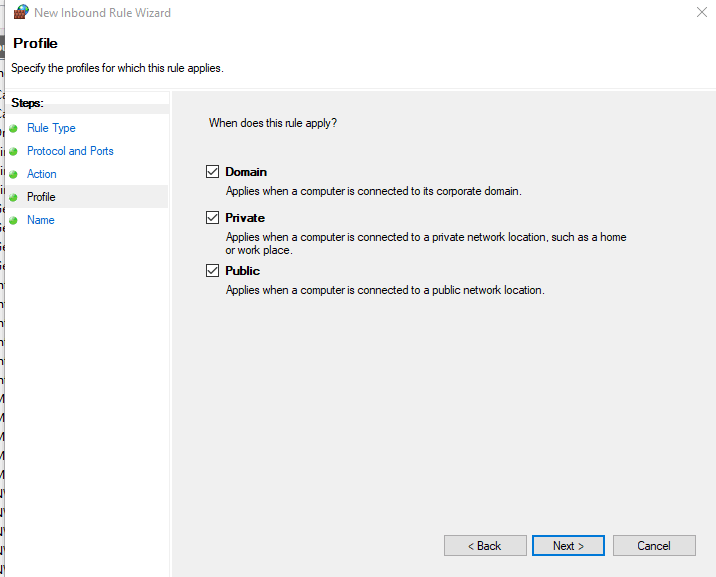
Enforcing the rule on various network types - Set a name for the exception rule you’ve just created, then hit Finish to complete the procedure.
- Restart your computer and see if the problem is now resolved by launching Final Fantasy XIV once again.
In case you are still seeing the same 90001 error, move down to the next potential fix below.
Method 6: Uninstalling 3rd-party Firewall
In the event that you’re using a 3rd party suite and you don’t want (or don’t know how) to exclude or whitelist the game executable, the only way of resolving a problem caused by an overprotective security suite is to uninstall it altogether.
Keep in mind that in case you’re using a 3rd party AV + firewall, disabling the real-time protection will likely not be enough since the same security suites will remain firmly in place even after the security suite is disabled.
If this scenario is applicable to your current situation, follow the instructions below to uninstall the current firewall solution:
- Open up a Run dialog box by pressing Windows key + R. Inside the text box, type ‘appwiz.cpl’ and press Enter to open the Programs and Files menu.

Type appwiz.cpl and Press Enter to Open Installed Programs List - Once you’re inside the Programs and Features menu, scroll down through the list of installed applications and locate the 3rd party firewall that you want to uninstall. When you see it, right-click on it and choose Uninstall from the context menu.
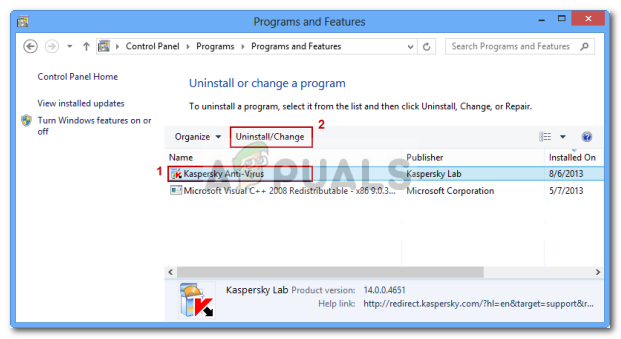
Uninstalling Antivirus Using Control Panel - At the uninstallation screen, follow the on-screen instructions to complete the process, then reboot your computer and see if the game stops disconnecting once the next startup is complete.
In case you’re still seeing the 90001 error when trying to connect to a game server in Final Fantasy XIV, move down to the final potential fix below.
Method 7: Using WTF Fast
If you’re forced to work with an unreliable Internet connection and you’re generally experiencing lag and instability with other games, you should start considering a service like WTFast.
Some affected users that were also encountering the 90001 error have confirmed that they managed to make the game a lot more stable after installing and using the free version of WTF Fast.
As it turns out, this service will improve the LAG by routing your connection through different servers according to the ISP range you get assigned by leveraging machine learning to detect and use the most optimized path for your game connection.
If you want to give this workaround a try, follow the instructions below to install, configure, and use WTF Fast:
- Open your default browser and visit the download page of WTFast. Once you’re inside, click on Start your free Trial, then follow the on-screen instructions to sign up for a free trial.

Start your free trial of WTFast - Once you complete the registration and create your account, download the desktop application and log in with your newly created account.
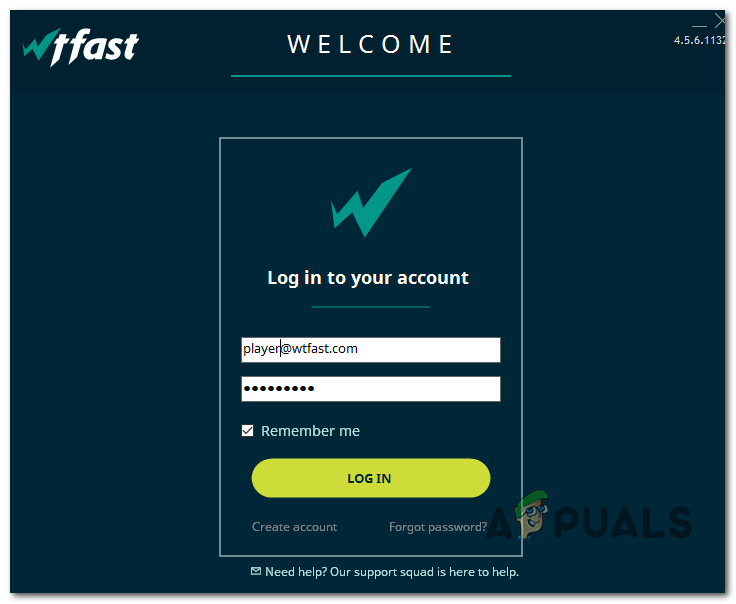
Signing in with your WTFast account - Start the WTFast service and then launch Final Fantasy XIV and see if the problem is now resolved.


