Files are missing from OneDrive? Here’s How to Recover
Usually, OneDrive lets you share a certain limit of your files to its storage safely without facing any major problems. However, there are cases when OneDrive fails to display your shared files and returns an empty folder with no data. This problem occurs when OneDrive fails to sync your shared files and as a result, they disappear from your OneDrive results, sometimes, even if you type the entire name of the file.
This guide will show you the steps to recover your shared files when they disappear from OneDrive.
Workaround: Search for files on OneDrive Live
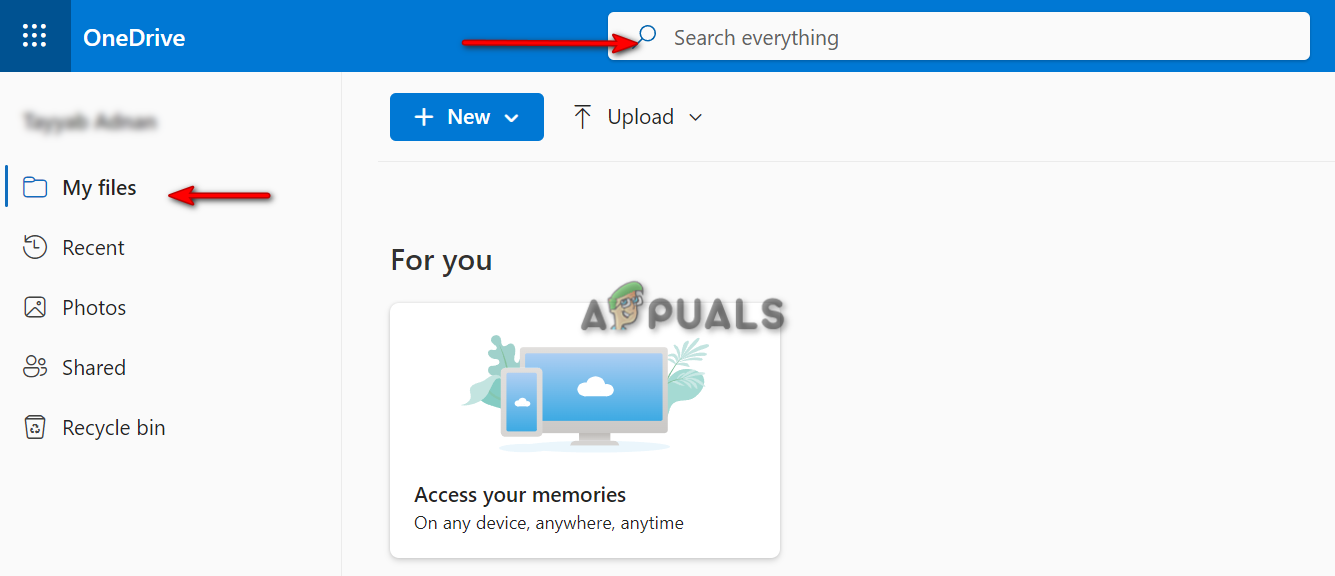
Before you make any changes to your OneDrive settings or follow any other method, you must check your files on the Official OneDrive live. Sometimes when OneDrive fails to sync your files on your Desktop, they are stills saved as a backup on OneDrive Live. Below we have given the steps for finding the missing OneDrive files on OneDrive live.
- Go to OneDrive live and Sign in to your account.
- Click on the “My files” option on the left side under “Office Tutorials.”
- Now, type the name of the file in the search bar above and press the Enter key.
Searching for missing OneDrive file - Scroll through the list of files and open the one that matches your file name.
1. Start the Backup Manually
Every now and then, OneDrive will remove your Desktop from its backup which causes certain files from the OneDrive folder to be missing. You can manually start the backup of your Desktop folder to prevent this from, happening. Below are the instructions to start the backup of your Desktop folder manually.
- Click on the OneDrive Icon on the right side of the Task Bar.
- Navigate to Help and Settings > Settings.
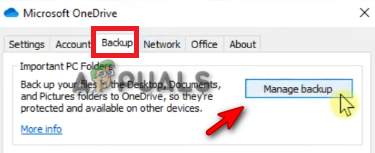
- Open the Backup tab and select “Manage backup” under “Important PC Folers.”
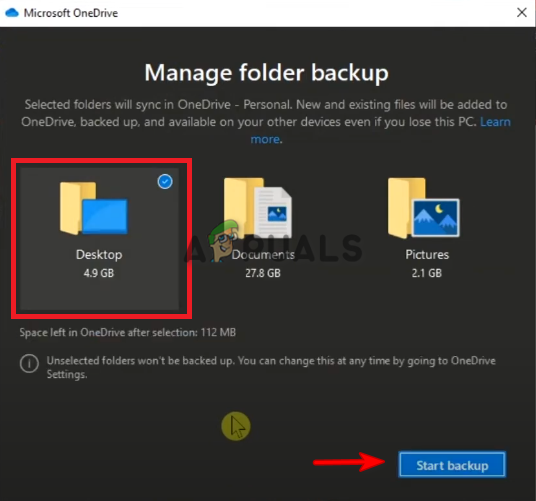
Managing backup - Select the Desktop folder on the Manage folder backup screen.
- Start the manual backup by clicking on the “Start backup” option.
Starting backup - Now you can open your OneDrive with all your files present.
2. Check the OneDrive Recycle Bin
When facing problems with OneDrive regarding your missing files, you must check your OneDrive Recycle Bin in case those files got deleted from your OneDrive folder by mistake. However, OneDrive files move directly to the OneDrivr Recycle Bin before they can get completely deleted. Therefore, you must restore them from the recycle bin with the steps below:
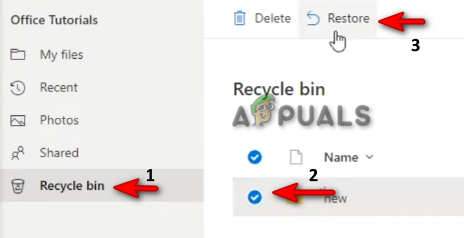
- Go to OneDrive live.
- Click on the “Recycle Bin” option under “Office Tutorials.”
- Select the file in the Recycle bin by clicking on it.
- Now, click on the Restore option above to retire the files from the Recycle bin.
Restoring files from recycle bin
3. Check your personal Vault to find the files
Personal Vault in a special protected folder in OneDrive that can only be accessed via a two-step identification verification. When your files cannot be searched in the search bar, then they would be in the personal vault as the Personal Vault does not show the names of your files in your search results. Therefore, with the instructions listed below, you must check your Personal Vault to find your missing OneDrive files:
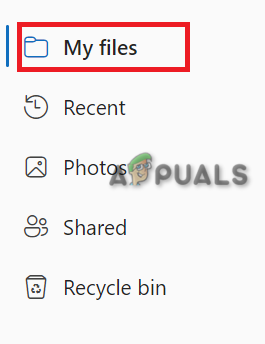
- Open OneDrive live and click on the My Files option under “Office Tutorial.”
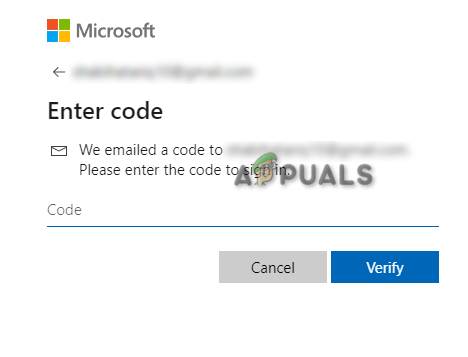
Opening My Files - Select the “Personal Vaut” folder and go through the 2-step verification process.
Verifying Account - Once the verification is completed you can access the personal vault and retrieve your files.
4. Re-Sync with OneDrive
One of the problems with OneDrive is that it occasionally un-syncs your account and as a result, your files are found missing in the folders. Therefore, you must Re-Sync your OneDrive to start the file-sharing process again.
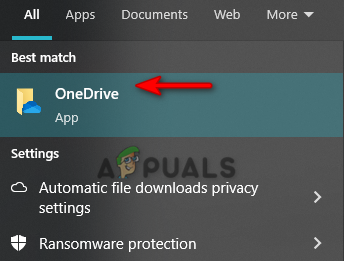
- Open the Windows Start Meny by pressing the Win key.
- Type “OneDrive” and click on the folder.
Opening OneDrive - Now, sign in to the account that you want to share the files with.
signing in to the account - Once your OneDrive starts syncing, you can share your files again.
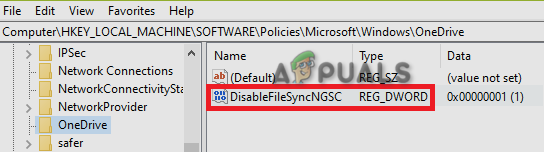
5. Set the DisableFileSyncNGSC key value to 0
DisableFileSyncNGSC is the key in the Registry Editor that is associated with the OneDrive synchronization. When the Registry key is set to 1, it prevents OneDrive from running. OneDrive will fail to sync your files when it doesn’t have the authority to run. Therefore, you must change the key value to 0 to run OneDrive. You can do that with the instructions below:
- Open the Run Command by pressing the Win + R keys together.
- Type “regedit” and click OK to open the Registry Editor.

Opening the registry editor - Navigate to KEY_LOCAL_MACHINE\Software\Policies\Microsoft\Windows\OneDrive.
- Right-click on the DisableFileSyncNGSC Registry Key and select “Modify“.
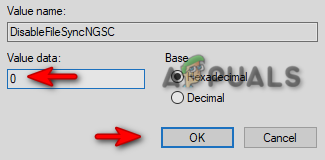
Modifying registry key - Change the value from 0 to 1 under “Value data” and click OK.
Changing the registry key value - This will start your OneDrive again and you can sync your shared file automatically.
6. Add the OneDrive folder in the Indexed locations
An index is a default feature in Windows that provides faster search results. When your OneDrive folders get removed from Indexing, it faces this issue and the majority of your content does not appear in the folder. Therefore, to prevent this from happening, you must add the OneDrive folder to the Indexed Locations. You can do that with the steps listed below:
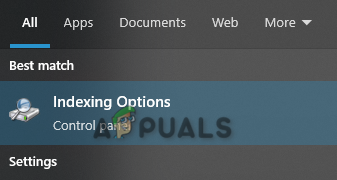
- Press the Win key to open the Windows Start Menu.
- Type “Indexing Options” and click on the top option.
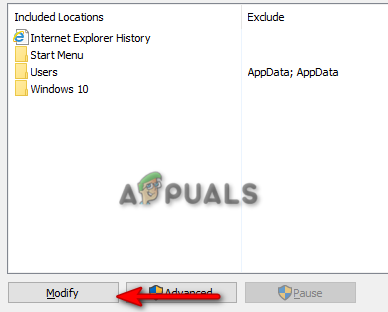
Indexing Options - Click on the Modify option under “include these locations.”
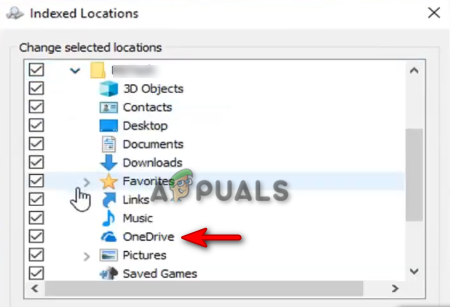
Modifying Included locations - Navigate to Users > Your PC Name.
- Now, click on the check box next to OneDrive.
Indexing OneDrive - Click OK to add it to the Indexed locations.
- Close the tabs and check your files in the OneDrive folder.
7. Reset the ODB Client
When your ODB Client starts facing corruption, it interferes with how OneDrive works and causes such issues to occur. Therefore, resetting it will stabilize the client. You can rest the ODB client with the steps below:
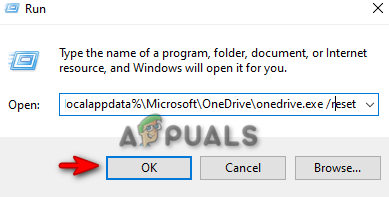
- Open the Run command by pressing the Win +R keys together.
- Paste the following command line in the search box and click OK to reset the ODB Client.
%localappdata%\Microsoft\OneDrive\onedrive.exe /reset
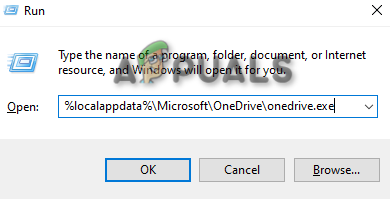
Resetting the ODB Client - Once the command line has reset the ODB Client, you can manually open OndDrive with the command line below:
%localappdata%\Microsoft\OneDrive\onedrive.exe
Manually opening OneDrive
8. Reinstall OneDrive
If none of the methods worked for you, then as a last resort you should start fresh by reinstalling OneDrive on your system. However, before you do uninstall it, you must terminate all the processes that are currently running as well. Below is how you can do that:
- Open the Windows Start Menu by pressing the Win key.
- Type “cmd’ and click on Run as administrator.
Running command prompt as administrator - Terminate each OneDrive process by pasting the following command into the Command prompt and pressing Enter:
taskkill /f /im
- Now, uninstall OneDrive by pasting the following commands:
%SystemRoot%\SysWOW64\OneDriveSetup.exe /uninstall
- After installing OneDrive, open the Run Command with Win + R keys.
- Type “regedit” to open the registry editor.
Opening registry editor - Open the following path and remove all the folders inside.
HKEY_CURRENT_USER\Software\Microsoft\OneDrive
Note: Before deleting the folders, make sure to make a backup copy of your Windows Registry for future restoration.


