[Fix] Files in Windows Automatically Compressing
Your computer may be compressing files if its hard disk is running out of space (especially, if the OS is creating space for the new Windows updates). Moreover, the corrupt icon cache database may show the double-blue arrows on the files/folders, making the user think that the compression is enabled.
The issue arises when the user notices 2 blue arrows on the top right of the folders (e.g., the Desktop folder) or the system drive and on checking find outs the contents to be compressed (every new file/folder created/added to the folder/drive is automatically compressed) and when he decompresses the contents, on the reboot, the contents are compressed again.

Before moving on with the solutions to stop Windows from automatically compressing files, make sure the Storage Sese setting (Settings>> System>> Storage) is disabled . If you are encountering the compression issue with an application (like files downloaded from the Firefox browser are compressed), then uninstall that application, remove all of its traces on the system and then reinstall the application to check if the automatic compression issue is resolved. Moreover, if your system is used by more than one person, ask the second person if he is enabling the compression (e.g., a sibling playing a heavy game and if the system drive runs out of space and the user is asked to compress the drive, the other person may be allowing it).
Solution 1: Delete the Temp Files of the System and Perform a Disk Cleanup
The automatic compression in Windows 10 can be started if your system drive is running out of space. In this context, deleting the temp files and performing a disk cleanup may solve the problem.
- Right-click Windows and open Run.
- Now navigate to the following path:
%temp%
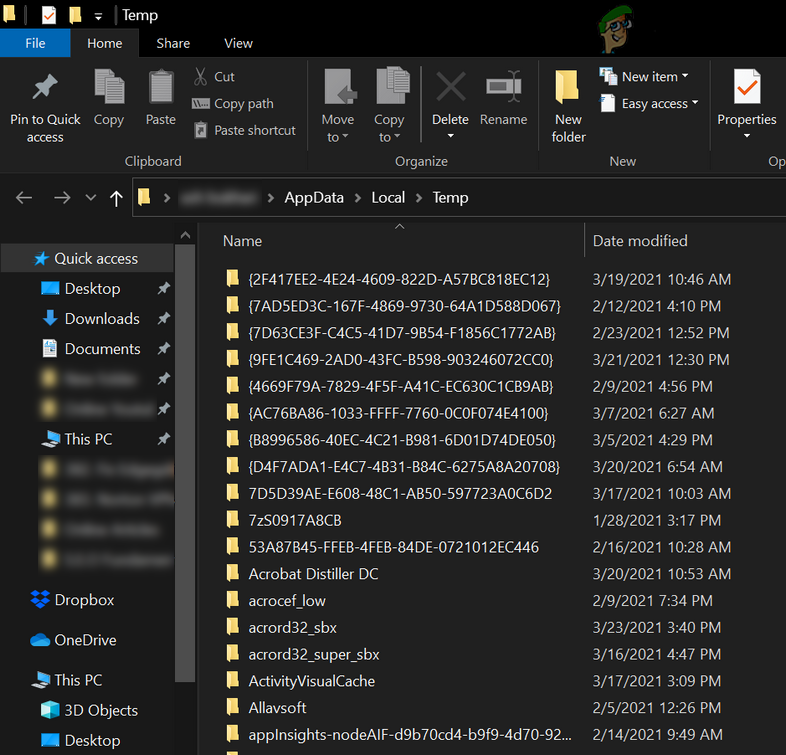
Delete the Files in the %Temp% Folder - Then delete all the contents of the temp folder and launch the Run command box (step 1).
- Now navigate to the following path:
temp
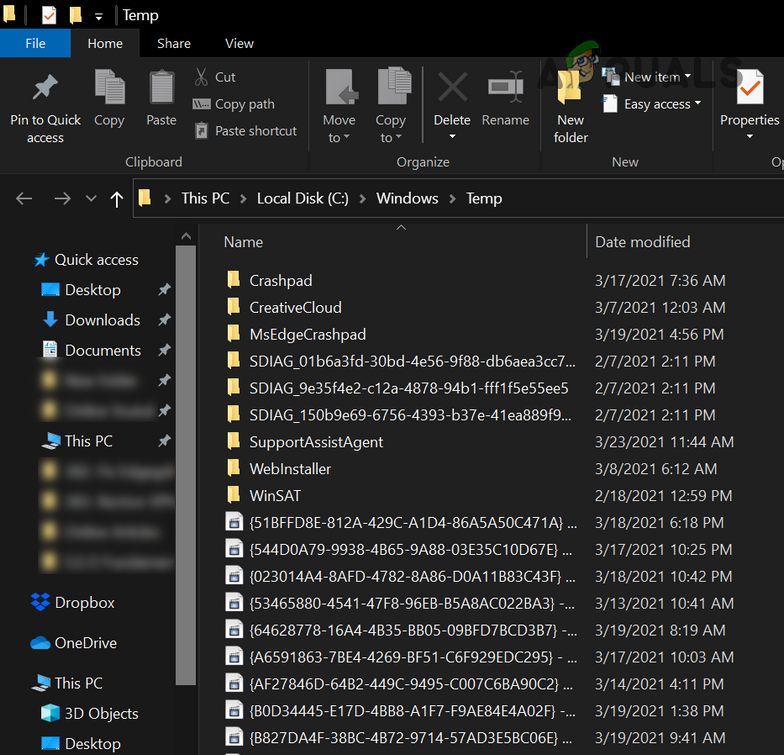
Delete the files in the Temp Folder - Then delete all the contents of the temp folder and open This PC (in the left pane of the window).
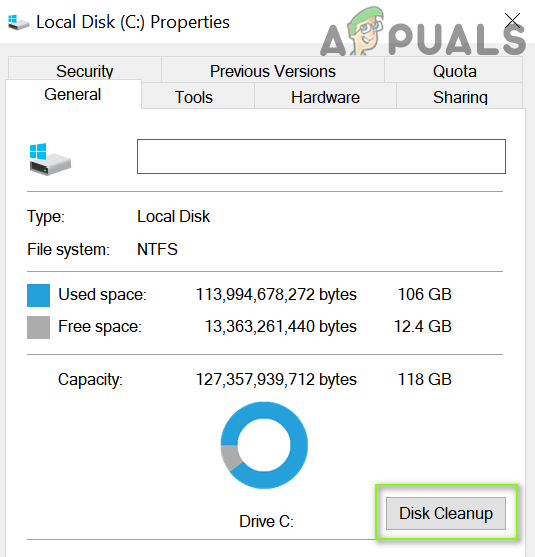
- Now, right-click on the system drive (e.g., C drive) and select Properties.

Open Properties of the System Drive - Then click on the Disk Cleanup button and open Clean Up System Files.
Click Disk Cleanup in the System Drive’s Properties - Now select all the checkboxes (except the essential types of files that you want to keep e.g., the Downloads folder) and click on the OK button.
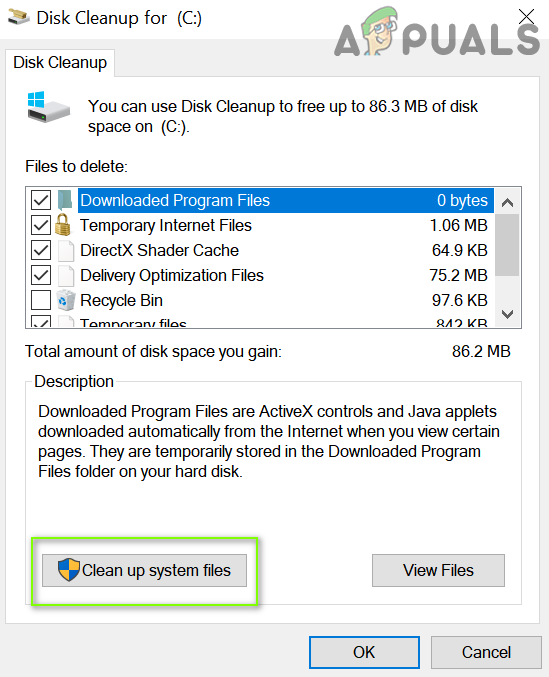
Open Clean Up System Files - Then let the process complete and make sure your system drive has enough free space available (20 GB for 32-bit OS and 32GB for 64-bit OS

Checkmark the Files to Delete and Click OK - Now decompress the folder/drive and ignore any errors reported during the process.
- Then reboot your PC and check if the compressing automatically issue is resolved. If the issue persists, wait for 5 minutes and then check if the system is clear of the compressing problem.
Solution 2: Update the Windows of Your PC to the Latest Build
Some Windows updates require tons of space to complete and to accommodate the space requirements, your OS may compress the files/folders on your system to create the space required for the updates to complete. In this context, updating the Windows of your PC (so that no update is pending and OS does not have to create the space to accommodate the updates) may solve the problem.
- Manually update the Windows of your PC to the latest release. Make sure no optional/additional update is left pending to install.
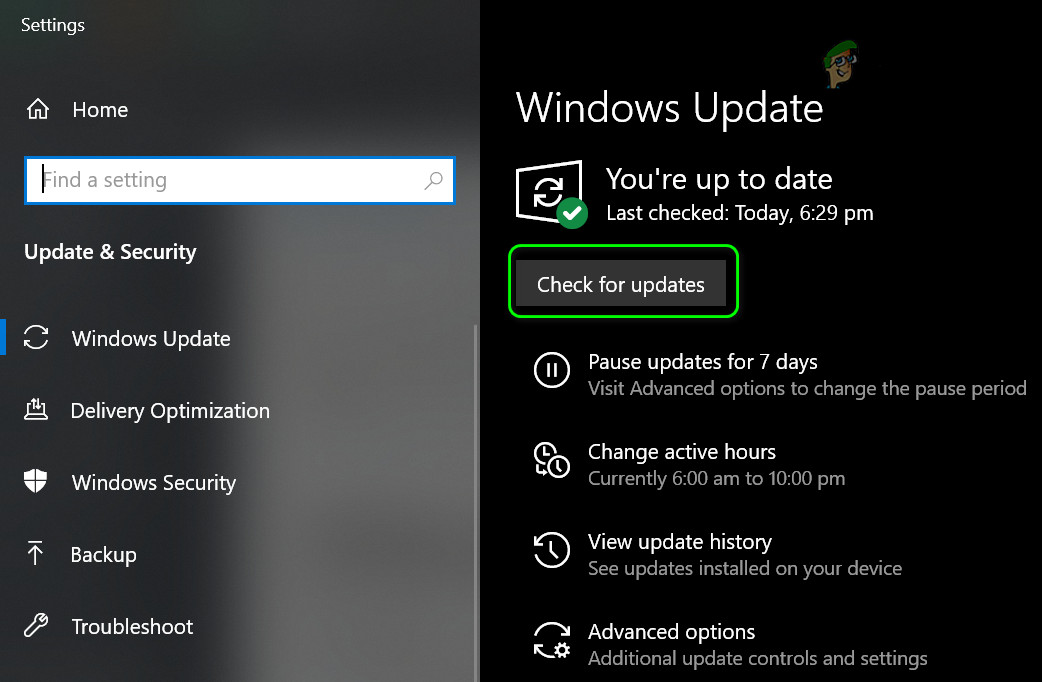
Check for Windows Updates - Once updates are installed, check if the contents of the drive/folders are not automatically compressing.
Solution 3: Disable Compression on the Driver/Folders
There can be many factors that can enable the automatic compression of the drives/folders (e.g., automatic compression by the OS to install newer Windows updates). In this case, disabling the compression (in the Folder/drive properties or the Group Policy) may solve the problem.
Disable Compression on the Drive
- Right-click Windows and open File Explorer.
- Now navigate to the problematic drive and right-click on it.
- Then open Properties and in the General tab, uncheck Compress This Drive to Save Disk Space.
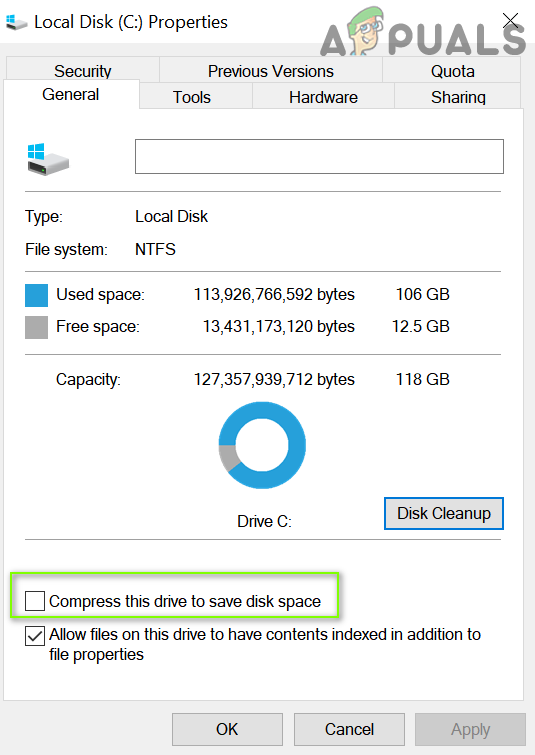
Compress This Drive to Save Disk Space - Now apply your changes and wait till the decompression completes (ignore any errors reported during the decompression process).
- Then reboot your PC and check if the compression issue is resolved.
Disable Compression on a Folder (Like the Desktop Folder)
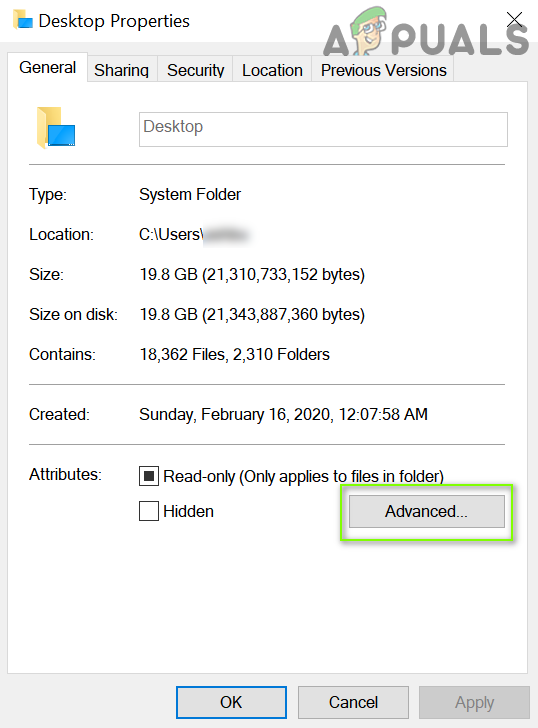
- Navigate to the problematic folder (e.g., the Desktop folder) and right-click on it.
- Now select Properties and click on the Advanced button.
Open the Advanced Properties of the Folder - Then uncheck the options of “Folder is Ready for Archiving” and “Compress Contents to Save Disk Space”.
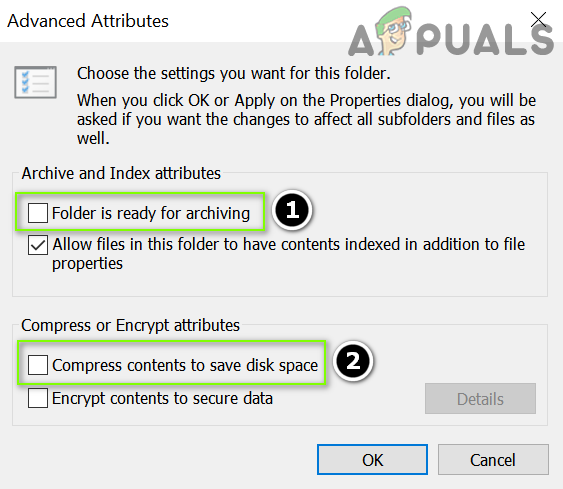
Uncheck “Folder is Ready for Archiving” and “Compress Contents to Save Disk Space” - Now apply the changes (if the issue is with more than one folder, repeat the above procedure on all such folders) and reboot your PC to check if the compression issue is resolved.
If you are encountering the issue where the compression is only affecting the user profile folders (like the user Desktop, Documents, AppData, etc.), then apply the above steps on the following folder one by one (if compression is not enabled on any of the folders, then enable/disable the compression on that folder):
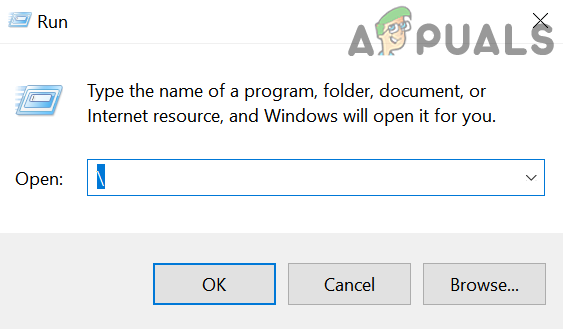
- Right-click Windows and open Run.
- Then execute the following to open the system drive:
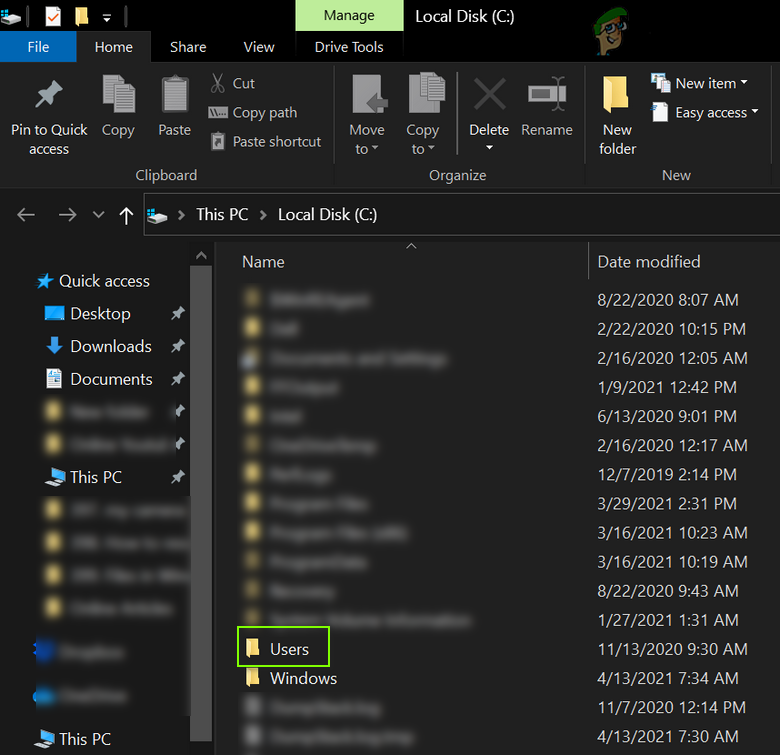
\
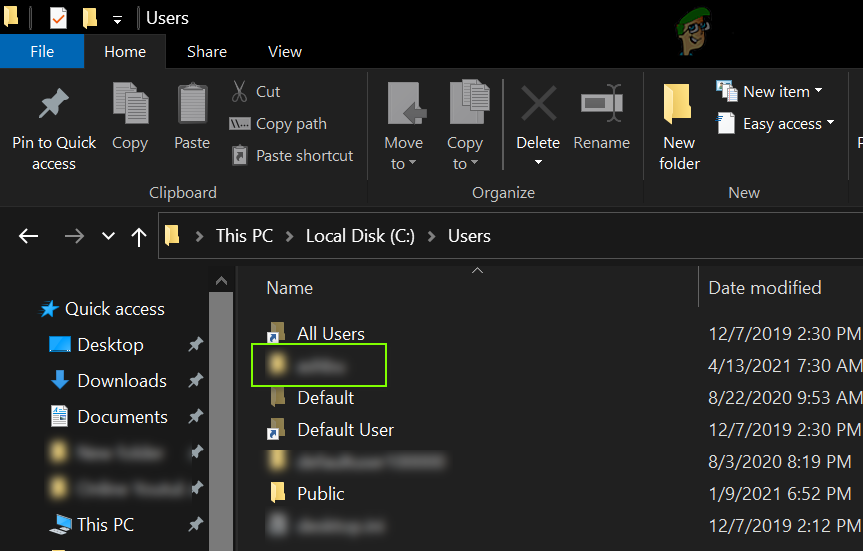
Open the System Drive Through the Run Command Box - Now disable compression on the Users folder (as discussed above and if asked to, make sure to apply to the subfolders/files) and then open the Users folder.
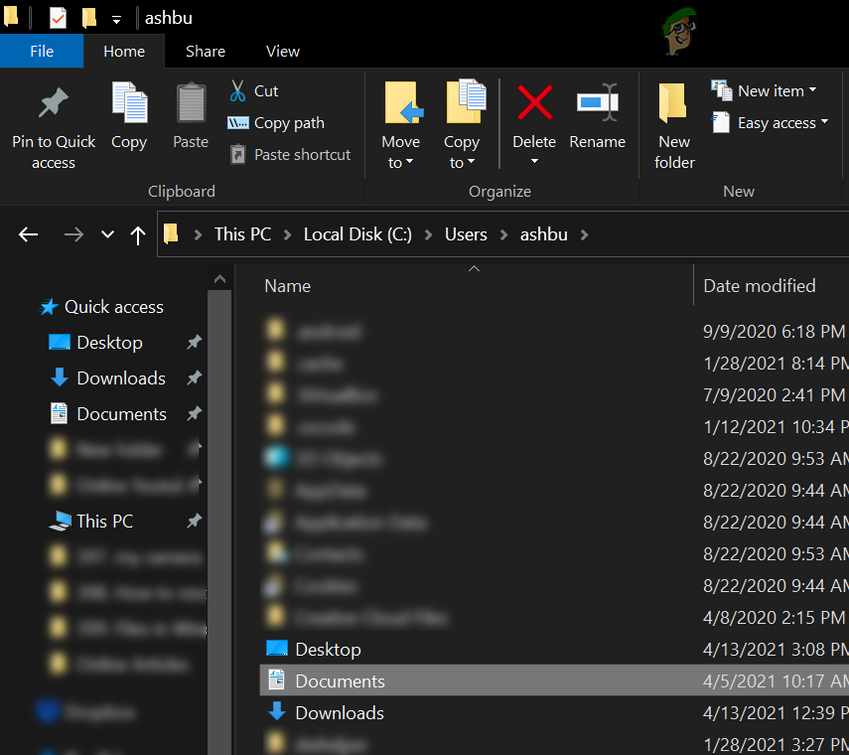
Disable Compression on the Users Folder and Open it - Then disable compression on your user profile folder and then open it.
Disable Compression on Your User Profile Folder and Open it - Now open the Documents folder (or execute Documents in the Run command box) and disable compression on it.
Disable Compression on the Documents Folder - Then apply the same to the following folders as well (execute in the Run command box):
Downloads

AppData

%appdata%
- Then reboot your PC and check if the contents of the folders are not automatically compressing.
Disable Compression Through the Group Policy Editor
- Click Windows, type: Group Policy, and open Edit Group Policy. The Windows 10 Home users may have to install the Group Policy Editor.

Open Group Policy Editor - Now, in the left pane, navigate to the following path:
Computer Configuration>> Administrative Templates>> System>> Filesystem>> NTFS
- Then double-click on “Do Not Allow Compression on All NTFS Volumes” and select the radio button of Enabled.
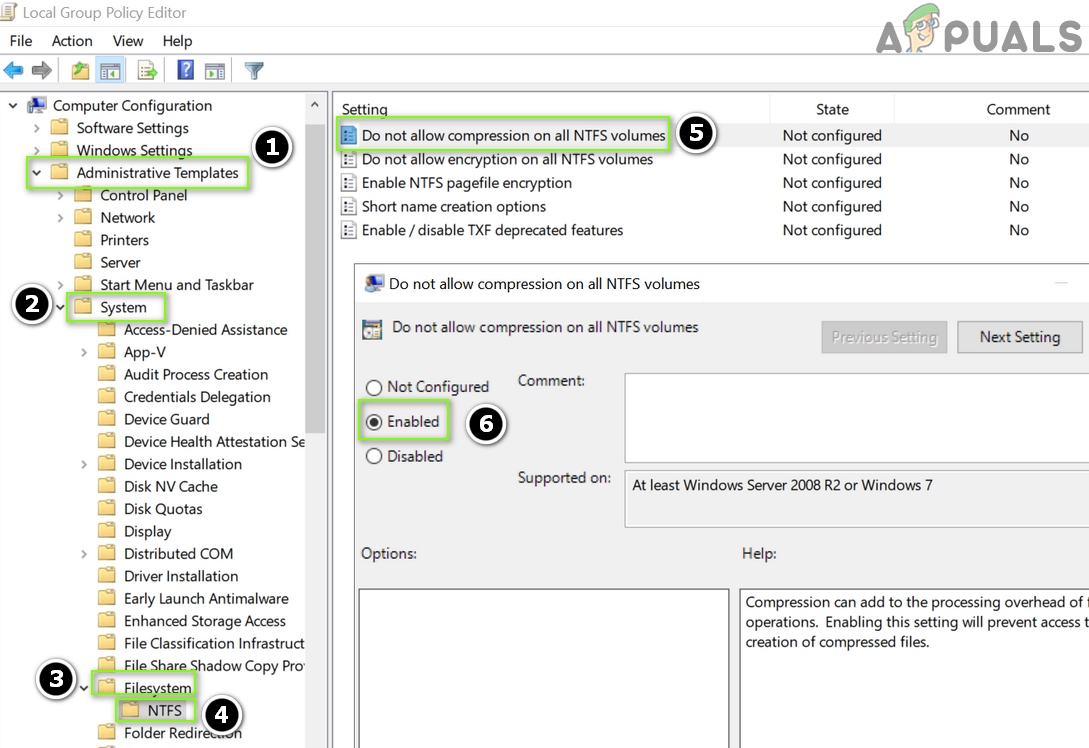
Enable Do Not Allow Compression on All NTFS Volumes in the Group Policy Editor - Now apply your changes and reboot your PC to check if the compression issue is resolved.
Use the Command Prompt to Disable Compression
- Press Windows, type: Command Prompt, and right-click on the Command Prompt. Then select Run as Administrator.
- Then execute the following:
fsutil behavior set DisableCompression 1
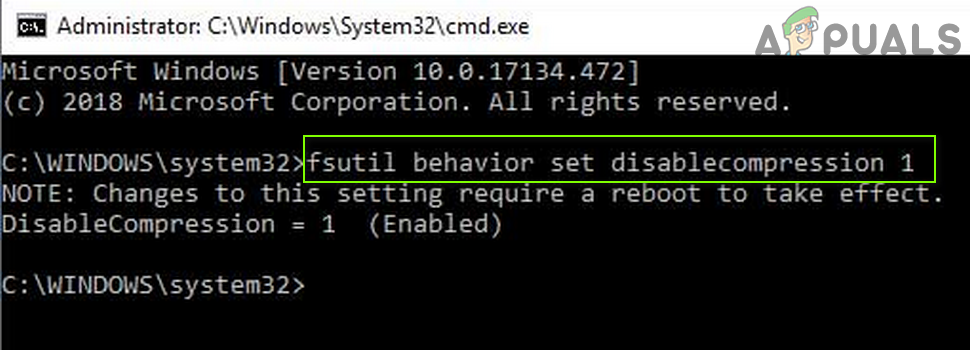
Disable Compression Through the FSUTIL Command - Now reboot your PC and execute the following to check if the compression is disabled:
fsutil behavior query disableCompression
- You may receive the following message if the compression is disabled:
disabledCompression = 1 (Enabled)
- To decompress the compressed files on the system drive (e.g., C), execute the following:
compact /U /S:"C:\"
Use the PowerShell to Disable CompactOS
In some cases, the compression was occurring on the OS modules only (technically speaking CompactOS) as the system drive (especially, SSD disks) has limited storage capacity. In this scenario, disabling the CompactOS may solve the problem.
- Right-click Windows and choose PowerShell (Admin).
- Then execute the following:
compact /compactOS:never
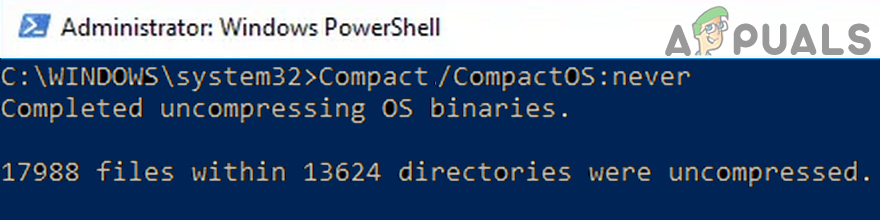
Set CompactOS to Never - Now exit the PowerShell and check if the compressing automatically issue is resolved.
Solution 4: Rebuild the Icon Cache Database
In some cases, after installation of the Windows updates, the drive/folders were decompressed but the two blue arrow icons keep on showing on the files/folders (making the user believe that the contents are still compressed) but the issue was caused by the corrupt Icon Cache database. In this case, rebuilding the Icon Cache database may solve the problem.
- If the issue is only about some shortcut icons of some EXE files, check if recreating the shortcuts (and deleting the old shortcuts) of those files solves the problem.
- If that is not the case, then close all the opened folders/applications on your system and open the Task Manager of your system (right-click Windows and select Task Manager).
- Then, right-click the Windows Explorer process and choose End Task.
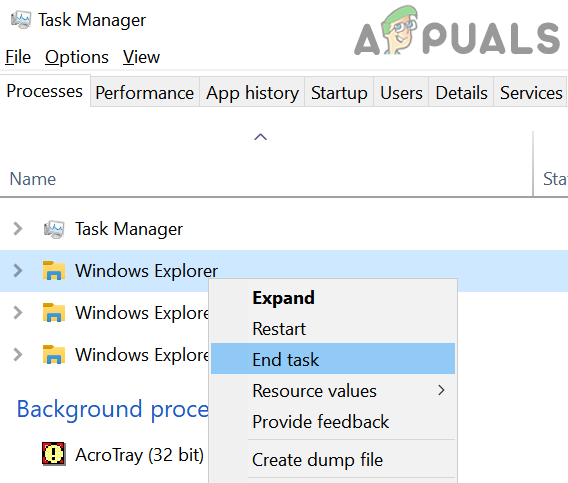
End Task of Windows Explorer - Now confirm to end the Explorer process and open the File menu.
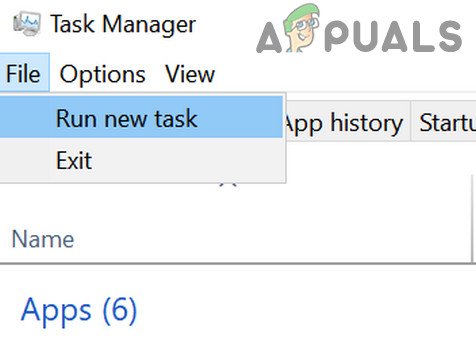
Run a New Task in the Task Manager - Then select Run New Task and checkmark Create This Task With Administrator Privileges.
- Now type CMD.exe in the Open box and hit the Enter key.

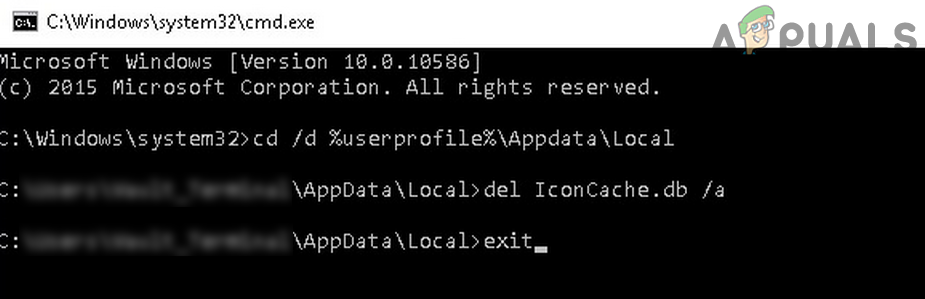
Run CMD.exe Task - Then execute the following one by one:
CD /d %userprofile%\AppData\Local

DEL IconCache.db /a

EXIT
Delete Iconcache Database - Again, open Run New Task and type:
explorer.exe

Run New Task of Explorer.exe in the Task Manager - Then hit the Enter key and once the Explorer opens up, reboot your PC to check if the compression icons are removed.
If the issue persists, then check if executing the following in an elevated Command Prompt solves the problem:
ie4uinit.exe -ClearIconCache
You can also use the Registry Editor (at your own risk but make sure to back up the Registry) to block the execution of the icons by creating a notepad file (that is saved as a .reg file) with the following lines:
Windows Registry Editor Version 5.00

[HKEY_LOCAL_MACHINE\SOFTWARE\Microsoft\Windows\CurrentVersion\Explorer\Shell Icons]

"179"="empty.ico,0"
Then double-click it to merge it to the Registry (make sure you have placed an empty file in the System32 folder) and check if the compression icons are removed.
If the issue persists, then check if performing an in-place upgrade (download the Windows 10 ISO and launch it as administrator but make sure to use the Keep Apps and Files option) sorts out the compression problem.


