Resolve File Size Exceeds Limit Error 0x800700DF on Windows 10
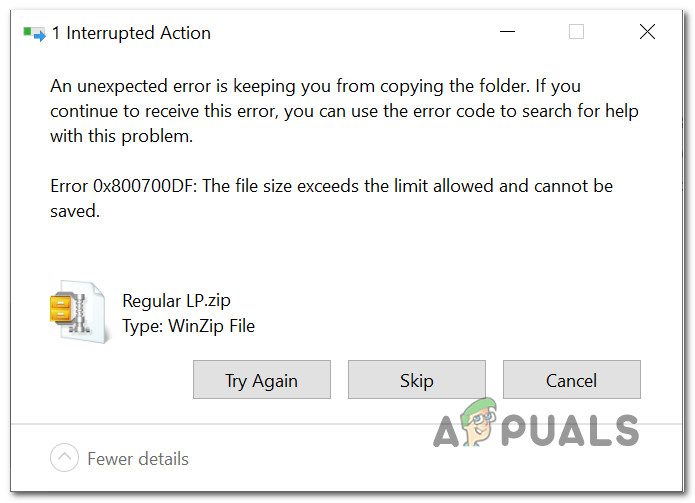
Some Windows 10 users are encountering the “Error 0x800700DF: The file size exceeds the limit allowed and cannot be saved” when they attempt to copy or move certain folders from or to online backup storage.
As it turns out, the issue is almost always related to a download limit imposed either by a registry file called FileSizeLimitinBytes, by the file system that you’re currently using, or due to the fact that a key service is forcibly disabled.
Here’s a shortlist of potential culprits:
- File size exceeds the value of FileSizeLimitInBytes value – The most common cause of this issue is when you attempt to download or upload a file (to or from a cloud service like SharePoint) that exceeds the maximum allowed file configured inside the Registry Editor. In this case, you can resolve the issue by modifying the maximum accepted value via the FileSizeLimitInBytes reg file.
- Web Client service is Disabled – If you only get this type of issue while attempting to upload a large file to SharePoint (or a similar service), chances are the problem is caused due to a required service that is forcibly disabled (Web Client). In this case, you should be able to fix the issue by opening the Services screen and re-configuring how the Web Client service operates by default.
- Current File System is not equipped to support this file transfer – In case you see this error while downloading files that exceed 4GB, the error is occurring because of a limitation of the FAT32 file system. In this case, the solution is to migrate the involved volume to NTFS by formatting your drive.
– This is essentially a protection mechanism that ensures no malicious application or process is able to trick your system into downloading files without your explicit say-so.
Now that you know the main cause of this issue, here’s how you can fix the issue and ensure that the Error 0x800700DF problem doesn’t return in the future.
1. Adjusting the value of FileSizeLimitInBytes via Registry Editor
Since the main cause of this issue is a limiting file size upload/download quota, the first thing you should do is ensure that the file you are trying to upload to an online drive (or download from an online drive) is smaller than the maximum accepted file size limit specified inside your Web Client Parameters.
To verify if this is the main cause of the issue, you’ll need to utilize the Registry Editor to navigate to the Parameters key of WebClient and cross-reference the value of FileSizwLimitInBytes against the actual size of the file you are trying to download or upload.
To make things easier for you, we’ve put together a series of step by step instructions that will walk you through the process of checking the current value of FileSizeLimitInBytes and modifying it to accommodate the file you are experiencing the 0x800700DF issue with:
- Press Windows key + R to open up a Run dialog box. Next, inside the text box, type ‘regedit’ and press Ctrl + Shift + Enter to open up the Registry Editor with admin access.
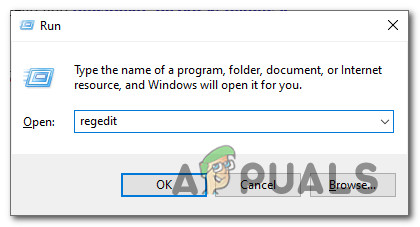
Opening the Registry Editor - When you are prompted by the UAC (User Account Control) prompt, click Yes to grant admin access.
- Once you’re inside the Registry Editor screen, use the menu on the left-hand side to navigate to the following location:
HKEY_LOCAL_MACHINE\SYSTEM\CurrentControlSet\Services\WebClient\Parameters
Note: You can either navigate here manually or you can paste the location directly into the navigation bar to get there instantly.
- After you arrive at the correct location, move over to the right-hand side menu of the screen and double-click on FleSizeLimitInBytes.
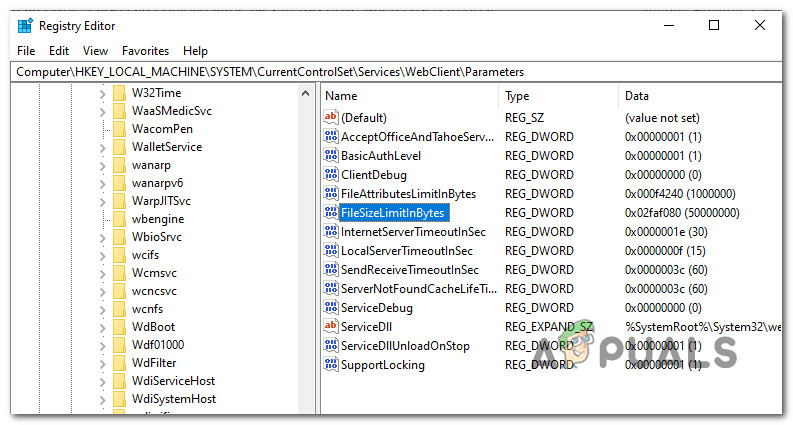
Open the File Size Limit - Next, set the base to Decimal and compare the currently set data against the file size you are trying to download or upload.
Note: Keep in mind that the value data is in bytes – So if the current Base value data is 1000000000, the maximum file allowed is just 1 GB. - If the Base value data is under the file size you are trying to download or upload, you should be able to fix the issue by saving a higher Value data. So for example, if the file size is 4 GB, you need to set the value data to 4000000000 in order to allow the transfer to go through without the same 0x800700DF error code.
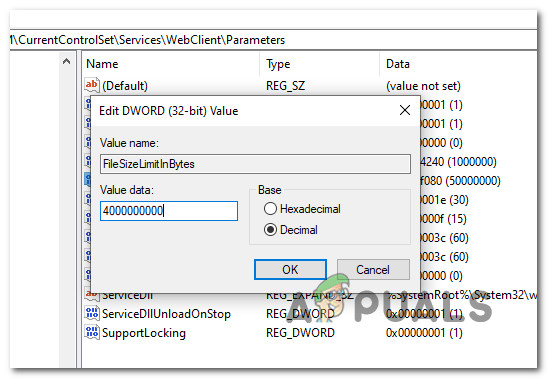
Adjusting the value data accordingly - Save the changes after you’ve done this modification, then go ahead and restart your computer and see if the problem is finally fixed.
If the problem is still not resolved or you’re looking for a way to prevent this issue from happening in the future, move down to the next potential fix below.
2. Enabling the Web Client service (if applicable)
If you are encountering this issue while attempting to upload a large file to SharePoint or a similar cloud service and you previously ensured that the file size doesn’t exceed the maximum file size allowed by FileSizeLimitInBytes, the next thing you should investigate is if the service required to do this operation is enabled.
The main service used for data exchanges between your local storage and SharePoint (or different software that’s using WebDAV) is Web Client.
Several affected users that we’re previously encountering the 0x800700DF have reported that the issue went away swiftly after they opened up the Services screen and ensure that the WebClient service is permitted to run and configured to be able to be called into action whenever it’s needed.
Follow the instructions below to ensure that the Web Client service is enabled in order to resolve the 0x800700DF:
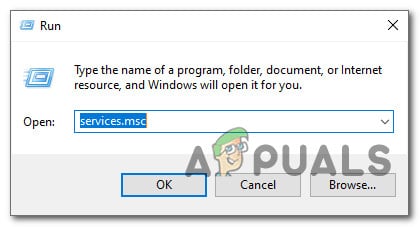
- Press Windows key + R to open up a Run dialog box. Next, when you’re prompted by the Run text box, type ‘service.msc’ and press Enter to open up the Services screen on Windows 10. At the UAC (User Account Prompt), click Yes to grant admin access.
Opening the services screen - Inside the Services screen, move over to the right-hand section of the screen and locate the service name WebClient.
- Once you see it, right-click on it and choose Properties from the context menu that just appeared.

Accessing the properties menu - Once you’re inside the Properties screen of the WebClient service, access the General tab and change the Startup type to Manual, then click on the Start button to forcibly enable the service if it’s currently disabled.
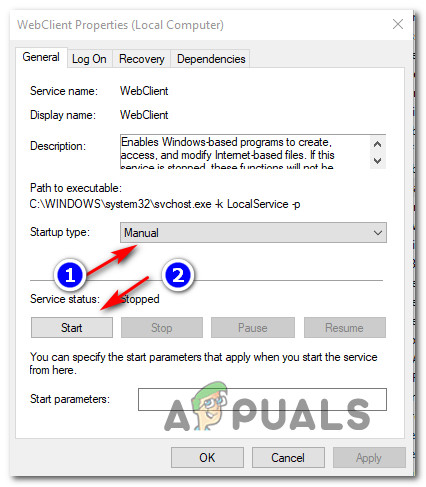
Enabling the Web Client service - Once you’ve ensured that the Web Client service is enabled, repeat the action that was previously causing the 0x800700DF and see if the problem is now fixed.
If the problem is still not fixed, move down to the next potential fix below.
3. Changing the file system on your local storage
If you’re only encountering this issue while you are attempting to download files that exceed 4GB on your local storage, you’re clearly seeing the 0x800700DF because of a limitation caused by your file system.
Most likely, you’re attempting to download the file on a drive that’s using FAT32 which only supports files of a maximum size of 4 GB, as opposed to NTFS which supports files up to a maximum of 16 TB.
If this scenario is applicable, the solution is clear – You’ll need to migrate to NTFS in order to facilitate the transfer of bigger file sizes.
This might be a bit of a hassle if you only have one petition that also holds your OS – In this case, you will need to back up your data in advance before changing the file system and reinstalling your OS.
But if you get this error while attempting to download on a standalone partition that doesn’t include your OS, you can simply format the drive to a different file system. Here’s a quick step by step guide on how to do this:
Important: This operation will effectively delete any data you currently hold on the partition. So if you have any important data that you can’t lose, take the time to back up your data in advance before starting with the steps below.
- Open File Explorer locate the drive that you’re having issues with.
- Next, right-click on it and choose Format… from the context menu that just appeared.
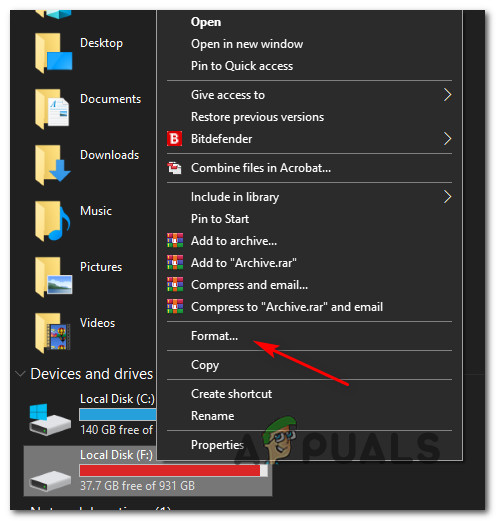
Formatting the problematic drive to a different file system - Inside the Format Local Disk menu, set the File System to NTFS and the Allocation unit size to Default allocation size.
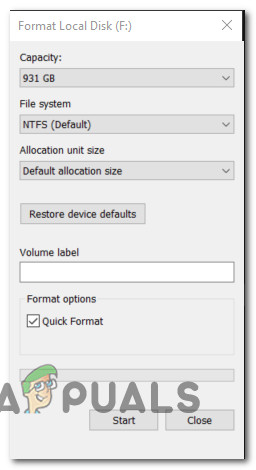
Formatting to NTFS - Next, name your newly formated volume before unchecking the Quick Format box and clicking on Start.
- After you confirm the formatting sequence to the new file system, wait patiently until NTFS is enforced. Depending on the size of the volume, expect this operation to take several hours.
- After you successfully transition to the new file system, reboot your PC, then repeat the operation that was previously causing the 0x800700df to see if the problem is now fixed.


