Failed to Load Overlay Localization File in Steam Fixes
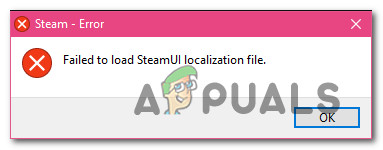
Some Windows are encountering the ‘Failed to load Overlay localization file’ error whenever they attempt to launch Steam conventionally. This problem is reported to occur on Windows 7, Windows 8.1, and Windows 10.
As it turns out, there are several different causes that might end up causing this error message with Steam. Here’s a shortlist of potential culprits:
- Corrupted clientregistry.blob file – If you’re using an older version modded of Steam, chances are you’re dealing with a common case corruption affecting the clientregistry.blob file. This is quite frequent with legacy Steam versions and the only way to fix it is to delete it in order to force Steam to download a healthy equivalent.
- Missing admin access – If you have strict security rules related to UAC, you can also expect to see this error if the main executable is missing admin access so it cannot modify certain files when a new update needs to be installed. In this case, you need to force the main executable to run with admin access.
- The connection is blocked by your firewall – Depending on how strict you’ve set the built-in firewall to be, you can also expect to see this error if the connection is blocked by Windows Defender + Windows firewall due to a false positive. In this case, you can fix the issue by whitelisting the main executable, the download folder as well as the ports used for download and upload.
- Corrupted Steam installation – Under certain circumstances, you can see this error occurring to a problem some type of underlying corruption affecting your Steam installation folder. In this case, reinstalling Steam along with every dependency should fix the issue in this case.
Method 1: Deleting clientregistry.blob file from the Steam folder
If you’re using an older Steam build for certain activities (like running modded game versions), it might be possible to see the ‘Failed to load Overlay localization file’ error due to some corrupted data that’s stored by the clientregistry.blob file.
Note: Keep in mind that if you’re using a more recent Steam version, your Steam installation will no longer contain a clientregistry.blob file.
However, if you’re using an older steam version, you can delete this file in order to force the Steam client to refresh the majority of temp files that might end up causing this problem.
If you don’t know how to do this, follow the instructions below:
- Open your File Explorer utility and navigate to the root location where you installed Steam. By default, that location is:
C:\Program Files\Steam
Note: If you installed Steam in a custom location, navigate there instead.
- Once you’re inside the root folder of steam, right-click on the clientregistry.blob file and choose Delete from the newly appeared context menu.
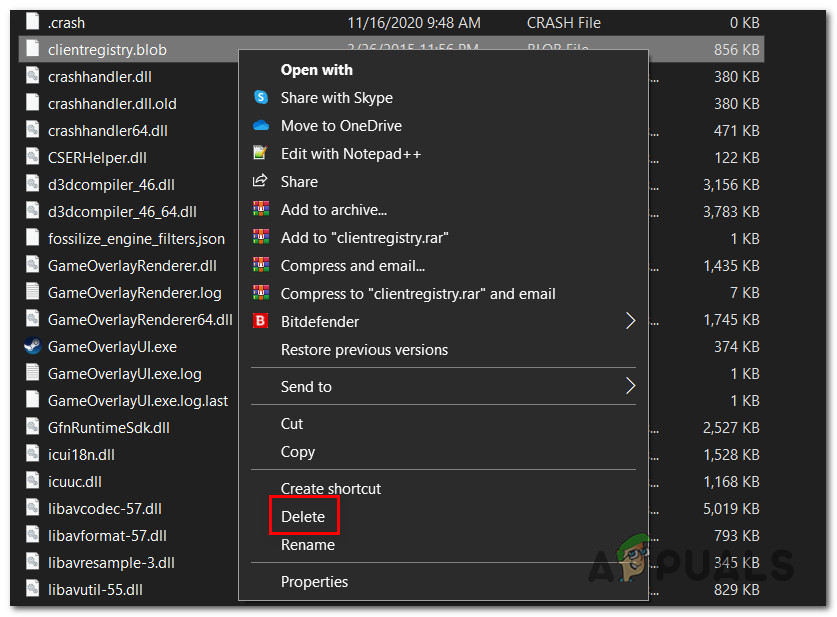
Deleting the problematic clientregistry.blob file - Once the file is successfully deleted, restart your computer and attempt to launch Steam once the next startup is complete.
If the same issue is still occurring, move down to the next potential fix below.
Method 2: Open Steam as Administrator
Another potential problem that might cause the ‘failed to load overlay localization file‘ error is a permission issue that is preventing Steam from updating itself or using certain dependencies.
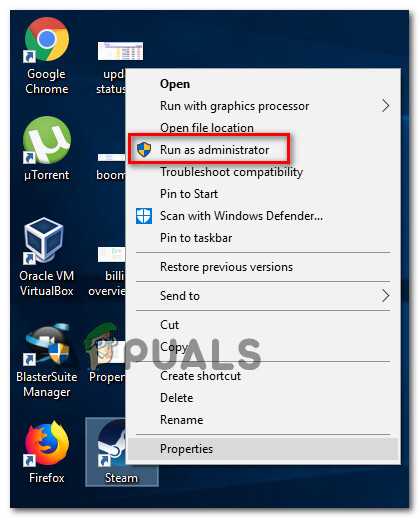
Several affected users that were facing the same problem have confirmed that they finally managed to fix the problem by forcing Steam to open with admin rights.
To do this, simply right-click on the main Steam executable or desktop shortcut and choose Run as Administrator from the newly appeared context menu.
If this allows you to open steam without encountering the same ‘failed to load overlay localization file‘ error, you should make this behavior default in order to avoid the apparition of the same issue in the future. Here’s a quick guide that will walk you through the process of doing this:
- Start by ensuring that Steam is fully closed and no background process is running in the background.
- Next, go ahead and open My Computer or File Explorer and navigate to the location where you installed Steam. By default, you’ll find your Steam installation here:
C:\Program Files (x86)\Steam
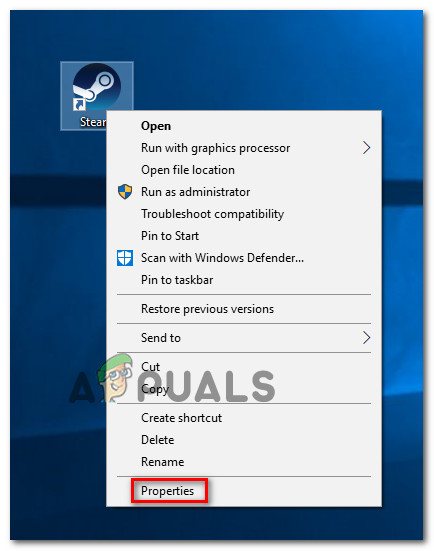
- Once you’re inside the correct location, right-click on Steam.exe and click on Properties from the newly appeared context menu.
Accessing the Properties screen of Steam - After you’re inside the Properties screen, go ahead and access the Compatibility tab form the ribbon menu at the top, then move down to the Settings menu and check the box associated with Run this program as an administrator.
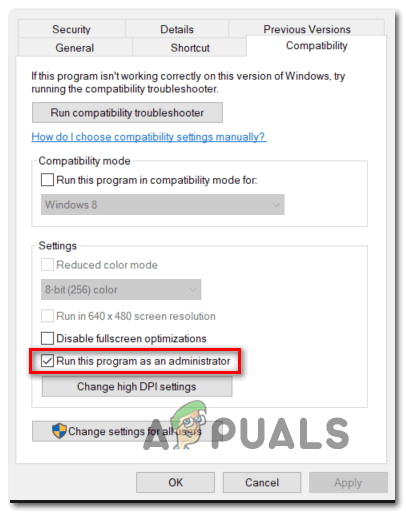
Configuring the game’s executable with admin rights. - Finally, hit the Apply button to make the changes permanent and launch Steam normally.
In case forcing admin access on Steam didn’t do the trick for you, move down to the next potential fix below.
Method 3: Whitelisting Steam in Windows Firewall (if applicable)
According to some affected users, you can also expect to see the ‘failed to load overlay localization file‘ error due to some security preferences enforced by your Windows Firewall. In certain circumstances, you might notice that your built-in security suite will sometimes decide to quarantine legitimate game executables and block Steam from communicating with the main server.
Note: The same problem can occur with some 3rd party firewall equivalents.
However, in this guide, we’re going to focus on instances where Windows Firewall is causing the error due to a false positive. If you find yourself in this scenario, follow the instructions below to establish a whitelisting rule for your Windows Firewall to ensure that Steam is not prevented from communicating with the main server.
Here’s what you need to do to whitelist Steam’s executable, the download folder, and the ports used when downloading and installing updates:
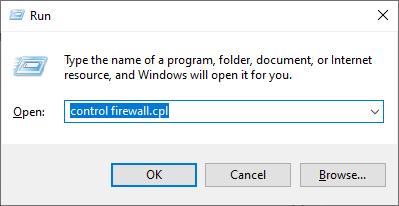
- Press Windows key + R to open up a Run dialog box. Inside the run text box, type ‘control firewall.cpl‘ and press Enter to open up the Windows Firewall window.
Accessing the Windows Defender Firewall - Once you’re inside the main menu of Windows Defender Firewall, access the menu on the left-hand side, then click on Allow an app or feature through Windows Defender firewall.

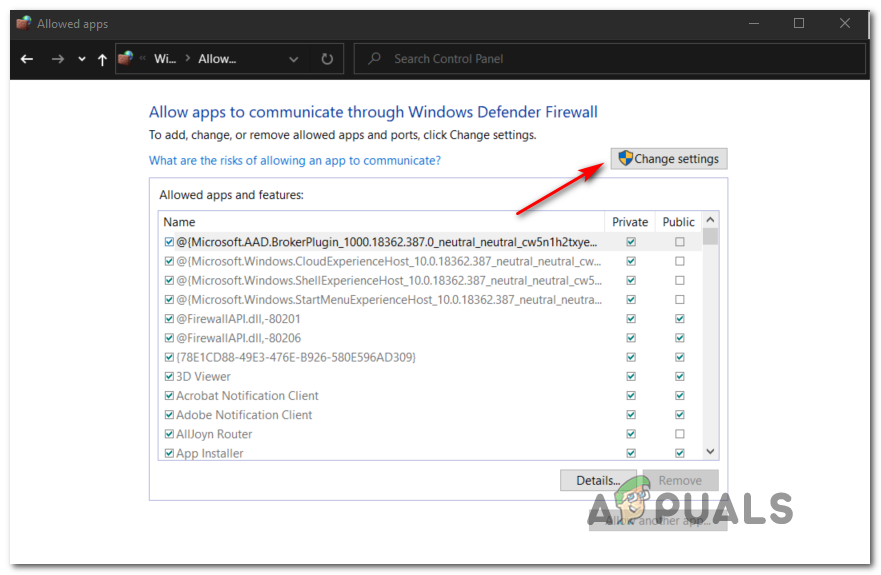
Allowing an app or feature through Windows Defender - Once you’re inside the Allowed Apps menu, start by clicking on Change settings button. When you see the UAC (User Account Control) prompt, click Yes to grant admin access.
Changing the Settings of the Allowed Items in Windows Firewall - Now that the Allowed apps menu is editable, go directly under Allowed another app and click on Browser to navigate to the location where your main Steam executable is. By default that location is:
C:\Program Files\Steam\bin
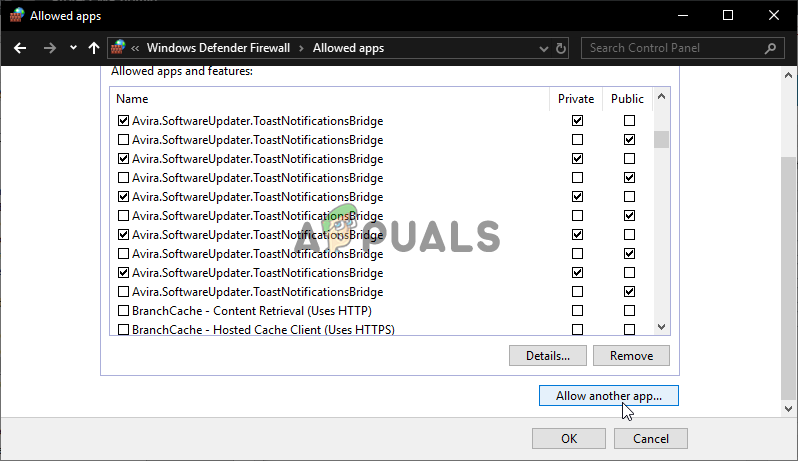
Allow another app - Once you manage to exclude the main Steam executable, find the entry inside the list of Allowed apps and features and ensure that both the Private and Public boxes are checked.
- Next, you can safely close the Allowed Apps window and follow the instructions at step 1 to return to the initial firewall menu.
- Once you’re back to the initial menu, click on Advanced Settings (from the menu on the left) and click Yes when prompted by the UAC (User Account Control) prompt.
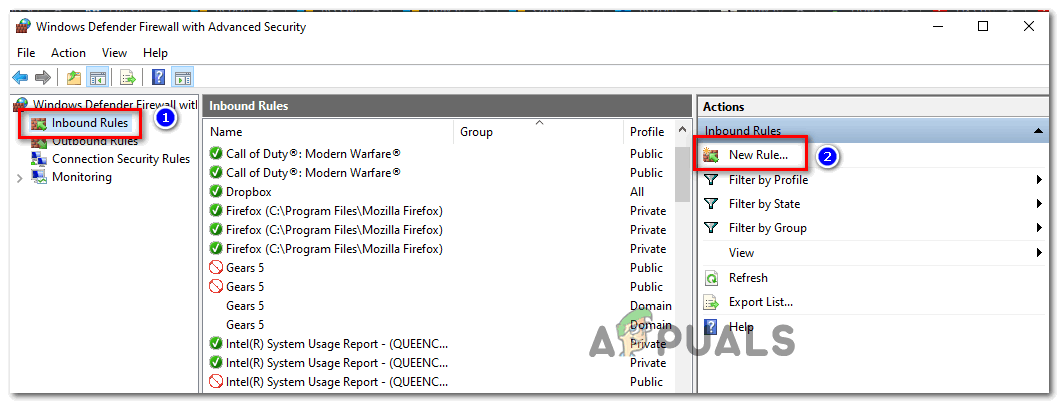
- Next, from the Advanced settings menu, click on New Rule from the left-hand menu associated with Inbound rules.
- With the Inbound rules tab selected, click on New rule from the menu on the left-hand side and click Next at the first prompt.
Creating New Rules in Windows Firewall - Next, from the New Inbound Rule window, choose port under Rule Type and click Next.
- At the next prompt, choose TCP from the list of available options, then enable Specific Local ports toggle.
- Once you get to the correct menu, ensure that the following Steam ports are inserted in order to prevent them from being blocked:
27015--27030
27036
27015
- Next, add another rule for UDP, then select Specific Local Ports once again and paste the following in the input box:
27015--27030
27000--27100
27031-2703
4380
27015
3478
4379
4380
- Once every port used by Steam is added to the exception list, click on Next to land directly into the action Prompt window, then click on Allow the connection and hit the next button once again.
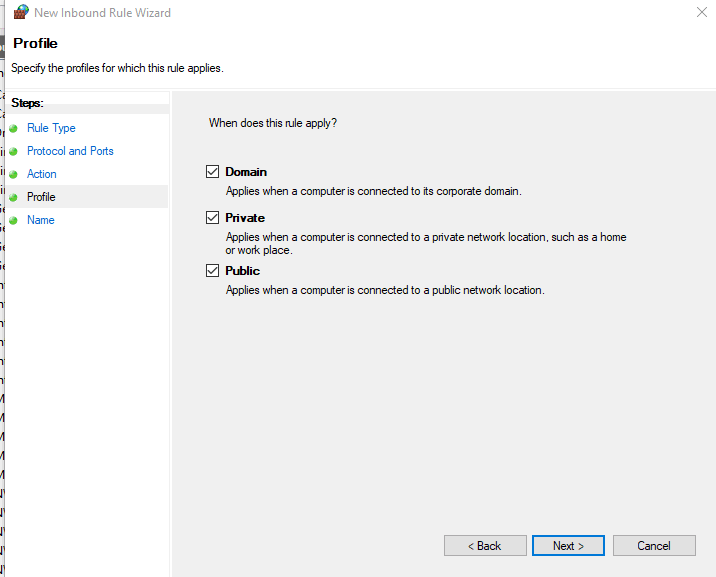
Enforcing the rule on various network types - Finally, set a name for the rules you’ve established and click on Finish to save the changes before opening Steam again and seeing if the problem is now fixed.
If the same problem is still occurring, move down to the next potential fix below.
Method 4: Reinstalling Steam
If none of the methods above have worked for you, chances are you’re dealing with some kind of system file corruption that ended up effectively breaking the application. If this scenario is applicable, the only thing you can do is uninstall Steam along with every associated component before reinstalling the latest version through the official channels.
If you didn’t attempt to fix the ‘failed to load overlay localization file‘ error by reinstalling Steam along with every associated component, follow the instructions below to do it:
- Press Windows key + R to open up a Run dialog box. Next, type ‘appwiz.cpl’ inside the text box and press Enter to open up the Apps and Features window.
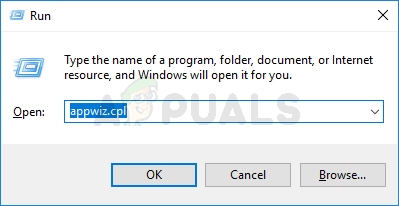
Type appwiz.cpl and Press Enter To Open Installed Programs Page Note: If you’re prompted by the UAC (User Account Control), click Yes to grant admin access.
- Once you’re finally inside the Apps & Features menu, scroll down through the list of installed applications and locate your Steam installation.
- After you manage to locate the entry associated with Steam, right-click on it and choose Uninstall from the context menu.
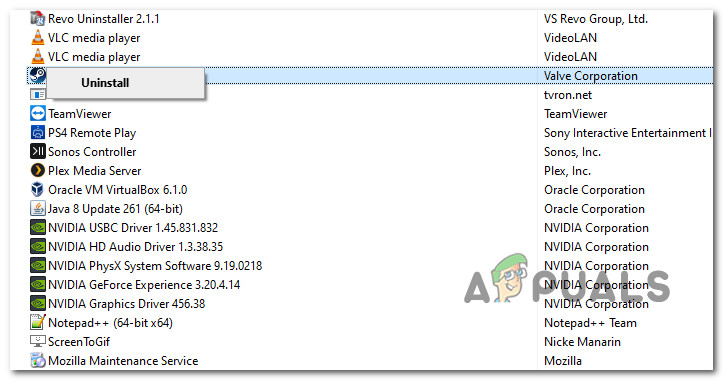
Uninstalling Steam Note: If you installed standalone modes or other applications that are dependent on Steam, uninstall them as well.
- Once you’re inside the uninstallation screen, follow the on-screen prompts to complete the uninstallation, then reboot your PC and wait for the next startup to complete.
- After your computer boots back up, open your default browser and visit the official Download Page of Steam and download the latest compatible version according to your Windows version.
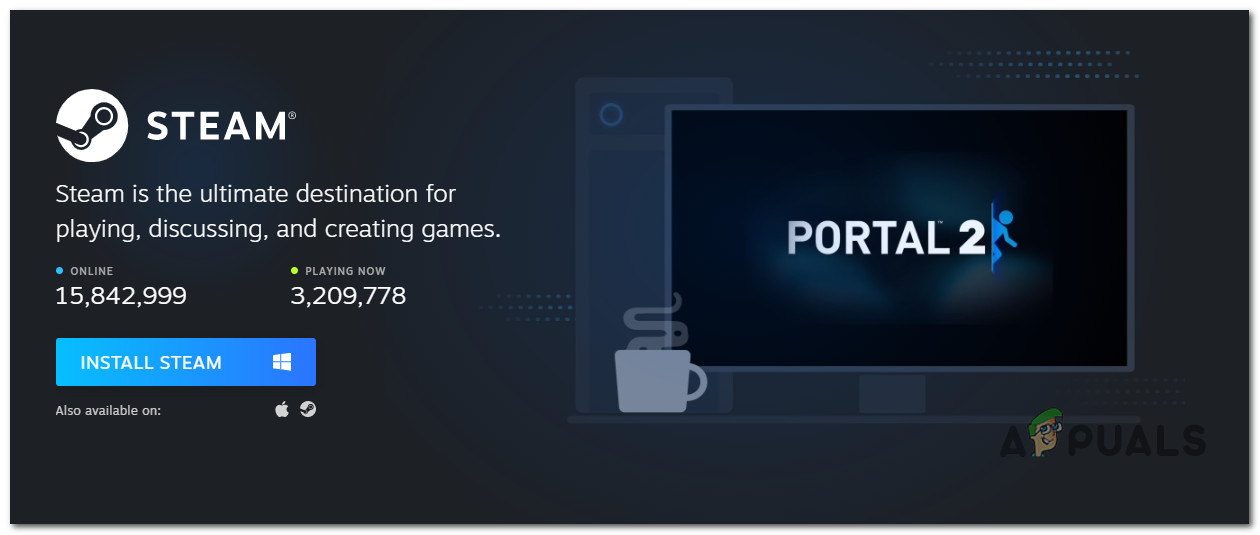
Downloading the latest version of Steam - Once the installer is fully downloaded, then double-click on it and follow the on-screen prompts to complete the installation of the latest Steam version.
- After the installation is complete, launch Steam conventionally and see if the issue is now resolved.