Facebook Login Error ‘Sorry, Something Went Wrong’
The “Sorry, Something Went Wrong. We are working on getting this fixed as soon as we can” Error while trying to log in or while opening a page can be due to the corruption of important data. This Error might also indicate a faulty extension that is preventing the page from being loaded.

What Causes the “Sorry, Something Went Wrong. We are working on getting this fixed as soon as we can” Error and How to Fix it?
We found the underlying causes to be:
- Cache: Sometimes, the cache being stored by the application or the browser might be the reason due to which this error is being triggered. Certain launch configurations are cached by the applications and the mobile to decrease loading times and provide a smoother experience. However, this cached data can be corrupted which can result in the error being triggered. This data can also block the News Feed from refreshing.
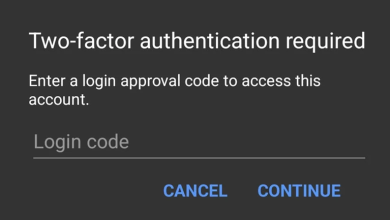
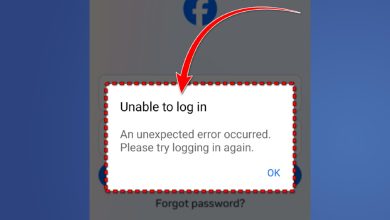
- Login Data: In some cases, the data login and other data being stored by the Facebook app might be the reason due to which this error is being triggered. The data might either be incorrect or corrupted which is why it might be preventing the login.
- Extensions: If you are using a browser that has a lot of extensions or add-ons installed, Facebook might face issues while loading certain pages. Extensions/Add-ons can sometimes prevent certain pages from being able to load and that might be the culprit in this case which is preventing Facebook from loading.
- Cookies: Cookies are stored by browsers to speed up the process of loading certain pages and to provide a smoother experience. However, they can sometimes be corrupted and prevent the page from loading altogether.
Solution 1: Clearing Cache
Since the corrupted cache might be preventing Facebook from working properly. In this step, we will be clearing the cache for it. Make sure to follow the steps that are relevant to your case.
For Mobile:
- Drag down the notifications panel and select the “Settings” icon.
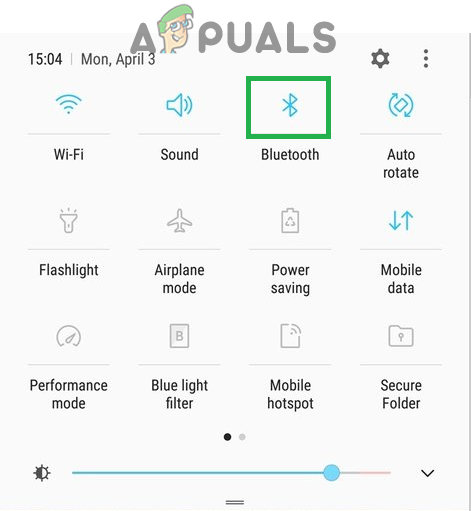
Dragging down the notifications panel and tapping on the “Bluetooth” icon - Click on the “Applications” option and then select “Apps”.
- Scroll down and select “Facebook”.
- Click on “Storage” and select the “Clear Cache” option.
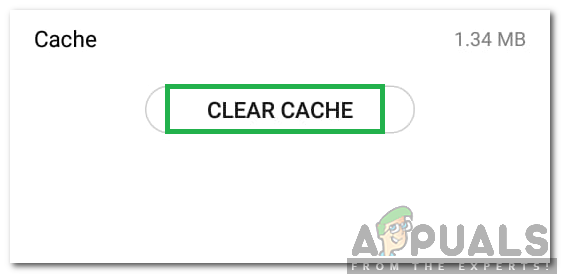
Clicking on “Clear Cache” - Also, click on the “Clear Data” option.
- Launch Facebook and check if the solution works.
For Computer:
Below, we have listed the steps to clear both cache and cookies for some of the most famous browsers. Be sure to follow the one relevant to your case.
For Chrome:
-
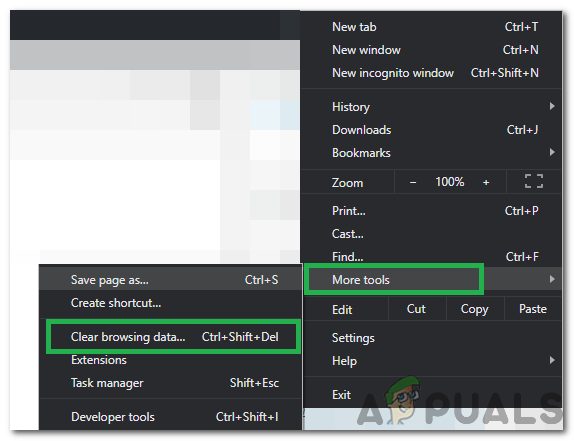
- Open Chrome on your computer and click on “More button” on the top right.

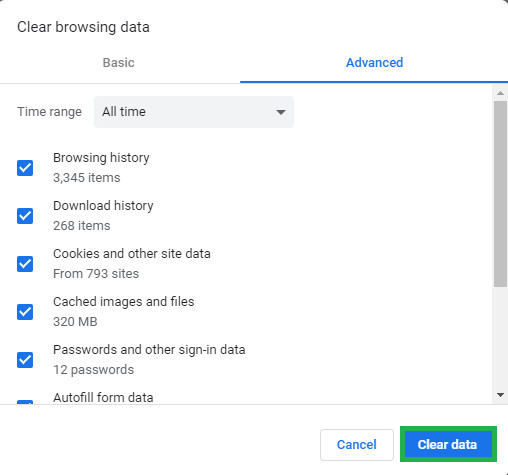
Clicking on the Menu button. - Select “More tools” from the list and click on “Clear Browsing Data“.
Selecting Clear Browsing Data Option - This will open up a new tab, select “Advanced” in the new tab.
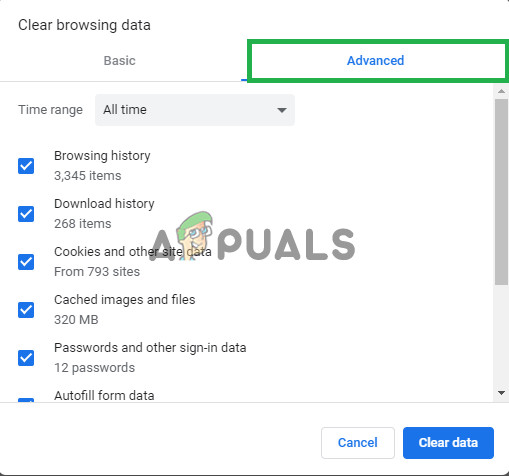
Selecting the advanced tab - Select “All time” as the time range, and check the “Cookie” and “Cache” boxes.
- Click on “Clear Data” and check to see if the issue persists.
Clicking on clear data
- Open Chrome on your computer and click on “More button” on the top right.
For Firefox:
- Click on the Menu button on the top right corner.

Clicking on the “Menu” button - In the History menu, select “Clear History”

Clicking on Clear history
Note: Press “alt” if the menu bar is hidden - In the “Time range to clear” dropdown menu, select “All time”
- Select all the options below.
- Click on “Clear Now” to clear your cookies and cache.
For Microsoft Edge:
-
- Click on the star with three horizontal lines on the top right side.

Clicking on the star button - Click on “history” on the right pane.
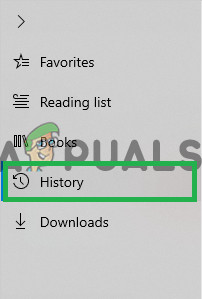
Clicking on history - Select the “Clear History” button on the top of the pane.
- Check all the boxes and select “Clear”
- Check to see if the issue persists after clearing the history.
- Click on the star with three horizontal lines on the top right side.
Note: If you are using a different browser you can check this information on their support site.
For Chrome:
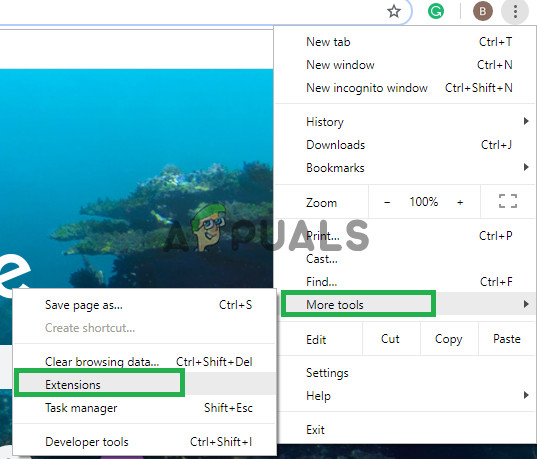
- Click on the “Three Dots” on the top right.

Clicking on the Three Dots in the top right corner - Select “More tools” and click on “Extensions” in the list.
Clicking on “More Tools” and then on “Extensions” - Now Turn off all the active extensions by clicking on the toggle.
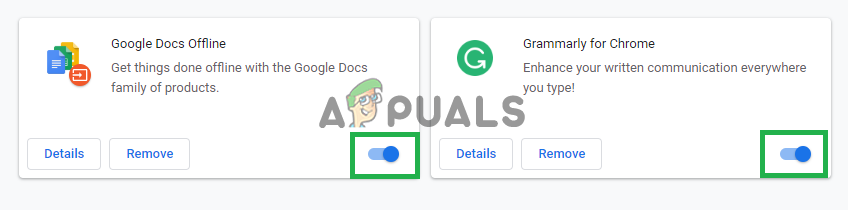
Click on these buttons in order to disable the extensions. - Check to see if the issue persists after disabling the extensions.
For Firefox:
- Click on the Menu icon on the top right side.
- Select the “Add-On” options from the list.
Clicking on the Add-ons option - Click on the “Extensions” button on left.
- Now select all the Extensions one after the other and click on “Disable“.
For Microsoft Edge:
-
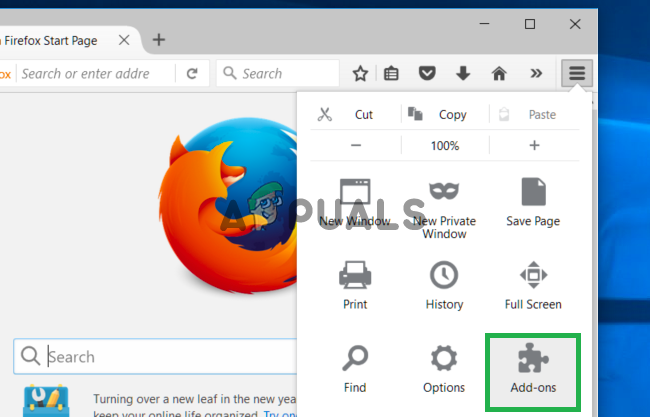
- Click on the “Menu” button on the top right corner.

Selecting the Menu button - Click on “Extensions” from the drop-down.
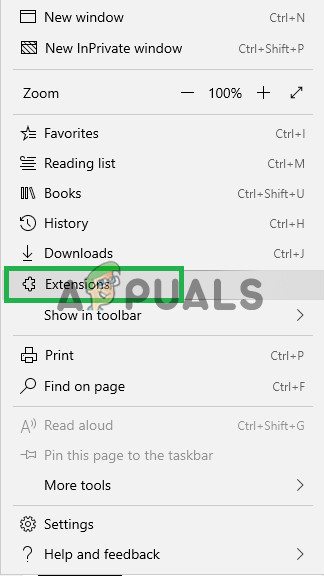
Selecting “Extensions” from the list - Select all the extensions one by one and click on “disable”.
- Check to see if the issue persists after disabling the extensions.
- Click on the “Menu” button on the top right corner.


None of that worked on my end I still see the error message on my phone and computer it’s been 8 days