How to Extract Intel RST (VMD) from SetupRST.exe Executable?
On systems that use Intel VMD, Windows Setup cannot detect NVMe storage unless the required storage driver is loaded manually. Intel includes this driver inside a standard installer designed for a fully running operating system, but it does not contain the raw INF and SYS files required during the initial setup phase. This makes driver extraction an essential step if the disk list shows up empty during installation.
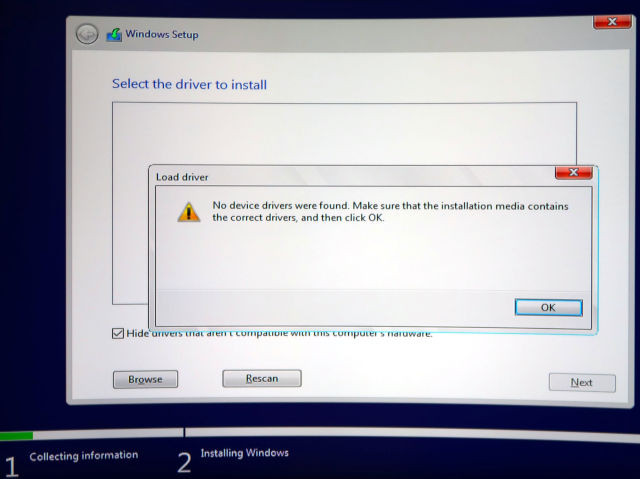
If the driver is missing, the installer will display a “No device drivers were found” error and block the installation from proceeding. This happens because Windows Setup has no communication path with the storage controller without the driver being injected first.
Once the necessary files are extracted, they can be loaded during the installation process, allowing the setup environment to properly detect and display your NVMe drives.
In this guide, you’ll learn how to extract and load the required Intel RST driver files step by step so the installation can continue smoothly.
Before You Begin: Verify BIOS and System Configuration
Before doing anything else, confirm that your system is configured to support Intel VMD. If these settings are incorrect, the driver will not work even after extraction and loading.
- Enable VMD in BIOS: Enter the BIOS and ensure the VMD controller is enabled for the storage port. If disabled, Windows Setup will not detect the NVMe drive.
- Switch to UEFI mode: Legacy or CSM boot modes can cause the driver to fail during loading. Make sure UEFI is active.
These drivers must be extracted on a working Windows PC and then copied to a USB flash drive. You will load them from this USB during installation on the target machine.
Step 1. Extract the Intel RST Driver Files
- Download the correct SetupRST.exe for your platform from Intel’s official website.
- Place the file in an easy-to-find folder, for example
C:\RST. - Open Terminal in that folder (or open Command Prompt and navigate manually):
cd C:\RST
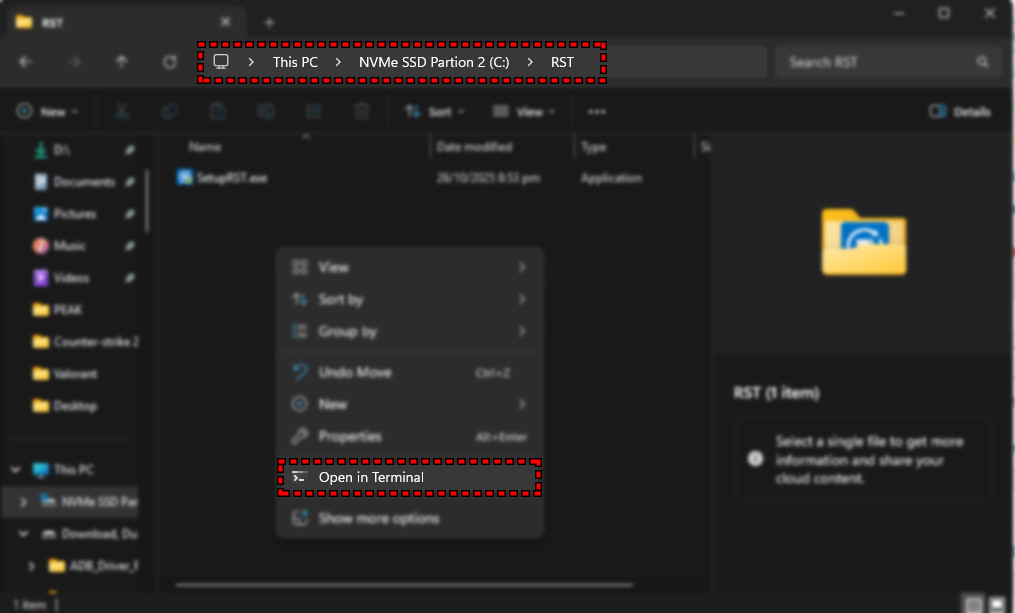
- Inside the terminal, type cmd and press Enter.
- Run the extraction command:
SetupRST.exe -extractdrivers SetupRST_extracted
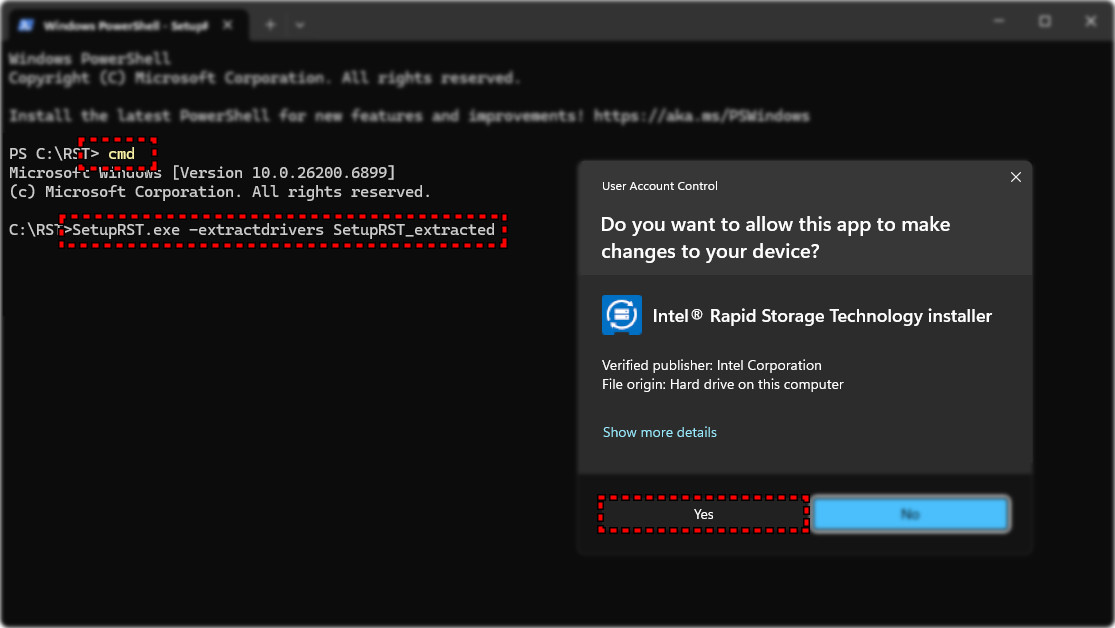
- Approve the UAC prompt by pressing Yes.
- Once completed, a new folder named
SetupRST_extractedwill appear with the required driver files.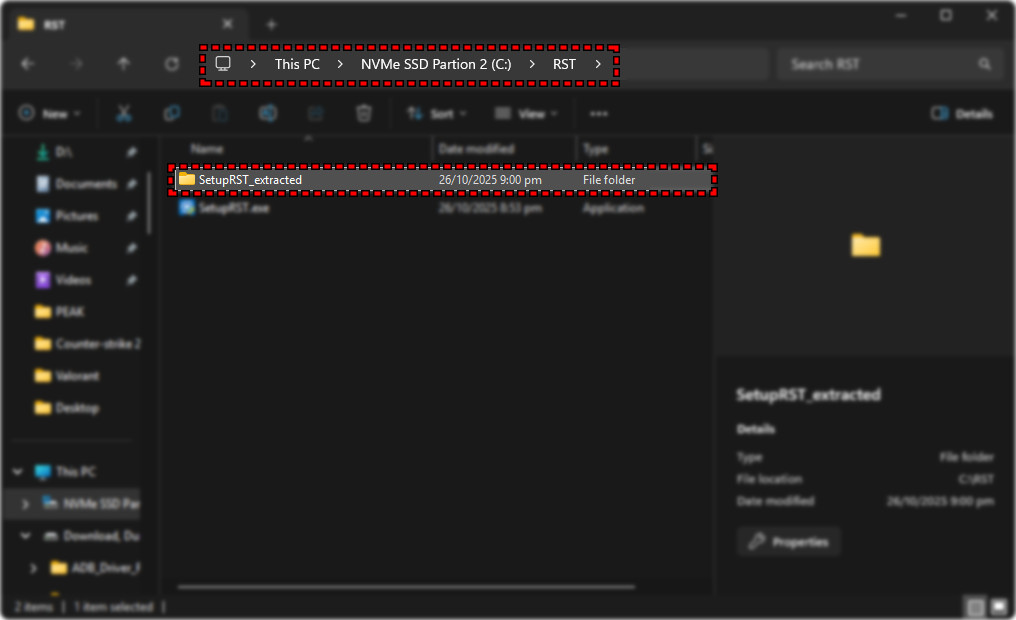
Step 2. Move the Extracted Driver to a USB
- Insert a USB flash drive into the working PC.
- Copy the entire
SetupRST_extractedfolder to the root of the USB (not inside any subfolder).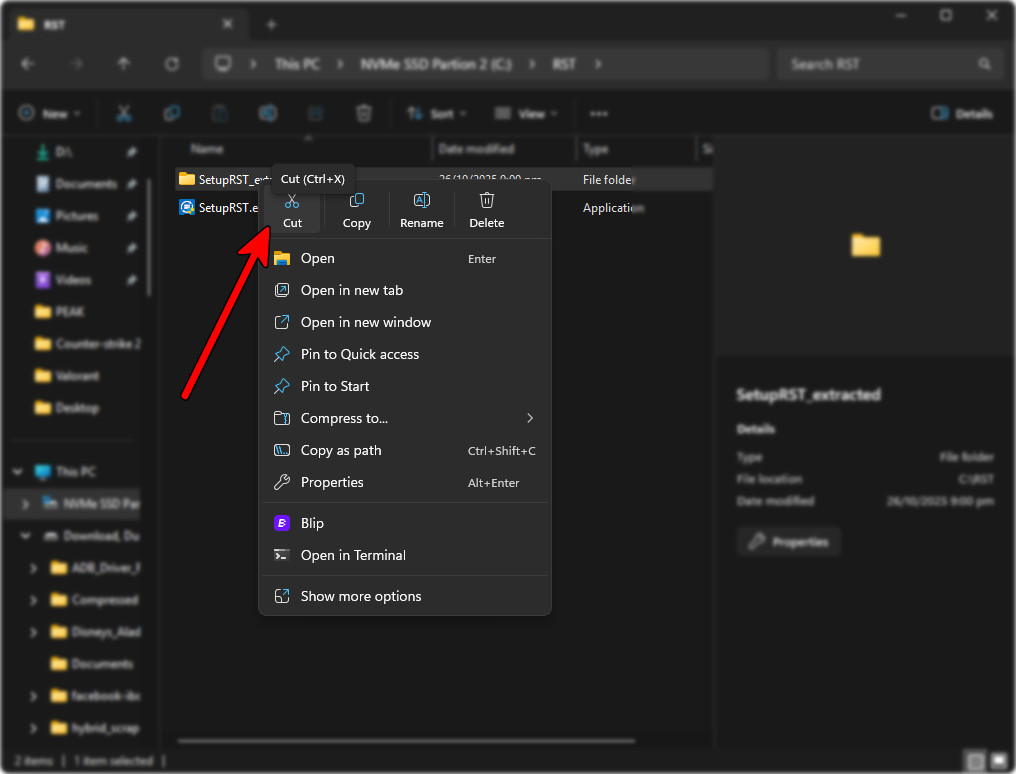
- Safely eject the USB drive once the transfer is done.
- Connect this USB to the machine where you’re installing Windows.
Step 3. Load the Driver During Windows Setup
- Boot from your Windows installation media.
- When the disk selection window appears, click Load Driver.
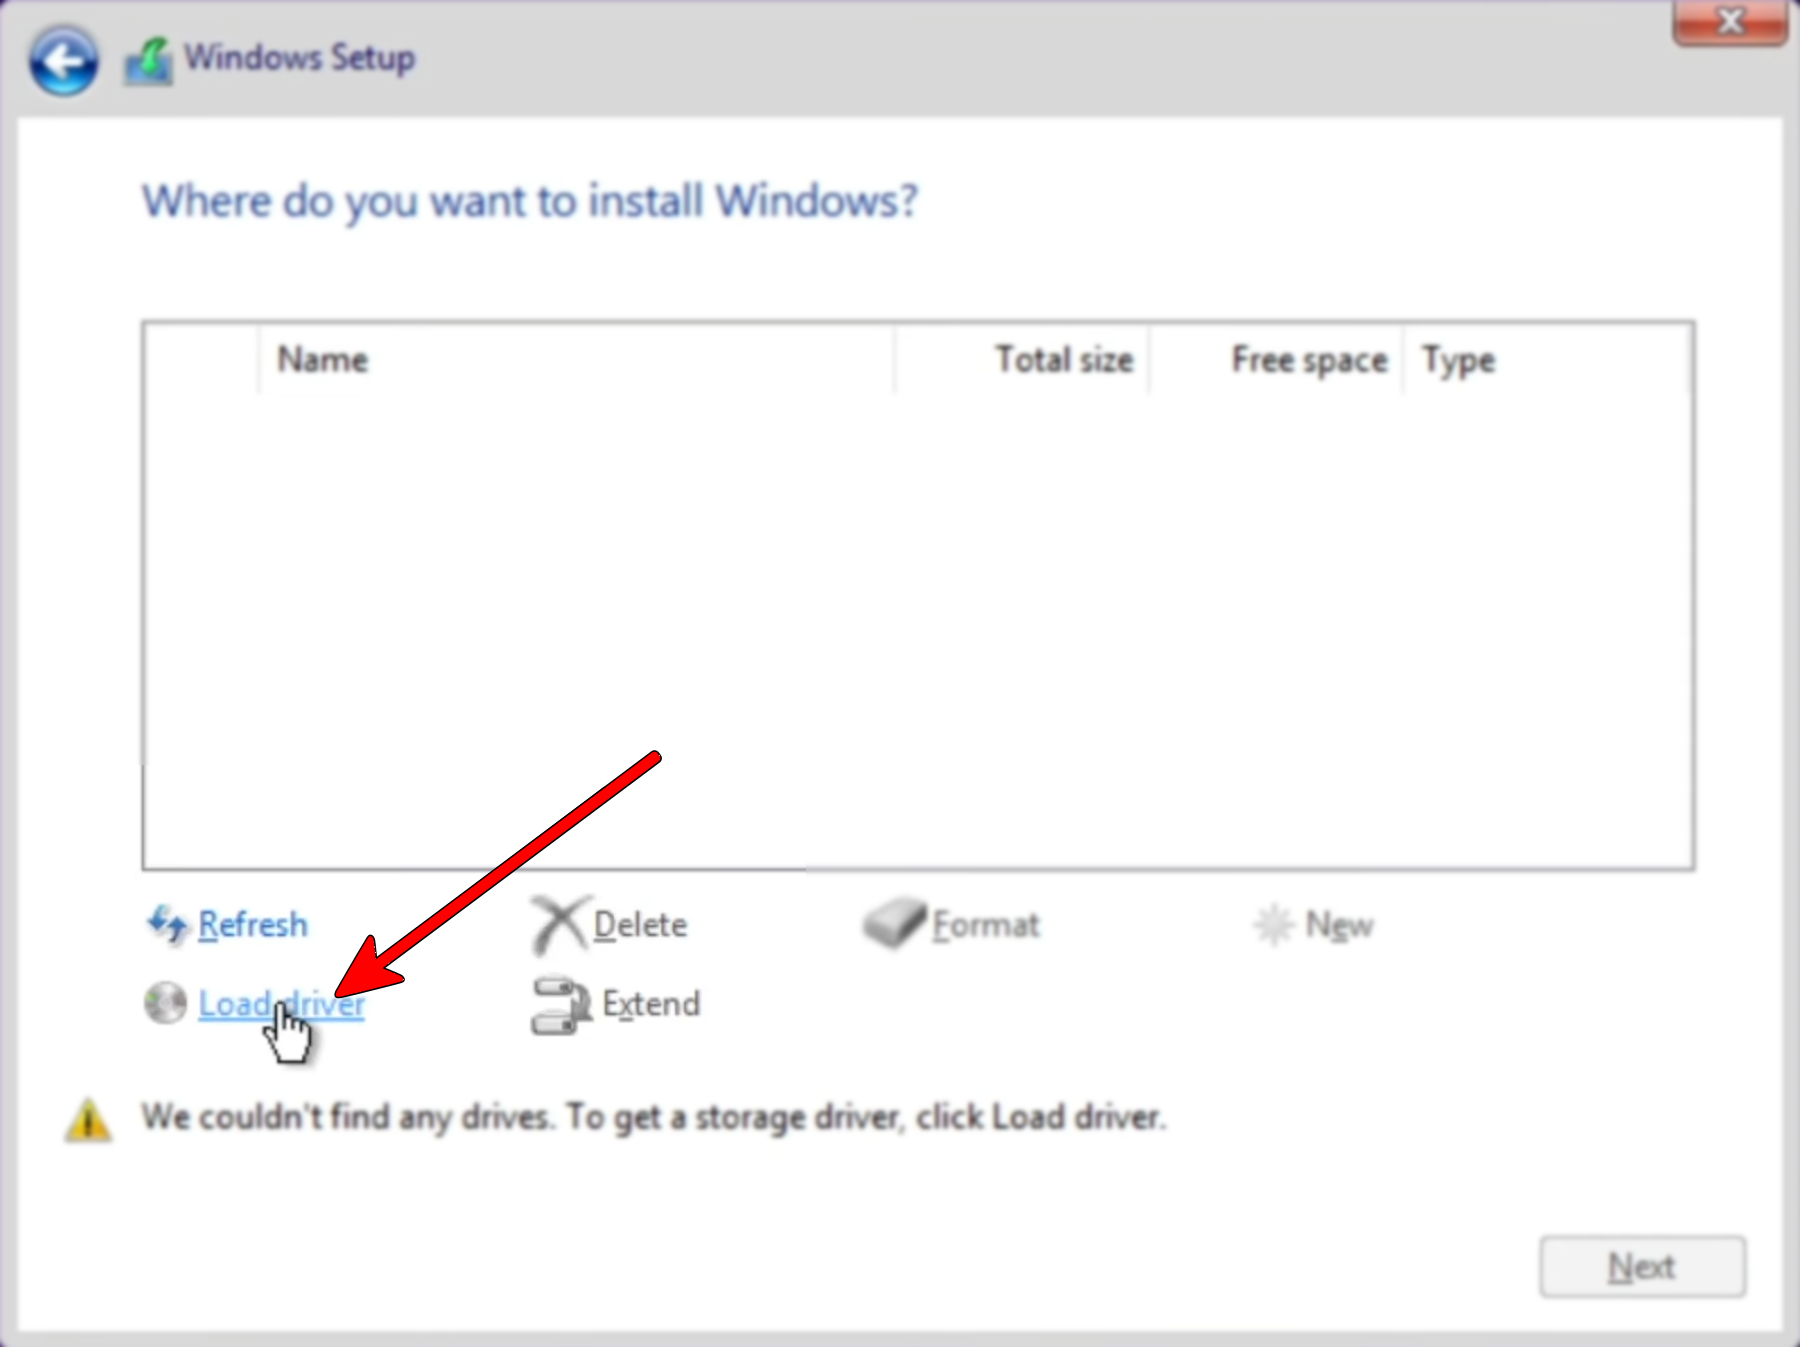
- Navigate to the folder containing the extracted INF and SYS files.
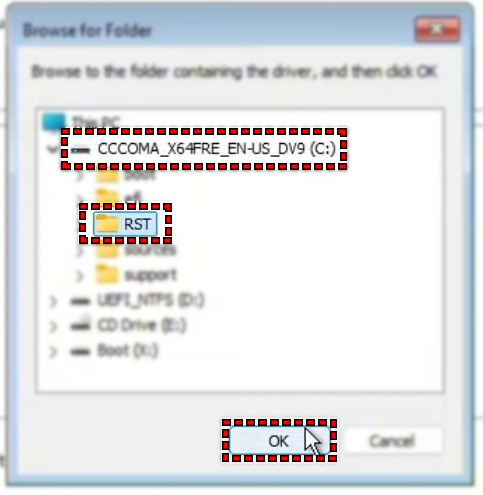
- Select the driver and click Next.
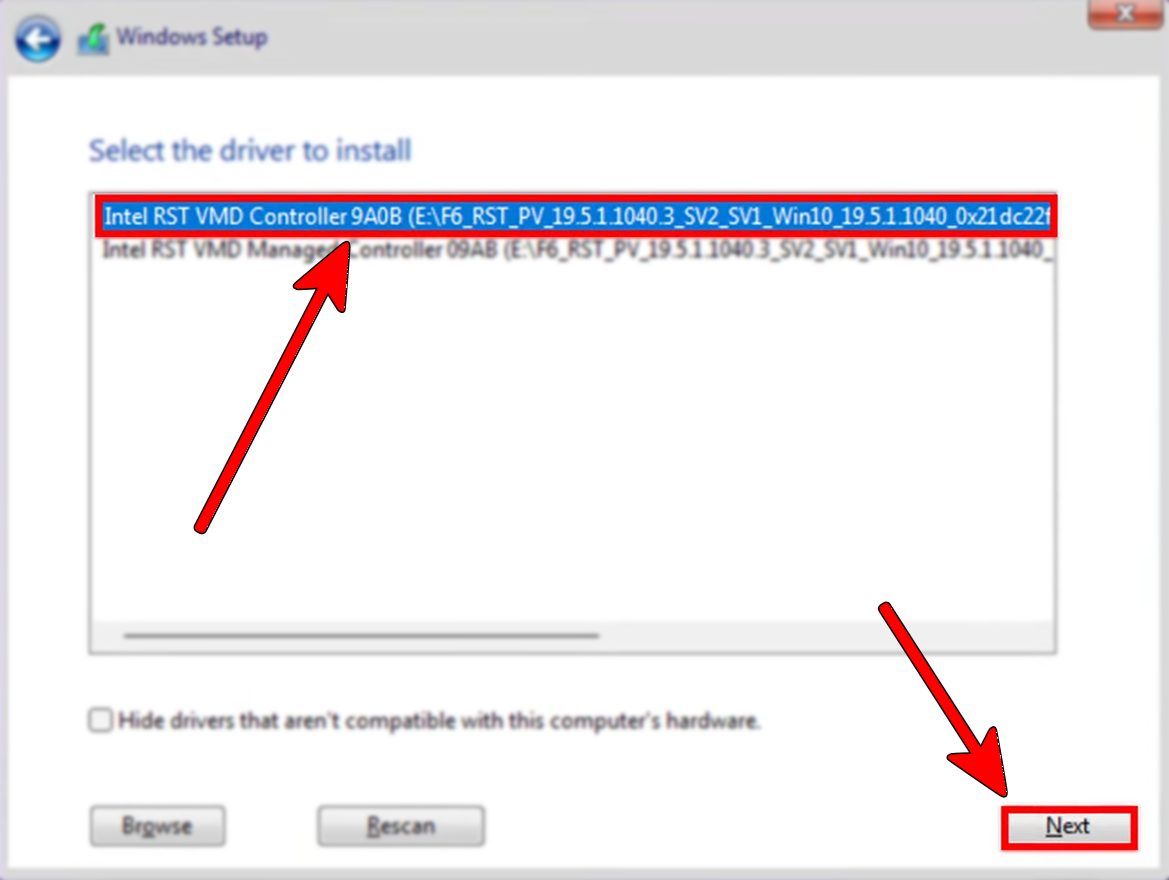
- Wait for Windows Setup to detect the NVMe storage.
Once the driver loads successfully, your NVMe storage should appear in the list of available drives.
- Select the detected drive for installation.
- Format or delete partitions if needed.
- Continue with the Windows installation normally.