EverQuest 2 Launcher Not Launching? Here is How to Fix
EverQuest 2 Launcher, not loading might be caused by Corrupt Game Files, Unstable/Outdated Windows Update. The error is reported to occur on startup leading the game to be unplayable for the users. It can also be a server-side issue which can be really frustrating as the user can not do anything besides wait until the servers have been resolved.

What Causes EverQuest 2 Launcher to not launch
There can be many reasons that may cause EverQuest 2 Launcher to not function properly but we found the following to be the chief responsible for the error at hand:
- Corrupt Game Files- Corrupted files are files that suddenly become inoperable or unusable. If for some reason your game has developed rogue files. You should run a file integrity check which might be able to help rectify this problem.
- Background Services/Programs- Services or Programs running in the background may intervene with a process’s smooth launch. In our case, EverQuest 2 launcher might be being intervened by a background process causing it to not function properly.
- Bad Cache- Cache is a storage medium and is used for fast retrieval of files. The cache is temporary and is mostly used in processes that require quick access to data such as in gaming. It is used to ensure Quality of service Cache files are saved and go bad after a while due to gaming being an ever-developing field of tech. We’ll be clearing the cache which might help us in fixing our game error.
- Outdated Graphics Drivers- Outdated graphics drivers can be a major cause of this error occurring, in order to rectify this problem we’ll be performing a clean installation of graphic drivers.
- Unstable Windows Build- Windows Comes out with new updates every now and then and some of them are not gaming oriented. Updating to a stable window build might help us rectify this error.
- Blacklisted From Antivirus- Windows Defender or third-party antivirus sometimes do not allow all steam games to send bandwidth out of the network. Blacklisted programs can be whitelisted easily.
1. Update graphics drivers
Outdated graphics driver can be a major cause to users facing this problem, We’ll be updating our graphics driver but before doing so we will be uninstalling graphics drivers through the control panel or device manager we’ll be using a DDU (Display Driver Uninstaller) to delete the currently installed drivers. Using a DDU ensures a clean Deletion of Graphics Drivers without leaving any residual files and corrupt registry entries which may lead to an inefficient up-gradation of drivers. Follow the below-mentioned steps to uninstall and update graphics drivers.
- Click here to Download Display Driver Uninstaller. Scroll Down Until you see the section of the page from where you can download the DDU.
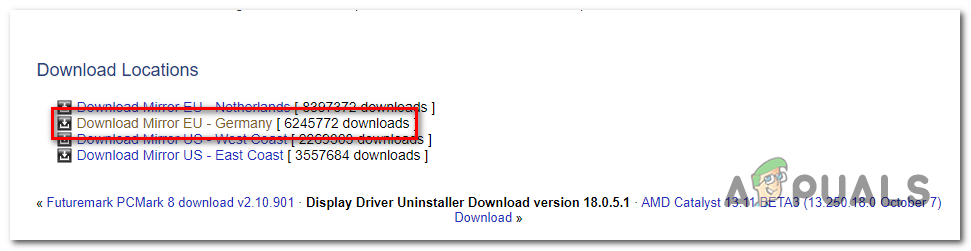
Downloading DDU - Extract the downloaded .zip file to a folder.
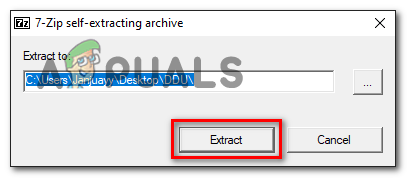
- Double-Click on the DDU v18.0.5.1 File.

Installing DDU - Click on extract, Once extracted a new folder should appear in your DDU folder.
Extracting Files from application file Make sure to proceed in windows safe mode as it ensures the proper deletion of graphics drivers. Click here to learn how to use windows safe mode - Open the newly created folder and double-click on the Display Driver Uninstaller application file.
- You’ll be greeted by a popup, select your preferences. Select only those files that you feel would be necessary to uninstall.
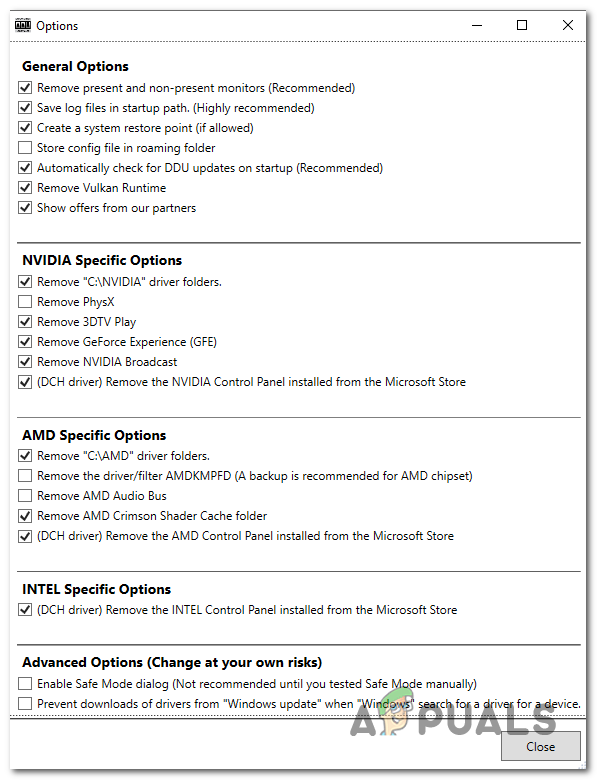
Selecting preferences in DDU - Click on the Close button on the bottom right.
- Select Your Graphics Card Manufacturer and select GPU on the right panel
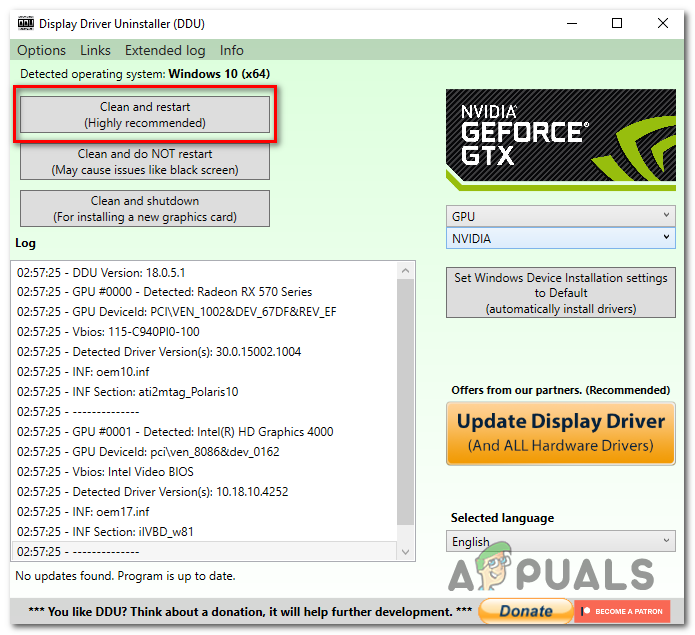
Reinstalling Graphics Card Drivers DDU will uninstall all Graphics Drivers installed on your machine and also delete any unnecessary residual files and corrupt registry entries.
- Now to install the latest graphic cards drivers head on over to your Graphic card’s manufacturer’s website
Click here to download AMD Drivers
Click here to download Nvidia Drivers - After opening your graphics card manufacturer’s website, select your graphics card manually
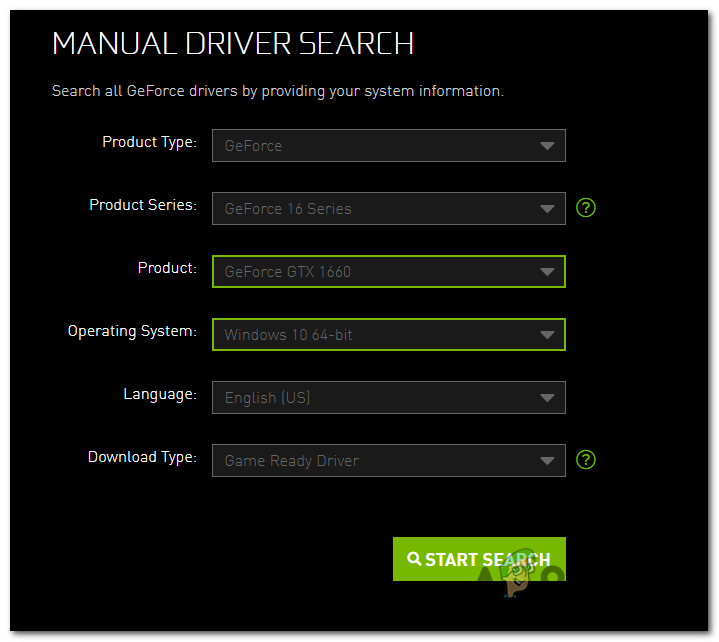
Downloading Nvidia Graphic card Driver’s - For Nvidia, users download Game Ready Drivers. AMD users should refer to this article to learn how to download and install drivers. Click here to view article.
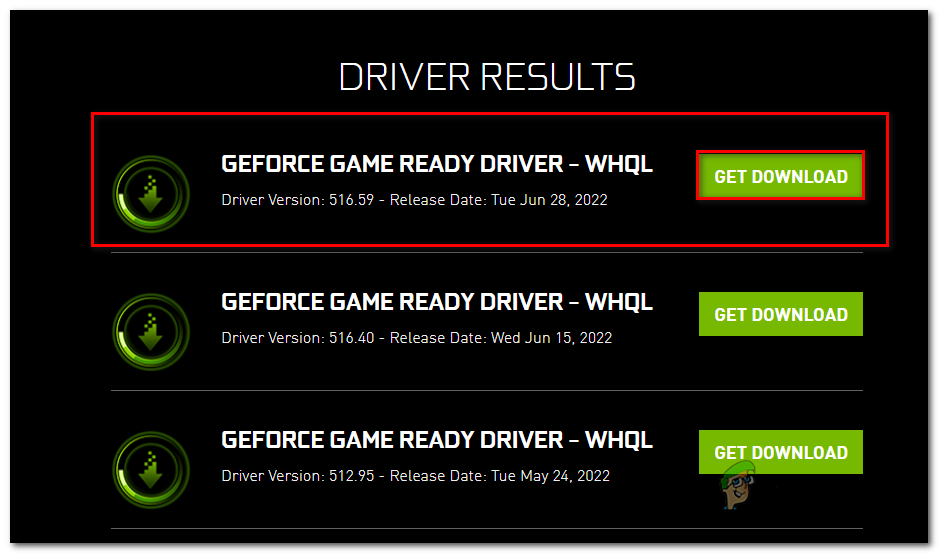
downloading game-ready drivers - Run the file that you just downloaded and continue with the really easy installation process.
Once Downloaded, Try relaunching Everquest 2 and check if the problem persists and continue to the other solutions.
2. Verify Game Files Integrity
Another possibility of you facing troubles while launching the EverQuest 2 launcher might be corrupt game files. Steam comes equipped with an option to check file integrity to access it follow the following really easy-to-follow steps.
- Open steam.
- Click On Library
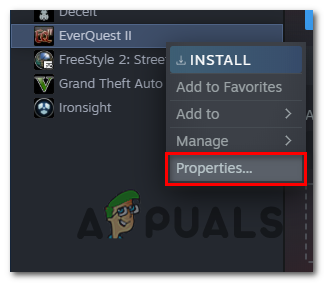
- Right-Click on the desired game in our case EverQuest 2.
- Click on Properties.
- In the left panel Click on Local files.
- Click on Verify Game Files Integrity and wait for a while until the files have been validated.
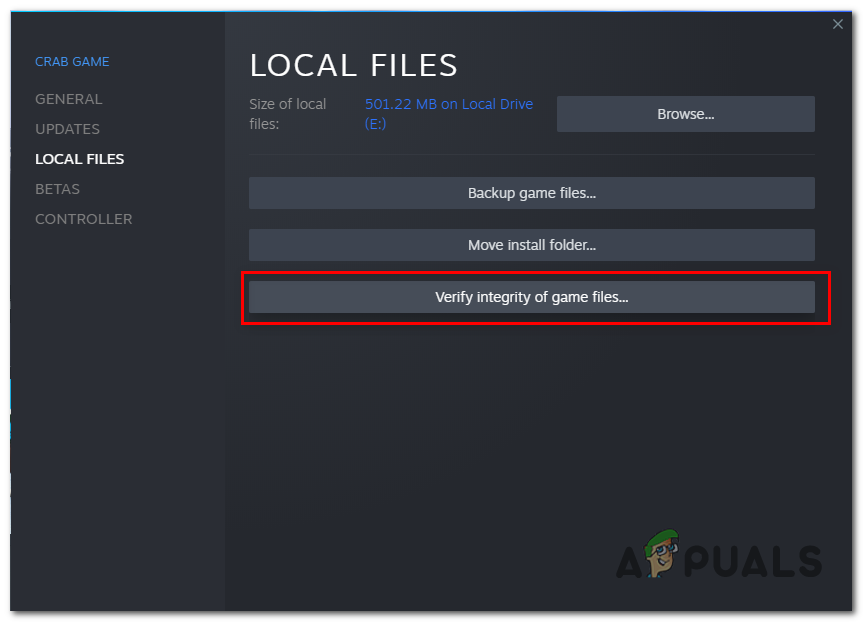
Verifying Game Files Integrity Try Launching your game, If it does not fix the error for you continue to the next steps.
3. Turn Off Background Services/Applications
Another possibility of you facing this error might be due to intrusion from background services. According to Valve, there is always a possibility that applications currently running on a computer may adversely affect the performance of Steam services. Applications/services that can be a root cause of you facing this error can be:
1. VPNs
2. Firewalls
3. Windows Defender or third-party Antiviruses
4. Third-party Download Managers etc
To identify if our game’s smooth processing is intervened by any of the above-mentioned programs/services we will be clean booting our system. What it essentially does is that it starts Windows with a minimal set of drivers and startup programs so that you can determine whether a background program is interfering with your game or program. This is similar to starting windows in safe mode but provides you more control over which services and programs run at startup to help you isolate the cause of a problem. To perform a clean Boot Perform the following steps:
- Press Windows Key.
- Search For System Configurations.
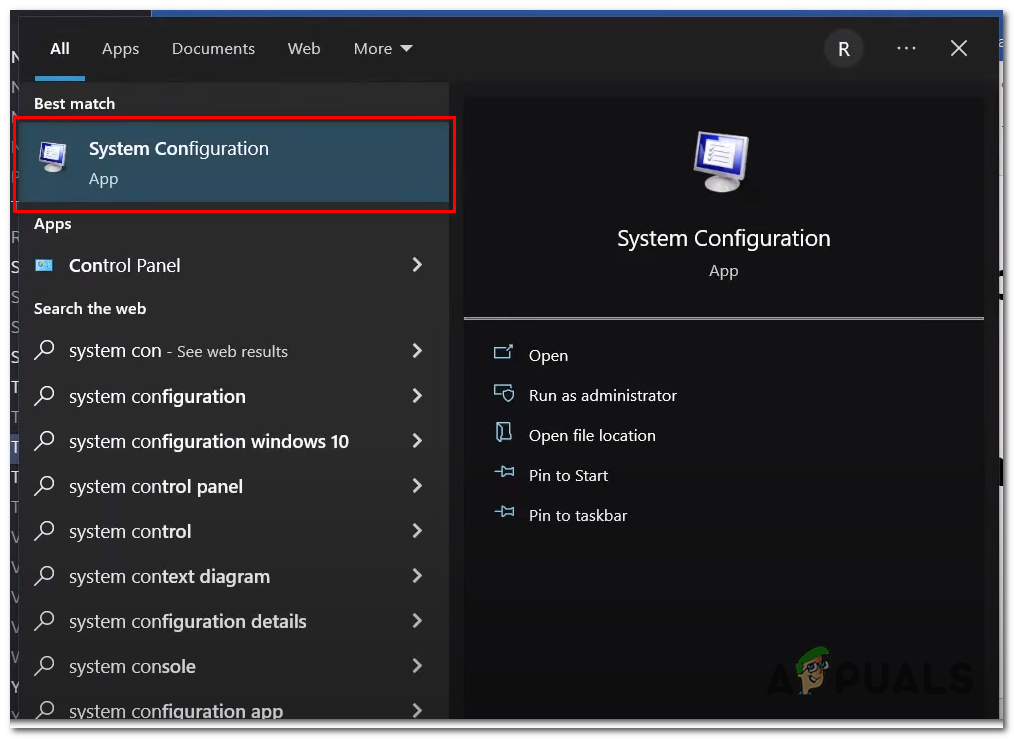
Searching for System Configurations - On the Services tab of System Configuration, select Hide all Microsoft services, and then select Disable all.
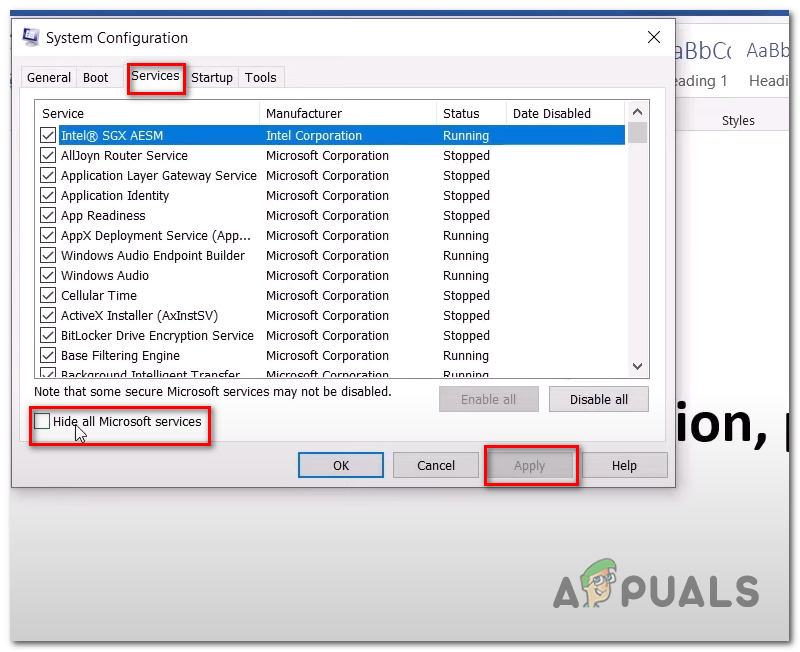
Performing a Clean boot - Click on apply.
- Restart.
4. Close Overlay Apps
The overlay can be a major cause to you facing this problem as users have reported them closing it helped them solve problems for many other games. Similarly, you should close discord, and TeamSpeak overlays as there is a possibility of them being a cause to us facing this error. To Close overlay apps in the steam head on over to your steam interface and follow these steps:
- Right-click on the game you want this setting to take effect on
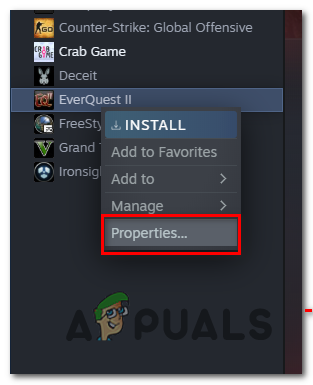
- Click on properties.
- Uncheck the “Enable The steam Overlay” if checked.
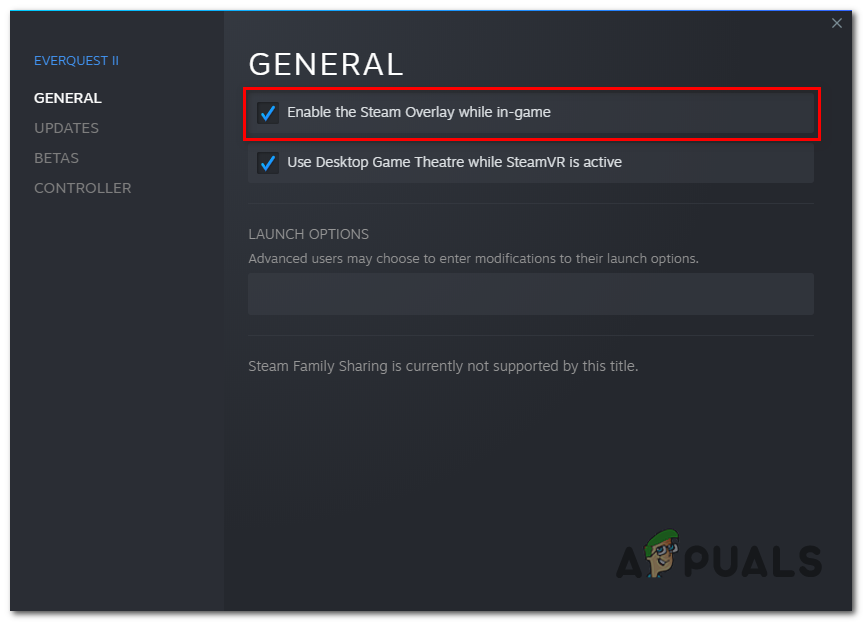
Disabling steam overlay - Run The Game.
5. Update Your Windows
Another Straightforward fix for this could be updating your windows as windows announce new updates every now and then and some of them aren’t gaming-oriented, to update your windows follow the steps given below.
- Press the Windows key.
- Search for “Check for updates”.
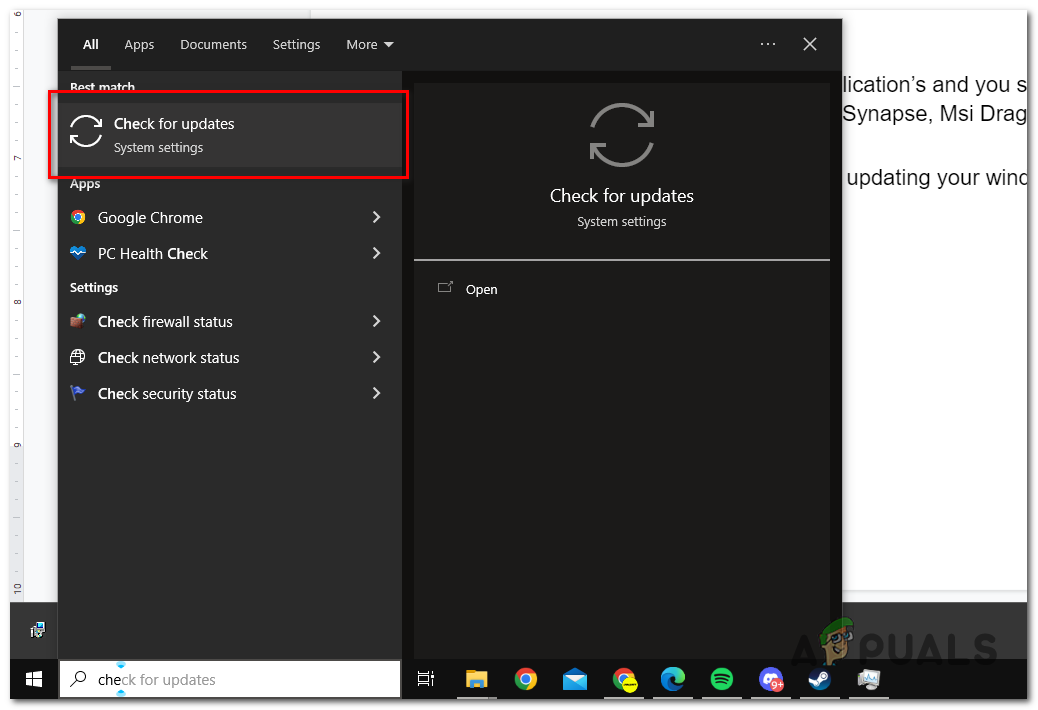
Checking for windows updates - Click on check For updates.
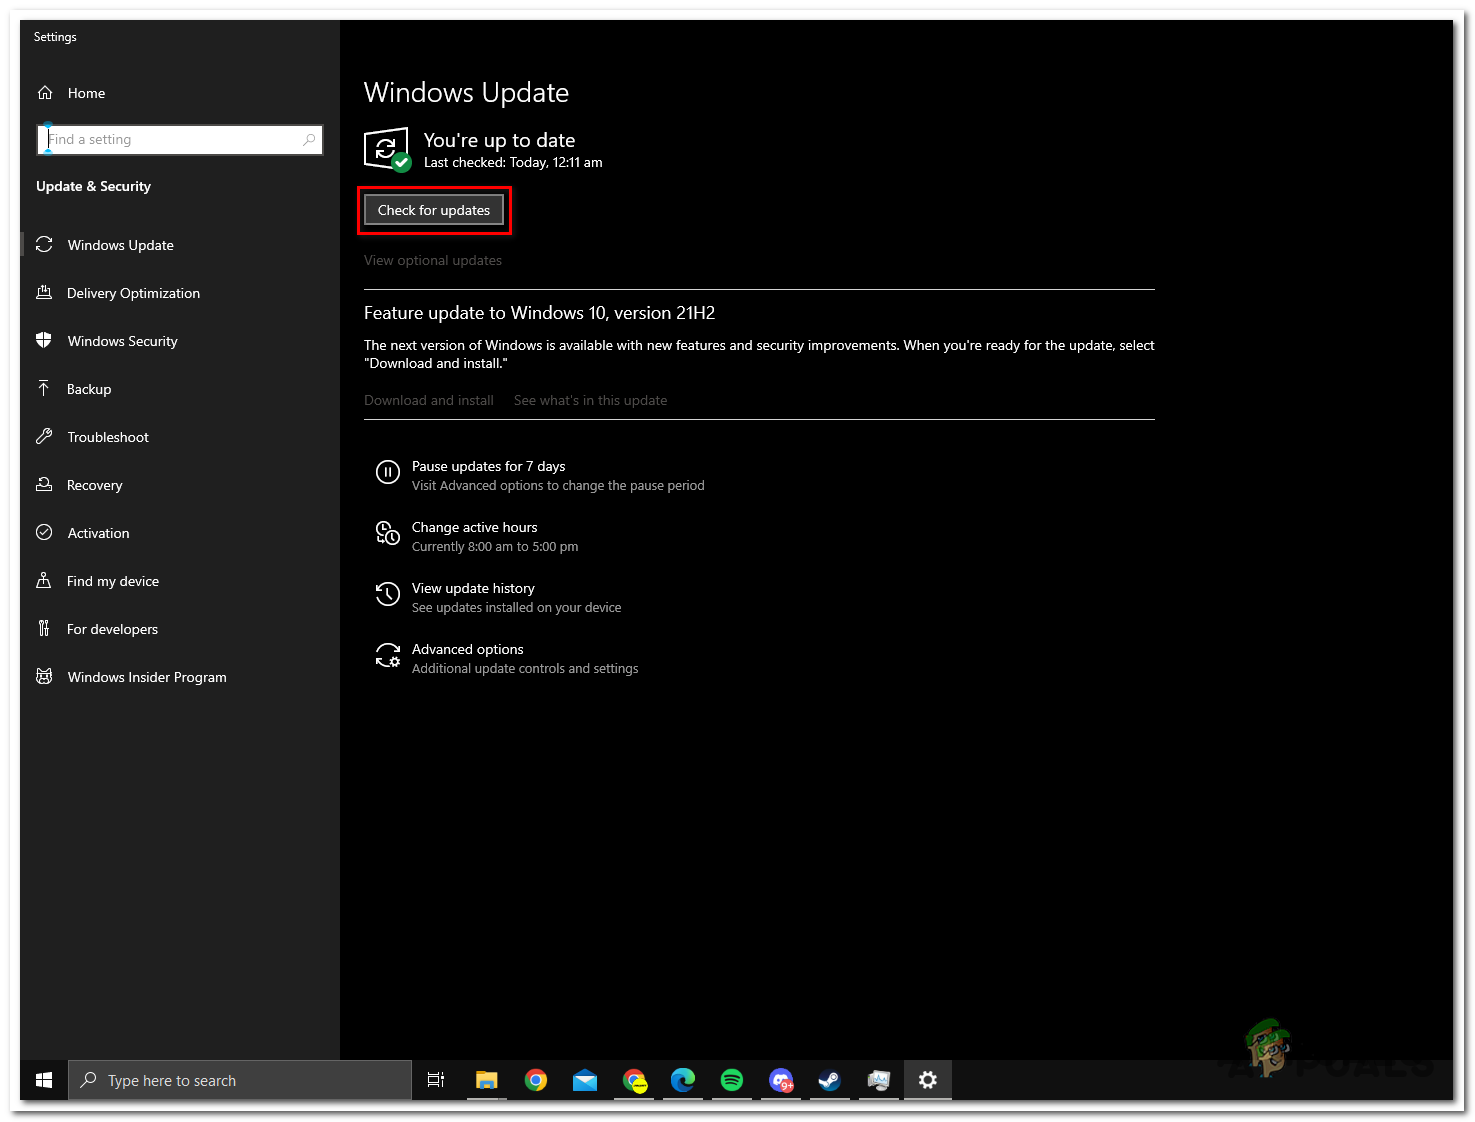
Check for window updates - Install if your windows is not updated, in our case windows is up to date.
6. Remove blacklist From windows defender
The windows defender sometimes does not allow all files to send bandwidth over the network causing the launcher to not proceed with functioning properly, This applies to third-party antiviruses as well. Follow these steps to allow the game executable file to access your Third-party or Windows Defender antivirus
- Press Windows key
- Search “Windows Security”.
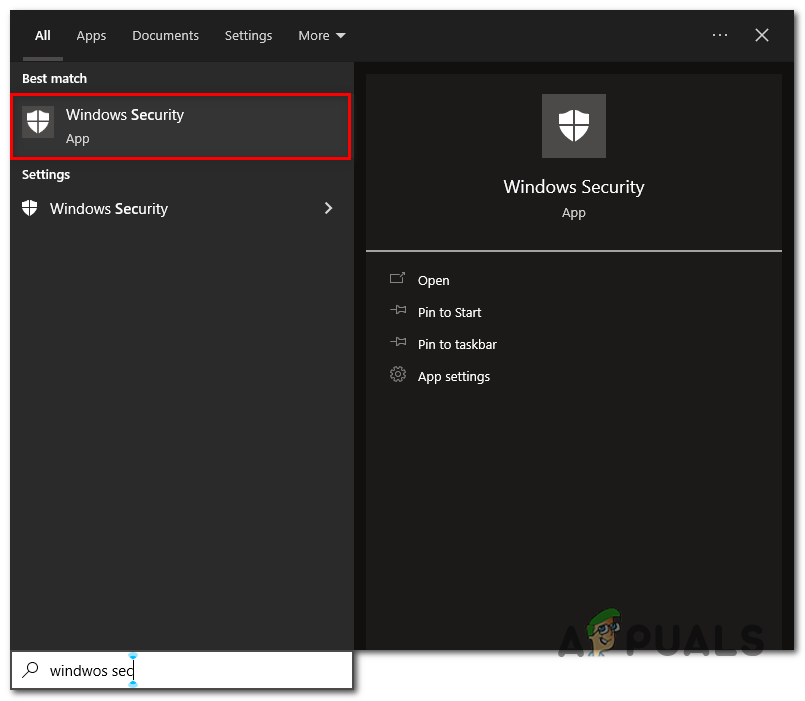
Whitelisting Game Files - Click on Virus and Threat Protection.
- Scroll Down, Click on Ransomware Protection.
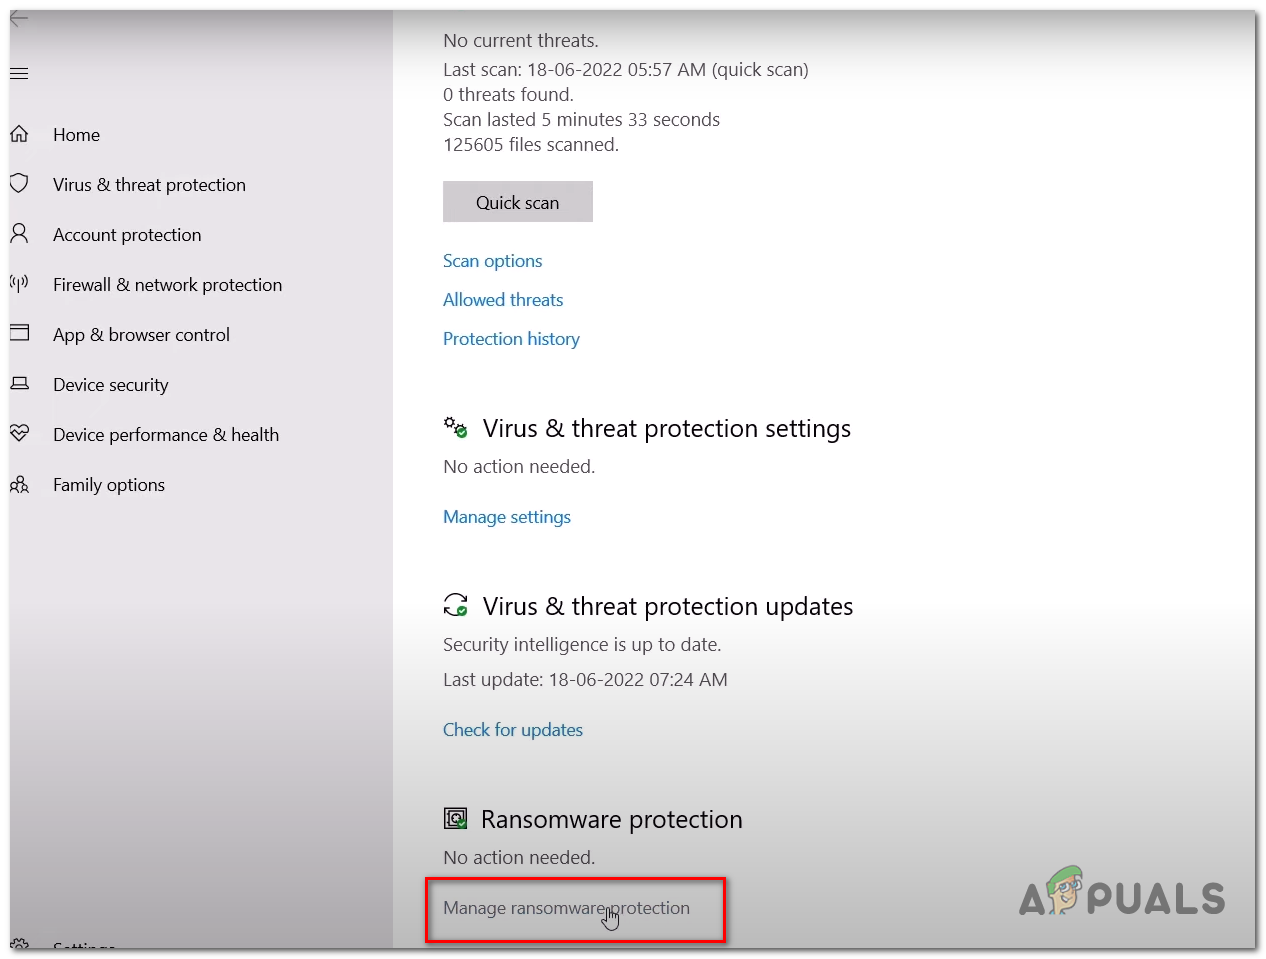
Allow the Game Exe file to the antivirus Program - Toggle the Controlled Folder Access to On.
- Now Click on “Allow an app through Controlled folder access”
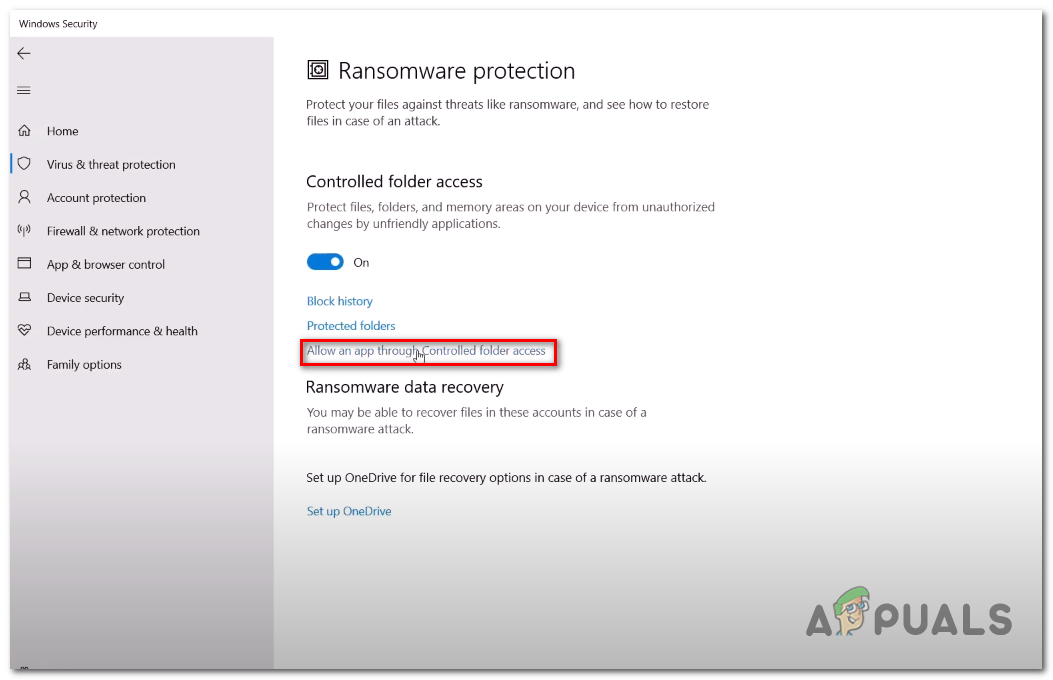
Allow an app through Controlled folder access - Click on add an Allowed app and click on browse all apps.
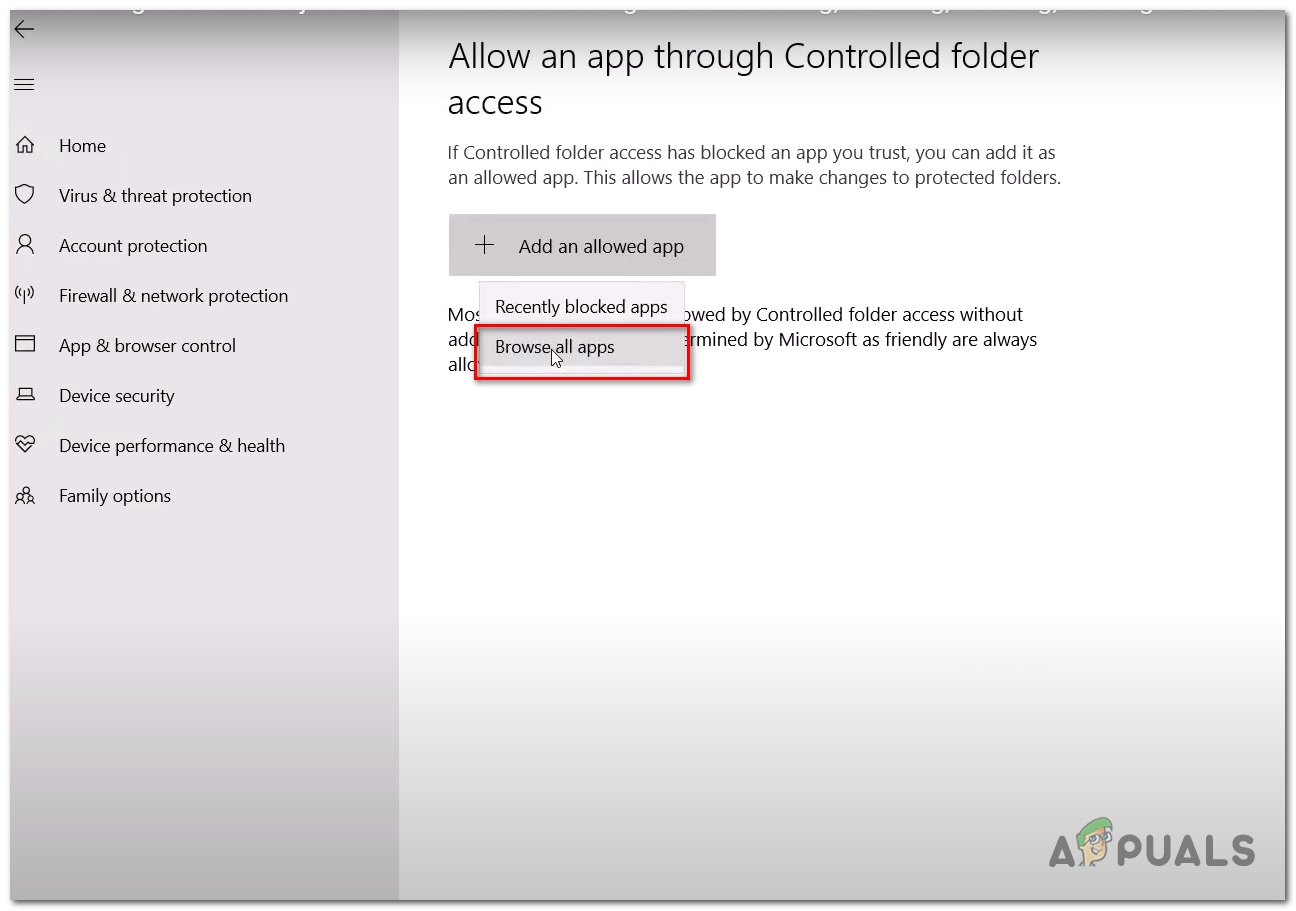
Click on add an Allowed app and click on browse all apps. - Now head on over to the game folder.
- Tap on Launchpad.exe and Click on Apply.
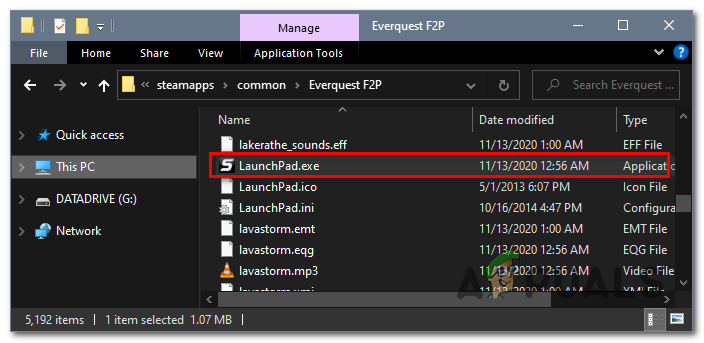
Click on launchpad.exe to whitelist
Now that we have done the steps, EverQuest 2 can now access the window’s defender folder. Try launching the game, if it doesn’t work continue to the next step.
7. Run the game as an administrator
In order to launch your game as an administrator on Steam Follow the following steps:
- Head on over to your steam interface
- Right-click on the game.
- Hover on to Manage and Click on Browse Local Files.
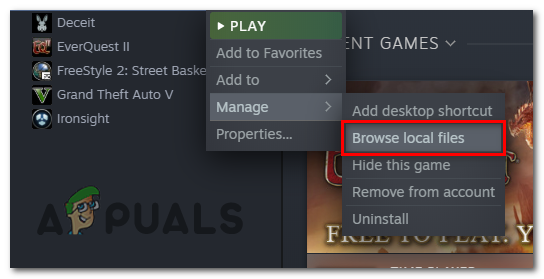
running the game as an administrator - Search For a File name “Launchpad.exe” and Right Click on it.
- Click on properties and on the new window it opened head over to Compatability Section.
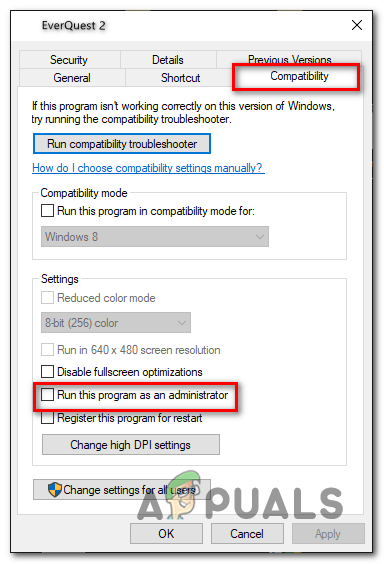
Running the game as an administrator - Check by clicking The “Run this program as an administrator” box.
- Hit Apply.
Try launching the game, If the problem persists try Uninstalling the game and reinstalling it.


