Fix: Error “Event ID 56, Application Popup” on Windows
The Event ID 56 error is quite a common error that, unfortunately, keeps coming back. Luckily, several fixes will save your PC from a total shutdown. Since the users are encountering this error due to different reasons, we have mentioned ten easy fixes that you can try one by one.
What is Event ID 56?
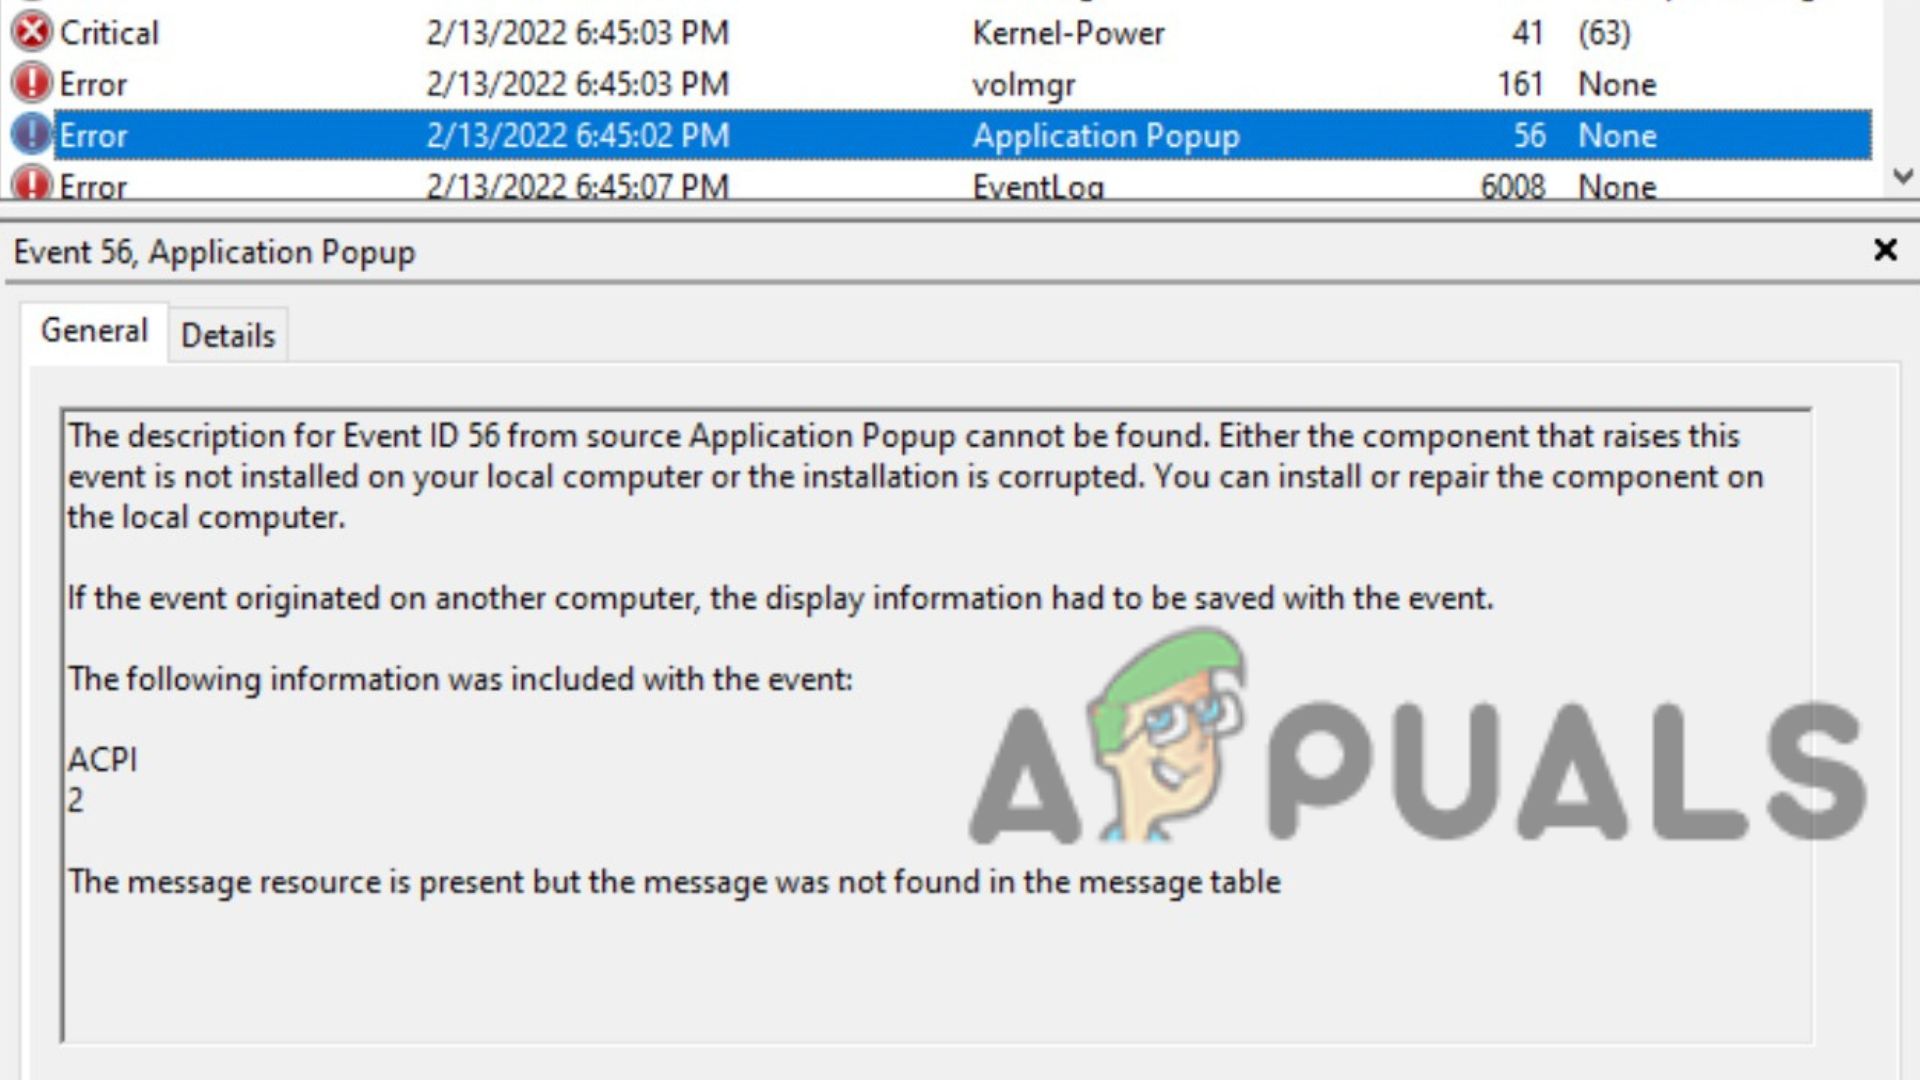
This error is often accompanied by the entire computer shutting down or a Blue Screen of Death (BSOD). When you get the error, you will get a notification highlighting the log name, source, event ID, level, and description.
The description will tell you that a driver has returned an invalid ID for a particular child’s device. Both the driver’s and the child’s device will be mentioned. For instance, the description will tell you that the ACPI 5 driver is faulty. The report may appear differently in some versions of Windows, but the driver and child device mentioned will be the same.
Unfortunately, this error has many causes, which cannot be pinpointed from the error message alone. The error has been reported on Windows 10 Home, Pro, Server, and Windows 11, among others.
1. Update BIOS
Your first instinct should be to update the BIOS. An outdated BIOS can cause many system errors, including this error.
- Identify the model number of your board. This can usually be found physically on the motherboard itself. For instance, your motherboard’s make and model may be Z170A Gaming Pro. Also, note down any revision numbers.
- Identify the current BIOS version by pressing the Windows Key + R buttons. This will open the Run prompt. In this, type ‘msinfo32.’
- A System Information window will open. Select the System Summary option on the menu on the left and look under BIOS Version/Date. Note down the BIOS version and date.
- Enter the BIOS by pressing the key mentioned on the screen during startup. Then, enter Advanced Mode. Also, plug in your USB to a working USB port.
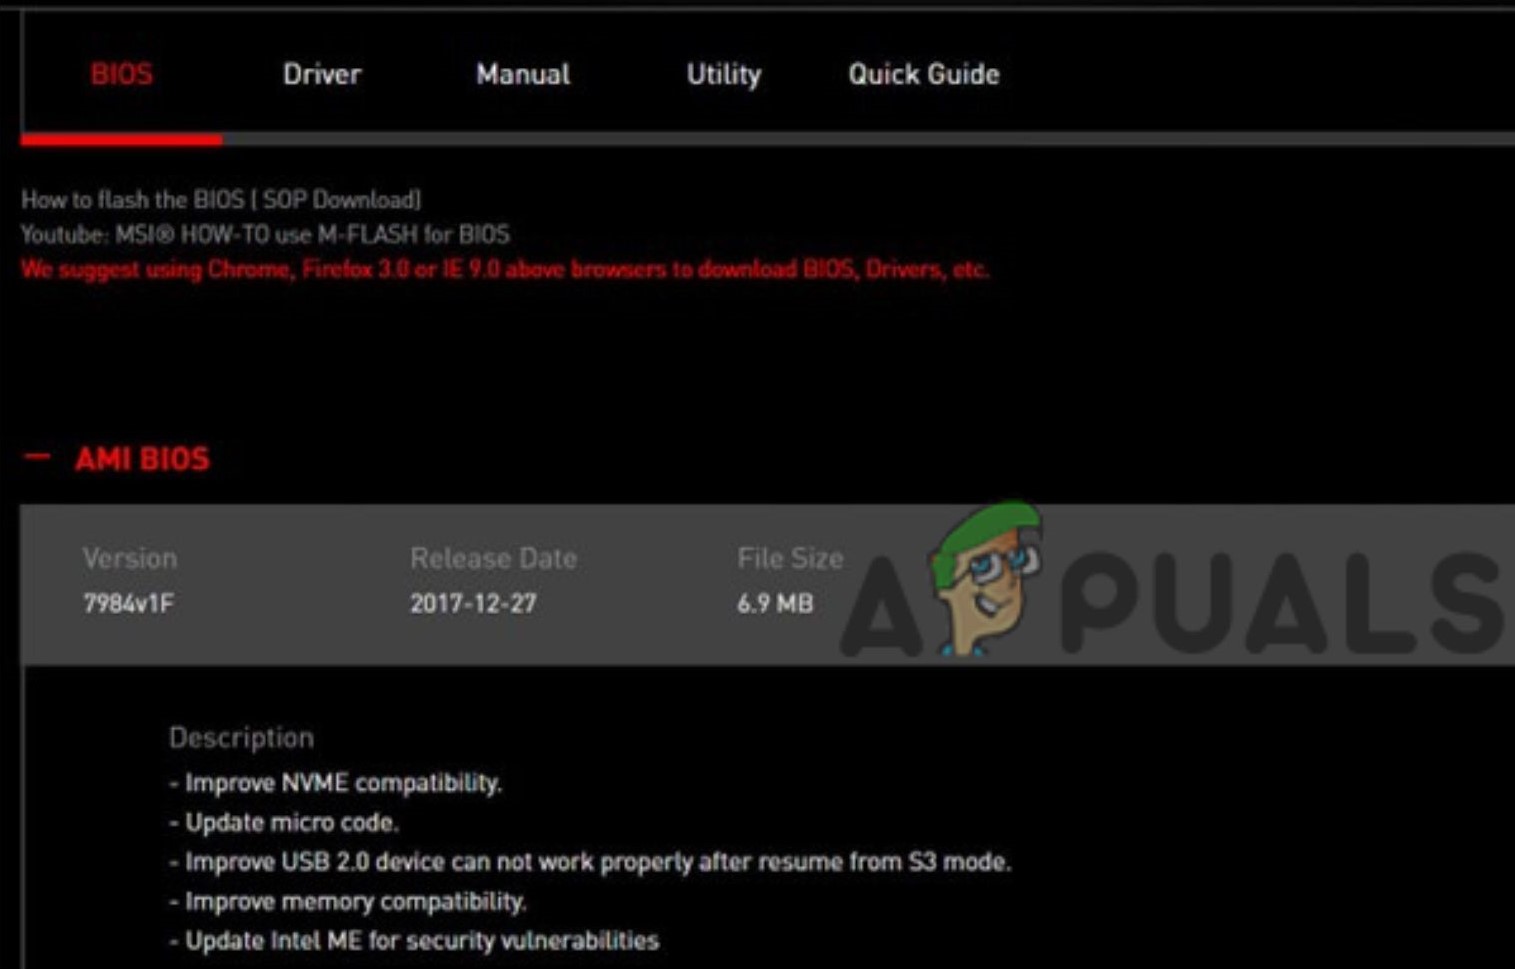
BIOS Settings - Here, you will find a utility such as ‘EZ Flash’, ‘Q Flash’, or another flash utility. It depends on the manufacturer of your motherboard. Click on it.
- Select the USB drive on which you stored your BIOS file from the pop-up screen.
- On the next screen, you’ll see the downloaded BIOS file. Double-click on the file.
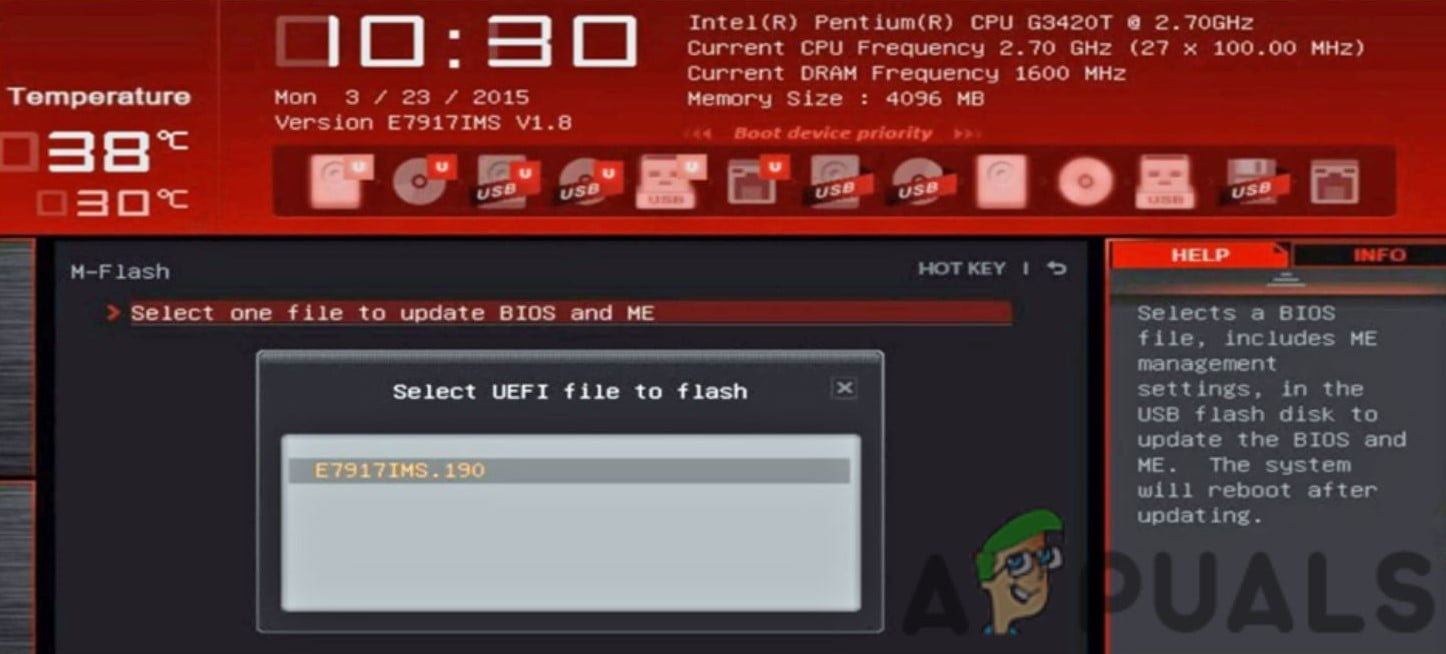
Select BIOS from the USB - On the pop-up prompt, click on Yes and then Yes again.
- The BIOS will go through the update process and, upon updating, press Ok on the prompt.
- Now, your computer will restart. Enter BIOS one more time and restart the computer.
For HP and Lenovo users, we recommend following How to Update BIOS on A HP Desktop/Laptop and How to Update BIOS On Lenovo.
2. Update Graphic And Video Drivers
This is a possible fix that has worked for many people. Updating the graphic and video drivers may help resolve the issue.
- Search for ‘Device Manager’ in the search bar present on the taskbar. Then click on Device Manager.
- You will see a list of different categories. Click on the arrow next to “Display adapters” to view the graphics and video cards.
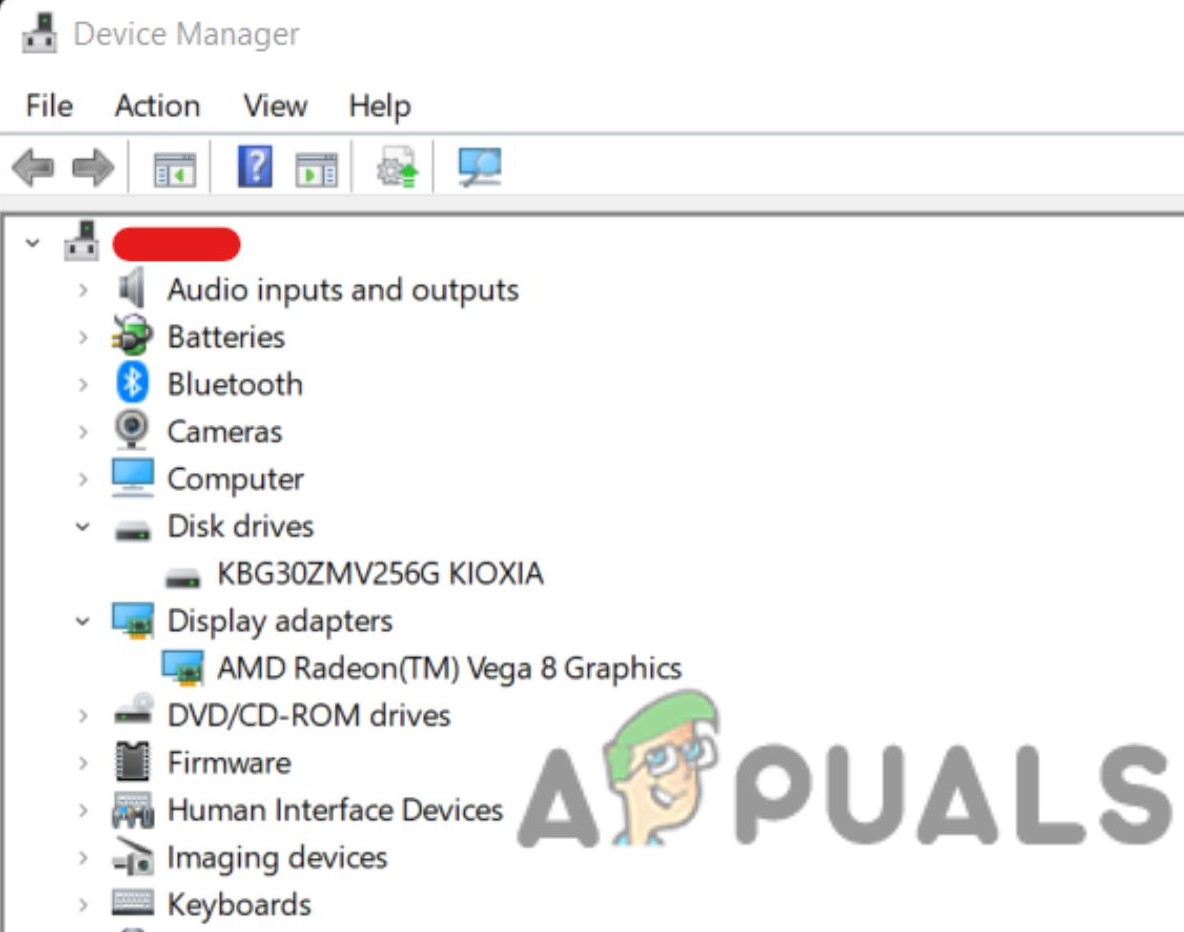
Update Drivers to Fix Event ID 56 - Double-click on one of them and go to the Driver tab.
- Here, click on the Update Driver button.
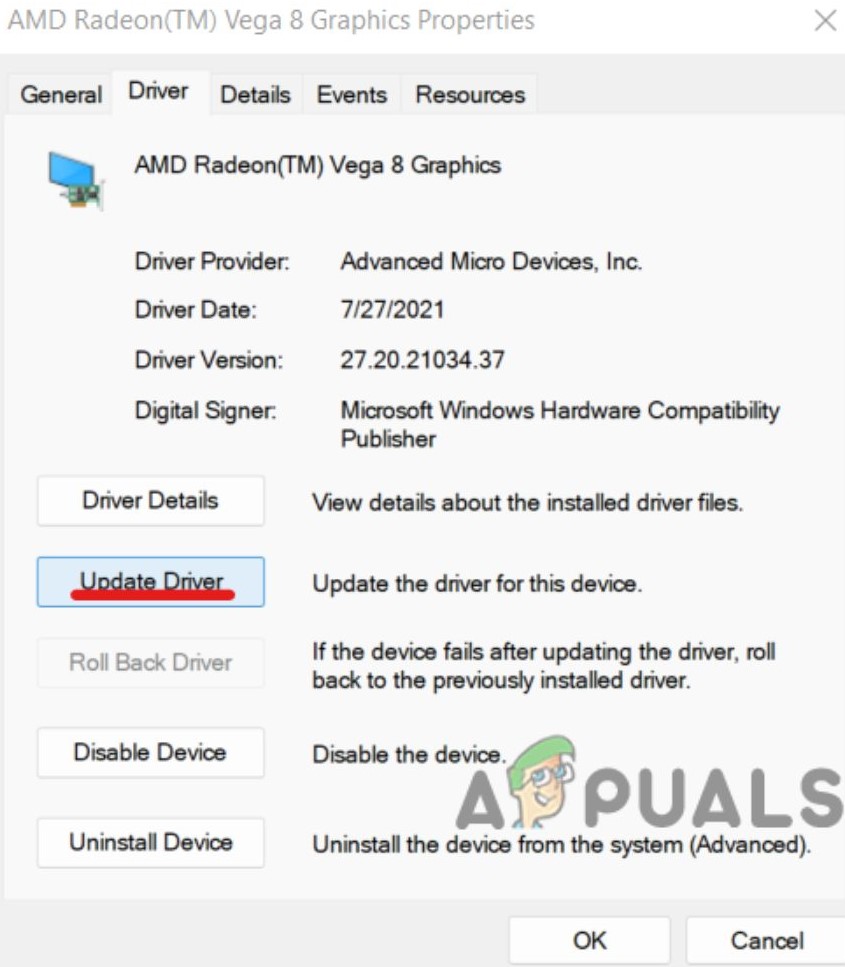
Click on Update Driver, then OK. - Select ‘Search automatically for drivers’ (preferable). Or, if you have driver files installed, click on ‘Browse my computer for drivers.’
- Wait for the computer to search for driver updates and install them if there are any.
- Do the same for every graphics and video card (preferably).
If you prefer updating drivers through third-party applications, check out The 5 Best Driver Updater Software for Windows In 2022, which are safe to use.
3. Disable C-States And Enable Power Loading
If the above two fixes didn’t work, then this one might. You’ll need to disable C-states and enable Power Loading.
- Go to the System Utilities screen by searching for it in the Start menu and select System Configuration.
- Go to BIOS/Platform Configuration (RBSU) and select Power and Performance Options.
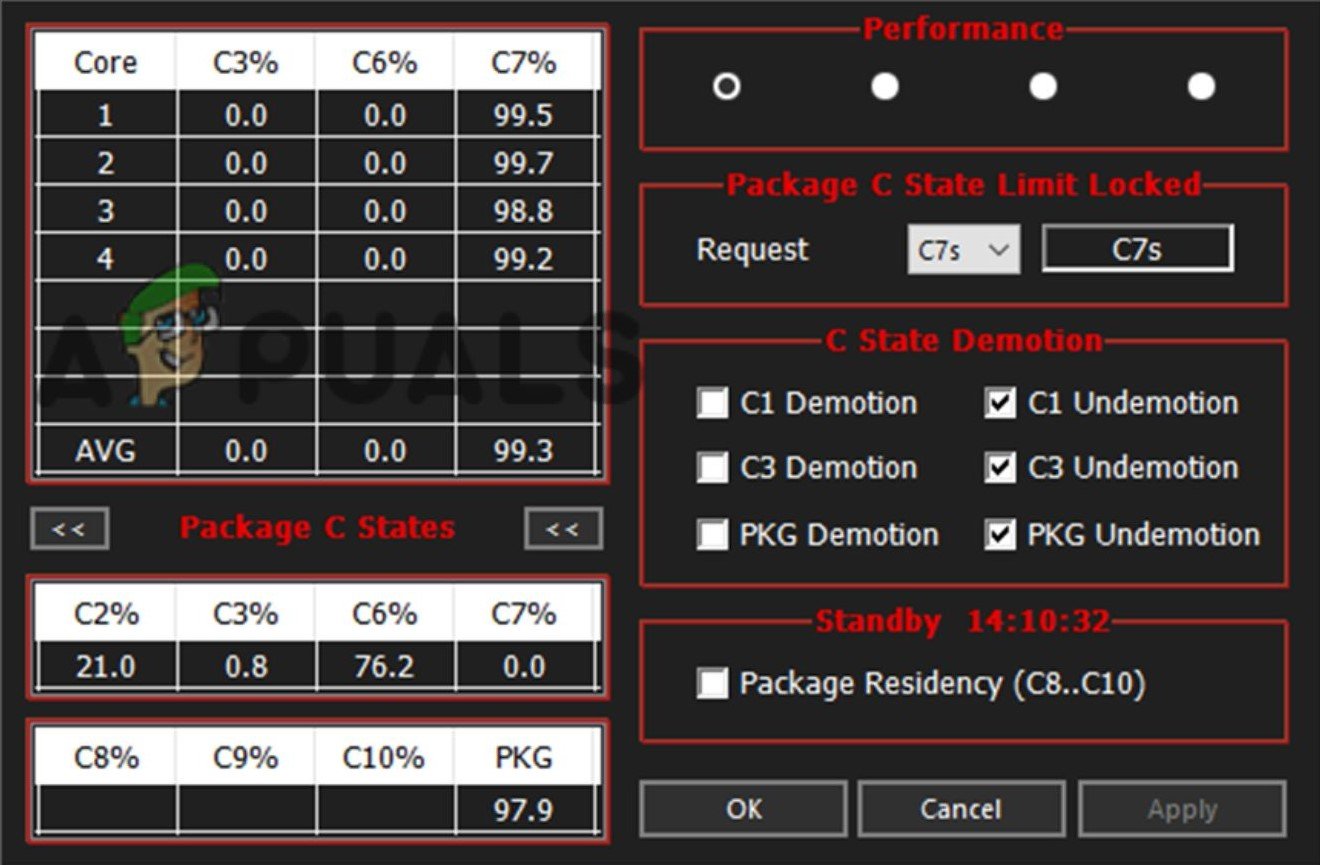
C-State - Next, go to the C-State Efficiency Mode option and select Disable.
- Save and move on to the next step.
- Restart your PC and enter the BIOS by pressing the key shown on the start-up screen.
- Go to the Power section and enable the Power Loading option.
4. Upgrade To Newer Hardware
Sometimes, backward incompatibility between your board and hardware devices may be the issue. This issue has been noted in the Startech USB 3.0 PEXUSB3S44V expansion card. But it may also be present in other hardware as well.
Upgrading to a newer version of the hardware may help resolve the issue. The problem may occur when the hardware’s driver and firmware are outdated. It may also happen when you install hardware from older PCs.
5. Manually Update ME Firmware
Another fix that may resolve the error is manually updating the ME firmware.
- Download the latest version of Intel ME from the manufacturer of your motherboard’s website.

Download the Latest Suitable Driver - Save the ME zip file in the OS folder.
- Unzip the file and double-click on the MEUpdateTool.exe application. This will initiate the ME update.
- It’s recommended to close any running apps in the background before proceeding to update. Then, click on Yes on the ME update tool prompt.
- Once the update has finished installing, click on the OK button. This will restart your PC.
- On the startup screen, press the key mentioned on the screen to enter BIOS.
- Under Advanced Mode in the Main Menu, check for the ME FW Version and verify it’s the latest one.
6. Disable Unused Audio Devices
Another fix for the error is disabling unused audio devices. This fix will most likely work when you receive a Blue Screen of Death (BSOD) with other errors.
- Search for device manager in your Taskbar’s search box and click on Device Manager.
- Click on the arrow next to Audio inputs and outputs.
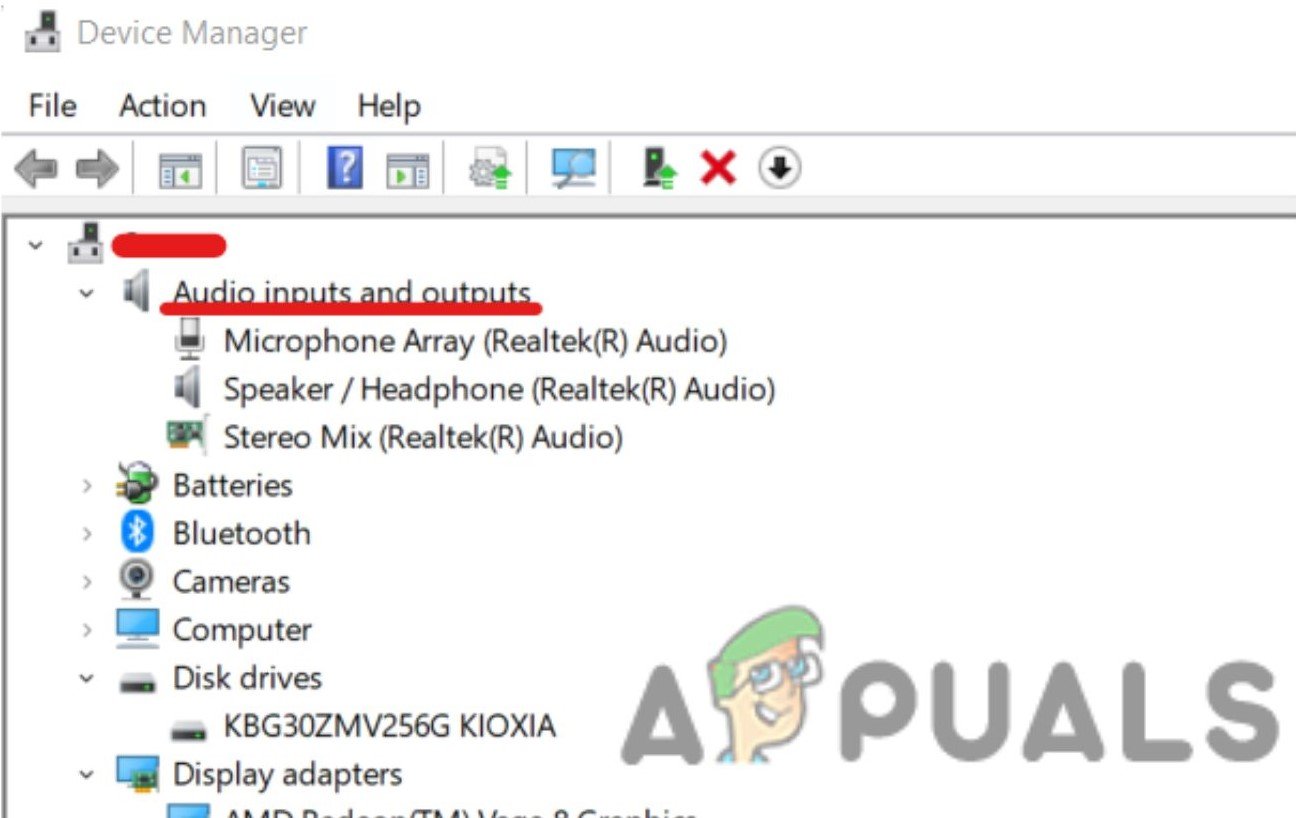
Go to Properties of Audio inputs and outputs. - Double-click on the audio devices (speakers or microphones) that you’re not using.
- Go over to the Driver tab and click on Disable Device. Click ‘Yes’ on the prompt.
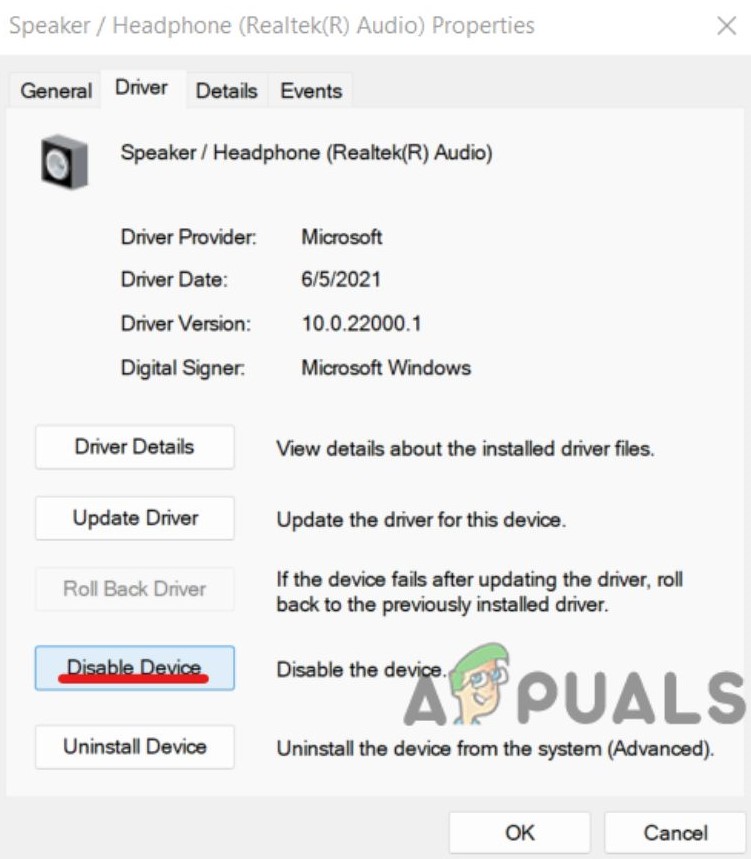
Disable the Unused Audio Device - The audio device has now been disabled.
7: Format Windows
Although this solution hasn’t worked for many people, it’s still worth a shot before going on to the next fixes. You’ll need to do a fresh reinstall of whatever version of Windows you’re running. Here’s the easiest way to reinstall Windows 10:
- First, ensure you have backed up all of your data to an external drive or the cloud.
- Go to the Start menu and click on Settings.
- Then, go to the Update & Security section and select Recovery.
- Find the ‘Reset this PC’ section and click “Get started.”
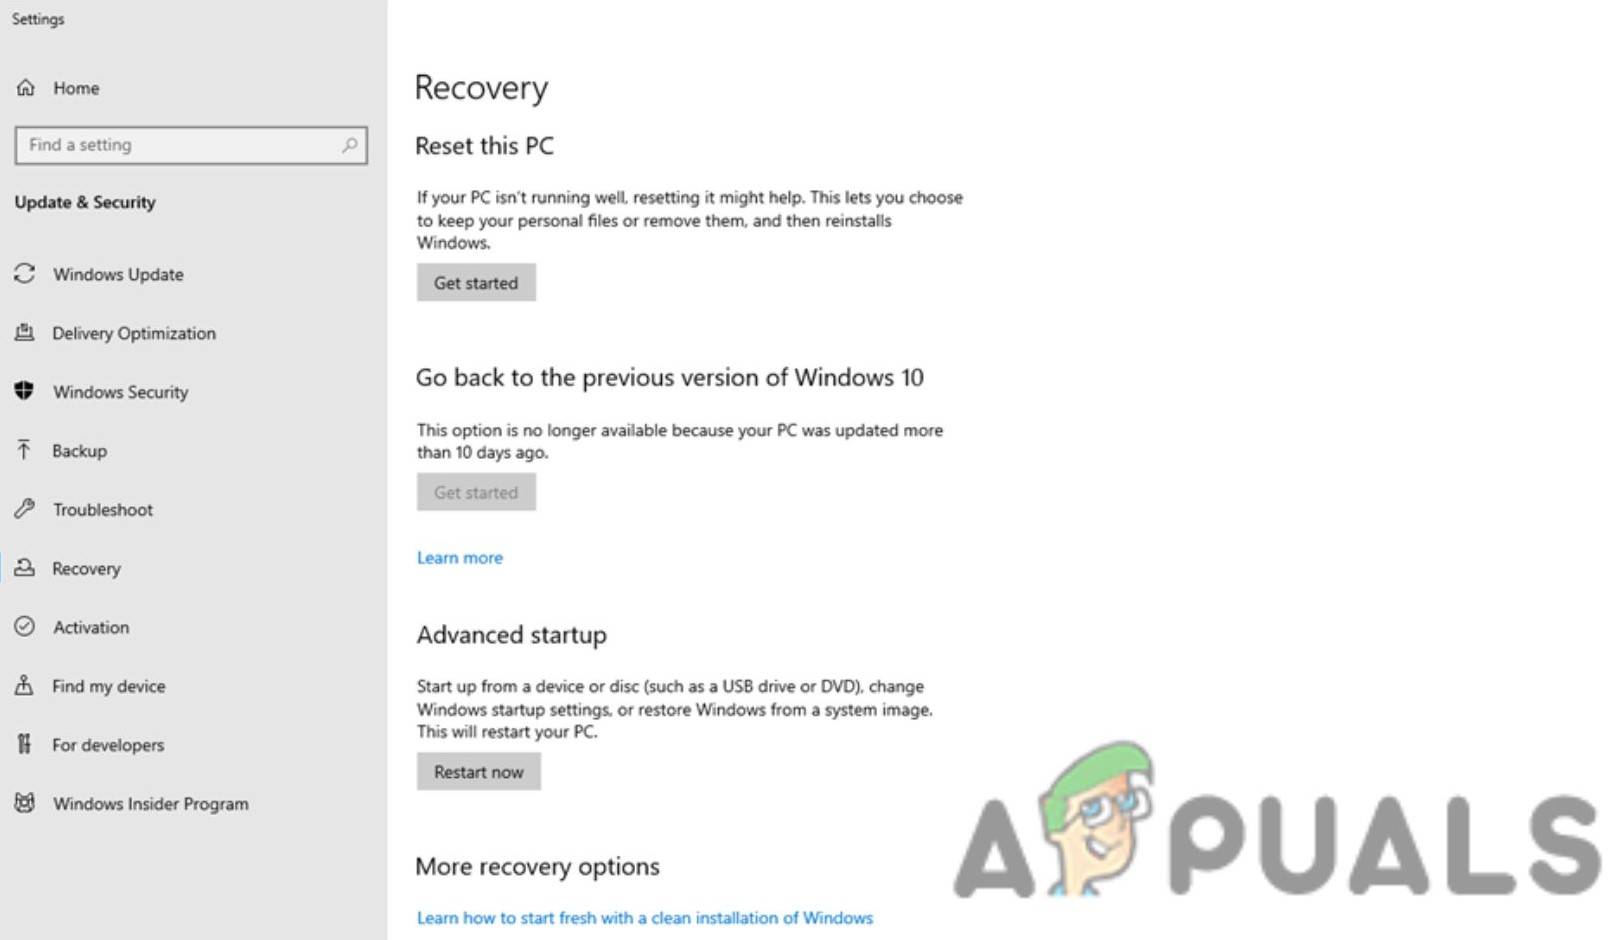 Click Get Started
 - Click on ‘Remove Everything’ to make sure that all data wipe out. Again, ensure you have your data backed up.
- Follow the steps to reinstall Windows 10.
8. Get A New PSU
Finally, if all else fails, you can try to replace some key components, such as the PSU. The PSU is the Power Supply Unit and is sometimes the core cause of this error. It would help if you got it replaced with a new one. Or better yet, buy one from a different brand, so you don’t run into the issue again.
Your first step should be to identify what’s causing the problem. It could be your motherboard, PSU, or chipset. If you cannot tell through experimentation, you might need to send it to a computer repair store.
9. Replace The Motherboard
In some cases, the motherboard is faulty and needs to be replaced. It’s unlikely, but some inherent issues with specific motherboard models may cause the error. In particular, the Z170 board has been reported to have the Event ID 56 issue. However, other motherboards from the Z series and other manufacturers are also experiencing this error.
Go to a repair shop or manually try to find out if the motherboard is the issue. Then, replace it with a different make and model.
10. Replace The CPU
Sometimes, the CPU can also be a problem. Some users have found that their Intel Core i5 6600k was faulty and had to be replaced. Although CPU defects are rare, they are not impossible. Replacing the CPU with a new one or one from a different brand should be your last resort. And you should bring your computer into a repair shop to determine what’s causing the problem.


