Fix: Ethernet Not Working When Connected to Docking Station (DELL)
Users of Dell laptops such as the Dell Latitude E5450, E7440 and E7450 have reported running into a number of different issues after connecting their laptops to their docking stations and using them afterwards. One of these issues is an Ethernet connection issue. Users affected by this problem have a completely stable internet connection when connected via Ethernet cable while their laptops are not docked, but they lose their internet connection or start experiencing other internet connectivity issues as soon as they dock their laptops.
An Ethernet connection is much stronger and more stable as compared to a Wi-Fi connection, which is why having your Ethernet connection stop working as soon as you dock your laptop can be a pretty significant problem. Thankfully, though, there are a number of different solutions that you can use to try and resolve this problem, and the following are the most effective ones:
Solution 1: Decrease your network adapter’s Power Output
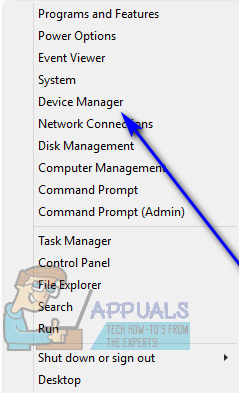
- Press the Windows Logo key + X to open the WinX Menu.

- Click on Device Manager in the WinX Menu to launch the Device Manager.
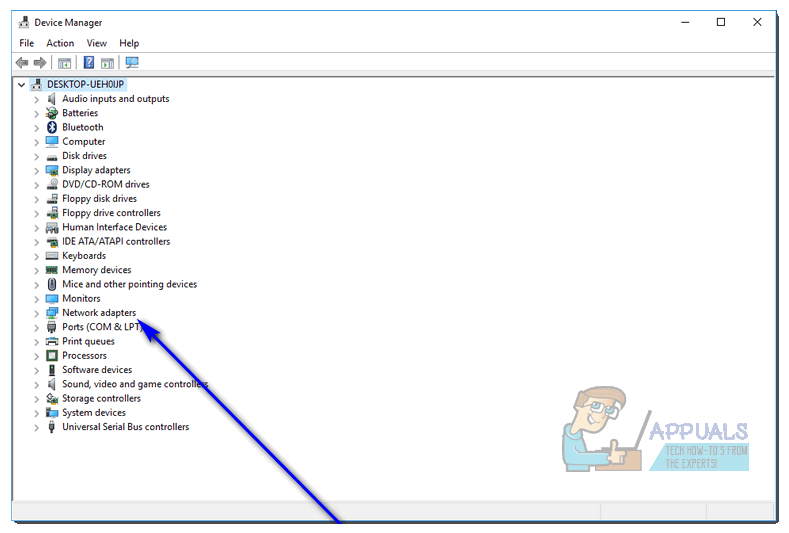
- In the Device Manager, double-click on the Network adapters section to expand it.
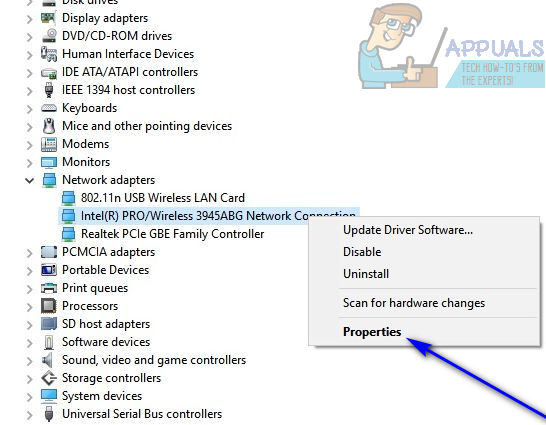
- Right-click on your computer’s active network adapter and click on Properties.
- Navigate to the Advanced tab.
- Under Property, locate the Power Output property and click on it to select it.
- Open the dropdown menu under Value and change it from 100% to 75%. If you are also going to be using an external monitor while your laptop is docked, change the value to 50% instead of 75%.
- Click on OK, close the Device Manager and restart your computer. Check to see whether or not the issue has been resolved once your computer boots up.
Solution 2: Disable Energy Efficient Ethernet for your network adapter
- Press the Windows Logo key + X to open the WinX Menu.
- Click on Device Manager in the WinX Menu to launch the Device Manager.
- In the Device Manager, double-click on the Network adapters section to expand it.
- Right-click on your computer’s active network adapter and click on Properties.
- Navigate to the Advanced tab.
- Under Property, locate the Energy Efficient Ethernet property and click on it to select it.
- Open the dropdown menu under Value and change it to Disabled or Off, whichever applies in your case.
- Click on OK and close the Device Manager.
- Restart your computer. When your computer starts up, go ahead and check whether the issue still persists.
Solution 3: Remove any USB devices from the ports below the Ethernet port
If you have any USB devices connected to the USB ports located directly below the Ethernet port, remove these devices and see if that resolves the problem for you. While it may sound a bit peculiar, something as bizarre as having one or more USB devices connected via the ports located below the Ethernet port is the culprit behind this problem for many people.
Solution 4: Don’t fully close your laptop’s screen after docking it
This solution might especially apply to your case if you dock your laptop, close its screen and use it on an extended screen and a Wi-Fi connection. As bizarre as it may sound, what caused this problem for many affected users was simply having their laptops’ screens closed while they were docked. The prevailing theory is that, in such cases, the laptops’ screens acted as faraday cages, interfering with the Wi-Fi connection and leading to connectivity problems. If you are experiencing this problem and fully close your laptop’s screen after docking it, see if not closing your laptop’s screen fully after docking it helps get rid of the problem. You can try leaving the laptop’s screen fully open or lowering it to the point where it is almost closed but the laptop doesn’t turn off (about 2″ from full closure).
Solution 5: Checking Device Manager
The device Manager hosts the list of all the components and manages the installation of drivers as well. For some users, a certain network adapter was showing up in the Device Manager but its Mac Address was empty. Therefore, in this step, we will be checking that. For that:
- Press “Windows” + “R” to open Run prompt.
- Type in “Devmgmt.msc” and press Enter to execute.
- Click on the “Network Adapters” dropdown and right-click on all the drivers listed there one by one and click on “Properties”.
- Click on “Advanced” and select “Network Address”.
- Check if the “Value” has been entered.
- If not, click on the value option to enable it and enter the appropriate Mac Address.
- Save your changes and check to see if the issue persists.
I ran into the same problem with my Dell laptop and docking station. In my case changing energy settings did not solve it.I then noticed in Device Manager that plugging in the station adds new network adapter called Realtek USB GbE Family Controller. Its MAC address, however, was empty.After I went to Properties > Advanced > Network Address and set its value manually network connection was fixed.