How to Fix ESENT 490 Error on Windows 10
Some Windows users are reporting that they discovered a lot of ESENT 490 errors inside Event Viewer. In most cases, this issue is reported to occur after Windows 10 was updated to version 18362.86.

After investigating this issue, it turns out that there are several different underlying causes that are known to produce this error code. Here’s a list of methods that are known to cause this error code on Windows 10:
- Windows 10 hotfix is not installed – Keep in mind that Microsoft is already aware of this issue with build 18362.86and has already released a fix that will take this particular issue. TO enforce it, you’ll simply need to install every pending update from the Windows Updates screen.
- The referenced path is not complete – As it turns out, you can expect to see this error code occurring if the Event is triggered because an incomplete path is referenced by a registry key. In this case, you can manually repair the problematic path.
- Corrupted Windows Update / Windows Store component – According to some affected users, this particular issue can also occur due to some kind of system file corruption that affects either Windows Update or Windows Store on Windows 10. In this case, you can resolve the issue by resetting each component.
- System file corruption – It’s not uncommon to see this error caused by some type of system file corruption that is affecting certain OS files. In this case, you should start by running CHKDSK, SFC and DISM scans in quick succession or deploy a clean install or repair install if this issue is not effective.
Now that you are intimately familiar with every method that has the potential of causing this particular error code, here’s a list of methods that other affected users have successfully used to resolve this issue:
Method 1: Installing the Windows 10 Hotfix (if applicable)
If you started experiencing this issue immediately after you updated your Windows 10 version to build 18362.86 (or you suspect this might be the main cause of the issue ) you should start this troubleshooting guide by installing the hotfix that Microsoft has released for this particular issue.
Some users that were dealing with the same issue have confirmed that no new instances of the ESENT Errors have been created inside the Event Viewer after they installed every pending Windows 10 update and restarted their computer.
If you’re looking for specific instructions on how to install the hotfix on Windows 10, follow the steps below to use the Windows Update tab inside the Settings app to install every pending Windows 10 update:
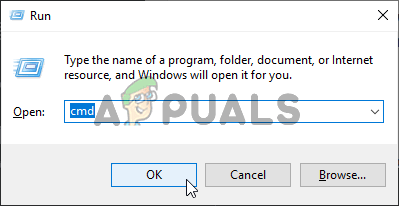
- Start by pressing Windows key + R to open up a Run dialog box. Next, type ”ms-settings:windowsupdate’ and press Enter to open up the Windows Update tab of the Settings app.
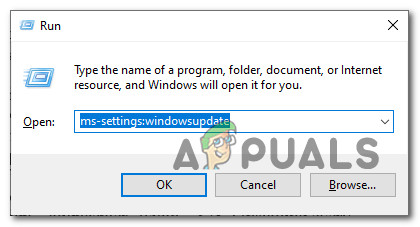
Opening the Windows Update screen - After you’re inside the Windows update screen, go ahead and click on Check for updates. Next, follow the on-screen prompts to install every Windows update that is currently pending.
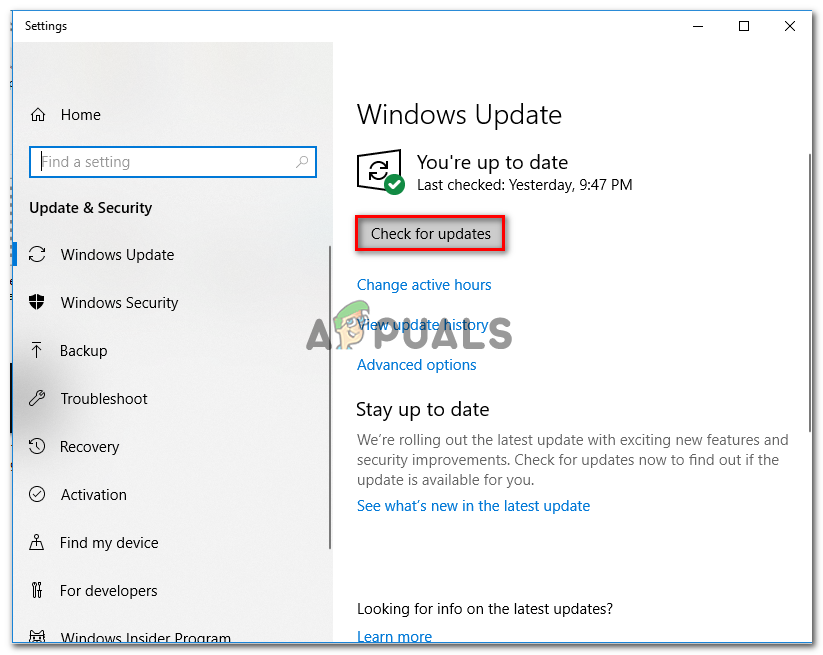
Installing every pending Windows Update - Keep in mind that if you have a lot of pending updates, you will be prompted to restart before every update is installed. In this case, restart as instructed, but make sure to return to this screen at the next startup and finish the installation of the rest of the updates.
- Once every pending update is installed, reboot your computer again and see check the Event Viewer to see if the new instances of the ESENT 490 errors have stopped occurring.
In case the same kind of issue is still occurring, move down to the next potential fix below.
Method 2: Complete the Corrected Path
As it turns out, in most documented instances you’ll encounter this issue due to a bad path that doesn’t exist in reality. if you don’t want to resolve this issue by utilizing a more comprehensive cleansing tool, one non-damaging operation would be to manually create the path expected by your OS as per the error displayed by Event Viewer.
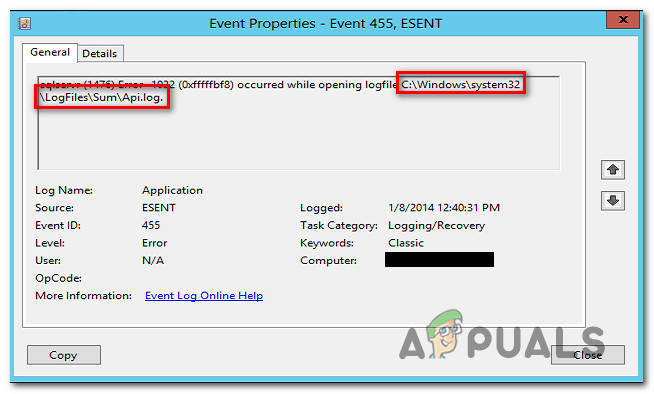
If you want to give this potential fix a try, go ahead and look at the error inside Event Viewer and see if there’s some kind of mention of a broken location. Something like:
C:\WINDOWS\system32\config\systemprofile\AppData\Local\TileDataLayer\Database\EDB.log.
Once you manage to locate the location that is signaled out by the Event Error, open File Explorer and try to naturally navigate through the location. If any folders are missing from the list, correct the path and create a blank file so the scan can reach it.
After you do so, restart your computer and see if new instances of the same kind of ESENT 490 errors are still appearing.
Additionally, you can do this directly from an elevated CMD prompt:
- Press Windows key + R to open up a Run dialog box. Next, type ‘cmd’ inside the Run dialog box and press Ctrl + Shift + Enter to open up an elevated Command Prompt. If you’re prompted by the UAC (User Account Control), click Yes to grant admin access.
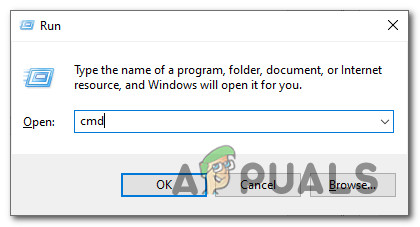
Accessing the elevated Command Prompt - Once you’re inside the elevated command prompt, enter the commands below (one at the time) and press Enter after each command to initiate a series of commands to ensure that the path to TileDataLayer is complete:
cd config\systemprofile\AppData\Local
mkdir TileDataLayer
cd TileDataLayer
mkdir Database
- Once the command was processed successfully, restart your computer and see if the issue is fixed once the next startup is complete.
If the issue is still not resolved and you’re still seeing new Event Viewer entrances related to ESENT 490, move down to the next potential fix below.
Method 3: Performing CHKDSK, SFC, and DISM scans
Since this issue is most likely related to some kind of system file corruption, your next attempt at fixing the ESENT 490 should be by running a couple of utilities that are designed to tackle corrupted Windows files.
Fortunately, every recent Windows version is equipped with CHKDSK (Check Disk utility) ( SFC (System File Checker) and DISM (Deployment Image Servicing and Management).
Our recommendation is to run all three utilities in quick succession (as per the instructions below) via the Recovery Menu in order to maximize your chances of fixing the corrupted files without having to clean install your Windows installation.
Follow the step-by-step instructions below for instructions on how to
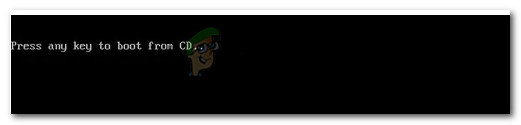
- Insert a compatible installation media, start your computer normally and press any key when you get asked if you want to boot from the installation media.
Boot from Compatible Windows installation media - After you get to the initial Windows installation screen, click on Repair your computer to open up the Recovery Menu.
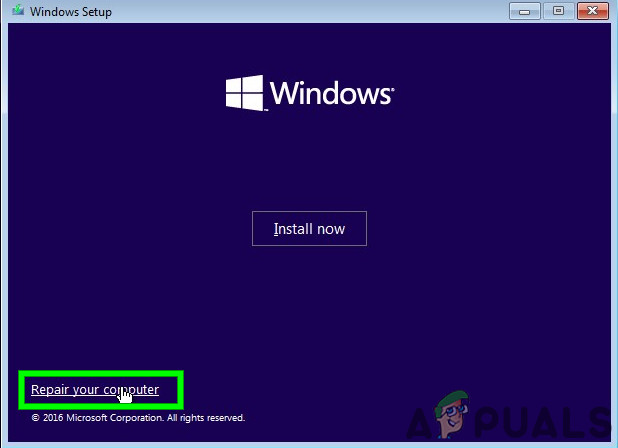
Repair computer via installation media Note: Keep in mind that even if you don’t have access to compatible installation media, you can still force the Recovery menu by forcing 3 unexpected shutdowns while your PC is booting up. Additionally, you can create your own installation media that’s compatible with your Windows installation.
- After you arrive inside the Recovery Menu, click on Troubleshoot from the list of available options, then click on Command Prompt from the list of available options.
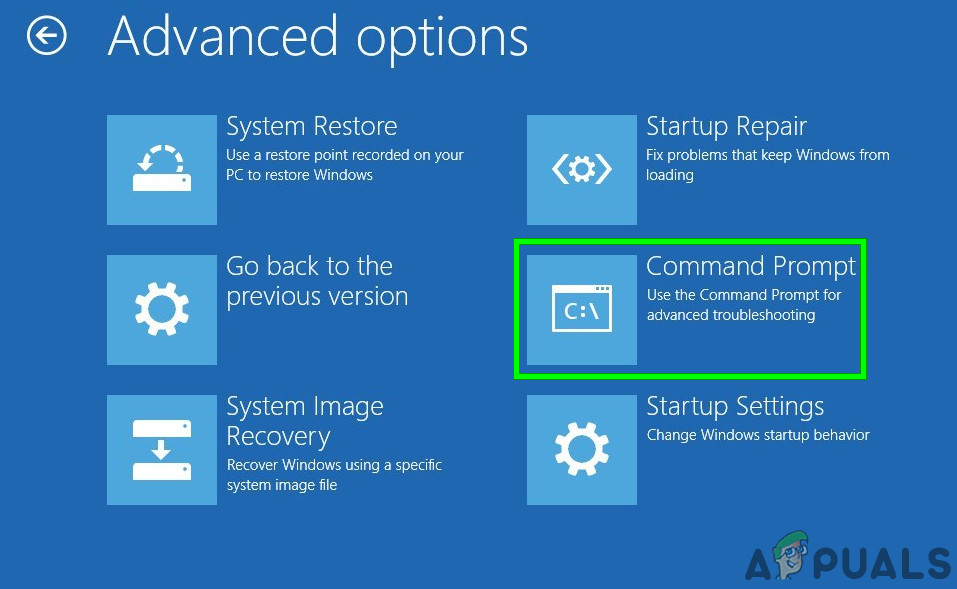
Open the command prompt via the recovery menu - Inside the elevated Command Prompt, type the following command and initiate a CHKDSK scan:
CHKDSK X:
Note: X is just a placeholder for the driver that currently stores your Windows installation. Make sure to replace the letter with the drive that contains your Windows installation (C: in most cases)
- After the operation is complete restart your computer as instructed, then follow steps 1 to 3 above all over again to open another elevated CMD prompt via the Recovery menu.
- In case the issue is still not resolved, type the following command and press Enter to initiate an SFC scan:
sfc /scannow
Note: Keep in mind that this utility might freeze during random times. When this happens, don’t interrupt the operation as you run the risk of creating additional logical errors.
- Once the operation is complete, reboot your computer and see if you are able to boot normally. In case you still run into the same kind of issues, follow steps 1 to 3 once again to open another elevated Command Prompt.
- Finally, type the following command and press Enter to run a DISM scan:
DISM.exe /Online /Cleanup-Image /RestoreHealth /Source:C:\RepairSource\Windows /LimitAccess
Note: Before you initiate the DISM scan, ensure that you have a stable connection to the internet. This is important because DISM uses a sub-component of Windows Update to download healthy copies in order to replace corrupted system files
- Once the DISM scan is finished, restart your computer one final time and see if you are able to boot normally.
In case you boot back up and you see the same kind of ESENT errors inside the Event Viewer utility, move down to the next potential fix below.
Method 4: Resetting every Windows Update & Windows Store
According to some affected users, you can expect to see this issue occurring due to some type of system file corruption that is affecting either Windows Update or Windows Firewall and ends up creating a lot of different listings inside Event Viewer.
As it turns out, most of these occurrences are created because one of the services mentioned above is stuck in a limbo state (they’re neither opened nor closed).
If this scenario is applicable you should be able to fix the issue swiftly either by resetting Windows Update or Windows Store, depending on the program that is causing this problem.
Since there is no way of checking which component is causing this issue, our recommendation is to reset both in order to eliminate 2 potential culprits of the list.
Follow the first sub-guide below and then the next one after to reset both Windows Update and Windows Store on your Windows 10 operating system:
A. Resetting Windows Store
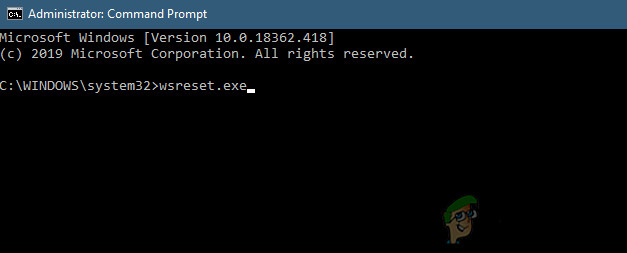
- Start by opening up a Run dialog box by pressing Windows key + R. Next, type ‘cmd’ inside the text box and press Ctrl + Shift + Enter to open up an elevated Command Prompt window. When you see the User Account Control (UAC) prompt, click Yes to grant admin access.
Running Command Prompt - Once you’re inside the elevated Command Prompt, type the following command and press Enter to initiate a complete Windows Store reset (and also clear any associated dependencies):
wsreset.exe
Running a wsreset operation from CMD - After the operation is complete, attempt to install the app update once again and see if the problem is now fixed.
B. Resetting Windows Update
- Start by pressing Windows key + R to open up a Run dialog box. Next, type ‘cmd’ and press Ctrl + Shift + Enter to open up an elevated Command Prompt window.

Accessing a CMD prompt Note: Once you are prompted by the UAC (User Account Control), click Yes to grant admin access.
- Once you’re inside an elevated CMD window, type the following commands in whichever order and press Enter after each one:
net stop wuauserv
net stop cryptSvc
net stop bits
net stop msiserver
Note: Just so you understand what these commands will do to your system – These commands will stop all the relevant Windows Update services from running: BITS service, Cryptographic service, MSI Installer service, Windows update service (main).
- Next, after you manage to stop every relevant service, run the following commands in order to clear and rename two vital WU folders (SoftwareDistribution and Catroot2):
ren C:\Windows\SoftwareDistribution SoftwareDistribution.old
ren C:\Windows\System32\catroot2 Catroot2.old
Note: SoftwareDistribution and Catroot are the two main folders responsible for holding and maintaining Windows Update files. You won’t be able to delete them conventionally, so the best way to ensure that they don’t have any corrupted files that might contribute to this error is to rename them in order to force your OS to create new and healthy equivalents.
- After the two folders have been renamed, run the following commands in order to re-enable the services that you previously disabled (at step 2):
net start wuauserv
net start cryptSvc
net start bits
net start msiserver
Once every relevant service has been restarted, repeat the WU action that was previously triggering the Event Errors and see if the new events have stopped occurring.
Method 5: Reset every Windows Component
In case none of the methods above have allowed you to stop the apparition of new instances of the ESENT 490 event errors, you should seriously take into consideration that you might be dealing a case of system file corruption.
If you find yourself in a scenario like this, the only thing you can do at this point is to reset every relevant Windows component and eliminate every potentially corrupted element – When it comes to doing this, you have two ways forward:
- Clean Install – Use this method if you’re looking for a quick fix that can be deployed without the need of using compatible Windows installation media. You can deploy a clean install procedure directly from the GUI menu of your Windows installation. However, unless you back up your data in advance, you will lose any personal data that’s currently stored on the OS drive.
- Repair Install – If you have any important information on the OS drive that you plan on keeping, a repair install should be the way to go for you, even if the procedure is a bit tedious. You are forced to use compatible installation media, but you will be able to keep your personal files, installed applications, games, and even some user preferences rooted on the OS drive.


