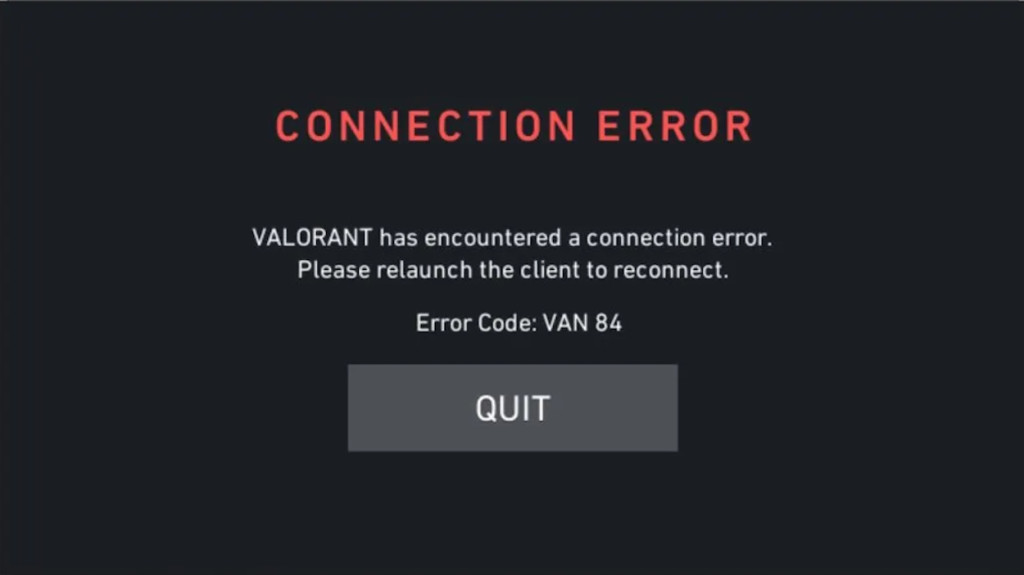
How to Fix Error Code “VAN 84” in VALORANT?
Error VAN 84 in VALORANT indicates that the client failed to establish a secure connection with Riot’s servers through Vanguard (VALORANT’s anti-cheat system). When this happens, you’ll be unable to sign in or join matchmaking, even if your internet connection appears normal.
This issue occurs when the VGC or other Vanguard services fail to start, packets are blocked by a firewall or VPN, or when routing to Riot’s servers times out.
1. Check VALORANT’s Server Status
Because this code represents a failed connection to Riot’s platform, checking the server status should be your first step before trying any local troubleshooting.
Visit the official Riot Games Service Status page and select your region to confirm if any outages or maintenance are in progress. You can also verify issues through DownDetector or the VALORANT Twitter feed.
If maintenance or downtime is active, the problem is temporary and will automatically resolve once Riot restores connectivity.
2. Start the VGC Service
The VGC service is a core part of Riot Vanguard. It authorizes VALORANT to connect securely with Riot’s servers. If this service is stopped or set to manual, the game cannot authenticate your session, resulting in VAN 84.
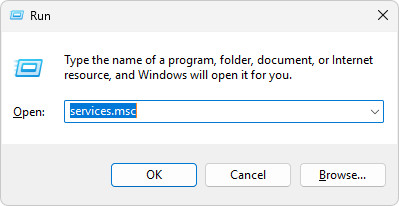
- Open the Run dialog (Windows + R), type
services.msc, and press Enter.
- Find vgc in the list, right-click it, and select Properties.
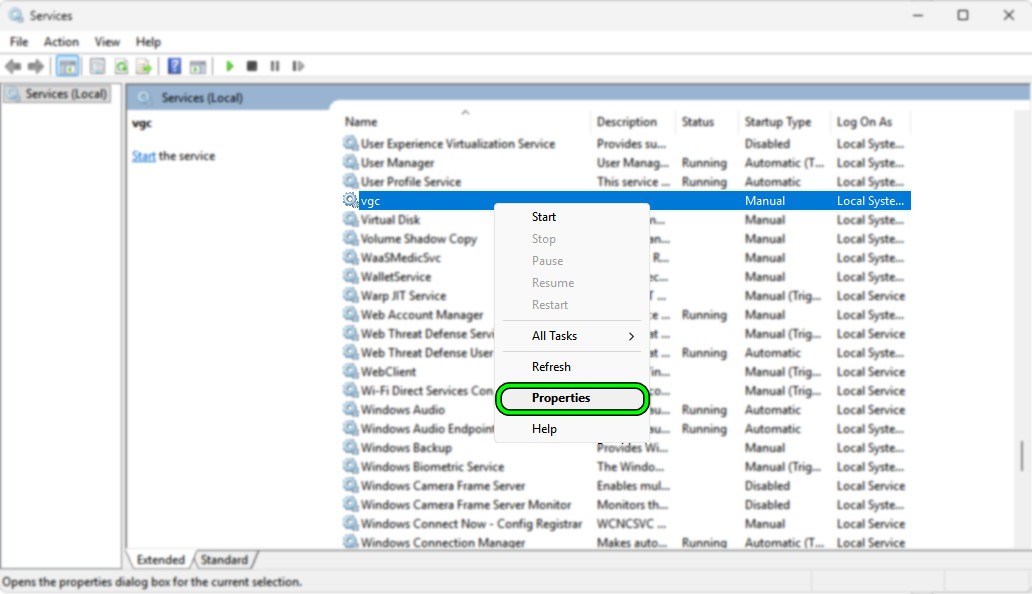
- Set the Startup type to Automatic, click Apply, then press Start.
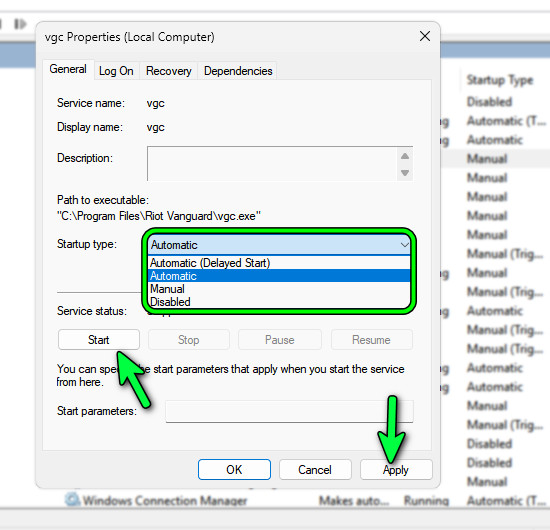
Restart your PC afterward to reinitialize Vanguard and try launching VALORANT again. Once the service runs automatically, authentication should complete normally.
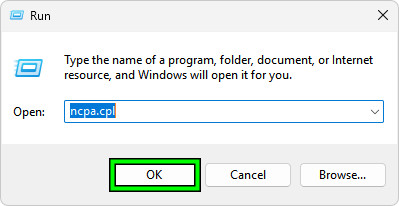
3. Flush DNS and Change DNS
VALORANT depends on accurate DNS resolution to reach Riot’s authentication servers. If cached DNS entries are outdated or corrupted, the client may connect to invalid routes, causing VAN 84.
Flushing the DNS clears old records and forces Windows to fetch updated entries. Switching to a reliable resolver like Google DNS (8.8.8.8 / 8.8.4.4) or Cloudflare DNS (1.1.1.1 / 1.0.0.1) ensures faster and more stable routing.
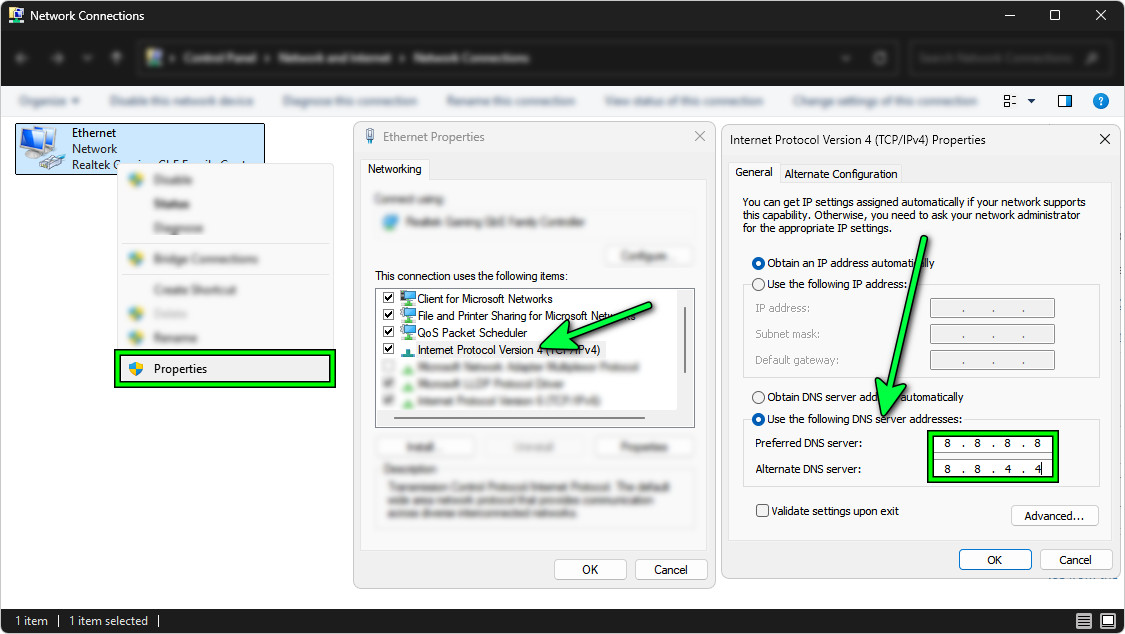
- Press Win + R, type
ncpa.cpl, and press Enter.
- Right-click your active network (Wi-Fi or Ethernet) and select Properties.
- Select Internet Protocol Version 4 (TCP/IPv4) → click Properties.
- Choose Use the following DNS server addresses and enter:
Preferred:8.8.8.8
Alternate:8.8.4.4 - Click OK, close all windows, and restart.
Then clear your DNS cache and restart your router:
- Open Command Prompt as administrator.
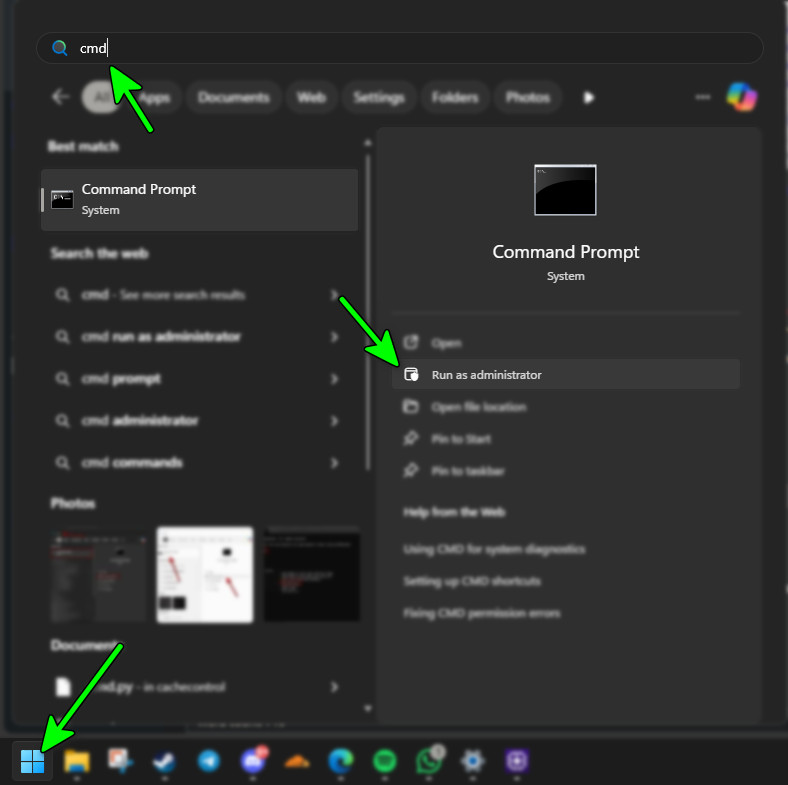
- Type the command and press Enter:
ipconfig /flushdns
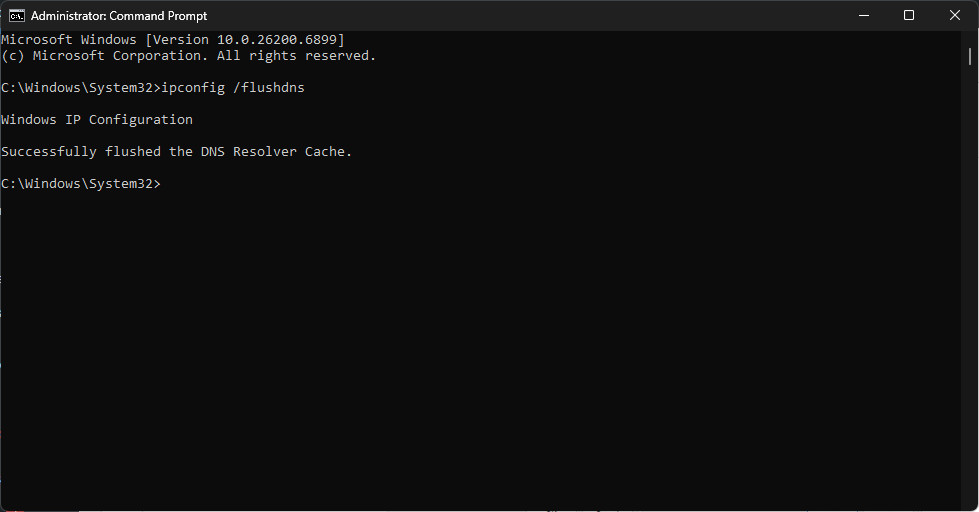
- Restart your PC and router.
4. Allow VALORANT Through Windows Firewall
If Windows Firewall blocks VALORANT or its ports, the game cannot communicate with Riot’s servers, triggering VAN 84. Adding both VALORANT and Vanguard to the exception list ensures smooth data exchange.
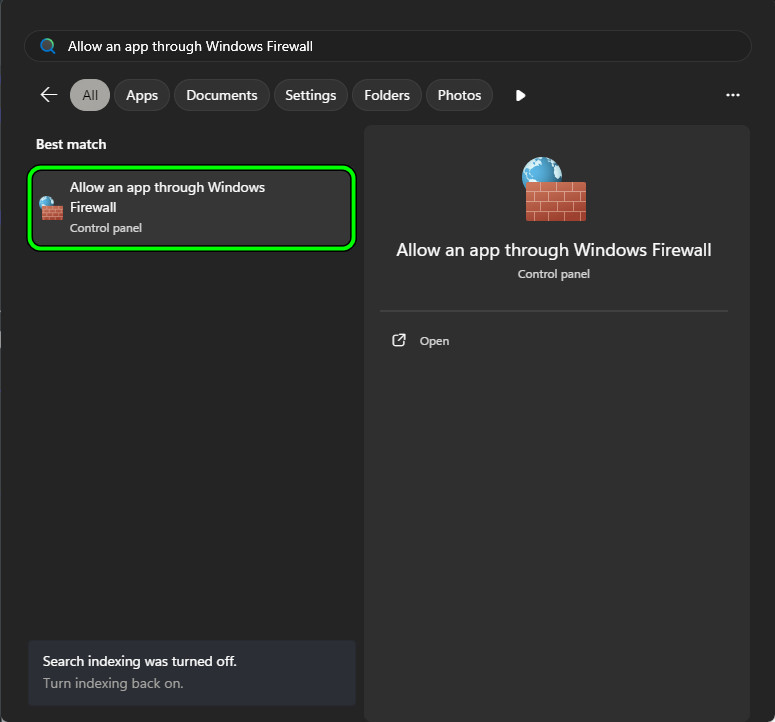
- In the search bar, type “Allow an app through Windows Firewall” and open it.
- Click Change Settings.
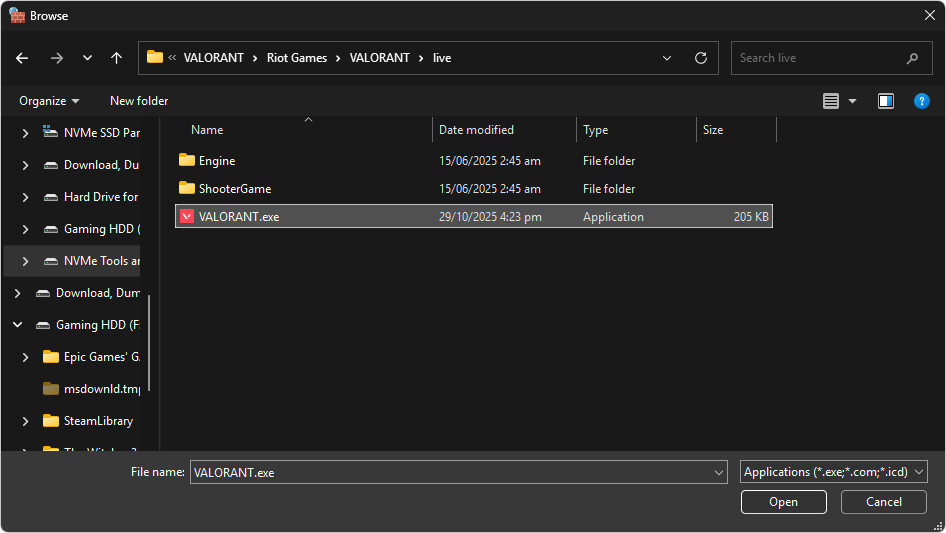
- Select Allow another app → Browse.

- Navigate to C:\Riot Games\VALORANT\live, select VALORANT.exe, and click Add.
Enable both Private and Public checkboxes for each entry, then save your changes.
If you use third-party firewalls or antivirus software (like Bitdefender, Avast, or Comodo), disable their network filtering temporarily. After that, restart Riot Client and test again.
5. Disable Killer Control
Killer Control Center and similar optimizers can interfere with Riot’s network routing by prioritizing or blocking packets. Since VALORANT depends on constant communication with Vanguard and Riot servers, these filters may cause VAN 84.
- Open Run (Windows + R), type
services.msc, and press Enter.

- Find Killer Network Service, right-click → Properties.
- Set Startup Type to Disabled and click Stop.

6. Disable IPv6
IPv6 can conflict with Riot’s routing, especially when your ISP or router lacks proper dual-stack support. This can break Vanguard’s authentication handshake and cause VAN 84.
Turning off IPv6 forces your system to use the more stable IPv4 protocol, improving compatibility.
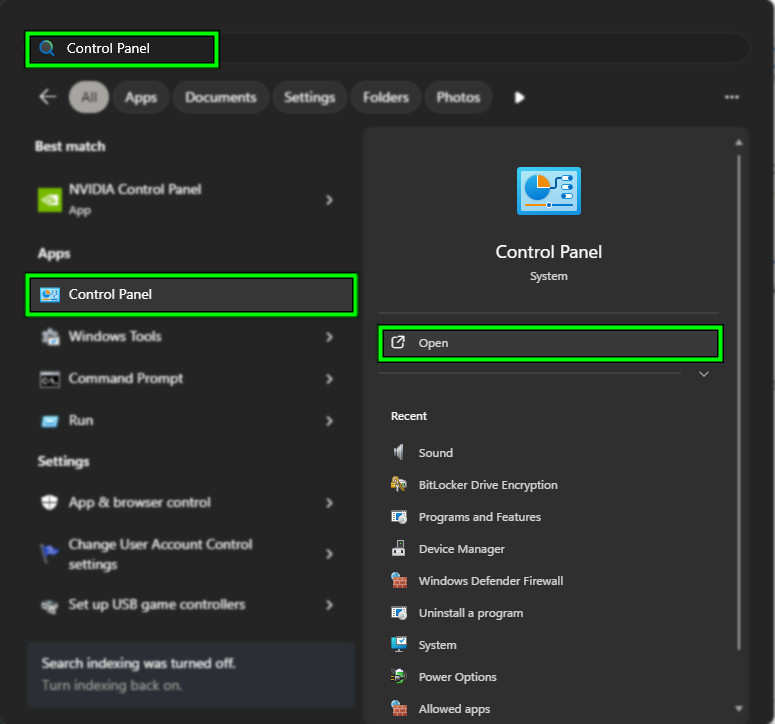
- Search for and open Control Panel.
- Go to Network and Internet → Network and Sharing Center → Change Adapter Settings. Right-click your active connection → Properties.

- Uncheck Internet Protocol Version 6 (TCP/IPv6).

- Restart your PC and relaunch VALORANT.
7. Reset Your Network Connection
Resetting the network stack rebuilds Windows’ TCP/IP configuration, renews routing data, and clears cache issues that block connectivity.
- Go to Settings > Network & Internet → Advanced Network Settings.
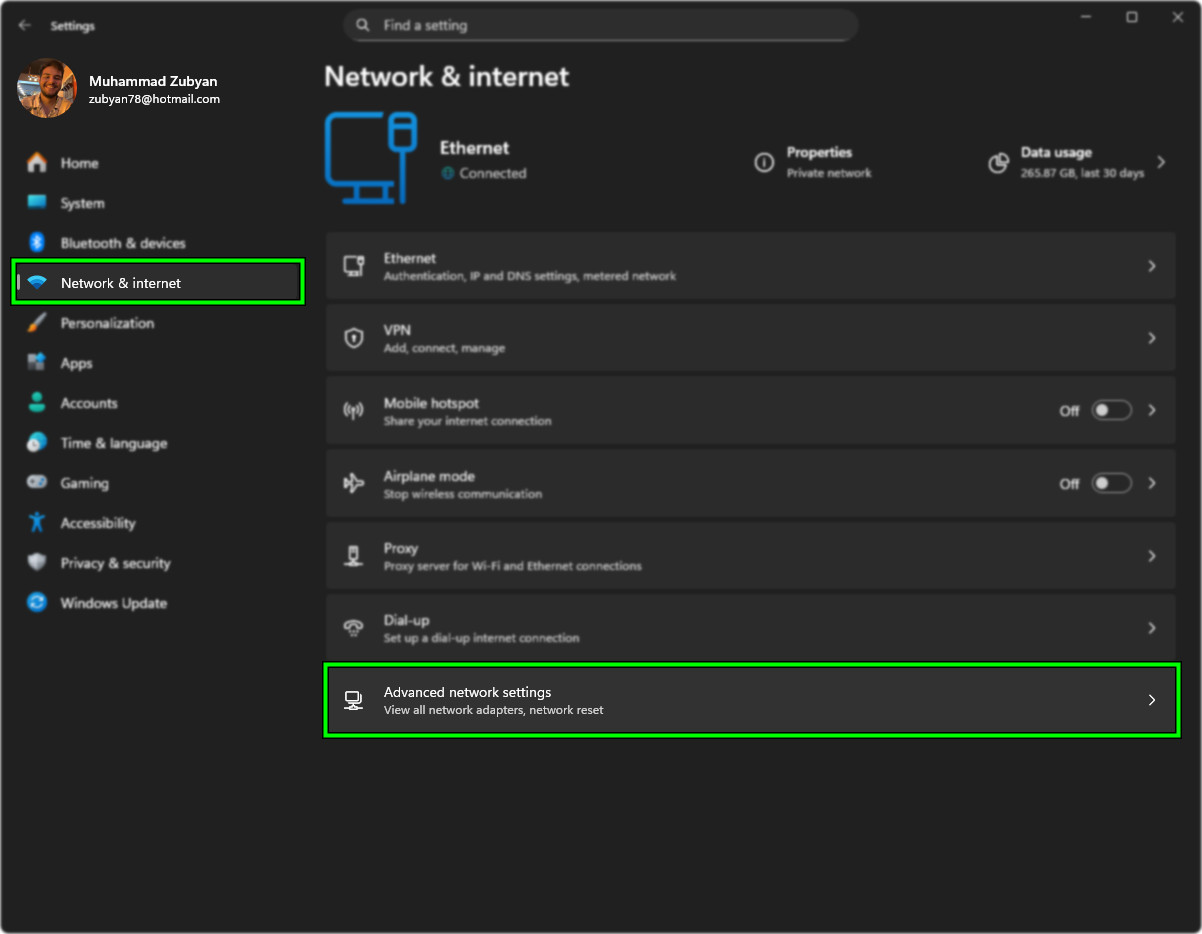
- Click Network Reset → Reset Now.

- Restart your PC when prompted.
8. Reinstall VALORANT
If none of the above resolves VAN 84, reinstalling VALORANT ensures that no corrupted files or registry entries block the connection.
Uninstall both VALORANT and Riot Vanguard from Apps & Features, restart your PC, and download the latest installer from the official VALORANT website.
After installation, reboot once more to allow Vanguard to initialize before launching the game.