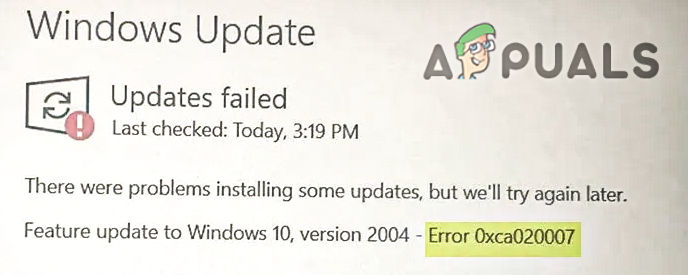
How to Fix “Error Code: 0xca020007” While Updating Windows?
Several users have reported that they are getting a 0xca020007 error. The 0xca020007 error occurs when we try to update Windows 10 or Windows 11. Mainly the error appears when the system files get corrupted or deleted.
There are multiple reasons for this error to occur some of them are below:-
- Corrupt system files.- System files are important to make Windows work properly. There’s a possibility that your system files were corrupted or deleted, which cause this 0xca020007 error.
- Multiple pending Updates- If your Windows needs more than one update then it may be a cause of your Windows update failure, rebooting and trying again will fix the error.
- Lack of storage– If your hard disk is running out of space where the Windows files are stored then simply use a desk cleanup tool to free up some space for your Windows update.
- Hardware conflicts- If some of your peripherals devices such as USB, controller and etc are connected with your computer then disconnect all your peripherals devices because these devices are might be preventing you from updating Windows.
- Drivers conflicts- Sometimes our device drivers conflict with each other and it can become a cause for this error, to prevent this disconnect all your peripherals devices and try to update your Windows.
- Unstable internet connection- If your internet is unstable then the 0xca020007 error might occur cause of the instability of the internet. Wait until the internet gets stable and then try again.
Now that, we know the causes let’s straight jump into some effective methods that helped users to fix this 0xca020007 error.
Windows Update Troubleshoot
The Windows Update troubleshooter is a utility that can help you to resolve the 0xca020007 error because the utility has been made for countering the Windows update errors.
Follow the steps below to run the Windows update troubleshoot:-
- Hold the Windows key and press the I key to open the settings.
- Select Update & Security and then click on the Troubleshoot option in the left pane.
- Go for Additional troubleshooter then select the Windows Update option under the Get up and running section.
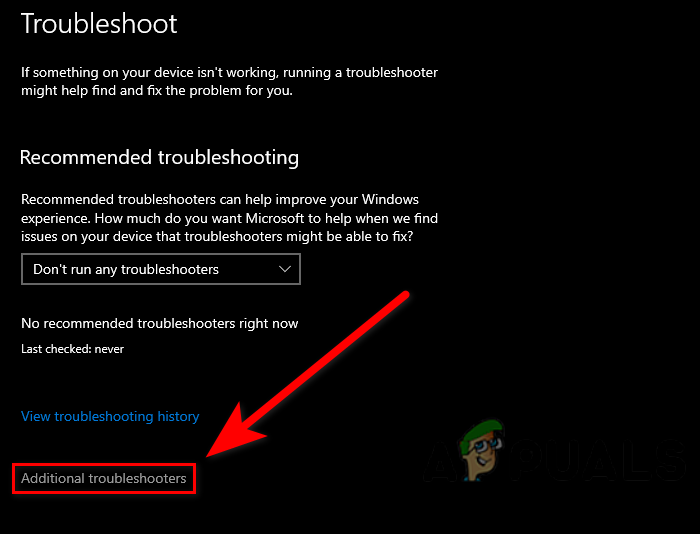
Click on Additional troubleshooters - Click on the Run the troubleshooter in the expand tray.
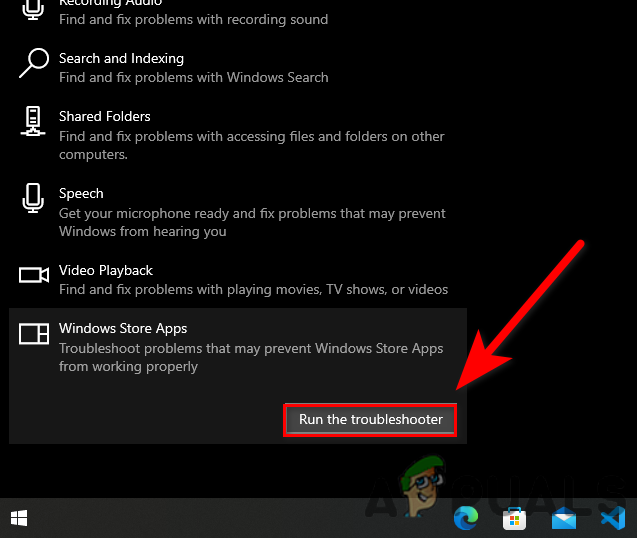
Run the windows update troubleshooter - The troubleshooting process should start, once done, check if the error persists.
Run System File checker
System File Checker is a utility that is developed by Microsoft for Windows Operating System. System File Checker allows the administrator to scan all your system files, and it will replace the corrupted files with cached copy files.
Follow the steps to run the system file checker:-
- Press the Windows key and type the Command Prompt in the search box.
- Open command prompt as administrator by pressing the ctrl + shift + enter keys together.
- Insert the below command to run the system file checker.
sfc/scannow
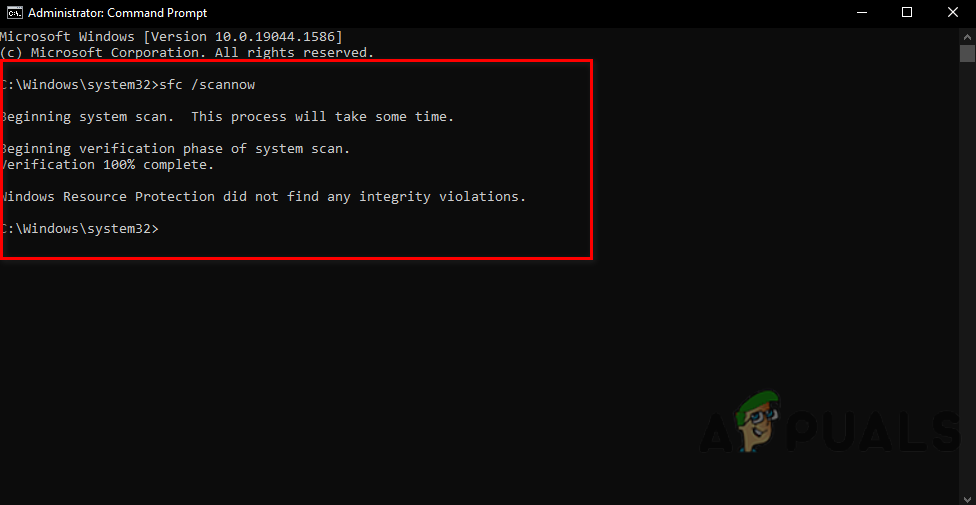
Run sfc/scannow in cmd - Once the process is completed, reboot your computer and check if the error is solved.

Restart Windows Update Service
If you ever noticed that, in the task manager several programs run in the background these programs are called windows services. Windows do a pretty good job in managing services. but sometimes the feature or the utility does not work quite enough to provide good results, for that, we have to manually manage the services.
Follow the steps to restart the Windows update service:-
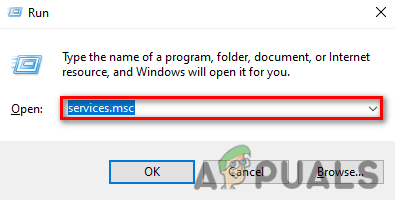
- Press Windows + R keys to open a Run Window.
- Type services.msc in the Input box and press enter.
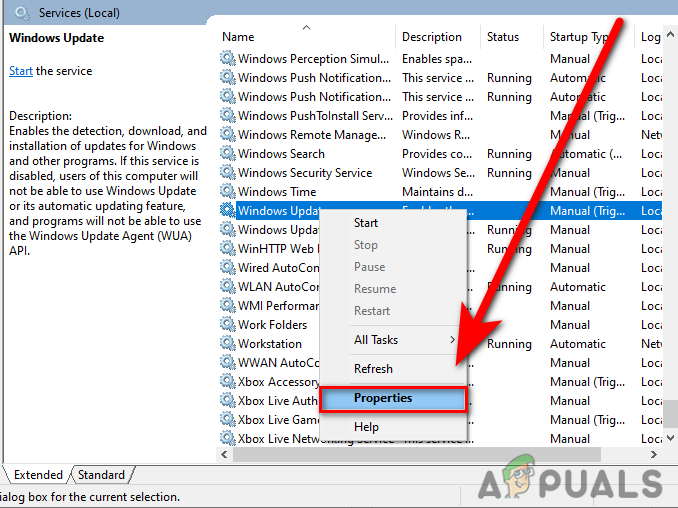
Service.msc command in Run Window - In the next Window, you will see Windows services, find the Windows Update service among them.
- Right-click on the Windows update service and select Properties.
Select the Properties option in Windows Update Service - Change the Startup type from Manual to Automatic by clicking on the dropdown of Startup type, and then select the Automatic option.
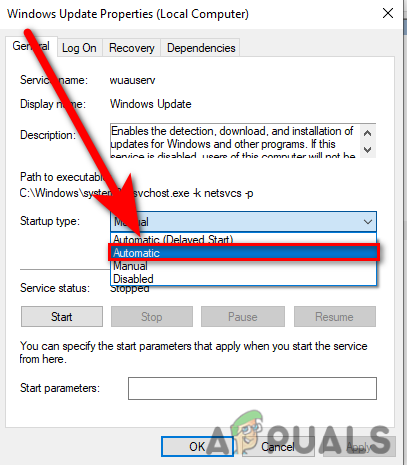
Select Automatic option - Click on Apply button to apply the settings.
- Start the Windows Update service by clicking on the Start button on the top left pane.
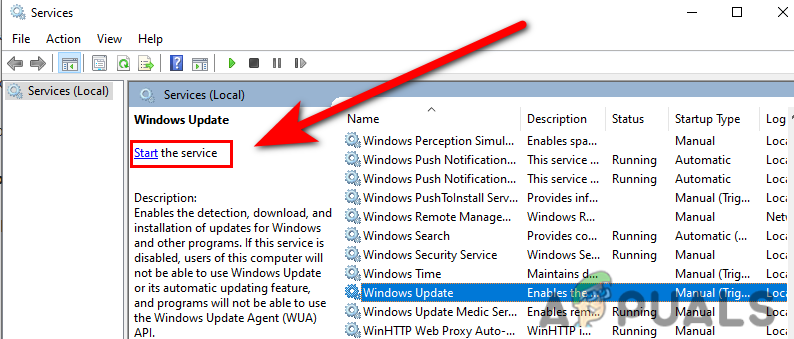
Start the Windows update service - If your service is already enabled then click on Restart to restart the service.
- Reboot your computer and check if the error is resolved.
Clear Software Distribution folder
The software distribution is a folder that is located in the Windows directory and used to store temporary files which are required to install Windows Update.
Clearing the software distribution folder might fix the 0xca020007 error. to clear the Software Distribution folder follow the steps below:-
First, you have to stop the Windows update services, if you don’t do that then you might end up with Windows installation.
Here is how you can clear the software distribution folder:-
- Press the Windows key and type the Windows PowerShell in the search box.
- Open Windows PowerShell as administrator by pressing the ctrl + shift + enter keys together.
- Insert the below command to stop the Windows update service.
net stop wuauserv
- Input the below command to clear the software distribution folder.
ren c:/windows/SoftwareDistribution softwaredistribution.old
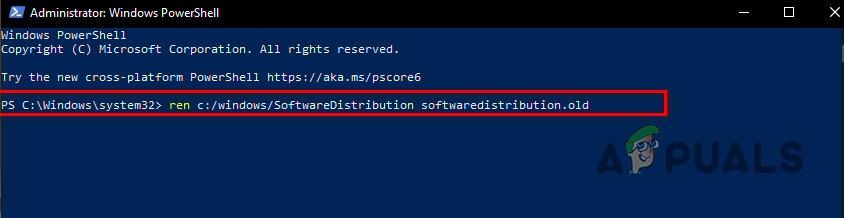 Clearing the software distribution folder
 - Again, insert the below command to start the windows update service.
net start wuauserv
Upgrade Windows Using Media Creation Tool
The media creation tool allows us to upgrade, and reinstall Windows with the ISO and into a separate USB flash drive, although you can upgrade your Windows using the media creation tool, in case upgrading the Windows will not work, then we suggest you clean Windows installation with the iso file.
Here is how you can upgrade your Windows:-
- Download the media creation tool from here.
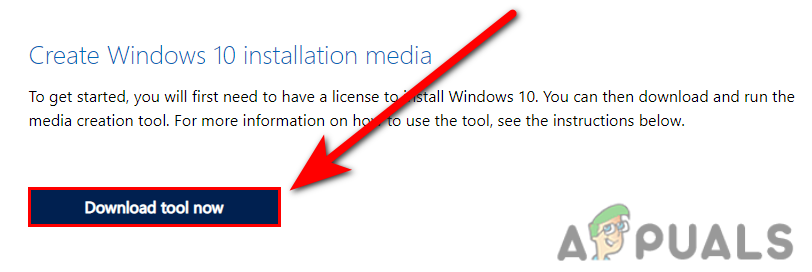
Download Windows media creation - Once the download is completed, open the media creation tool.
- In the next step, accept the agreement by clicking on the Accept.
- Then leave the default option Upgrade this PC now and go on Next.

Select Upgrade this pc now option - It should start the downloading process once done, follow the further instruction and make sure to check the keep files option which will come up in the next Window, then click on the Install button it will upgrade the Windows and restart your computer.
Hopefully, you have successfully solved the 0xC004F074 error, if you have any doubts about this issue we would like to hear in the comments.


