How to Fix Error 0x800F0955 – 0x20003 While Reinstalling Windows 11?
Some Windows 11 users are experiencing a weird issue where every attempt at performing a reinstall procedure on their operating system results in the error 0x800F0955 – 0x20003. In most cases, this problem occurs when the conventional procedure is followed.

After looking into various reports of users experiencing the same problem, we identified a series of common causes that are most likely responsible for this problem. Here’s a list of potential culprits that might cause the 0x800F0955 – 0x20003 when attempting to reinstall Windows 11:
- Insufficient Storage available on the OS partition – Keep in mind that similar to a clean installation of Windows, there’s a certain threshold of free space that you need to meet in order to be able to reinstall Windows 11. Make sure you have at least 35 GB of free space before attempting to initiate the repair procedure once again.
- The conflict caused by the Developer Mode package – If you’re not actively sideloading or relying on additional deployment options for debugging, there is no use in keeping the Developer Mode package installed. It ends up conflicting with a lot of procedures (including repair-installing), so you should disable it before re-initiating the repair procedure.
- Migration file glitch – As it turns out, this issue can also be facilitated by a glitch affecting some old migration files that were previously used to upgrade to Windows 11 from an older Windows version. To fix this particular issue, you should rename the old migration files to avoid conflict (since you can’t delete them conventionally).
- Failing storage sectors – Under certain circumstances, the reinstall procedure might fail with this error due to one or more storage sectors of your active drive. If the drive is only beginning to fail, you should be able to get the issue fixed by deploying a CHKDSK scan to replace the failing sectors with unused equivalents.
- System file corruption – If you’re trying to reinstall Windows 11 directly from the GUI menu, chances are the installation will fail if your system is dealing with file corruption affecting some dependencies used in the reinstallation procedure. In this case, deploy SFC and DISM scans to fix the problem or perform a clean install (or repair install) using an installation media if the problem persists.
- Secure boot interference – Secure boot has already become an industry standard, but increasingly more users are reporting that this feature might conflict with the reinstallation of Windows 11. If this is the culprit causing the 0x800F0955 – 0x20003, you should be able to bypass the error by temporarily disabling Secure Boot before you attempt to do the reinstallation of Windows 11.
- Conflict with a 3rd party firewall component – If you’re performing an in-place reinstall while you’re using a 3rd party firewall, you might be able to bypass the error by uninstalling the security component prior to deploying the reinstall procedure.
- Conflict with a 3rd party disk encryption software – Another 3rd party software component that is known to affect the reinstallation dependencies are services used by certain disk encryption software. To avoid this type of conflict, uninstall the 3rd party encryption software prior to reinitiating the reinstallation procedure.
- Different 3rd party conflict – According to some affected users, there are also other 3rd party services that are known to cause this type of error during a conventional reinstallation procedure. To make sure these issues don’t occur, boot in Safe Mode before attempting to do the reinstallation of Windows 11 again.
- Conflicting information inside the NGC folder – If you’ve previously upgraded to Windows 11 from Windows 11, another reason why you can expect to deal with this error is a scenario in which your PC contains conflicting information inside the NGC folder. You can resolve this error by deleting the contents of the NGC folder before trying to reinstall Windows 11 once again.
Now that we went over every potential cause that might be responsible for the 0x800F0955 – 0x20003, let’s revisit every possible fix for this issue that was already confirmed by an affected user.
Free at least 35 GB of Space on Windows Partition
The first thing you should do when troubleshooting this issue is to make sure you have enough space on your operating system partition.
This might not seem like something important, but a reinstallation procedure of Windows 11 requires at least 35 GB of free space in order to complete (even if Microsoft doesn’t advertise that).
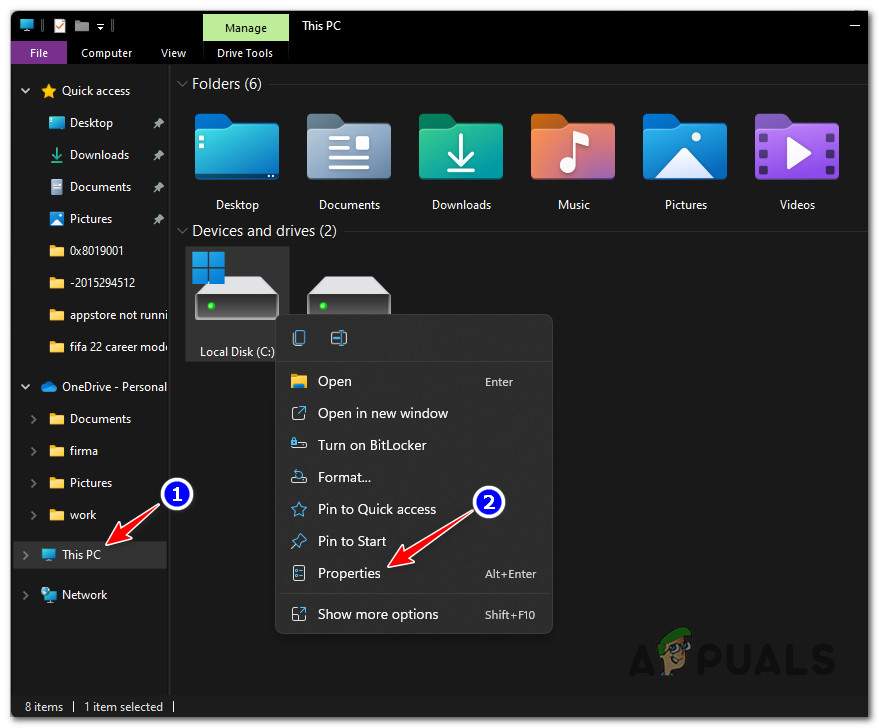
So first things first, open File Explorer (Windows key + E) and go to This PC. Next, go to This PC (using the side menu on the left), right-click on the Windows partition, then click on Properties from the list.
Note: You can figure out which partition contains the Windows installation by looking for the Windows logo.
From the Properties screen, access the General tab, then check the available Free space.
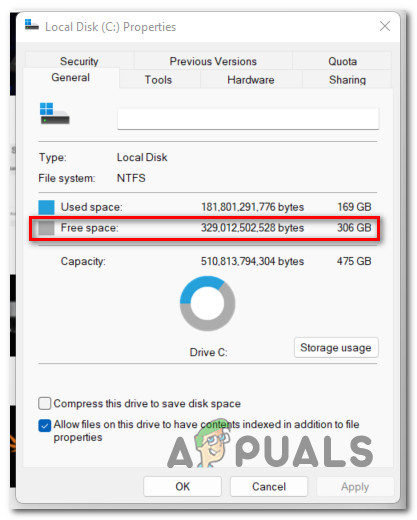
If the available space is under 35 GB, follow the instructions below:
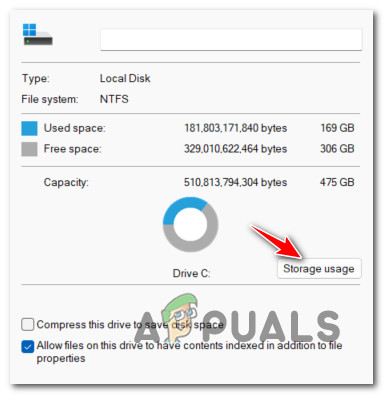
- From the Properties screen of your Windows partition, click on Storage usage.
Access the Storage usage menu - Once you’re inside the Storage usage menu, start by clicking on Temporary files from the top of the screen.
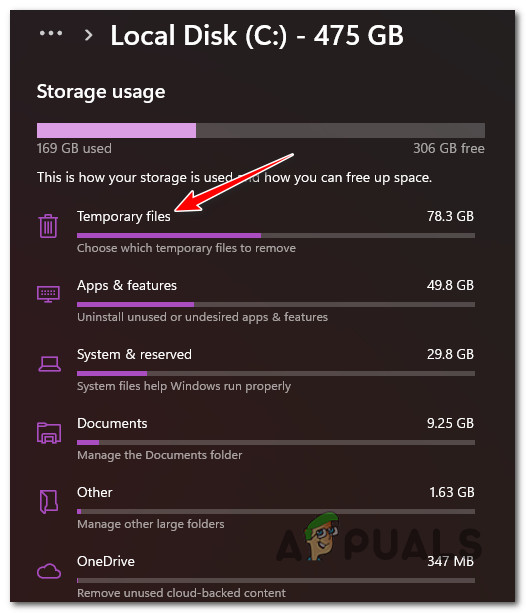
Access the Temporary files menu - From the next screen, select which type of files you want to delete and check the associated boxes, then click on Remove files to start the operation.
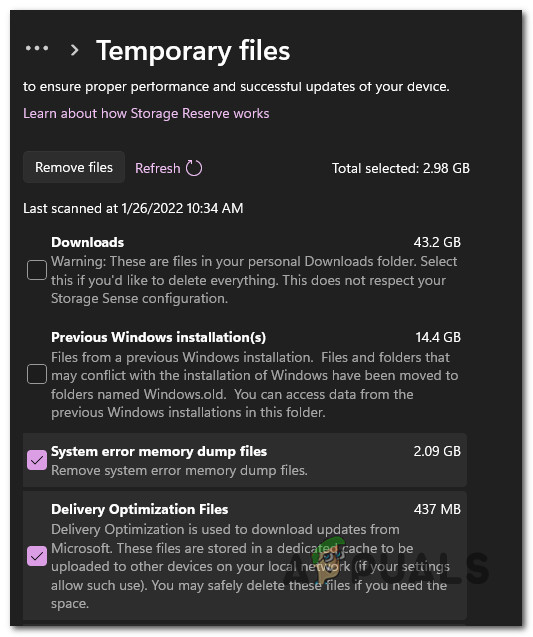
Remove temp files - This will likely be enough to free 35 GB of free space, but just in case it’s not, return to the previous menu and click on Apps & Feature, then uninstall a series of unnecessary native Windows apps to free some more space.
- Once you have enough space to work with, attempt to do the reinstallation again and see if the error-0x800f0955-0x20003 is now fixed.
If the same problem is still ongoing, try the next method below.
Remove the Developer Mode Package (if applicable)
As it turns out, the 0x800f0955-0x20003 error can also be caused by a conflict facilitated by Developer Mode.
Note: Developer Mode will allow you to sideload apps and presents you with many more debugging tools. This is very useful for a Windows developer but quite unnecessary for the average user.
If you previously enabled this feature to complete a task or to troubleshoot something and left it enabled, you might want to toggle it off before retrying the reinstallation of Windows 11.
We’ve managed to discover a lot of users’ reports confirming that in their case, the 0x800f0955-0x20003 error occurred because a Developer Mode service ended up conflicting with the Windows install an agent.
In case this scenario is applicable and you have the Developer Mode enabled, follow the instructions below to disable this feature before repeating the reinstallation procedure of Windows 11:
- Press Windows key + I to open up the Settings menu of Windows 11.
- From the side menu on the left, click on Privacy & Security.
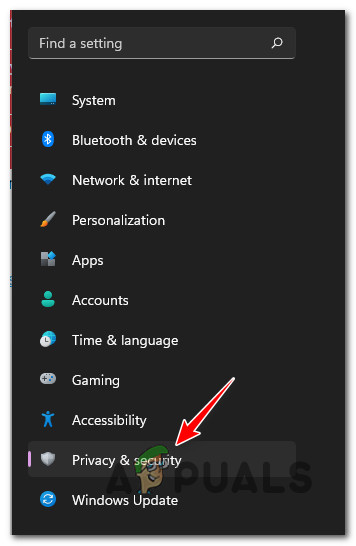
Accessing the Privacy and Security tab Note: If the side menu is invisible by default, click on the action icon at the top to make it visible.
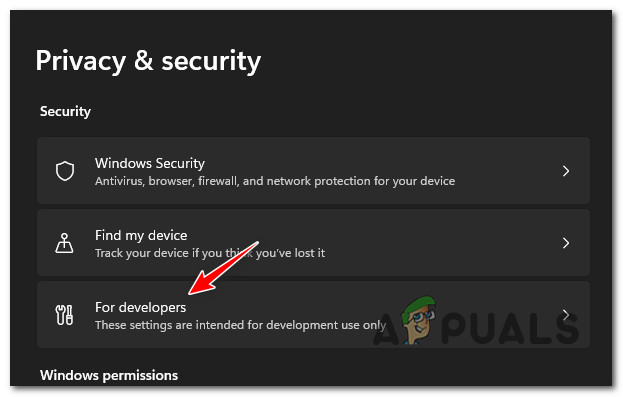
- Inside the Privacy & security tab, move over to the right menu and click on For developers (under Security).
Accessing the For Developers tab - Once you’re inside the For Developers tab, disable the toggle associated with Developer Mode, then confirm at the next prompt.
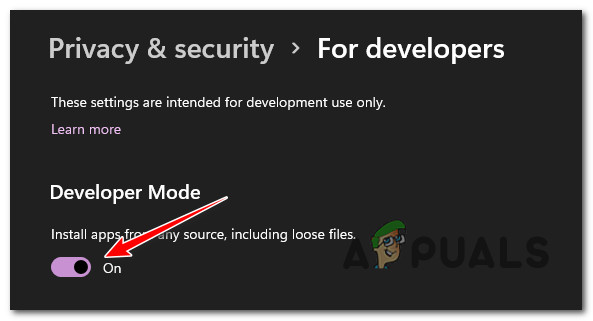
Disable the Developers tab - Once Developer mode has been disabled, reboot your PC, then attempt to reinstall Windows 11 once again and see if the problem is fixed.
If the 0x800f0955-0x20003 error is still ongoing, move down to the next potential fix below.
Rename Old Migration Files
If you previously upgraded to Windows 11 from an older Windows 10 installation instead of clean installing, you might be experiencing the 0x800f0955-0x20003 error due to a glitch affecting migration files previously used for the upgrade to Windows 11.
Keep in mind that these files can’t be deleted (even if they’re no longer needed) as Windows keeps them as a backup in case you want to revert back to the old Windows version.
However, you can prevent this glitch from occurring by renaming the old migration files from an elevated Command Prompt with the .old. This will serve the purpose of forcing your operating system to disregard the old files.
Here’s what you need to do:
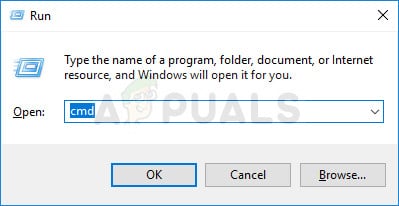
- Press Windows key + R to open up a Run dialog box. Next, type ‘cmd’ inside the text box and press Ctrl + Shift + Enter to open up an elevated Command Prompt window.
CMD menu - At the User Account Control (UAC) window, click Yes to grant admin access.
- Once you’re inside the elevated Command Prompt window, type the following commands in quick succession and press Enter after each one to rename the old migration files:
ren C:\Windows\System32\migration migration.old
ren C:\Windows\System32\migwiz migwiz.old
- After the operation is complete, close the elevated CMD prompt and reboot your PC before attempting to reinstall Windows 11 once again.
If the same 0x800f0955-0x20003 error is still occurring, move down to the next method below.
Deploy a CHKDSK Scan
According to a few users who were using a traditional HDD, this problem can also occur due to some bad sectors on your HDD that might be provoking general system instability.
If bad sector data ends up affecting the reinstall procedure, chances are your system will trigger the 0x800f0955-0x20003 every time the integrity of your drive is checked.
The good news is, we found some user reports that running a CHKDSK scan ended up resolving the issue for them entirely.
Here’s how to deploy a CHKDSK scan on your Windows 11 computer:
- Start by pressing Windows key + R to open up a Run dialog box.
- Next, type ‘cmd’ inside the box and press Ctrl + Shift + Enter to open up an elevated Command Prompt.
CMD menu - At the UAC (User Account Control) prompt, click Yes to grant administrative privileges.
- Inside the elevated Command Prompt, type the following command and press Enter to initiate an offline scan:
chkdsk /f
- Wait for the process to be completed, then restart your computer and see if the issue is resolved at the next system startup.
If the 0x800f0830-0x20003 error still occurs when you attempt to reinstall Windows 11 even after deploying a CHKDSK scan, move down to the next potential fix below.
Deploy SFC and DISM scans
Under certain circumstances, the 0x800f0955-0x20003 error can also occur due to some kind of system file corruption.
If a critical process is tainted by system file corruption, you should be able to resolve most conventional system file corruption instances by running a couple of utilities that are included by default on your Windows installation – SFC (System File Checker) and DISM ( Deployment Image Servicing and Management).
Although these tools are apparently similar, the two have different approaches when it comes to fixing system file corruption.
To put things into perspective, SFC is much more efficient when dealing with logical errors, while DISM is better at fixing OS components.
Even more, DISM requires an Internet connection since it relies on the WU component to download healthy copies to replace corrupted files, while SFC is entirely local and it uses a locally cached copy to replace corrupted instances.
Our recommendation is to run both if you’re facing the 0x800f0955-0x20003 and you suspect that system file corruption might be responsible.
Here’s how to do this:
- Start by pressing Windows key + R.
- Inside the Run box, type ‘cmd’ and press Ctrl + Shift + Enter to open up a Command Prompt with admin access.

Open an elevated CMD prompt - When you see the UAC (User Account Control) prompt, click yes to grant admin access.
- Inside the CMD window, type the following command and hit Enter after each one to initiate a DISM scan:
Dism.exe /online /cleanup-image /scanhealth
Dism.exe /online /cleanup-image /restorehealth
Note: DISM is actively using Windows update to download healthy copies. For these reasons, you need to ensure that you have a stable internet connection before initiating this procedure. The first command line will scan your system for inconsistencies and the second one will repair them.
- Once the DISM scan is finished, restart your computer and wait for the next startup to complete.
- After the next startup is complete, follow the first step again to open up another elevated CMD window, type the following command and press Enter to initiate an SFC scan:
sfc /scannow
Note: Interrupting this process after you start this scan is not recommended. Doing this runs the risk of leaving your system exposed to other logical errors that might produce other issues in the future.
- Reboot your computer once again and see if the issue is resolved at the next system startup.
If you’re still experiencing the 0x800f0955-0x20003 error while attempting to reinstall Windows 11, move down to the next method below.
Disable Secure Boot
Another thing that you should investigate is if the Secure Boot feature is enabled or disabled in your BIOS or UEFI settings.
The secure boot has slowly become the industry standard, but more and more users are blaming it for inhibiting the reinstallation of Windows 11.
Several users that were also dealing with this problem have confirmed that once they disabled Secure boot from BIOS or UEFI, the reinstallation of Windows 11 was finally successful without the same 0x800f0955-0x20003 error.
Note: Secure boot is the new industry standard to ensure that modern PCs only use software trusted by OEMs ( Original Equipment Manufacturers).
Follow the instructions below to temporarily disable Secure Boot in order to avoid the 0x800f0955-0x20003:
Note: If this method allows you to reinstall Windows 11, make sure to re-enable secure boot by reverse-engineering the steps below.
- Start your PC conventionally and press the Setup key (boot key) as soon as you see the initial screen.

Press the Setup key Note: In most cases, you’ll see the Setup key at the bottom of the screen. It’s usually one of the following keys: F1, F2, F4, F8, F12, Esc, or Del.
- Inside the BIOS or UEFI settings, look for an option named Secure Boot and make sure that it’s Disabled.
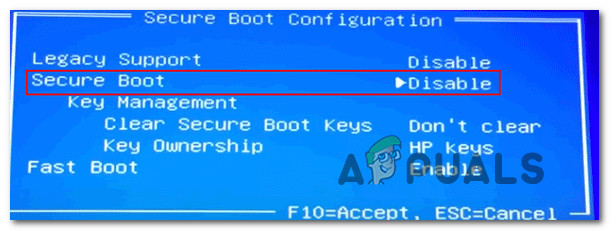
Disable Secure boot Note: The BIOS version you’ll see on your screen will vary depending on its manufacturer, but you can typically find this option somewhere under the Security tab.
- Once the Secure Boot option is disabled, save the changes in order to boot your computer normally.
- Once your PC boots back up, attempt to reinstall Windows 11 and see if the problem is now fixed.
In case the same error is still popping up during the installation, move down to the next potential fix below.
Uninstall or Disable Non-Microsoft AV or Firewall components (if applicable)
As it turns out, the 0x800f0955-0x20003 error can appear due to a conflict between a 3rd party security suite and a Kernel process used by the Windows 11 install agent. There are several user reports blaming Comodo AV for this issue, but there might be other suites triggering the same behavior.
If that’s the case and you’re using a 3rd party security suite, you should disable the real-time protection of your antivirus and see if the issue stops occurring.
However, in order to be 100% sure that your 3rd party AV suite has no role in this error (especially if it has a firewall component), you’ll need to uninstall the security program and remove any remnant files.
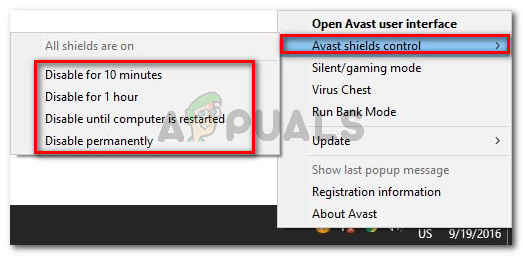
Start simple by disabling the real-time protection. This operation will be distinct across the various 3rd party AV suites, but you are typically able to do so via the dedicated taskbar menu.
Leave the real-time protection disabled for a while and see if the issue is still occurring when you try to reinstall Windows 11.
If the operation is still halted by the 0x800f0955-0x20003 error, try uninstalling the security program altogether and remove any remnant files that can still cause this problem.
If you decide to go this route, follow these steps to completely uninstall a 3rd party security suite along with every remnant file.
In case this method was not applicable in your case, move down to the next potential fix below.
Uninstall all non-Microsoft disk encryption software (if applicable)
As it turns out, overprotective AV suites are not the only 3rd party software components that might inhibit the Windows 11 install agent when it needs to re-do the OS installation.
There’s also an entire category of 3rd party encryption software that is known to cause the 0x800f0955-0x20003 error.
Here’s a shortlist of the most commonly reported encryption culprits:
- VeraCrypt
- AxCrypt
- Folder Lock
- FileVault
- DiskCryptor
- BitLocker
- BoxCryptor
If you’re using any of the encryption tools above or a similar utility, consider temporarily uninstalling it (at least until the reinstall procedure is complete)
Here’s how to uninstall the problematic encryption tool:
- Start by pressing Windows key + R to open up a Run dialog box.
- Next, type ‘appwiz.cpl’ and press Enter to open up the Programs and Features menu.

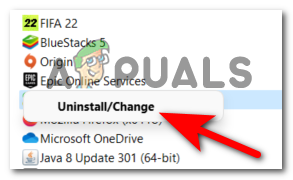
Access the uninstallation utility - Inside the Programs and Features menu, scroll down through the list of installed programs and locate the problematic encryption tool that you suspect might be causing the issue.
- Next, right-click on it and choose Uninstall from the context menu that just appeared.
Uninstall the encryption program - Finally, follow the on-screen prompts to complete the uninstallation, then restart your computer.
If this method was not applicable or you uninstall the 3rd party encryption tool with no success, move down to the next method.
Reinstall in Safe Mode
As it turns out, there’s also the possibility that you’re experiencing this issue due to a different process interference that is neither an antivirus component nor an encryption tool.
Since there’s virtually impossible to make a list with every conflicting program, the best course of action is to boot into safe mode and do the reinstallation of your Windows while in this mode.
Note: Going this route will ensure that no 3rd party process, service, or startup item is actually permitted to conflict with the Windows 11 install agent.
Follow the instructions below to boot in Safe Mode:
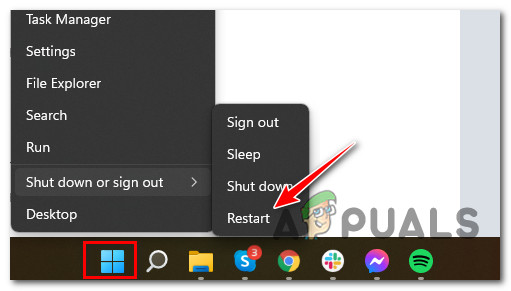
- Press the Windows key to bring up the Start menu.
- Next, click on the power icon and hold the Shift key while clicking on Restart in order to force your computer to boot in Safe Mode.
Shift + Restart to boot in Safe Mode - After you do this our computer will restart directly into the Recovery menu.
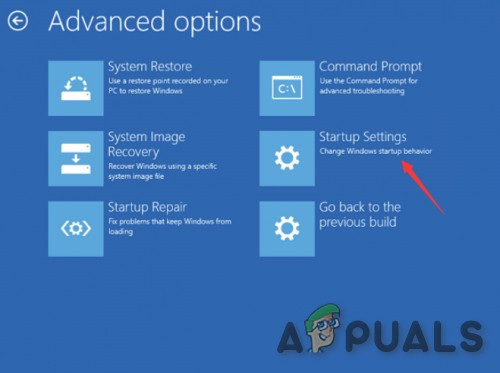
- From the Recovery menu, click on Troubleshoot from the list of available options.

Access the Troubleshoot menu - In the Advanced Options menu, click on Startup Settings from the list of options.
Access the Startup settings - Once you get to the next screen, press F5 to boot your computer in Safe Mode with Networking.
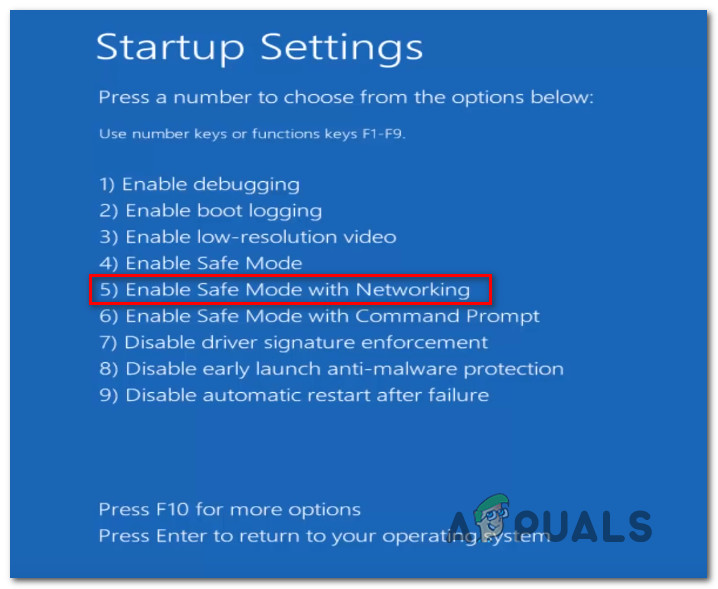
Safe Mode with Networking - Wait until your PC boots in Safe mode, then reinstall Windows 11 and see if you are able to complete the procedure without experiencing the 0x800f0955-0x20003 error.
If the problem is still not fixed, try the next method below.
Delete the NGC Folder
As it turns out, if you are coming to Windows 11 from Windows 8.1 or Windows 10, chances are you’re experiencing the 0x800f0955-0x20003 error due to some conflicting information that is affecting the reinstallation operation.
If this scenario is applicable, you should be able to get the issue resolved by deleting the contents of the NGC folder before attempting to reinstall Windows 11 once again.
Several affected users have confirmed that this method finally allowed them to complete the reinstallation of Windows 11 without experiencing the same 0x800f0955-0x20003 error.
Here’s how to clear the contents of the NGC folder:
- Press Windows key + E to open up File Explorer.
- Navigate to the following location:
C:\Windows\ServiceProfiles\LocalService\AppData\Local\Microsoft\ngc
- Once you’re inside the NGC folder, press Ctrl + A to select everything inside, then right-click on a selected item and choose to Delete to clear the contents of the folder.
- After the contents of the NGC folder have been cleared, reboot your PC before attempting to reinstall Windows 11 once again.
If the 0x800f0955 – 0x20003 is still ongoing, try the next method below.
Reinstall via the Media Creation Tool
If you’re experiencing this issue while attempting to use the Windows Upgrade Assistant to reinstall Windows 11, chances are you can avoid the 0x800f0955-0x20003 error entirely by choosing to reinstall using the Media Creation tool instead.
Be advised that the procedure is longer than a regular reinstall, but it will allow you to get the job done in case the conventional way failed.
To go this route, follow the instructions here to upgrade to Windows 11 via the Media Creation Tool.
If this method returns the same 0x800f0955-0x20003 error, move down to the next method below.
Perform a Clean Install or Repair install
If none of the methods above have fixed the issue, there’s a big chance you’re dealing with some type of system file corruption that cannot be resolved conventionally. In this case, the only viable fix is to perform a series of instructions that will reset every OS component.
To do this, you have two ways forward; You either perform a repair install or a clean install.
- A clean install is a quick procedure that only requires a few clicks and no installation media. However, the major downside is that it will probably make you lose most of your personal data (apps, games, user preferences, etc.) if you don’t back them up in advance.
- A more effective way would be to perform a repair install. This will require compatible Windows 11 installation media, but it will allow you to keep all your personal components including apps, games, user preferences, and personal media. The operation will only touch the OS components and leave everything else intact.


