How to Enable Thumbnail Preview in Windows 10
Most of the Windows users have a habit of browsing through their pictures whilst looking at their thumbnail previews to avoid opening them and still being able to get a look at each one. Often users have noticed the feature of thumbnail preview not set by default in their Windows 10 operating systems. This is normal and not a bug, so if you are scavenging over the internet looking for “fixes”, you won’t find working ones. We have a small step by step guide for you which can help you in being able to get thumbnail previews of your images working like a charm. Follow these steps:
Method 1: Via File Explorer Settings
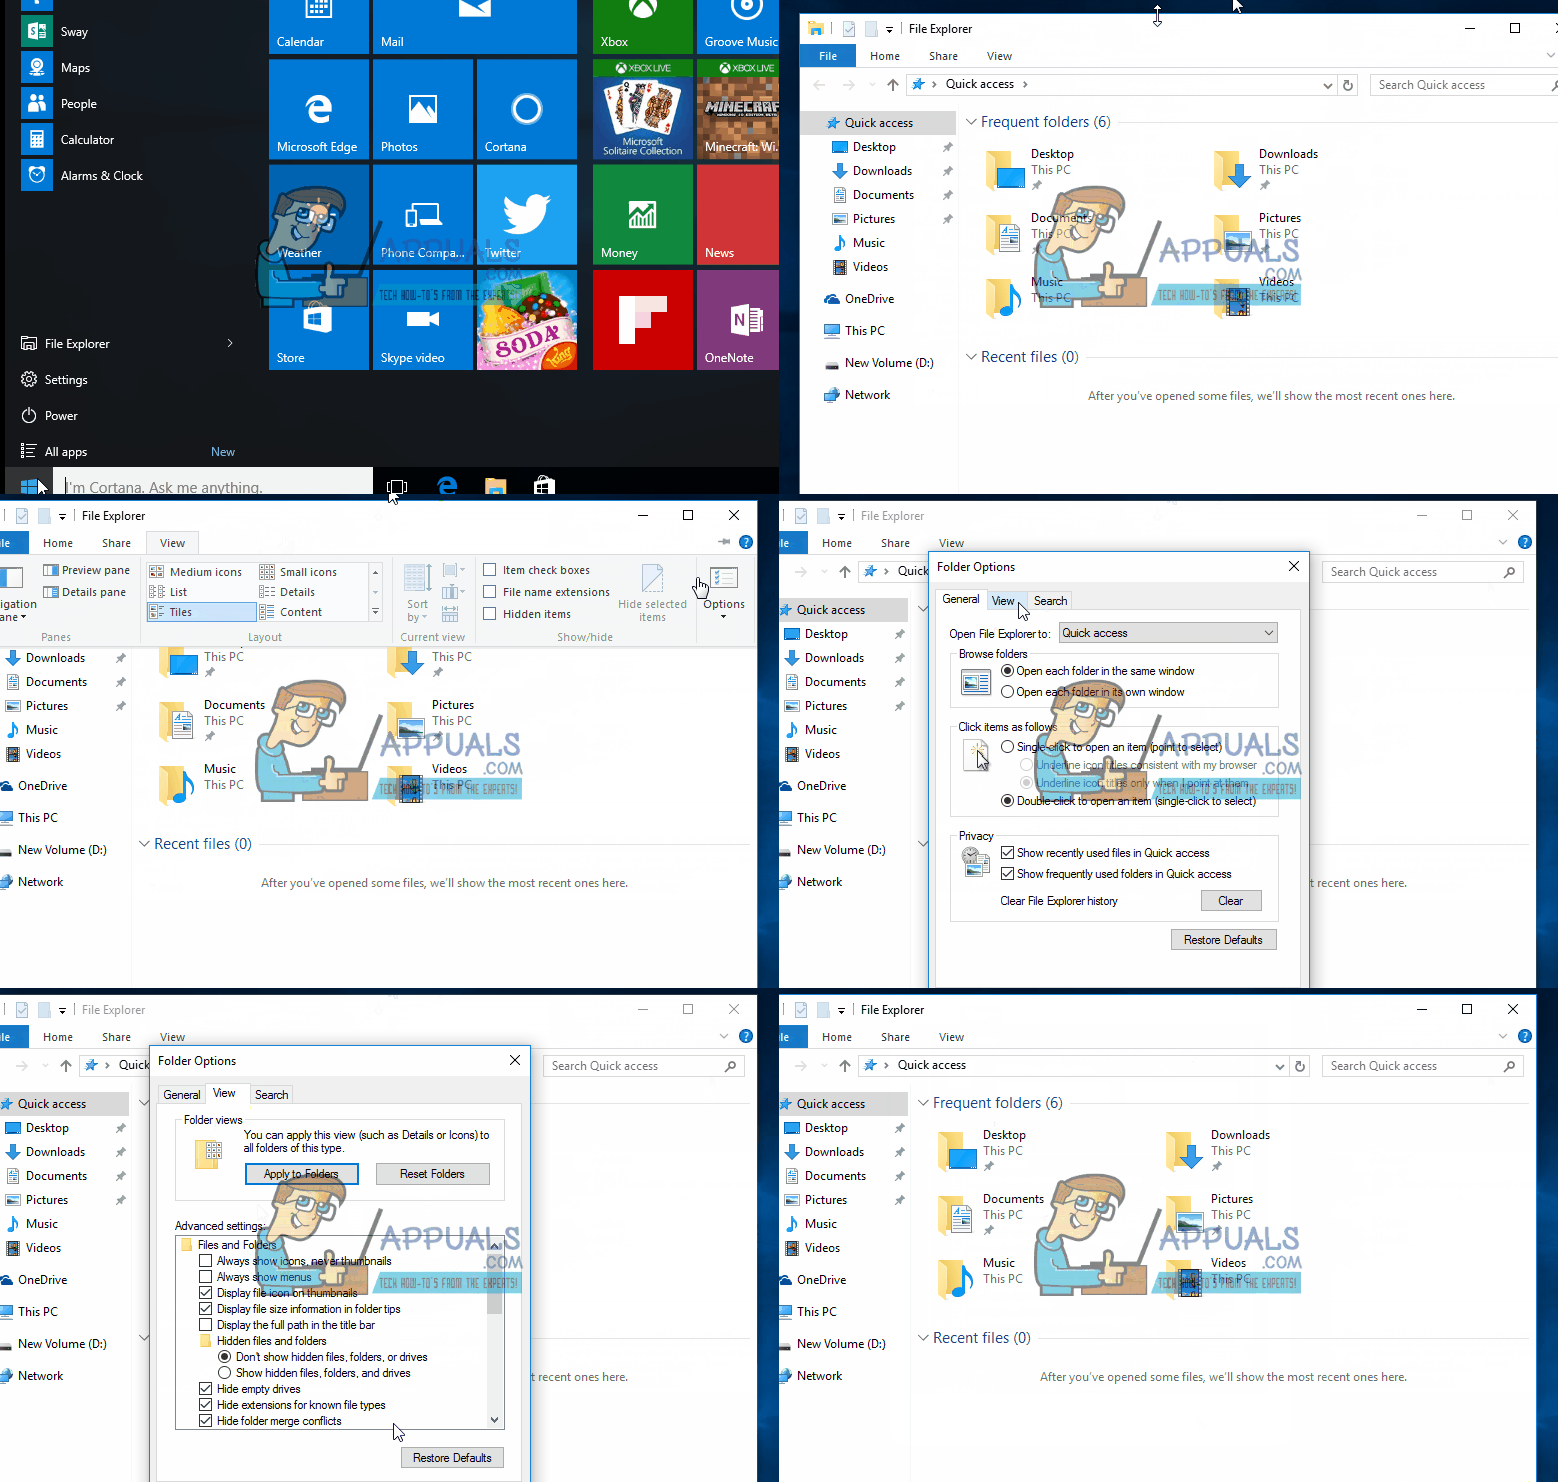
On the top of the file explorer window, press on the “View” tab to move to it.
Now to the extreme top right of the file explorer menu, click on “Options”.
From the drop-down select “Change folder and search options” or Click Options (not the small arrow under it)
Now move to the View tab and uncheck the option that says “Always show icons, never thumbnails”
This should be able to work for you. There are a few alternatives to this method as well. Read on.

Method 2: Visual Effect Settings
In this method, we will be enabling the thumbnail previews from within the visual effects settings. Follow these steps:
- Press Windows key + X to invoke the pop-up menu above the start button.
- Select System from the list.
- Now on the left hand side, you will see a link that says “Advanced system settings”. Click on it.
- Now from the window that appears, click on Settings under the Performance
- Check the box behind “Show thumbnails instead of icons”.

Method 3: Using a Batch File
If you don’t want to go through the different steps required to enable thumbnail previews, we have a solution that fits your lifestyle as well. In this method, we will be asking you to download a batch file via this link. This batch file will modify this registry key value:
HKEY_CURRENT_USER\SOFTWARE\Microsoft\Windows\CurrentVersion\Explorer\Advanced
and the DWORD value stored in the IconsOnly DWORD. “0” means off or show icons only whereas “1” means on or displaying thumbnails.
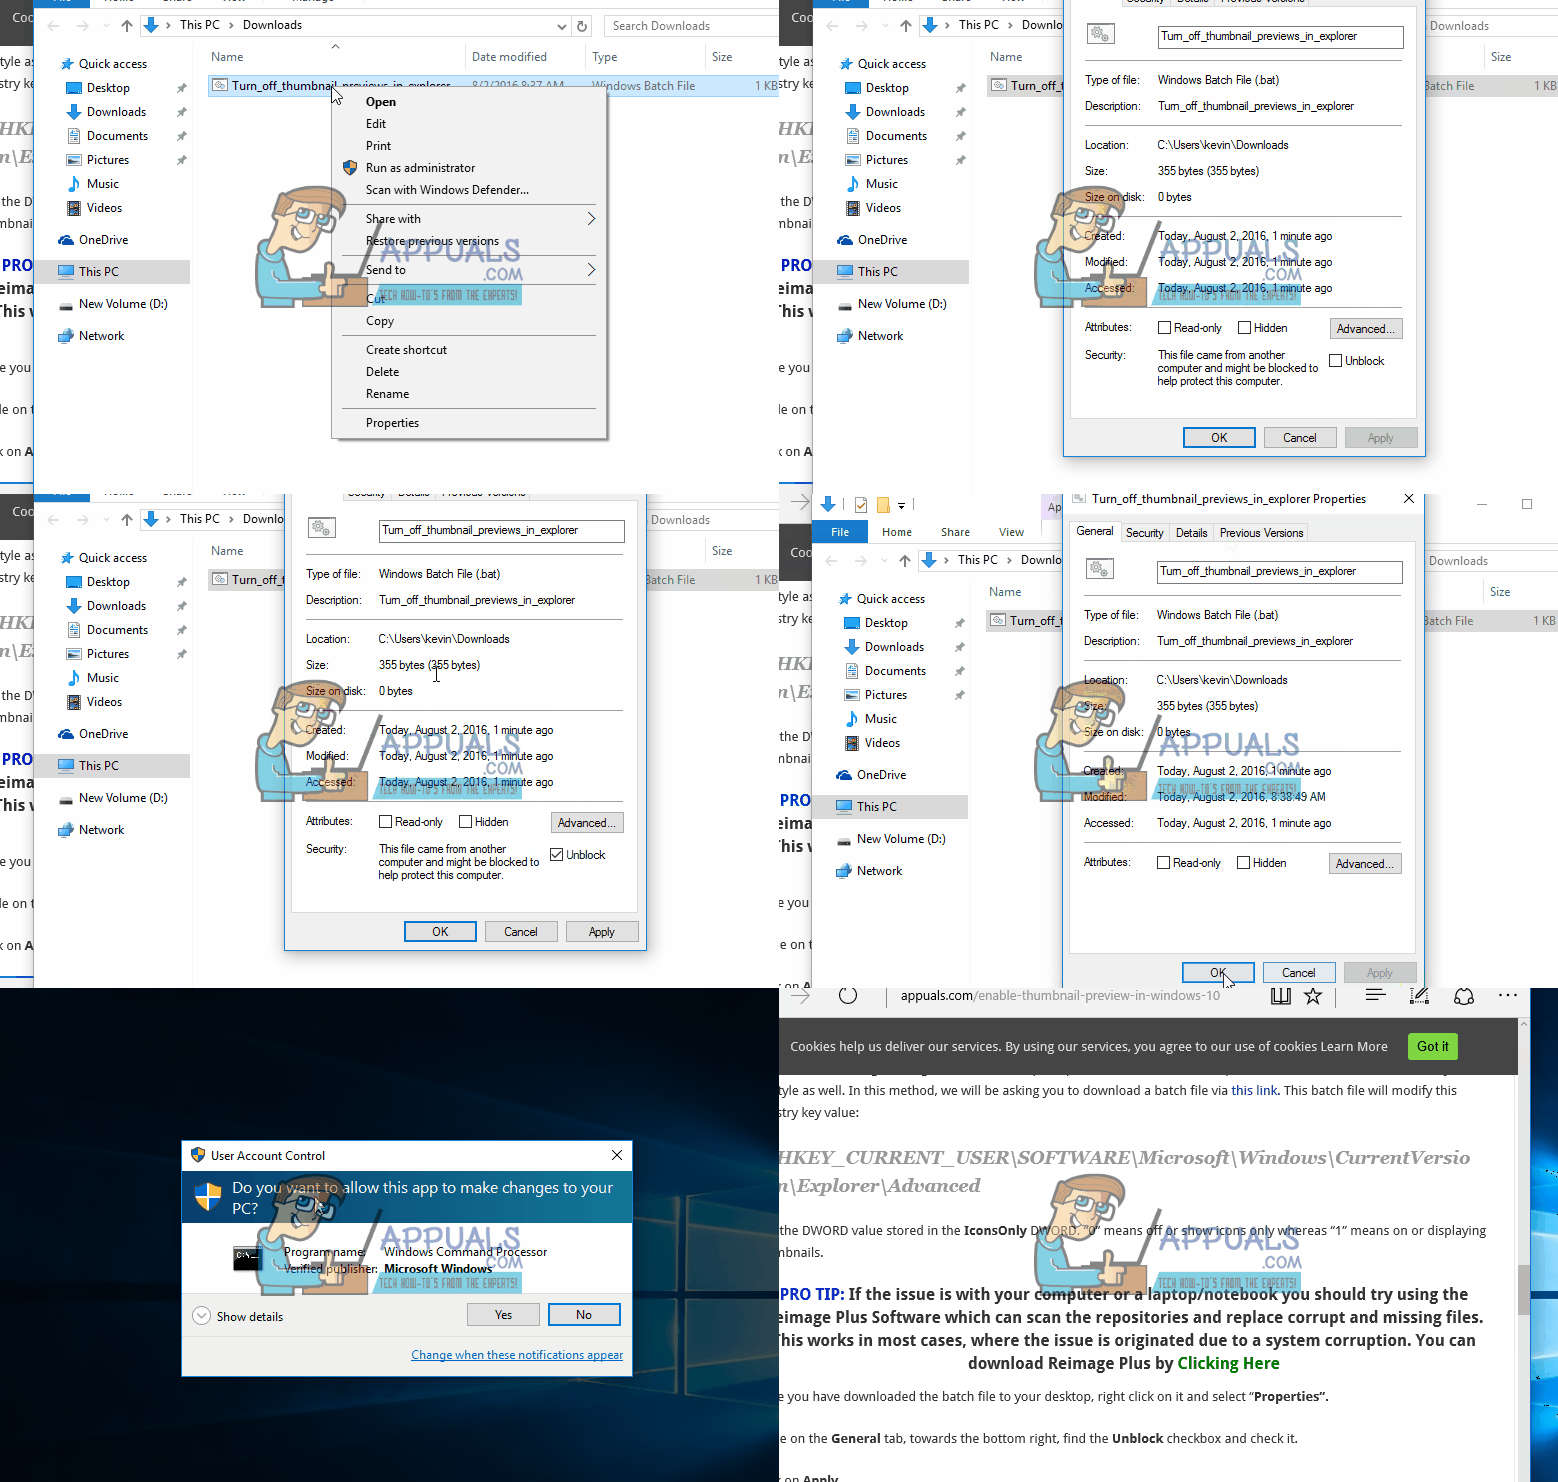
Once you have downloaded the batch file to your desktop, right click on it and select “Properties”.
While on the General tab, towards the bottom right, find the Unblock checkbox and check it.
Click on Apply
Right click on the batch file and then choose Run As Administrator
You should see your screen flickering and a command prompt window appearing and disappearing instantly. These are the signs of batch file installation. If a file explorer window is open, it would also be restarted for the changes to apply.
Delete the batch file once completed.

Method 4: Using the Group Policy Editor
If somehow you weren’t able to make the above methods work for you, the feature might not be available to you simply because it has not been enabled from the group policy editor. We will be making changes in the editor to achieve our goal. If you don’t have the group policy editor (Windows 10 home owners don’t, by default) you can either follow the method 5 instead or follow this guide to install it first.
Once you are ready, follow these steps: (Note: You need to be logged in as an administrator to perform the following steps)
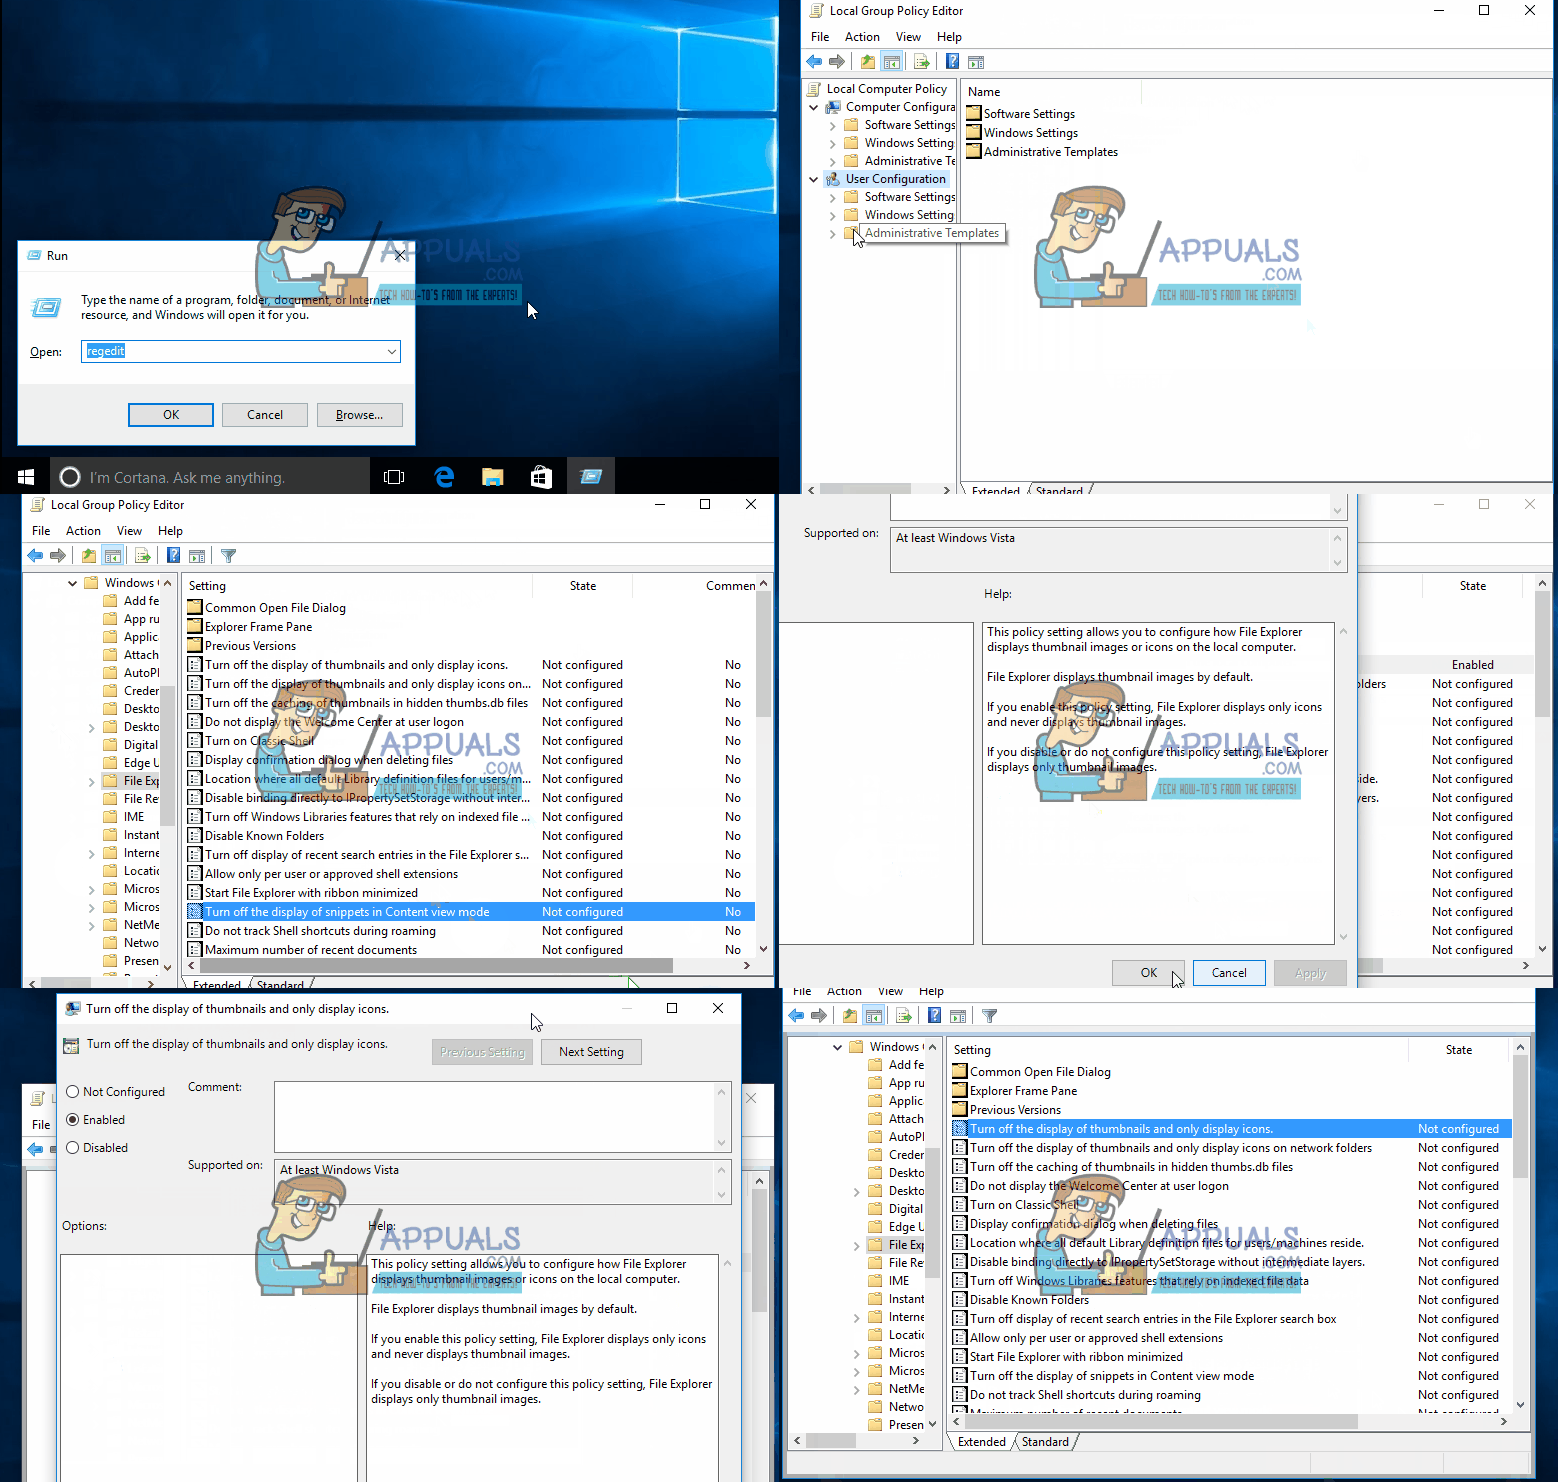
Press Windows key + R to invoke the Run dialog.
Type gpedit.msc in the dialog and press Enter.
When the window appears, click on the User configuration folder on the left hand side.
Now from the expanded list of folders, select Administrative templates for expansion.
Now click on Windows components.
Finally click on File explorer.
Now on the right hand side, you should be able to see a list of options. Double click on Turn off the display of thumbnails and only display icons.
Click on Not configured and select. You should now be able to enable the thumbnail previews easily via any of the above 3 methods.

Method 5: Modifying Registry
In this last method, we will be using a registry file to try to enable the feature. Follow these steps while ensuring that you are logged in as an administrator:
Go to this link to download the registry file. It will be making changes in the following 2 registry files HKEY_CURRENT_USER\SOFTWARE\Microsoft\Windows\CurrentVersion\Policies\Explorer and HKEY_LOCAL_MACHINE\SOFTWARE\Microsoft\Windows\CurrentVersion\Policies\Explorer while setting the DWORD DisableThumbnails’ 0 means enabling and 1 means disabling.
Once downloaded, double click on the file.
If prompted, provide with the administrative privileges required to add the information to the registry.
Once the process completes, restart the computer.
You should now be able to set the thumbnail preview on via any of the first 3 methods.