How to Enable AVX in Windows?
Some programs and games require a feature called AVX to function properly. AVX stands for Advanced Vector Extensions, a set of processor instructions designed to speed up demanding tasks like video rendering, data processing, and modern graphics workloads. If AVX is turned off or unsupported, certain programs may fail to launch or display compatibility warnings.
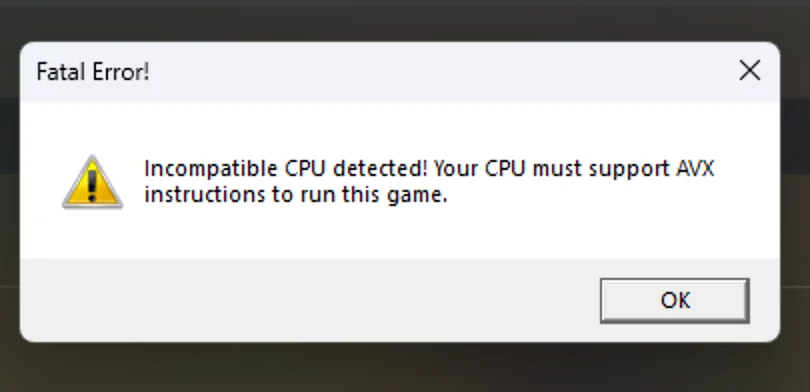
Windows does not include a setting to turn AVX on or off because it is controlled by the CPU and firmware. If your processor supports AVX, you can usually enable or confirm it in BIOS or UEFI. In Windows, you can also ensure the required AVX context saving is enabled so the OS initializes AVX correctly.
This guide explains what AVX means in simple terms and walks you through checking support, enabling it safely, and confirming that Windows detects it once your system restarts.
Step 1. Check Whether Your CPU Supports AVX or Not
Before enabling AVX, you first need to confirm that your processor actually supports it. AVX is a hardware-level feature, meaning it’s physically built into the CPU. Most Intel processors from Sandy Bridge 2011 and newer and most AMD processors from Bulldozer 2011 and newer support AVX, but it is still best to verify. Since Windows doesn’t include a native way to check this, you can quickly confirm support using a utility like CPU-Z or Coreinfo. Below are the steps using CPU-Z.
- Download CPU-Z from its official download page.

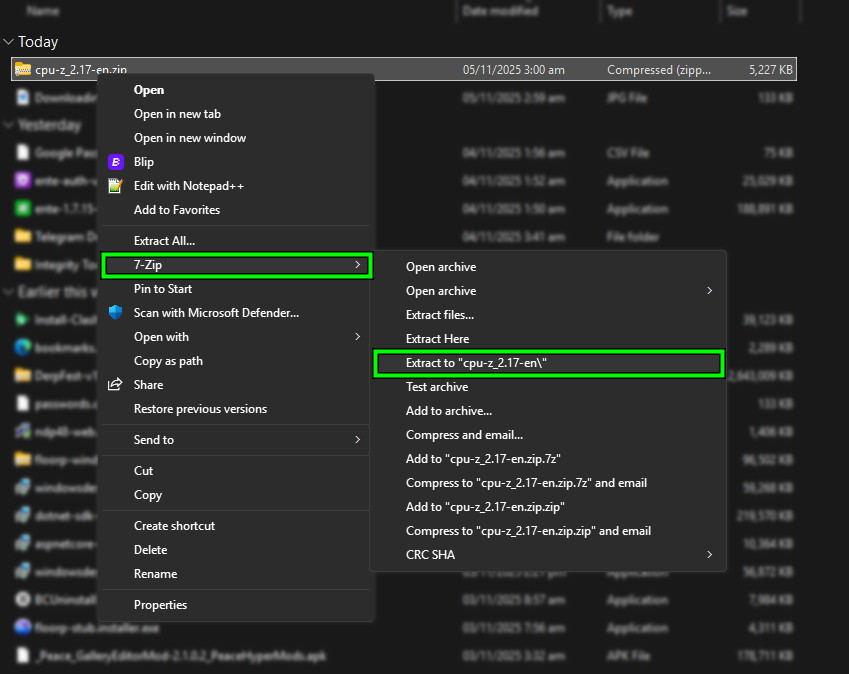
I’ll download the ZIP version since I prefer not to install programs I’ll only use once. - Extract the downloaded ZIP file using 7-Zip or any other decompression tool.
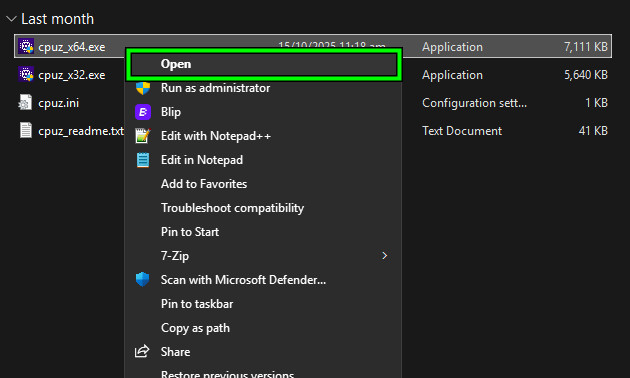
- Open the extracted folder and run either the 64-bit or 32-bit version depending on your Windows platform.
- Click Yes on the permission prompt if asked, and wait for CPU-Z to load.
- Once the program opens, locate the Instructions section.
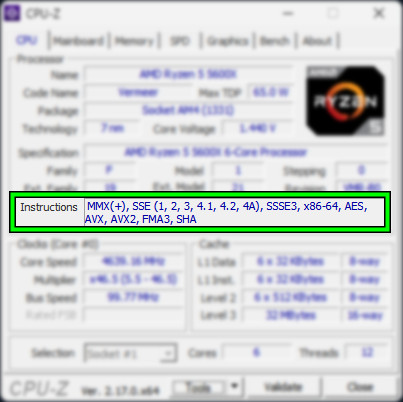
- If you see AVX or AVX2 listed here, it means your CPU supports AVX. If it doesn’t appear, your processor does not support this feature and you won’t be able to enable it.
Step 2. Ensure AVX Initialization Using BCDEDIT in Windows
Before changing BIOS settings, first confirm that Windows initializes AVX properly. This only applies if your processor supports AVX. The command below enables extended CPU state saving that AVX relies on, which can resolve cases where Windows is not initializing AVX as expected.
- Press Start, type cmd, and select Run as administrator.
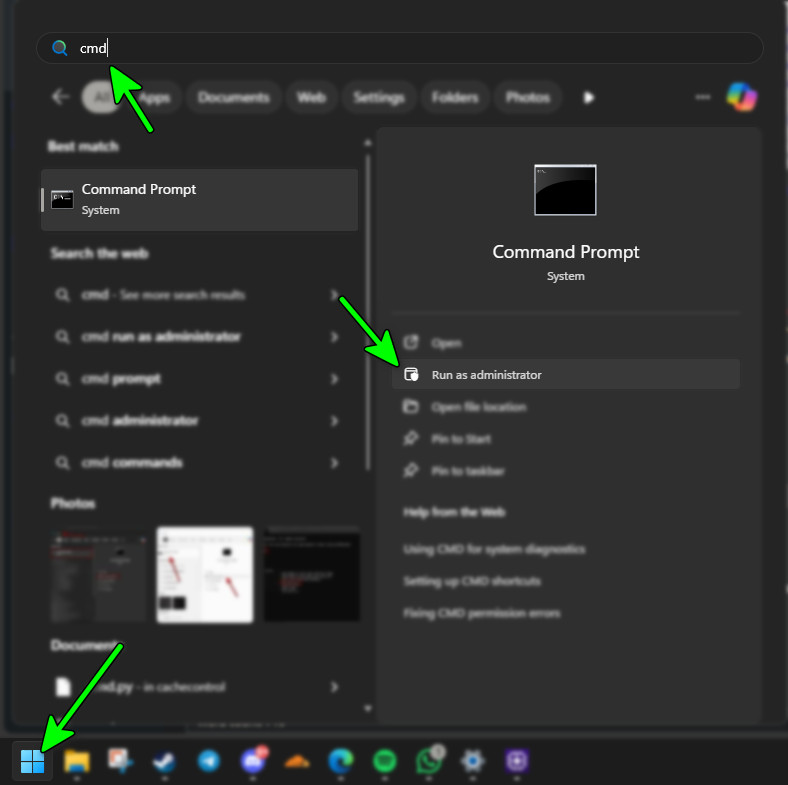
- In the Command Prompt, enter the following command and press Enter:
bcdedit /set xsavedisable 0
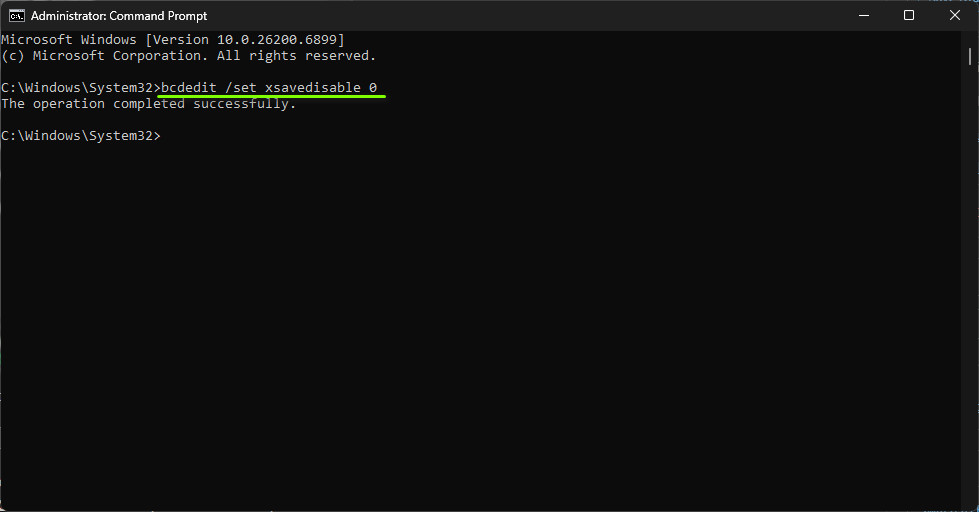
- If the command runs successfully, restart your PC to apply the changes.
- After the restart, verify AVX support by opening Coreinfo or CPU-Z and checking the instruction list. If AVX or AVX2 appears, the CPU supports it and Windows initialized it.
Step 3. Enable AVX Support from BIOS or UEFI
If the BCDEDIT step does not help and your BIOS includes an AVX setting, open BIOS or UEFI and make sure AVX is enabled. This ensures Windows can recognize and use AVX instructions at startup.
Note: BIOS menus differ depending on your motherboard manufacturer. The steps below are demonstrated using an MSI motherboard, but your interface might look slightly different.
- Restart your computer and repeatedly press the BIOS key during startup. On most systems, this key is F2, Delete, or Esc. If you’re unsure, visit our detailed guide on How to Access the BIOS on Different Motherboard Manufacturers?
- Inside the BIOS, navigate to the Advanced or CPU Configuration section. Depending on your motherboard, this option may also appear under Performance or Overclocking, so explore carefully.
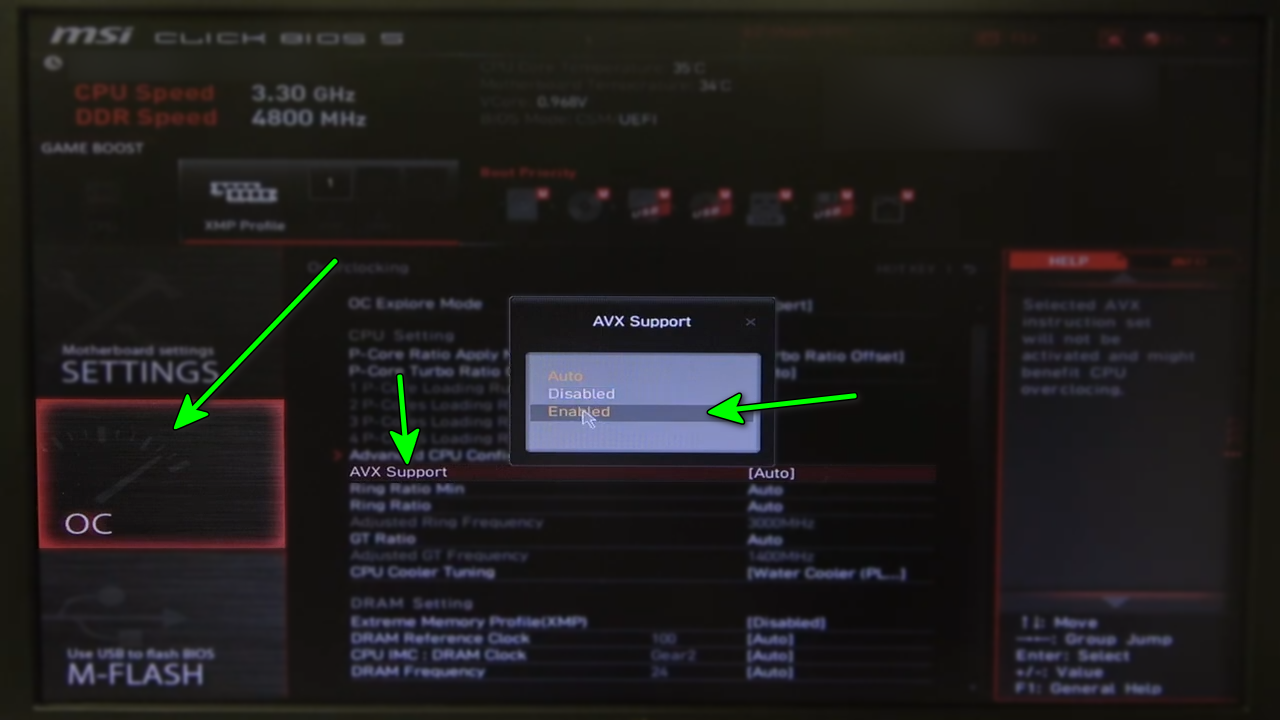
- Look for an option named AVX, AVX2, or CPU Features. If present, set it to Enabled. If no AVX option is shown, it is usually enabled by default.
- Press F10 to save your changes and exit the BIOS. Your system will automatically restart.