Fix: Docker Engine Keeps Freezing at Starting Screen
Docker is a platform used to test and deploy applications at a rapid speed. This software doesn’t take much time to start. However, since it searches for a Linux container, you will face startup issues with it when using it on a Windows Operating System. As a result, Docker will be stuck on an endless loop of the “Docker Desktop Starting’ message.
In this guide, we will be showing you the methods that will help you fix Docker stuck on starting.
Prerequisites: Check System Requirements
Docker is a development software and requires a high-end system to run. if your system doesn’t meet the required specification to run this software, then it will have issues with the opening. Therefore, check your system specifications before running Docker:
- Open the Run command by pressing the Win + R keys together.
- open the Diagnostics Tool by typing “dxdiag” in the search box and clicking OK.
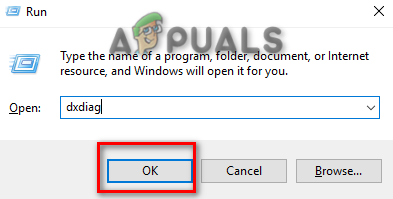
Opening the DirectX Diagnostics Tool - On the “System” tab, check your system specifications.
- On the Driver” tab, check the specifications of your graphics.
Requirements
- Windows 10/11 with a 64-bit operating system.
- 2004 or higher version of Pro.
- 1909 version or higher.
- 4GB or higher RAM
- Hyper V, WSL 2, and Container feature.
1. Run Under the Windows Container
When installing Docker, it doesn’t recognize the Operating System as Windows and instead functions according to the Linus Operating System while finding Linux containers during its startup. Since the Linus containers don’t exist on Windows, Docker will fail to start. Therefore, you must follow the steps given below to run Docker Under the Windows Container:
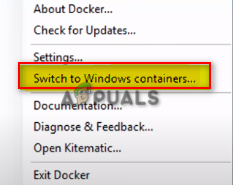
- On the bottom right corner of your taskbar, open the tray that contains the Docker “whale” icon.
- Right-click on the Docker icon and select the “Switch to Windows Containers” option.
Switching Docker to Windows Container - Confirm the action by clicking the “Yes” option.
- Now, launch the app to unfreeze Docker For Windows.
2. Turn off the Control Flow Guard Feature
Control Flow Guard is used as a protection tool. This feature prevents certain vulnerable programs from running that can cause harm to your system information. However, it will also interfere with the launch of the Docker software as it will detect it as vulnerable software. Therefore, disabling this feature is a must when launching Docker on Windows. Below are the steps that will guide your o disabling your Control Flow Guard Feature:
- Open the Windows Settings by pressing the Win + I keys together.
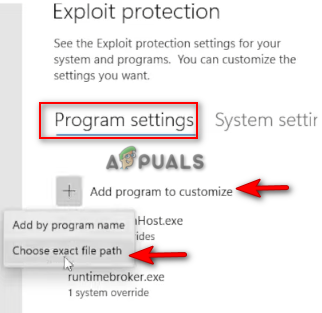
- Navigate to Windows Security > Apps and Browse Control > Exploit Protection.
- Select the “Program Settings” option next to the System Settings.
- Click on the “Add program to customize” option.
- Add the program by clicking on the “Choose exact file path” option.
Choosing the Exact File Path - Locate the file by pasting the following path into the “File Name” Section and clicking on the “Open” option:
C:\WINDOWS\System32\vmcompute.exe
- Now, select the added exe file path and click on the “Edit” option.
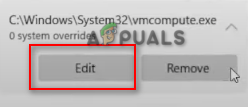
Editing the program settings - Turn off the Control Flow Guard Featue by unchecking the “Override system settings” box under “Control Flow Guard.”
- Save the changes by clicking on the “Apply” option.

Turning off the Control Flow Guard Feature - Confirm the action by clicking the “Yes” option on the User Account Control prompt.
3. Update the WSL Version
One of the reasons for the occurrence of this issue is an unsupported and outdated WSL version. This prevents the Docker from launching. You can update the WSL manually through your PowerShell. Simply follow the instructions below to manually update the WSL Version:
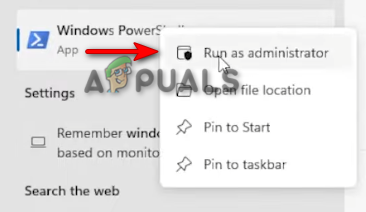
- Open the Windows Start Menu by pressing the Win key.
- Type “Powershell” in the search box.
- Right-click on it and select the “run as an administrator” option.
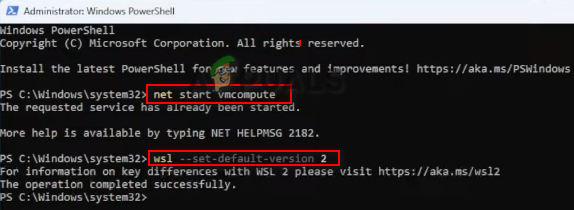
Running Powershell as an administrator - Set the WSL to an updated version by copying and pasting the following commands into the PowerShell and pressing Enter after each command:
net start vmcompute
wsl --set-default-version 2
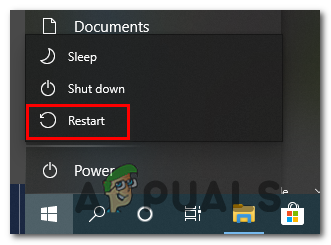
Updating the WSL Version - Open the Windows Start Menu by pressing the Win key.
- Restart your computer by clicking on the Power option and selecting “Restart.”
Restarting the Windows computer - Relaunch Docker to fix the problem.
4. Remove Windows Subsystem Linux
If you already have the Windows Subsystem Linux version 2 installed on your system, then you must remove it from the Windows features since it is known to prevent Docker from opening. Windows Subsystem Linus can be removed from Windows with the instructions below:
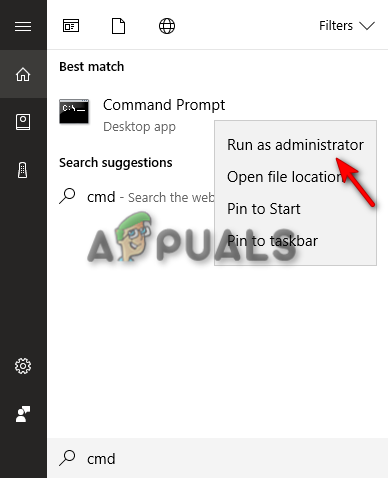
- Open the Windows Start Menu by pressing the Win key.
- Type “cmd” in the Windows Search bar.
- Right-click on the Command Prompt, and select the “Run as administrator” option.
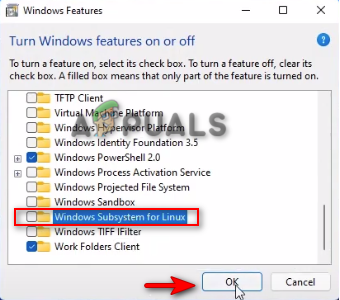
Running the Command Prompt as an administrator. - Open the Windows features Box by typing the following command in the Command Prompt:
optionalfeatures.exe
- Remove Windows Subsystem for Linux by unchecking the folder titled “Windows Subsystem Linus” and click OK.
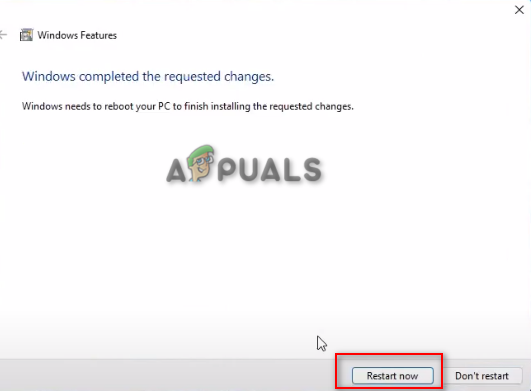
Removing Windows Subsystem for Linux - After removal, restart the system by clicking on the “Restart Now” option.
Restarting the computer
5. Enable Hyper-V Platform
Hyper-V platform is a hardware virtualization product that allows you to create and run a virtual machine. If the feature is disabled, you will not be able to start your Docker. Therefore, you must enable the Hyper-V platform before launching Docker. With the steps listed below you can enable the Hyper-V platform on Windows:
- Open the Windows Start Menu by pressing the Win key.
- Type “cmd” in the Windows Search bar.
- Right-click on the Command Prompt, and select the “Run as administrator” option.
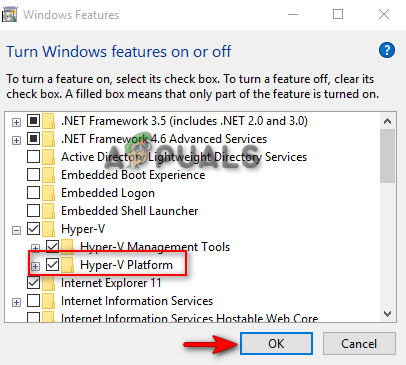
Running the Command Prompt as an administrator. - Open the Windows features Box by typing the following command in the Command Prompt:
optionalfeatures.exe
- Enable the Hyper-V Platform by making the “Hyper-V Platform” subfolder as checked and clicking OK
Enabling the Hyper-V platform
- Open the Windows Start Menu by pressing the Win key.
- Type “Powershell” in the search box.
- Right-click on it and select the “run as an administrator” option.
Running Powershell as an administrator - Enable the Hyper-V Platform by copying and pasting the following command into the PowerShell:
Enable-WindowsOptionalFeature -Online -FeatureName Microsoft-Hyper-V -All
- After the command has been executed, restart your computer to make changes.
6. Restart the Docker Service
You will also face this issue when the Docker Service fails to run properly. Therefore, you must restart the Service to help the software launch without taking too long. Below we have listed the steps to restart the Docker Service:
- Open the Run command by pressing the Win + R keys together.
- Open the Windows Services by typing “services.msc” in the search box and clicking OK.

- Now, scroll down and find the Docker Desktop Service.
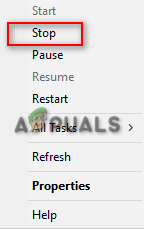
- Stop the Service by right-clicking on it and selecting the “Stop” option.
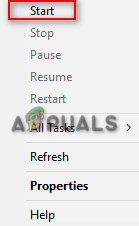
Stopping the Service - Restart the Service by right-clicking on it and selecting the “Start” option.
Starting the Service - Lastly, reopen the Docker desktop to fix the issue.
7. Update your Windows
An updated Windows is one of the prerequisite requirements for installing and running the Docker Software on Windows. If your Windows is outdated, it will have issues launching. Therefore, you must update your Windows if there is an update available before installing and using Docker. Below are the instructions that will help you update your Windows:
- Open the Windows Settings by pressing the Win + I keys together.
- Navigate Update and Security > Windows Update.
- Click on the “Check for Updates” option.
- Click on the Download option to download the latest Windows update.
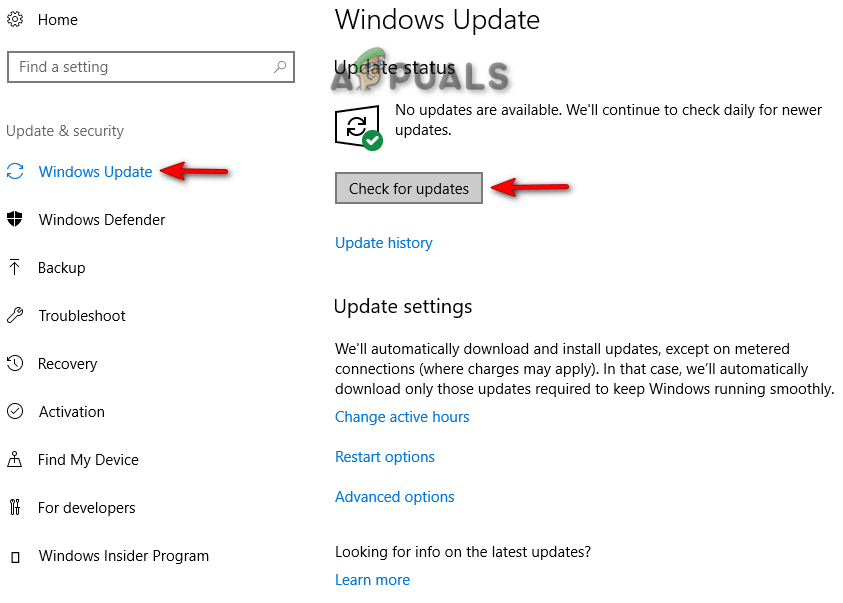
Checking Windows Update - Restart your computer after the Windows update has been installed to make the changes
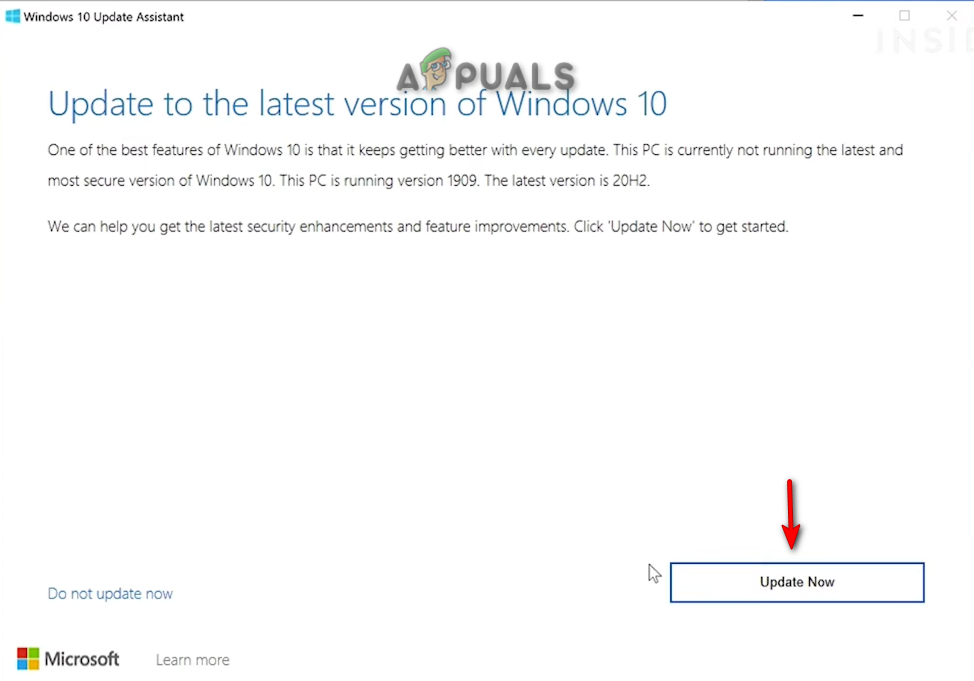
- Download the latest Windows Update, by going to the Official Microsoft Web Page and clicking on the “Update Now” option.
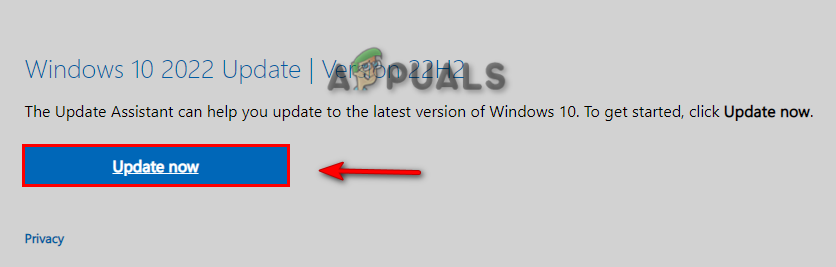
Downloading the Latest Windows Update - Install the update by clicking on the “Update Now” option.
Installing Windows Update - Restart the computer by clicking on the “Restart Now” option after the installation is completed.

Restarting Computer
8. Reinstall Docker
If none of the methods worked for you, then, as a last resort, you must perform a complete Reinstallation. However, before that, you must remove the temporary files from your system. The steps below will guide you to removing temporary files and reinstalling Docker on Windows:
- Open the Run command by pressing the Win + R keys together.
- Paste the following paths into the search bar, one at a time (will require administrative permissions):
C:\Windows\Temp C:\Users{yourAccountName}\AppData\Local\Temp C:\Windows\Prefetch - Select all files in the path by pressing the CTRL +A keys together.
- Delete all the files by pressing the Delete button on the keyboard.
After the all files are removed, you must uninstall Docker on your system.
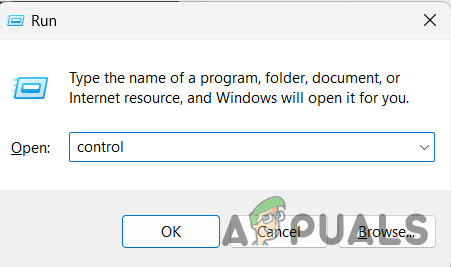
- Open the Run command by pressing the Win + R keys together.
- Open the Control Panel by typing “Control” in the search box and clicking OK.
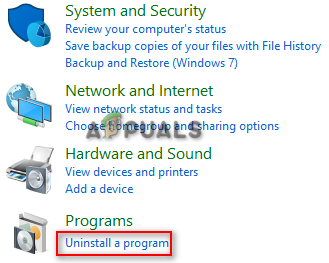
Opening the Control Panel - Click on “Uninstall a program” under Programs.
Uninstall a Program - Uninstall Docker by right-clicking on it and selecting the “Uninstall” option.
- After uninstalling Docker, restart your system.
Once the system is restarted, Reinstall Docker.
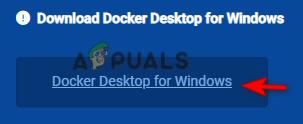
- Open the Official Docker Website.
- Download it by clicking on the “Docker Desktop for Windows” option under “Download Docker Desktop for Windows.”
Downloading Docker Desktop for Windows - Select the folder where you want to save the file and click on the “Save” option.
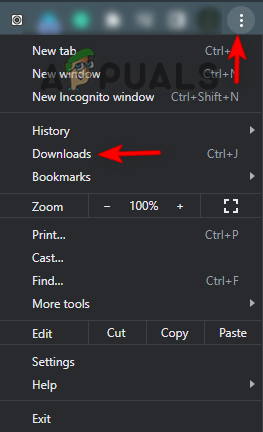
- Open the Browser Downloads page by clicking on the three dots in the top right corner and clicking on the “Downloads” option.
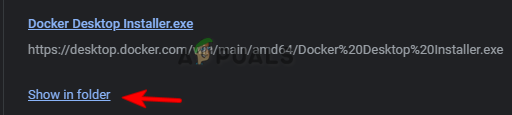
Opening the Downloads tab - Open the file in the folder by clicking on “Show in Folder.
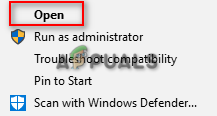
Showing file in the folder - Open the file by right-clicking on it and selecting the “Open” option.
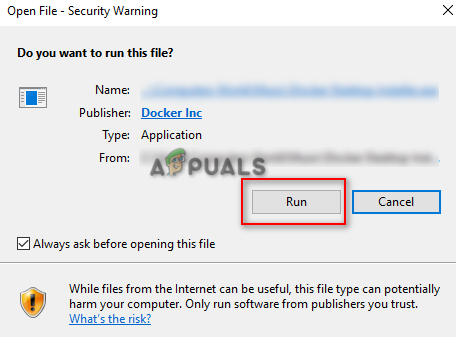
Opening the EXE File - Run the file by clicking on the “Run” option.
Running the file - After the Installation is completed, launch Docker successfully.


