Fix: Discord Direct Message Notification Won’t Go Away
 Reviewed by Muhammad Zubyan
The Discord direct message notification without a new message is often caused by the Nitro promotion that has been sent to you. The direct message notification appears even without a new message since that is where the Nitro promotion for Discord is stored as well.
In addition, the notification can also appear for new friend requests that you might have received on Discord. In some cases, the app cache can also result in an inconsistency with the app in which case you will have to clear out the cache. We will take you through a number of methods in this article that will show you how to get rid of the Discord direct message notification.
1. Open Nitro Promotion
The first thing that you should do when starting to resolve the problem in question is check the Nitro promotion. In most cases, the notification appears not because of a new message, but because you have been sent the promotion for Discord Nitro.
In such a scenario, you will have to open the Nitro promotion to get rid of the direct message notification. Nitro is a subscription plan offered by Discord that gives you various features over normal users that can often be tempting. 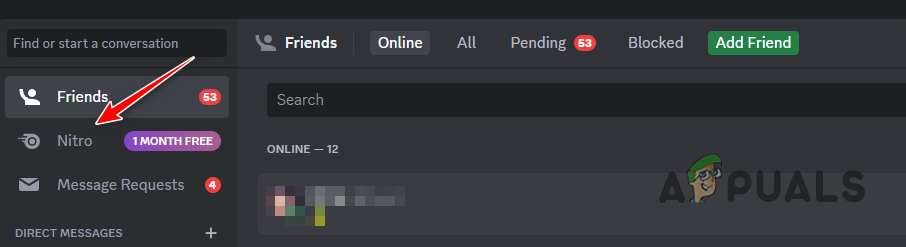
The Nitro promotion is pinned at the top, right above your direct messages. Click on the Nitro tab, and view the promotion. Once you have done that, it will be marked as read and the direct message notification should go away.
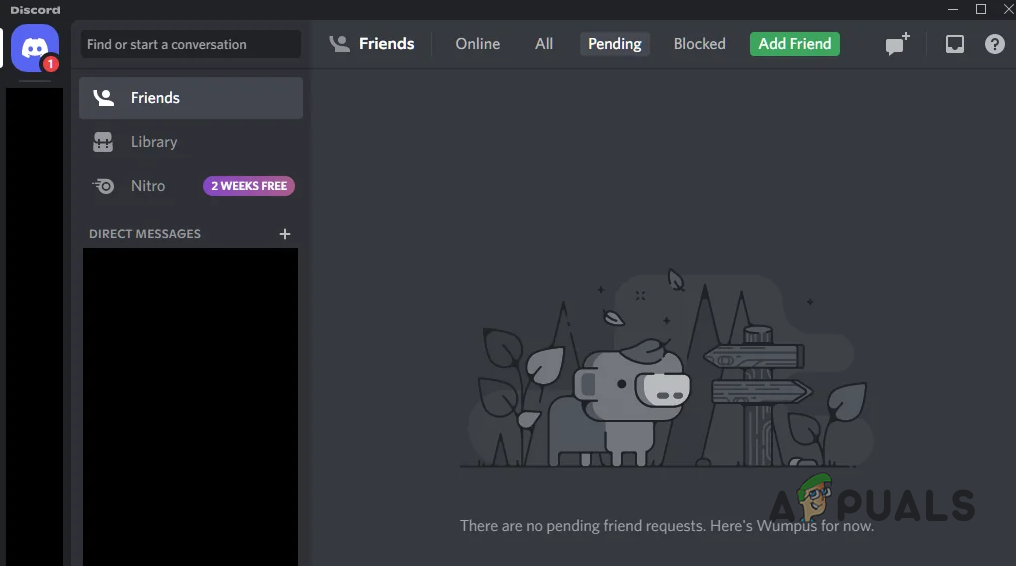
2. Check the Friends Tab
If you have already viewed the Nitro promotion and the problem persists, it is possible the notification is appearing due to new friend requests or message requests that you have received.
The friend’s tab is also located in the direct messages area, therefore, a new friend request can cause the direct message notification to appear. As such, click on the Friends tab in the direct messages area and go through any pending requests.
Once you have checked the Friends tab, see if that resolves the issue for you. In case the problem persists, move to the next method below.
3. Sign In Again
In some scenarios, the direct message notification can appear due to an inconsistency in communication between the app and Discord servers. This can happen when certain requests are not received by either the client or the servers properly.
In such a scenario, you can overcome the issue by logging out of your account and then logging back in. This will force the app to receive your user account information from the respective servers again to display the information accurately. This will get rid of any inconsistencies that might have been caused due to a communication gap.
To sign out of your Discord account, follow the instructions below:
- On the Discord client, click on the Settings icon next to your username.
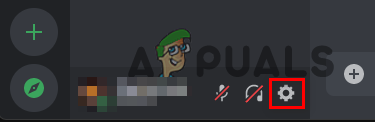
Navigating to Discord Settings - After that, click the Log Out option at the bottom on the left-hand side.
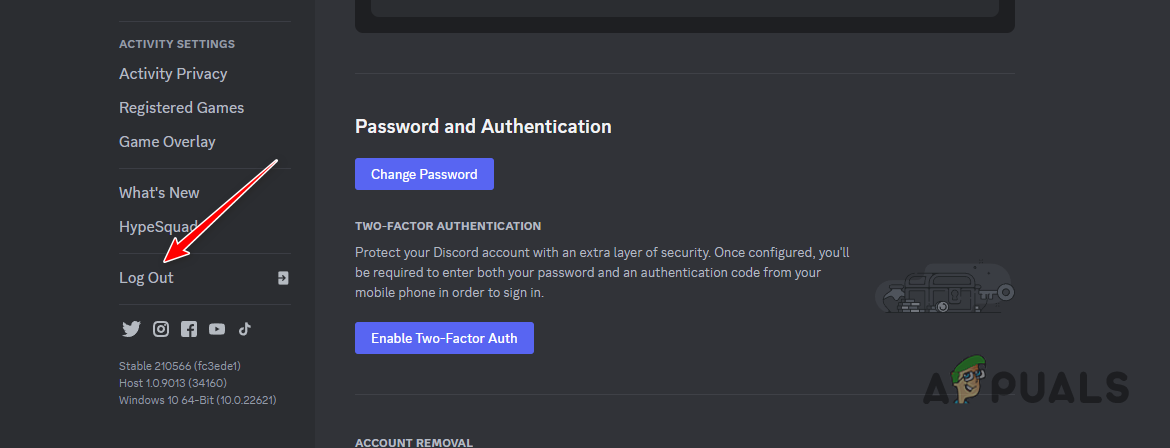
Logging out of Discord - Once you have been logged out, restart the application.
- Log into your account and see if the problem is still there.
4. Clear App Cache
Every app that you use on your computer, or any other device, stores cache locally. This is helpful in improving the performance of the app and it is used to save various information about the user, such as the user preferences and much more.
Every time Discord launches, or any app for that matter, it loads the local cache stored on your computer. In some cases, an inconsistency in the app cache can cause the Discord notification to appear. In such a scenario, you will have to clear the Discord cache on your device to resolve the issue.
Deleting the cache can often log you out of your account, as such details are stored in the cache as well. To clear Discord’s cache on your system, follow the instructions below:
- First, close the Discord app on your computer completely.
- Then, open the Run dialog box by pressing the Windows key + R on your keyboard.
- In the Run dialog box, type in %appdata%\discord and hit Enter.
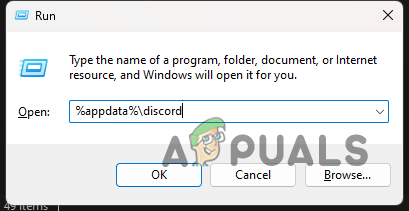
Navigating to Discord Folder - This will open a File Explorer window.
- In the File Explorer window, locate the Cache, Code Cache and GPUCache folders.
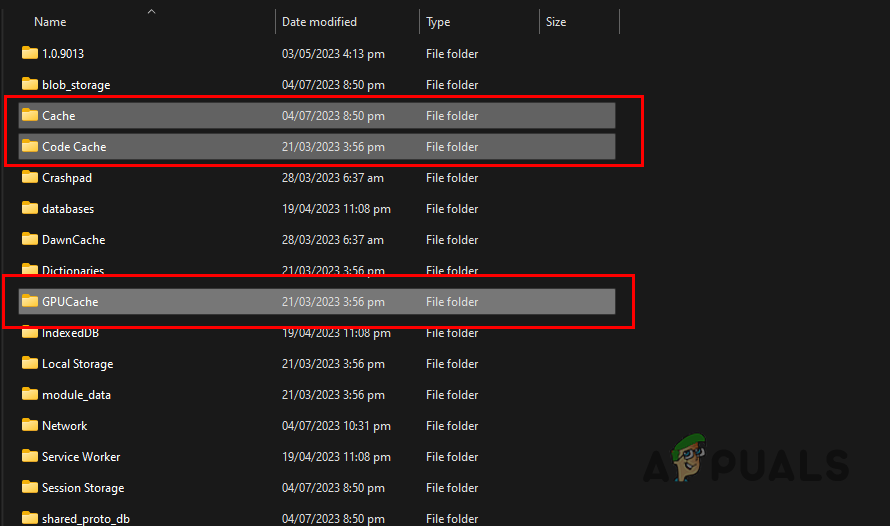
Discord Cache Folders - Select these folders and delete them.
- Once you have deleted these folders, open the Discord client and see if the issue is still there.
If you are experiencing the issue on a mobile phone, you will have to use the Apps option under the Settings app to clear Discord’s cache and data.
5. Reinstall Discord
Finally, if none of the above methods has resolved the problem, it is likely the problem is caused by the installation files of the Discord client on your device. In such a scenario, you will have to reinstall the application on your computer to resolve the issue.
Reinstalling the app will renew the installation files on your device, allowing you to mitigate the issue. To reinstall the Discord client, follow the instructions below:
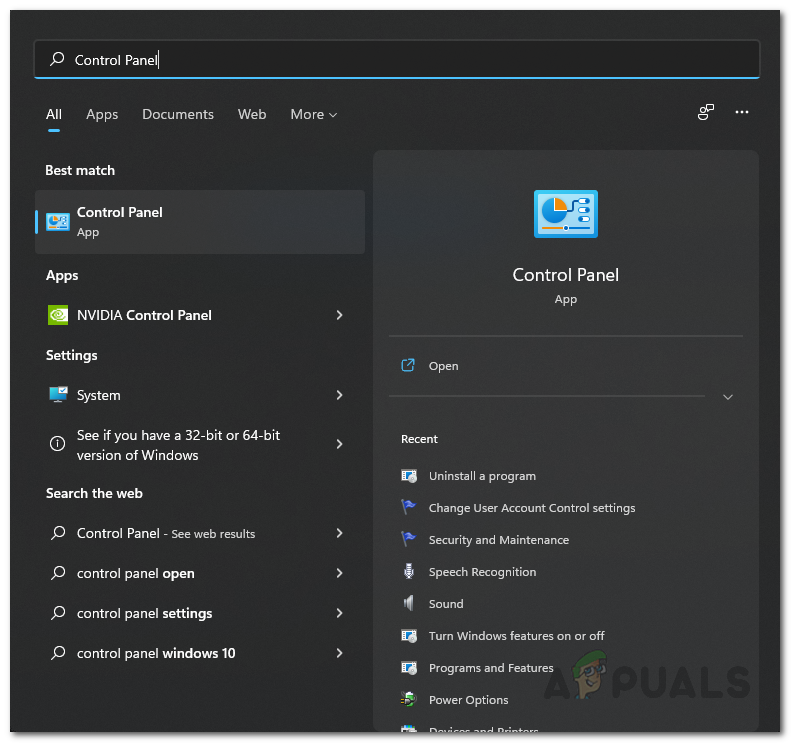
- First, open the Control Panel by searching for it in the Start Menu.
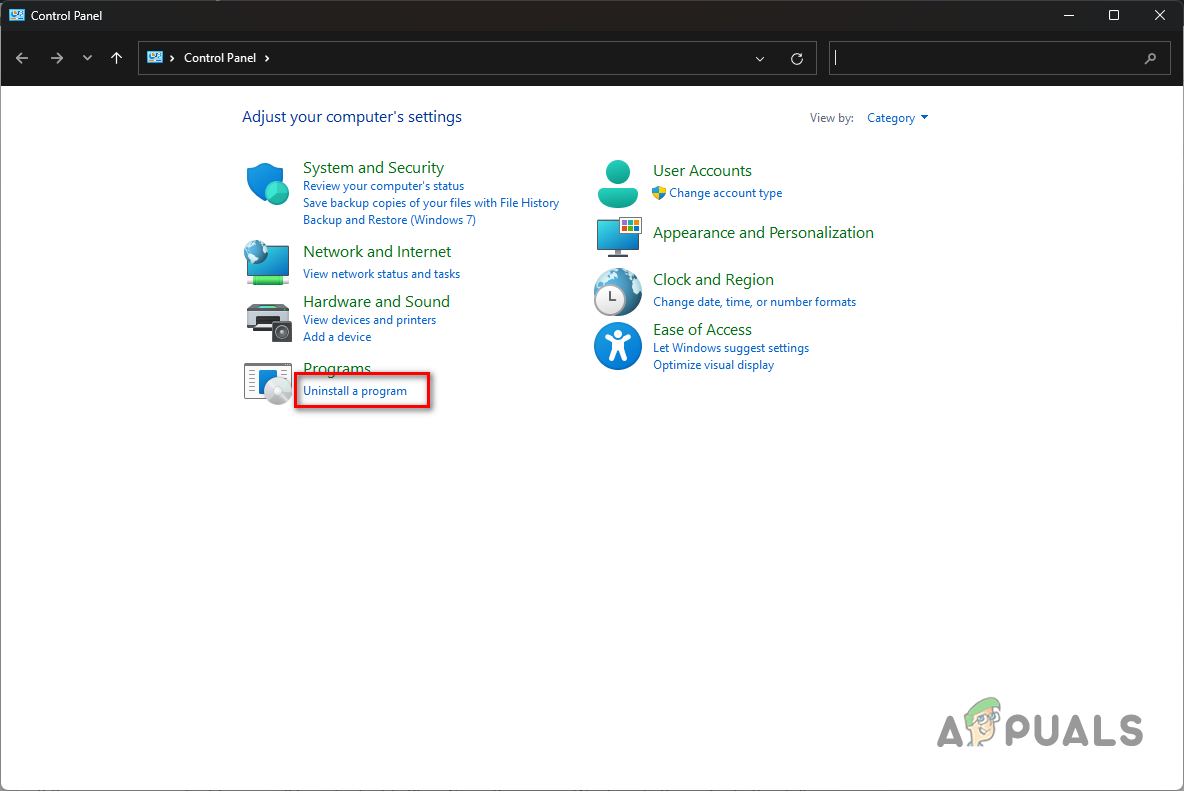
Opening Control Panel - After that, in the Control Panel window, click on the Uninstall a program option.
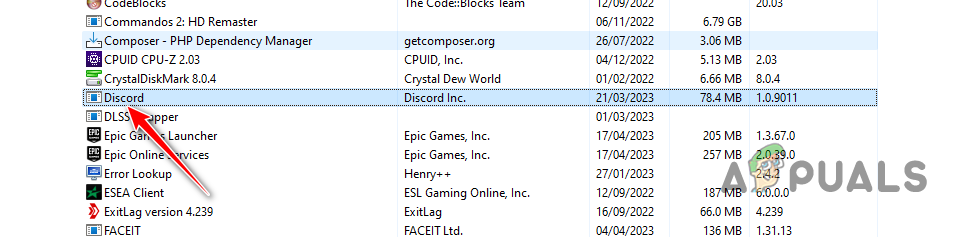
Navigating to Installed Applications - This will show you a list of all the installed applications.
- Locate Discord from the list and double-click on it.
Uninstalling Discord - Follow the onscreen prompts to uninstall Discord from your system.
- After that, download the Discord installer from the official website to install it again.
- Once you have reinstalled Discord, open it up and see if the problem still occurs.
Reviewed by Muhammad Zubyan