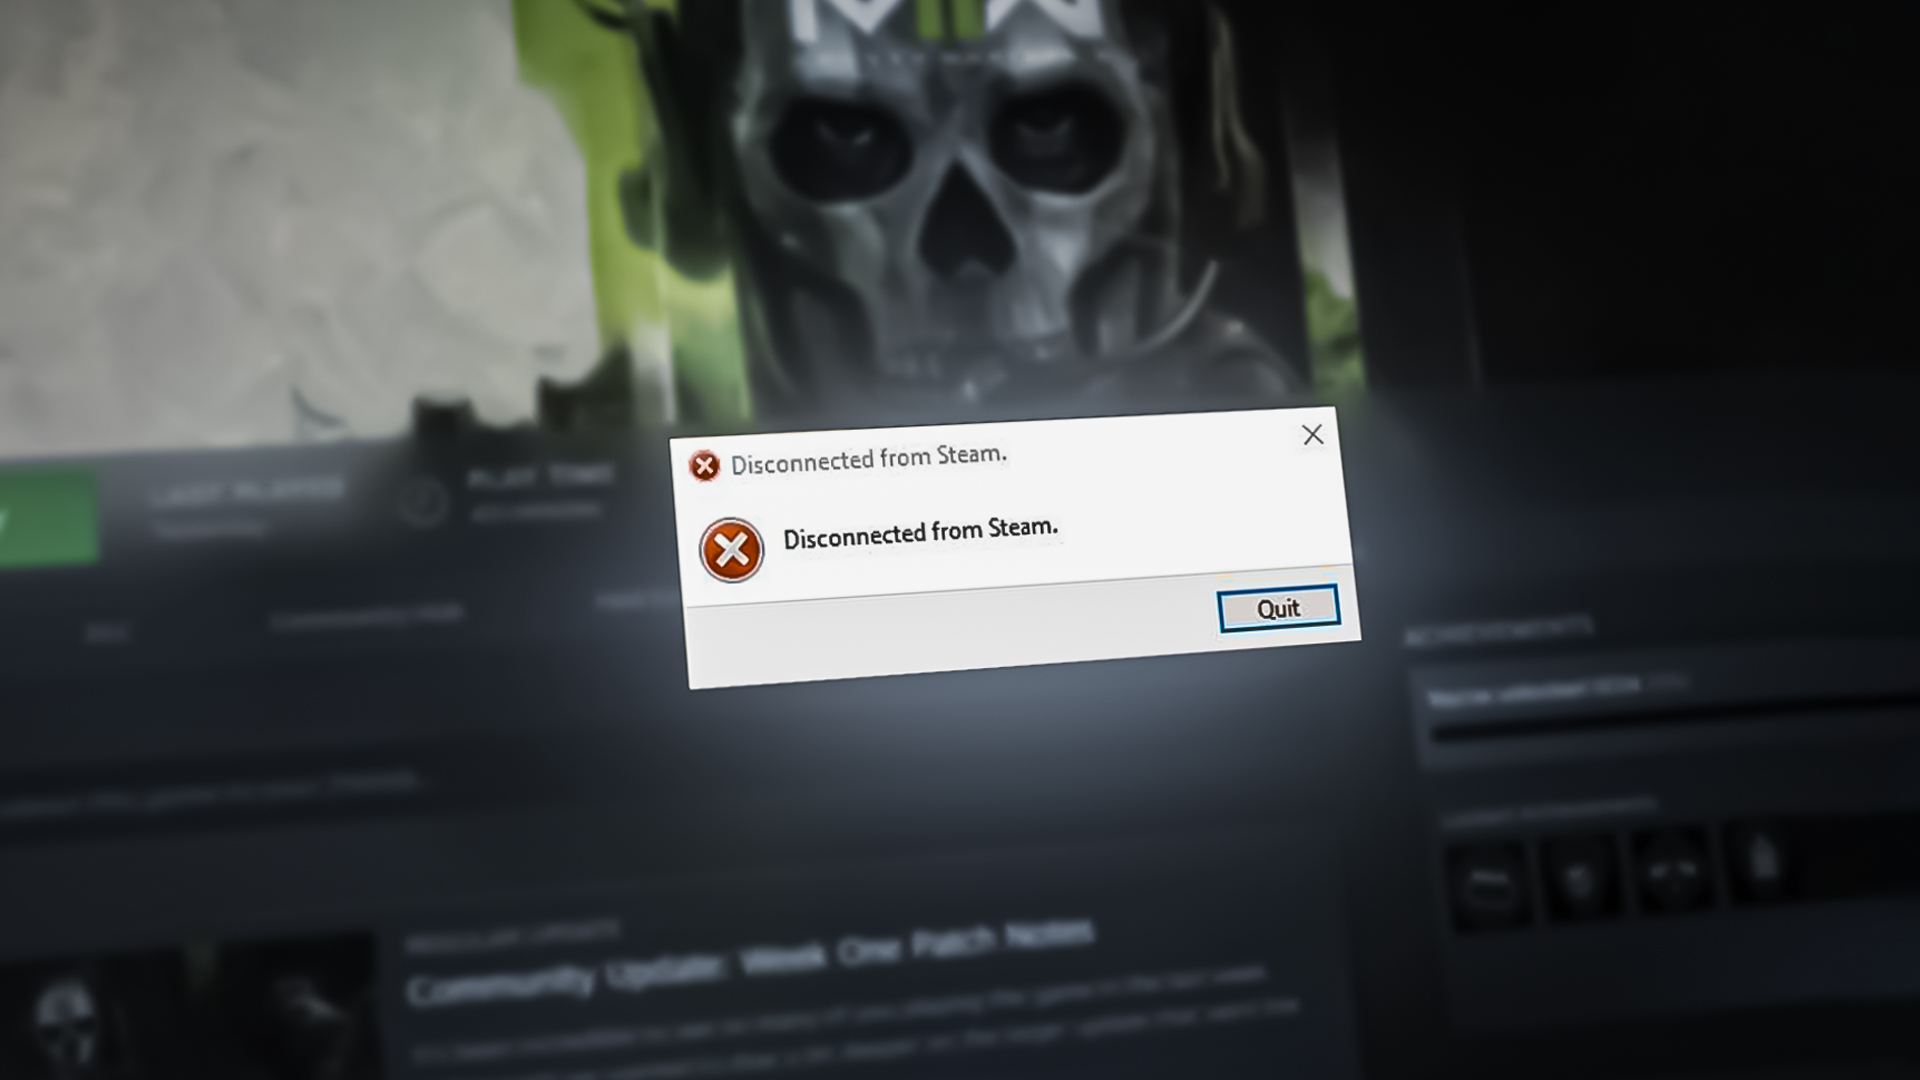
How to Fix ‘Disconnected from Steam’ Error in Call of Duty: Warzone 2
Call of Duty Warzone 2 is facing Disconnectivity errors on Steam. This error is most commonly caused by a corrupted cache, incomplete file installation, and Server issues. However, there are other causes as well that interfere with the game’s connectivity. This guide will be showing you how to fix the “Disconnected From Steam” Error In Warzone 2
1. Check the Server Status
Before performing other methods, you must check the Call of Duty Warzone 2 servers first to make sure that the game is not facing any server issues. In case the game is facing server issues, you must wait till the servers are active again before you launch the game.
2. Restart Steam
You can try restarting the Steam to see if it was causing the error. Relaunching the Steam may resolve internet connectivity issues that may be causing a disconnectivity error with the game. Follow the steps below to see how to restart Steam:
- Open the Windows Start Menu by pressing the Win key.
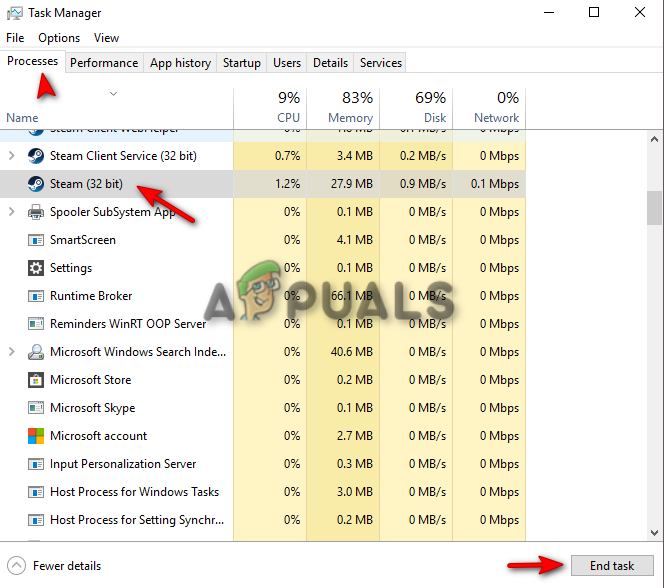
- Search for “Task Manager” in the Windows Search Bar and open the app.

Opening Windows Task Manager - To close the Steam, go to the Processes tab, click on the Steam and select “End Task” at the bottom of the Window.
Closing Steam from Task Manager - Restart your Steam after a while and relaunch the game from the game’s Library folder.
3. Clear Steam Download Cache
Another reason why you may be facing this error is because of a corrupted cache stored in the Steam. Therefore, try clearing the unwanted download cache from your Steam account and see if it helps you resolve the error. Follow the methods below to learn how to Clear the download cache on your Steam:
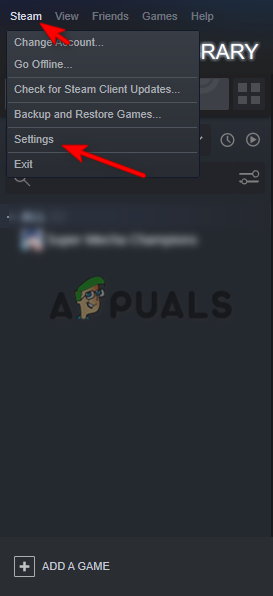
- Click on the Steam option at the top left corner of the page.
- Open the Steam Settings page by clicking on the Settings option.
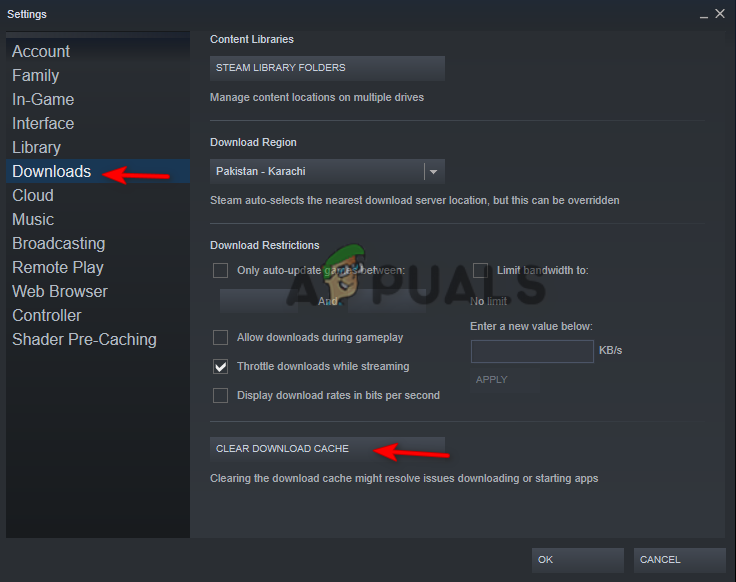
Opening Steam Settings - To clear the Steam Download Cache, navigate to Downloads > Clear Download Cache.
- Confirm the process by clicking OK and Relaunch your game to see if this resolves the error.
Clearing Steam Download Cache
4. Temporarily Disable Third Party Software
Third-party software running on your system can be a factor in this issue since this software usually interferes with your game, preventing them from performing certain actions. Therefore, you can temporarily disable the Tamper protection service from the system and check if your problem is resolved.
To learn how to temporarily disable the Tamper protection service from your computer, follow the steps mentioned below:
- Open the Windows Settings by pressing the Win + I keys together.
- Click on the “Update and Security” option on the Windows Settings page.
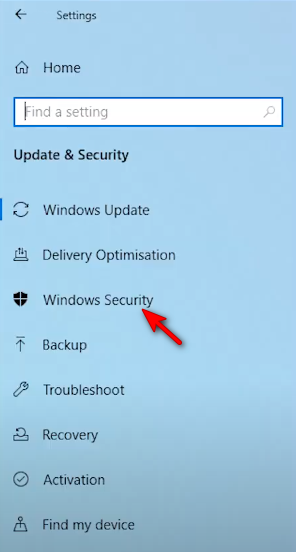
- Click on the “Windows Security” option on the left of the Update and Security panel.
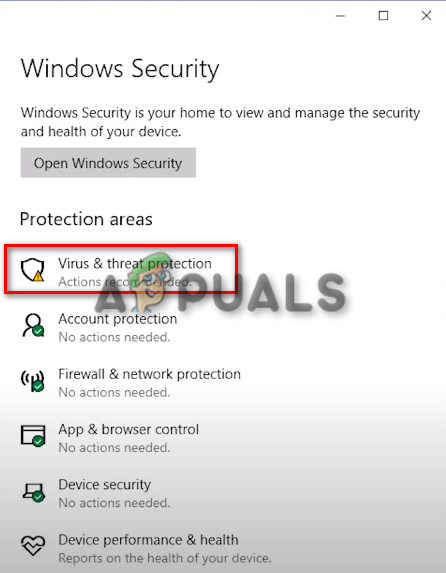
Opening Windows Security Settings - On the right side of the Window, click on the Virus and Threat Protection option in the “Protection areas”.
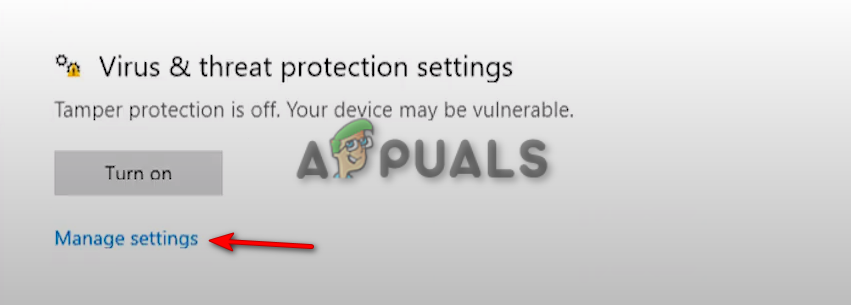
Opening Virus and Threat Protection settings, - Click on the “Manage Settings” option below the “Turn on” button in the Virus and threat protection settings Window,
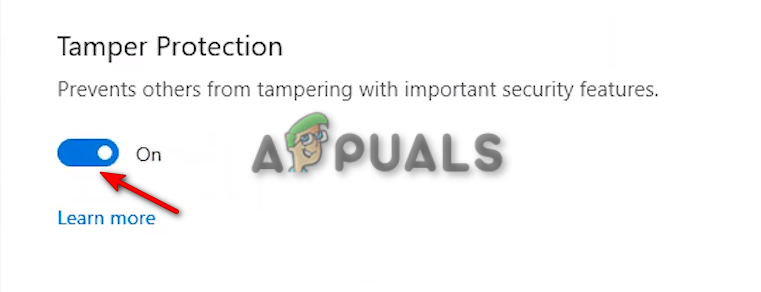
Managing Virus and threat protection settings - Turn off the “Tamper Protection” button.
Disabling Tamper Protection - Close the Windows and Restart your Computer.
- Open the Steam launcher and launch the game.
5. Verify the Integrity of your Game Files
Incomplete file installation may also be one of the reasons for the occurrence of this error. Therefore, you must verify the Integrity of your game files in case the game was unable to install properly. Follow the steps listed below to verify the integrity of your game files.
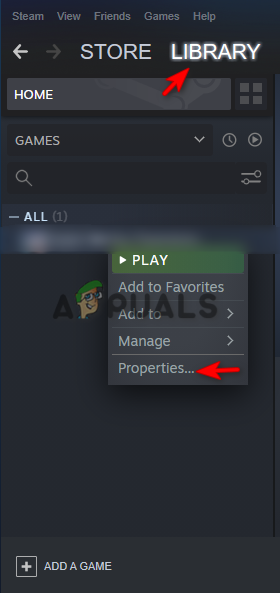
- Open your Steam launcher and click on the Library section.
- Right-Click on the game files and click on the properties option.
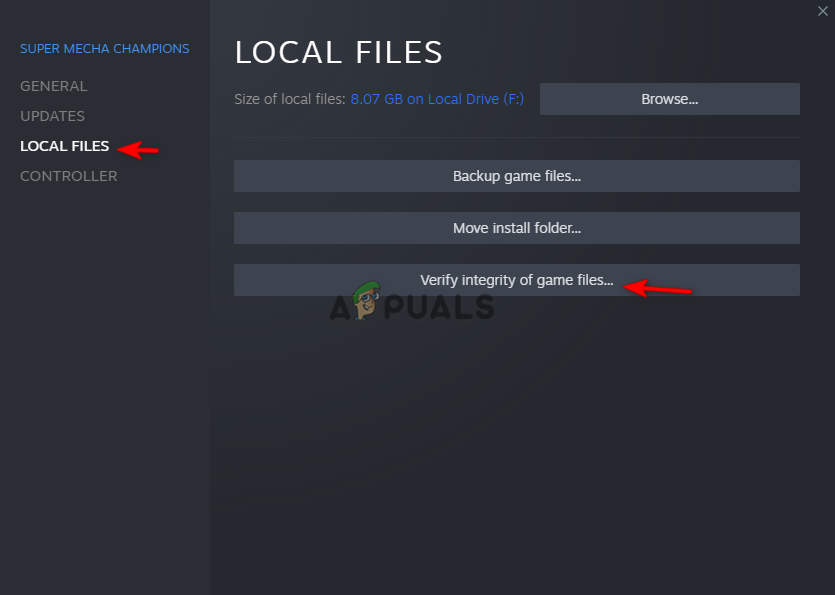
Opening Game Properties - Click on the Local Files tab and click on the “Verify the integrity of game files” option to verify your game files.
- Relaunch your Steam Launcher and launch your game.
6. Clear DNS Cache
You can try clearing the DNS Cache as it may be interfering with your internet connection as a corrupted DNS cache may also be a reason for the occurrence of this error. Follow the steps below to learn how to clear the DNS cache from your system:
- Open the Windows Start Menu by pressing the Win key.
- Search for the command prompt in the Windows Search Box by typing “cmd.”
- Right-Click on the command prompt and click on Run as administrator.
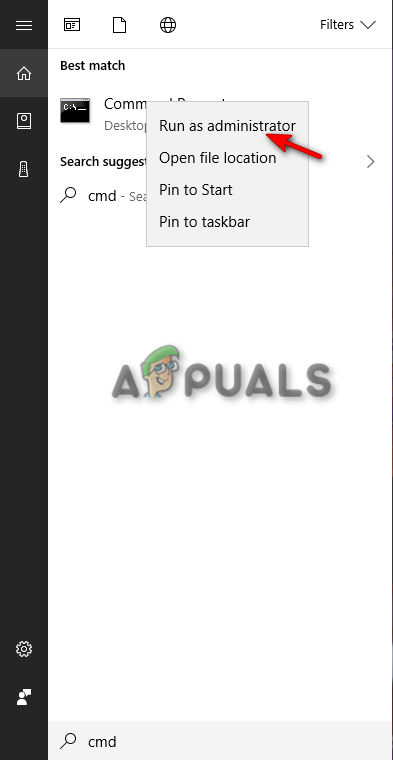
Running the Command prompt as an administrator. - Copy and paste the following commands into the Command prompt while making sure you press enter after each command:
ipconfig/flushdns
ipconfig /release
ipconfig /renew
netsh Winsock reset
- Restart your computer and then Relaunch the game to see if this fixed the error.
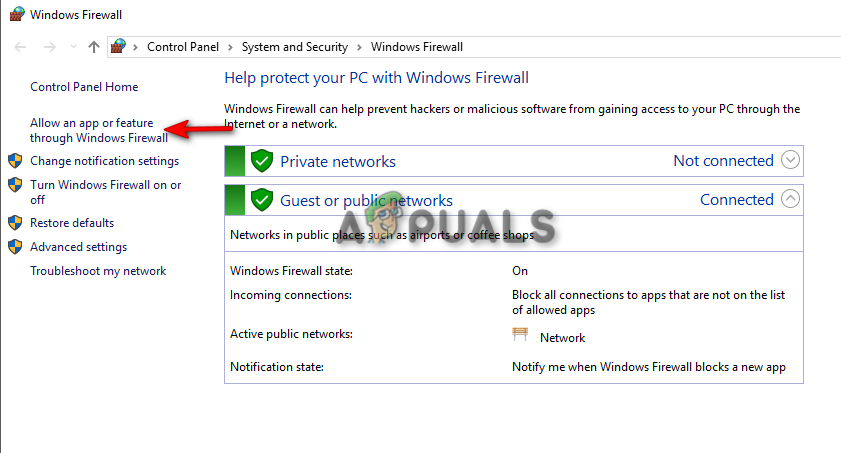
7. Allow your game through the Windows Firewall
Windows Firewall may have blocked access to your Warzone 2 game file hence why it is facing the disconnectivity error. You can resolve the issue by following the steps below to allow your game in the Windows Firewall.
- Open the Windows Start menu by pressing the Win key.
- Search for Windows Firewall on the Windows Search box.
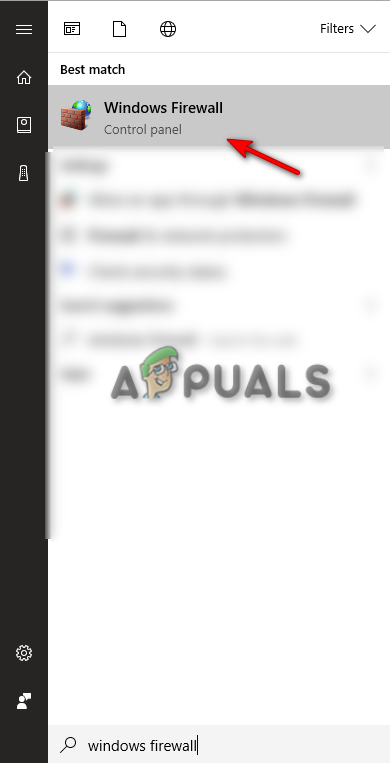
Opening Windows Firewall - Click on the “Allow an app or feature through Windows Firewall” option on the left side of the panel.
Allowing apps through Windows Firewall - Click on Change Settings and Allow another app.
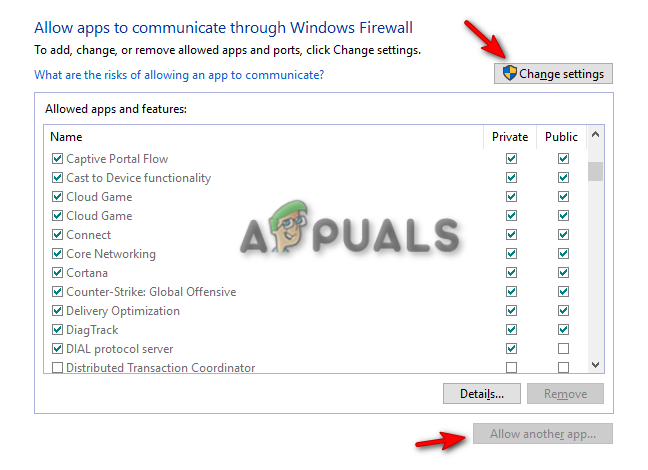
Changing Windows Firewall settings - Click on Browse and search for the Warzone 2 game file.
- Select the file and click on Add.
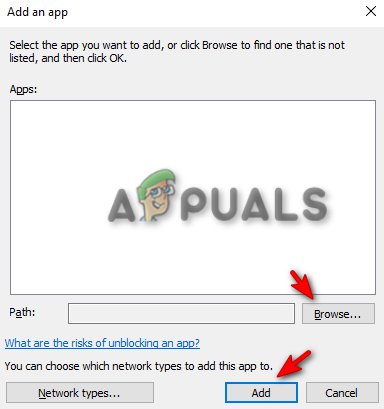
Adding game files into Windows Firewall - Click on OK to allow the game in the Windows Firewall.
8. Disable VPN Access
Enabling Windows VPN can also cause the game to face some connectivity issues. Therefore, disable your VPN if it is enabled to see if it is causing the issue. You can follow the steps below to learn how to disable Windows VPN:
- Open the Windows Settings by pressing the Win + I keys together.
- Click on the Network and Internet option on the Settings page.
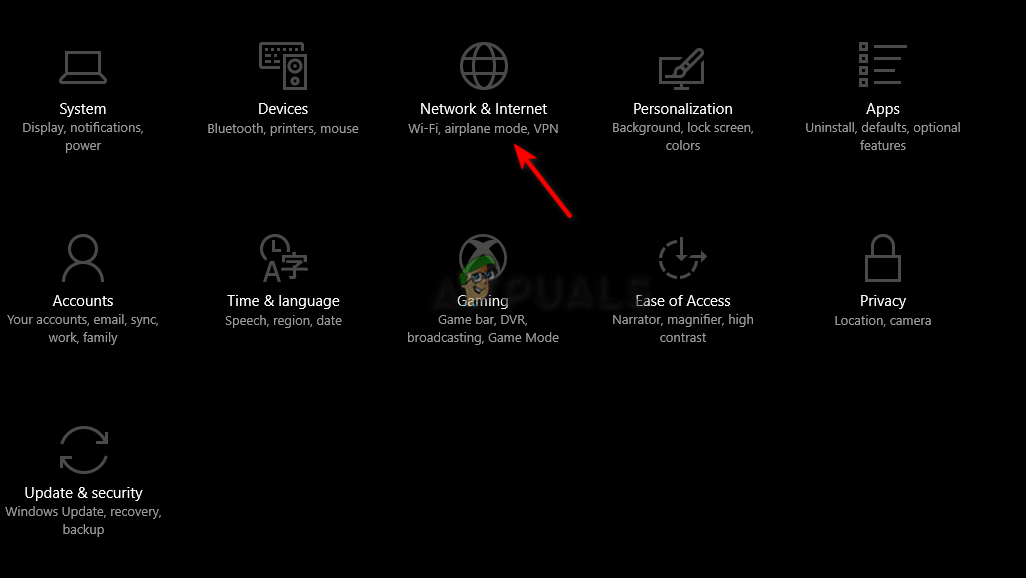
Opening Network and Internet Settings - Click on VPN on the left side of the panel and disable the VPN Connection.
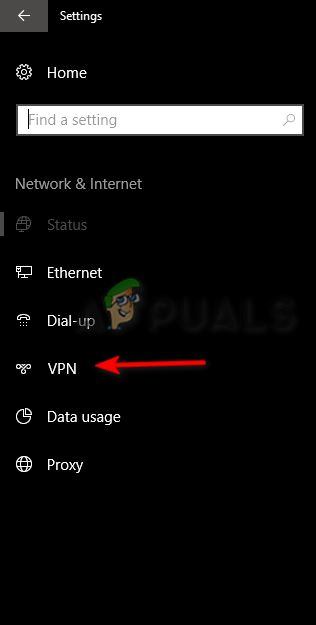
Disabling Windows VPN
9. Disable On-Demand Texture Streaming
On-Demand Texture Streaming uses an internet connection during your gameplay and it may be causing disconnectivity issues. Therefore, disable the On-Demand Texture Streaming feature and try launching the to see if this resolves the error. Follow the steps below to disable Warzone 2 the on-demand texture streaming:
- Open the Call of Duty Warzone 2 Settings.
- Click on the Graphics option.
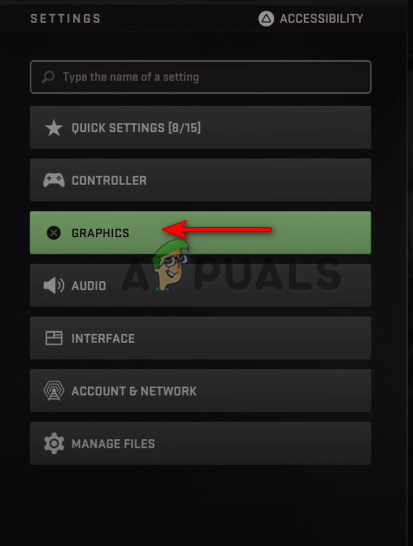
Opening Warzone 2 Graphics settings - Turn off the “Disable On-Demand Texture Streaming” option under the Details and Textures Section.
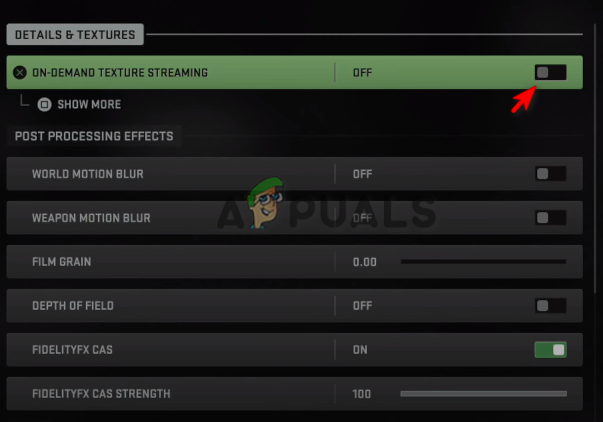
Disabling Warzone 2 On-Demand Texture Streaming
10. Reinstall Steam
If you are still facing the error, as a last resort, you must reinstall the Steam and see if there are any disconnectivity errors found in the game. Follow the steps below to see how to remove Steam from your system for a reinstallation process:
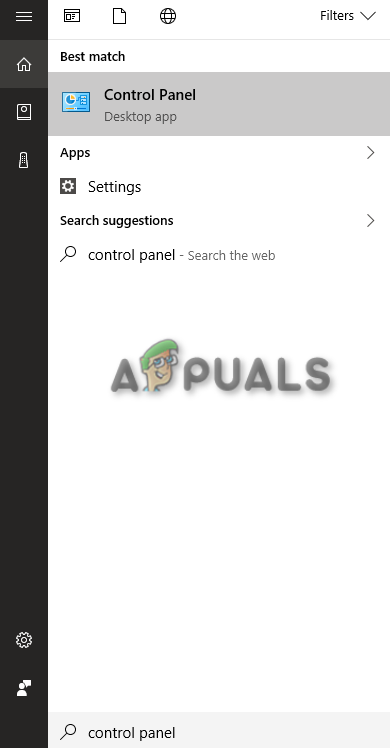
- Open the Windows Start menu by pressing the Win key.
- Open the Control Panel by typing “Control Panel” in the Windows Search bar.
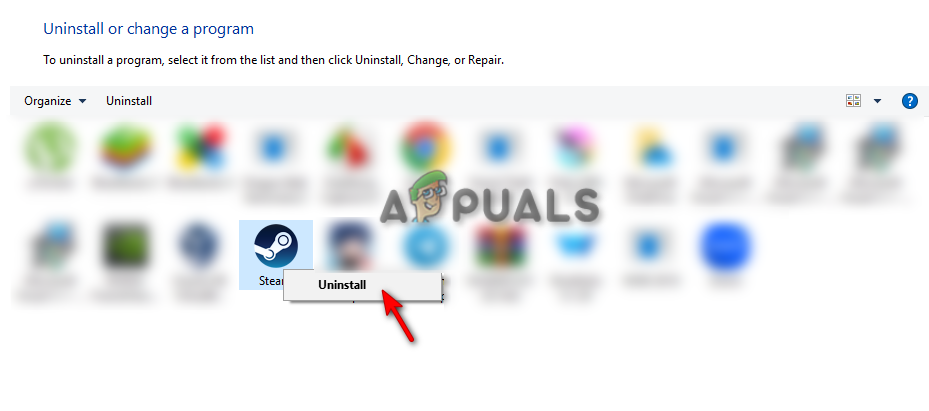
Opening control panel - Click on the “Uninstall a program” option in the Programs section.

Opening Uninstall a program. - Right-Click on the Steam launcher and click on Uninstall to uninstall it.
Uninstalling Steam - Reinstall Steam on your Windows and Reinstall the Warzone 2 game.
Workaround: Play Call of Duty Warzone 2 on Battle.net
The last option available is to shift to Battle.net completely. Since Warzone 2 is free to play on both platforms, it is no shame to abandon one platform for the other, especially if steam has been facing connectivity issues for a while now. Battle.net hasn’t been facing any connection issues for Warzone 2. Therefore, it is best that you install Battle.net and play Warzone 2 over there.


