How to Disable Online Speech Recognition Option in Windows 10?
The Online Speech Recognition in Windows is used for dictation to convert spoken words into text. It can also be used to talk to Cortana and other applications that use Windows cloud-based speech recognition. If the Online Speech Recognition is turned off, then users won’t be able to speak to Cortana or use dictation. Users can still use other speech services that do not rely on the Windows cloud-based services. In this article, we will show you methods through which you can enable and disable the Online Speech Recognition setting on your system.
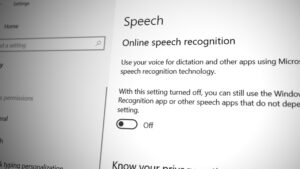
By default, the setting for the Online Speech Recognition is enabled on Windows 10. Users can go to the Settings app and turn ON the Online Speech Recognition anytime they want. However, administrators can disable the Online Speech Recognition from other users. This will grey out the Online Speech Recognition setting in the Settings app. Standard users will be unable to turn ON the Online Speech Recognition. We will provide the steps for disabling, however, at the end of each method, we also added the enabling step.
Method 1: Using the Local Group Policy Editor
The Group Policy is a Windows feature that can be used to configure many different types of settings for the operating systems. These settings are used to define what a system will look like and how it will behave. In this method, we are using a specific setting that will grey out the Online Speech Recognition setting. By default, the setting is enabled and users can turn it ON or turn it OFF accordingly. However, by using this policy setting, an administrator can disable access to the Online Speech Recognition setting for other users. Follow the below steps to configure this setting:
Note: If you are using the Windows 10 Home version, then kindly skip this method. That is because the Group Policy Editor isn’t available for the Windows 10 Home users.
- Press the Windows + R key together on your keyboard to open the Run dialog box. After that, type “gpedit.msc” and press the Enter key to open the Local Group Policy Editor window.
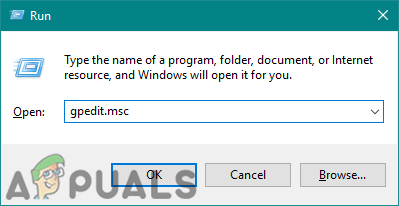
Opening the Group Policy Editor - Head over to the following path in the Local Group Policy Editor window as shown:
Computer Configuration\Administrative Templates\Control Panel\Regional and Language Options\
Navigating to the setting - Double-click on the setting named “Allow users to enable online speech recognition services” and it will open in another window. To disable the settings, change the toggle option to Disabled.

Disabling the setting - Lastly, you need to click on the Apply/Ok button to save the changes.
- You can always enable the Online Speech Recognition settings by changing the toggle option to Not Configured or Enabled.
Method 2: Using the Registry Editor
The Registry Editor is another tool that can be used to configure the settings for an operating system. This is an alternative method for disabling the Online Speech Recognition setting. This is also the only available method for Windows 10 Home users. It will require some additional steps of creating the missing key/value in the Registry. Make sure to follow each step carefully:
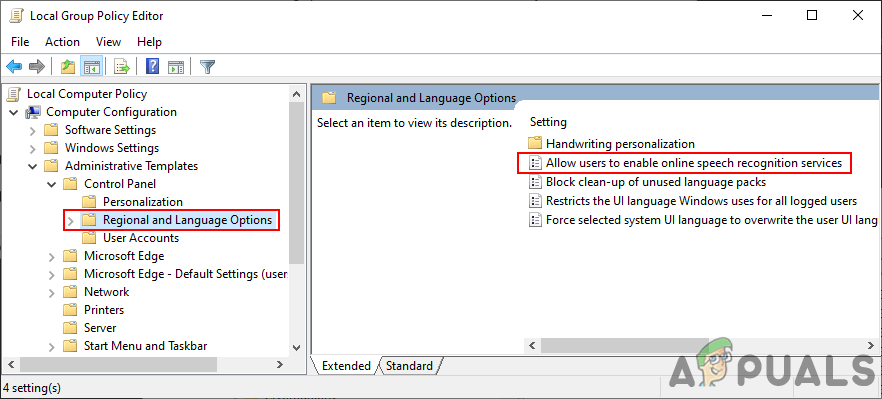
- Press the Windows + R key together to open a Run dialog box. Now type “regedit” and press the Enter key to open the Registry Editor window. If you get UAC (User Account Control) prompt, then click on the Yes button.
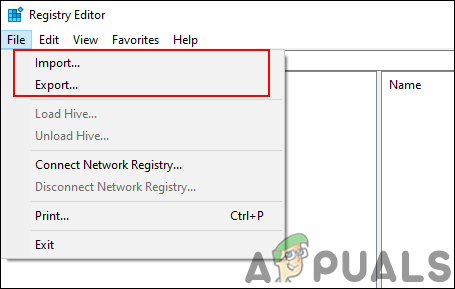
Opening the Registry Editor - You can also create a Registry backup before making any new changes in the Registry. First, click on the File menu in the menu bar and then choose the Export option. Now name the file and select the path where you want to save it. Lastly, click on the Save button.
Creating registry backup - In the Registry Editor window, go to the following directory as shown:
HKEY_LOCAL_MACHINE\SOFTWARE\Policies\Microsoft\InputPersonalization
Note: If the InputPersonalization key is missing, you can create it by right-click on the available key and choosing the New > Key option.
- Select the InputPersonalization key, right-click on the right pane and choose the New > DWORD (32-bit) Value option. Name the value as “AllowInputPersonalization“.
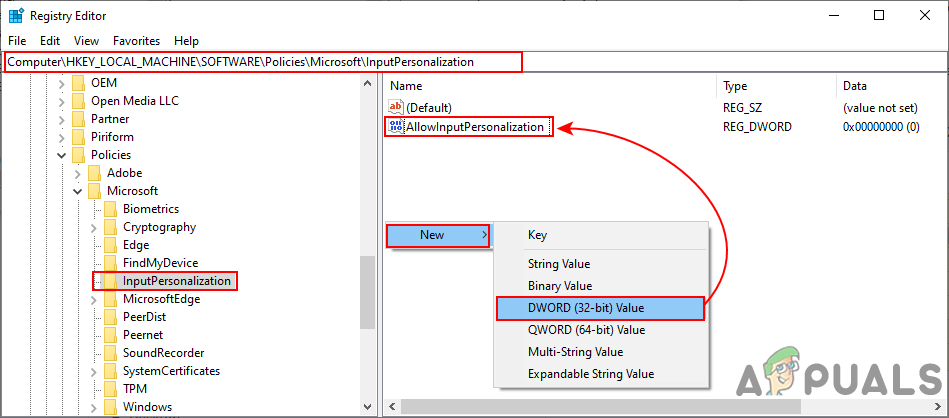
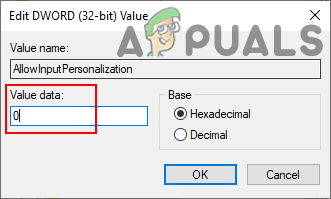
Creating a new value - Double-click on the AllowInputPersonalization value and it will open a small dialog box. Now to disable the Online Speech Recognition settings, set the value data to 0.
Changing the value data - If the settings are not applied instantly to the Settings app, you need to restart the computer to apply the changes.
- You can always enable it back by deleting the value from the Registry Editor.


