How to Disable ‘Lock the Taskbar’ in Windows 10?
The Lock the Taskbar option keeps your taskbar the same and you cannot resize or move it. If this is off, then you can accidentally resize or move your Taskbar. However, this option can easily be enabled and disabled through the context menu. As an administrator, you can gray out this option and prevent access to this option for standard users. Sometimes, some users may have an issue with “Lock the Taskbar grayed out”, they can also get it back through this article. In this article, we have included both enabling and disabling of ‘Lock the Taskbar’ on your system.

Disabling ‘Lock the Taskbar’ through the Local Group Policy Editor
This setting can be found in the Local Group Policy Editor on your system. You just need to navigate to it and enable the setting to gray out the Lock the Taskbar option. This policy setting is only available in the User Configuration category and not in the Computer Configuration category.
However, since the Local Group Policy isn’t available in the Windows Home edition, we have also included the Registry Method. If you are using the Windows Home operating system, then skip this method.
- Press the Windows + R keys together to open a Run command dialog box. Then type “gpedit.msc” and press the Enter key to open the Local Group Policy Editor on your system.
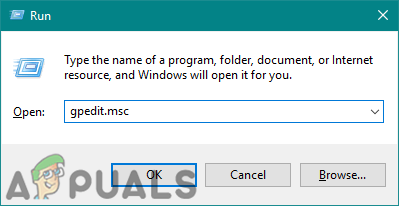
Opening the Local Group Policy Editor - In the User Configuration category, navigate to the following path:
User Configuration\Administrative Templates\Start Menu and Taskbar\
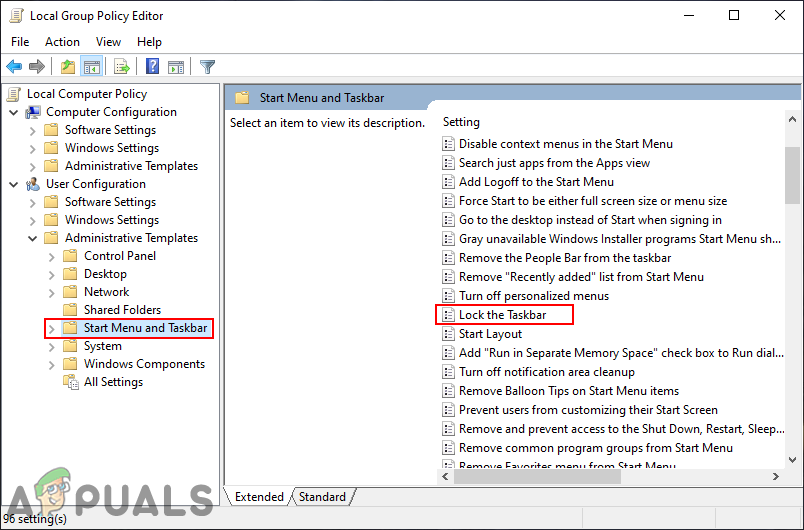
Navigating to Lock the Taskbar setting - Double-click on the setting named “Lock the Taskbar” and it will open in another window. Now change the toggle option to Enabled as shown in the screenshot.
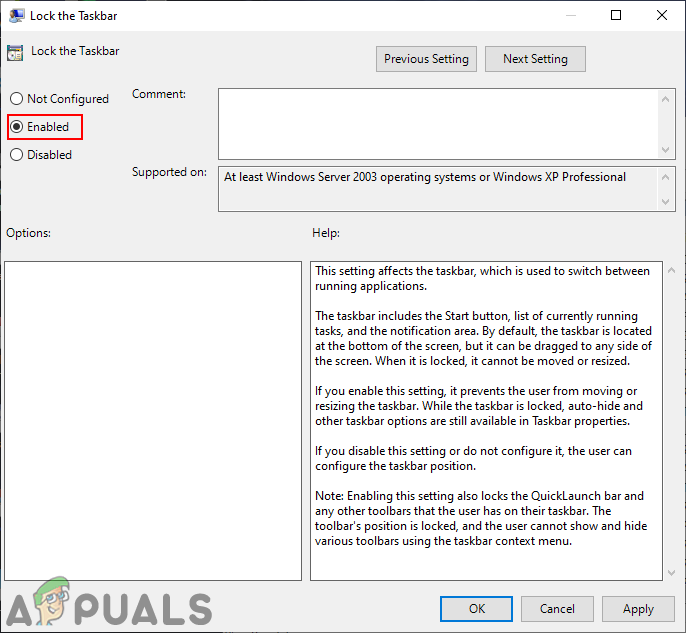
Enabling the setting - To save the changes, click on the Apply/Ok button. This will gray out the Lock the Taskbar option in the context menu of the Taskbar.
- To enable it back, you will need to change the toggle option in step 3 back to Not Configured or Disabled.
Disabling ‘Lock the Taskbar’ through the Registry Editor
The Windows Registry is used to modify the low-level settings of your system. This method also does the same job as the above method, but it requires a few of the technical steps from the user. Users will need to create the missing key/value for the setting they are configuring. Just like the Local Group Policy Editor method, the value can be configured in the Current User hive only and not in the Current Machine hive. Follow the below steps to make this work:
Note: It is always best to create a backup of your Registry before making any new changes.
- Press the Windows + R keys together on your keyboard to open a Run command dialog box. Now type “regedit” and press the Enter key to open the Registry Editor on your system.
Note: If prompted by UAC (User Account Control), then click on the Yes button.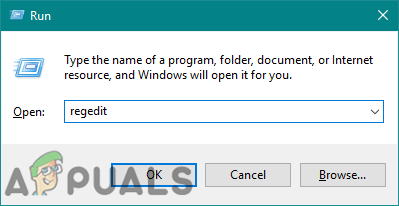
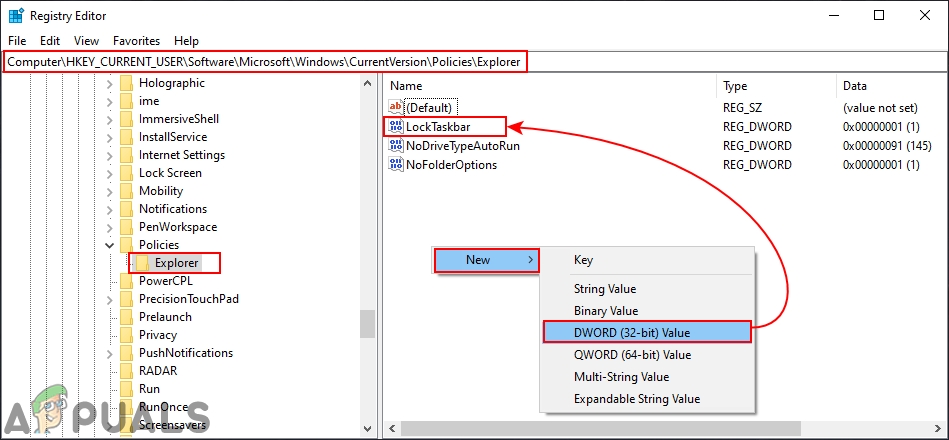
Opening the Registry Editor - In the Current User hive of the Registry Editor, navigate to the following path:
HKEY_CURRENT_USER\Software\Microsoft\Windows\CurrentVersion\Policies\Explorer
- Right-click on the right pane of the Explorer key and choose the New > DWORD (32-bit) Value option. Name this new value as “LockTaskbar” and save it.
Creating the LockTaskbar value in Registry - Double-click on the LockTaskbar value and then change the value data to 1.
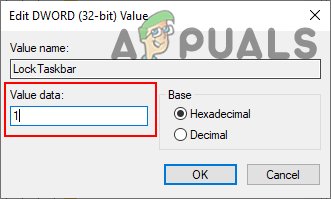
Enabling the LockTaskbar value - Finally, after making all changes, you need to restart your system to apply the changes. This will gray out the Lock the Taskbar option and users will be unable to use it.
- To enable it back, you need to change the value data in step 4 back to 0. You can also remove the LockTaskbar value from the Registry.


