How to Disable Guest Mode in Microsoft Edge?
The new Chromium-based Microsoft Edge runs on the same Chromium web engine as Google Chrome. It offers the best performance and compatibility for the users. Guest Mode is a feature in Microsoft Edge that allows users to browse on a device where they don’t want to sign in. In guest mode, the info about the visited website will not be collected and the automatic suggestions will be turned off. However, this feature can be disabled if the administrator does not allow private searching in the browser. There can be several other reasons for disabling this feature in your browser. In this article, we will show you methods through which you can easily disable this feature.
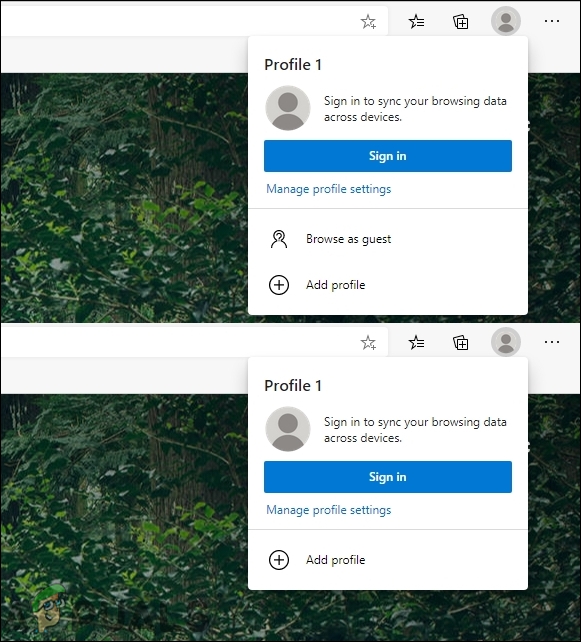
Disabling Guest Mode through the Registry Editor
The Windows Registry Editor is an administrative tool that allows users to view and make changes in the Registry. Users can create a value in the Registry for this specific task and disable the guest mode through that value. Similarly, sometimes the users have to create the missing keys too. A wrong edit or entry in the Registry may cause issues for the Windows machine. However, by following the below steps, you can easily configure the setting without any worries.
- Open a Run dialog box by pressing the Windows and R keys together on your keyboard. Now type “regedit” and press the Enter key to open the Registry Editor. If prompted by UAC, then click on the Yes button.
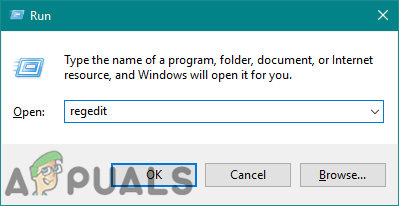
Opening the Registry Editor - In the Registry Editor, navigate to the Edge key:
HKEY_LOCAL_MACHINE\SOFTWARE\Policies\Microsoft\Edge
- If the Edge key is missing, right-click on the Microsoft and choose the New > Key option. Rename this key as “Edge“.
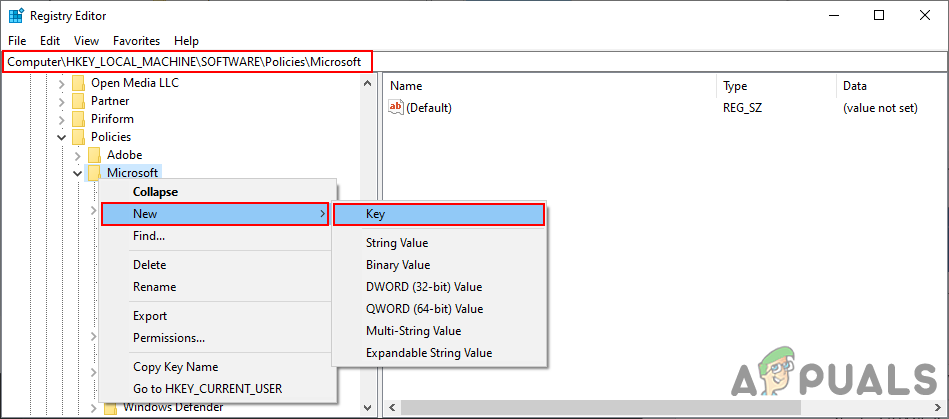
Creating a new key - Now right-click on the right pane and choose the New > DWORD (32-bit) Value option. Rename this value as “BrowserGuestModeEnabled“.
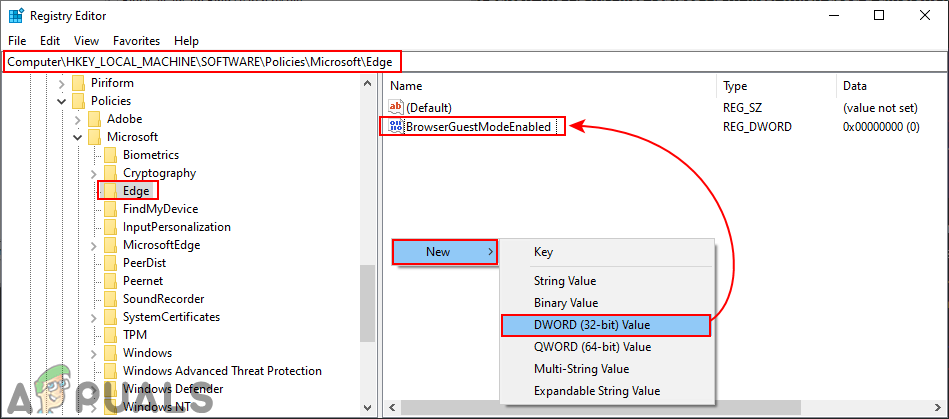
Creating a new value - After that, open the value by double-clicking on it and change the value data to 0.
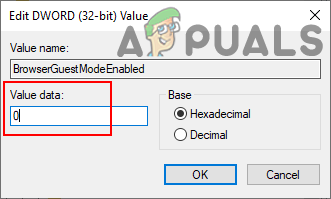
Changing the value data - Finally, make sure you restart your system to apply all these changes. This will disable the guest mode from the new Microsoft Edge.
- You can always enable it back by removing this newly created value from the Registry Editor.
Disabling Guest Mode through the Group Policy Editor
The Group Policy Editor is another administrative tool that allows users to control the working environment of the operating system. Compared to the Registry Editor, this is much easier for adjusting specific settings. However, the Group Policy Editor does not have the latest policy settings for the new Microsoft Edge. You have to download and install the latest policy settings for the new Microsoft Edge, which is why it will take some extra steps to accomplish the task.
Note: The Group Policy isn’t available for the Windows Home editions. Therefore, use the Registry method if you are using the Windows Home operating system.
- Firstly, go to the Microsoft site and download the policy files for the new Microsoft Edge. Select the version information and click on the “GET POLICY FILES” to download files.
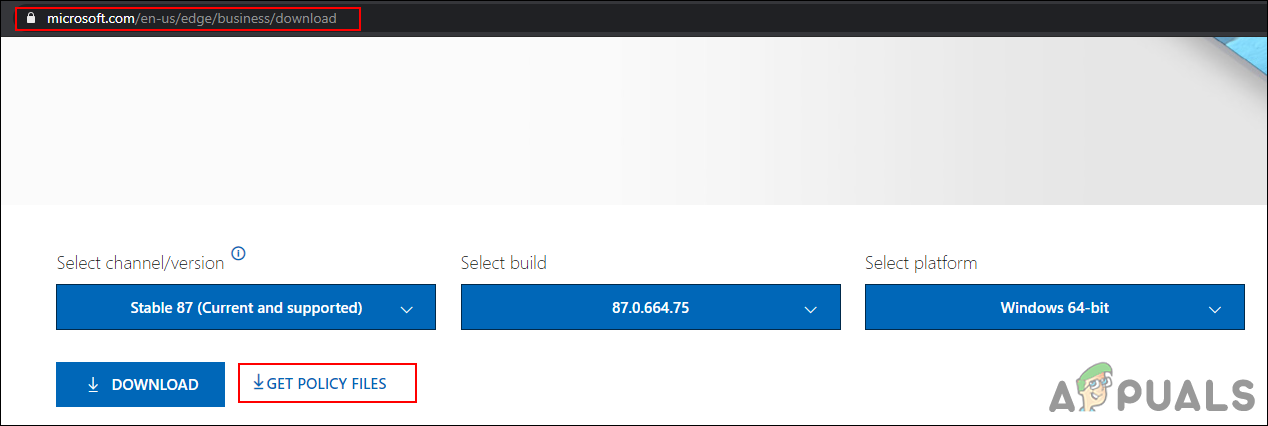
Downloading policy files - Right-click on the downloaded files and choose “Extract files” to extract the files by using the WinRAR.
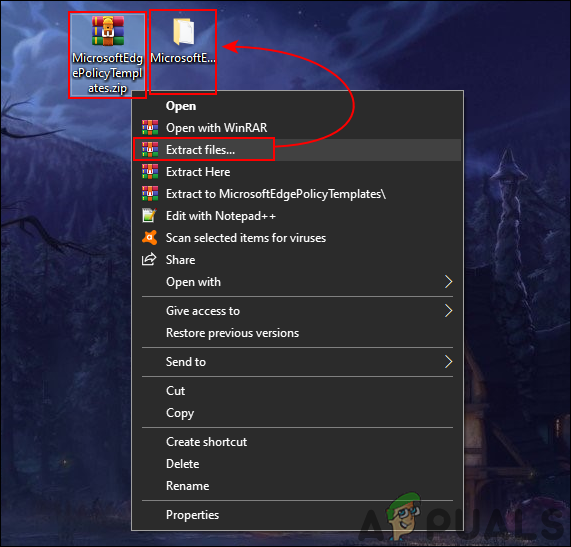
Extracting the downloaded files - Open the extracted folder and navigate to “MicrosoftEdgePolicyTemplates\windows\admx” path.
- Copy the “msedge.admx” and “msedge.adml” files from the downloaded folder and paste them in the “C:\Windows\PolicyDefinitions” folder.
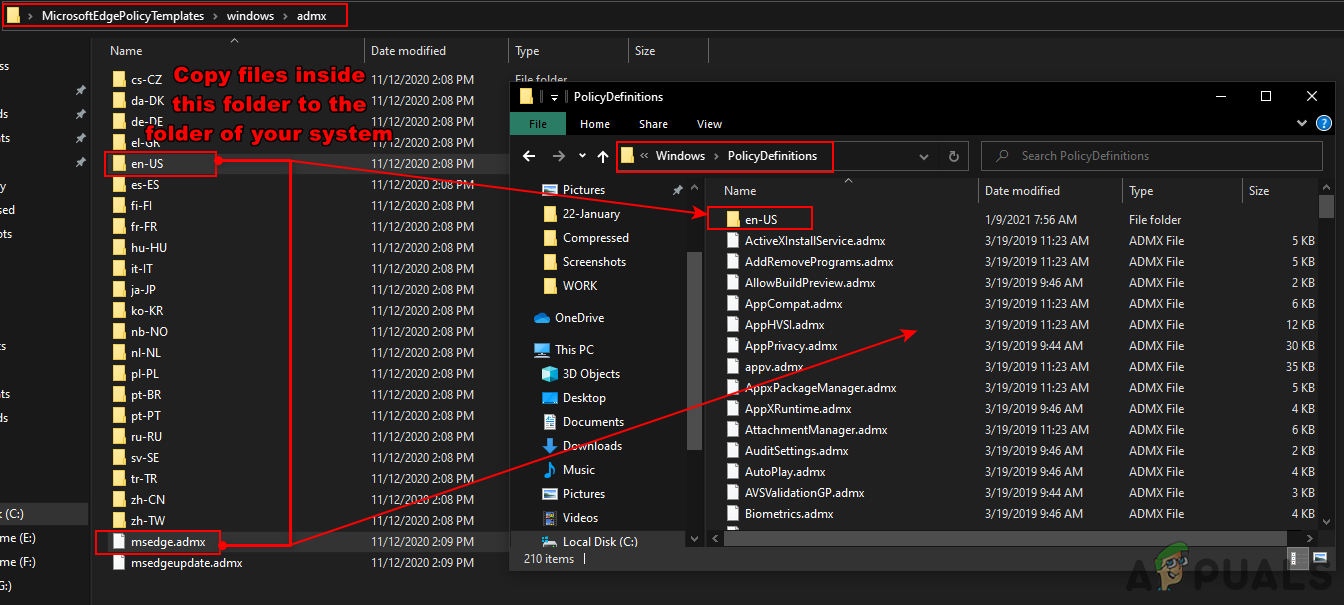
Copying files Note: The language file is located inside the folder and should be copied in the folder.
- You may have to restart your system to see these new settings in the Local Group Policy Editor.
- After that, open a Run dialog box by pressing the Windows + R key combination. Type “gpedit.msc” and press the Enter key to open the Local Group Policy Editor.
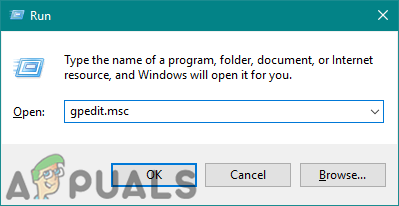
Opening the Registry Editor - In the Local Group Policy Editor, navigate to the following path:
Computer Configuration\ Administrative Templates\ Microsoft Edge
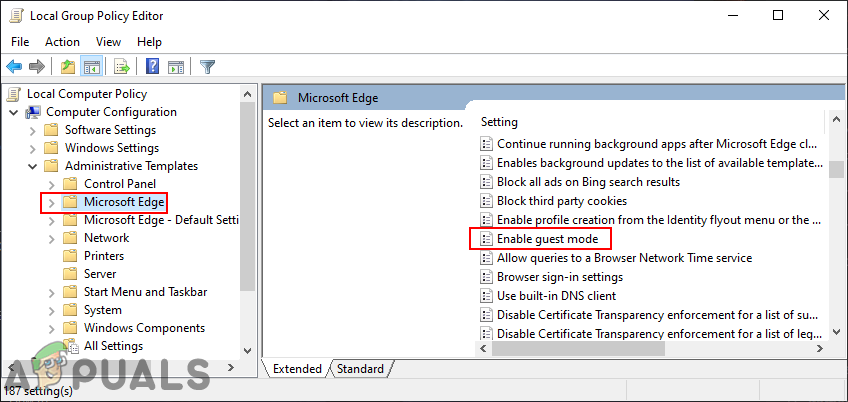
Navigating to the setting - Double-click on the setting named “Enable guest mode” and it will open in another window. Now change the toggle option from Not Configured to Disabled.
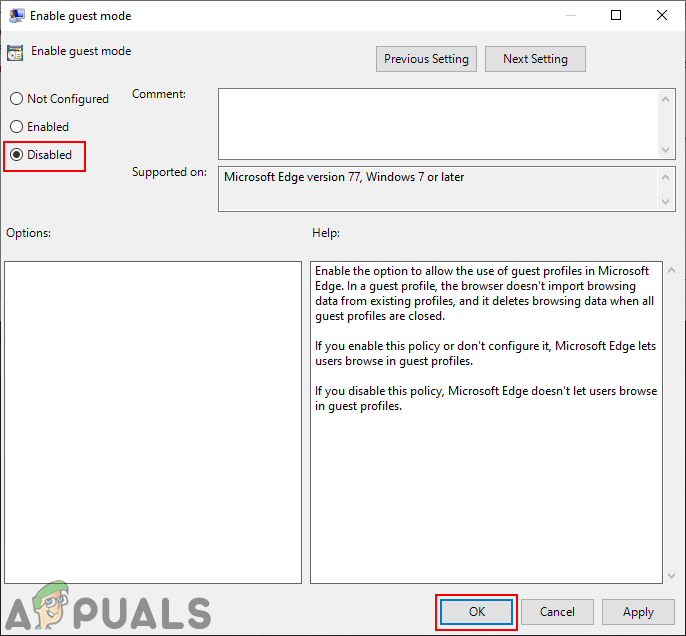
Disabling the guest mode - Click on the Apply and Ok buttons to save the changes. This will disable the guest mode in the Microsoft Edge.
- You can always enable it back by changing the toggle option to Not Configured or Enabled in step 8.


