How to Enable or Disable Fast User Switching on Windows?
Fast User switching is one of the best features in Windows, where users can switch between multiple accounts without affecting the workflow in any of them. For instance, if three applications are running in account A and you fast switch to account B, then the applications in account A won’t be affected and will keep on running.
The best utilization of this feature shows up when you’re working on a shared computer. So a user can switch to their account without affecting your workflow, and you can do the same. Besides, the accounts have their own login credentials, so privacy and security are never an issue.
Now there are two methods to activate and deactivate Fast User switching on Windows . I’ll discuss them in the next section.
How Do I Enable or Disable Fast User Switching on Windows 10?
You can use Group Policy or the Registry Editor to activate or deactivate Fast User switching on your computer. The process isn’t very technical and can be done by anyone.
Below are steps with pictures to help you out:
Method 1: Using the Registry Editor
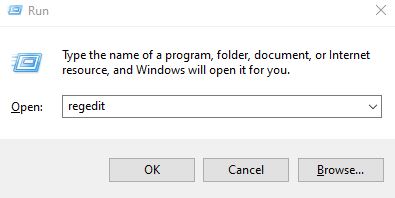
- Press the Win + R keys, and the Run dialog box will open.
- Type regedit and click OK.
- In the left pane, go to Computer\HKEY_LOCAL_MACHINE\SOFTWARE\Microsoft\Windows\CurrentVersion\Policies\System.
- Alternatively, paste the above path into the address bar at the top.
- On the right pane, double-click on a REG_DWORD value named HideFastUserSwitching.
- If it isn’t available, then right-click on an empty space in the right pane and select New. Select the DWORD (32-bit) value.
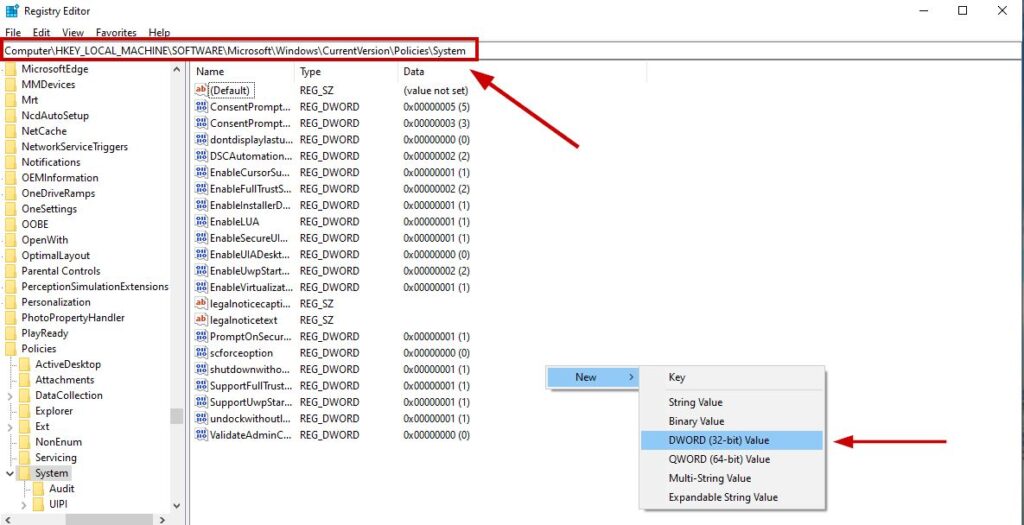
- Rename the value as HideFastUserSwitching.
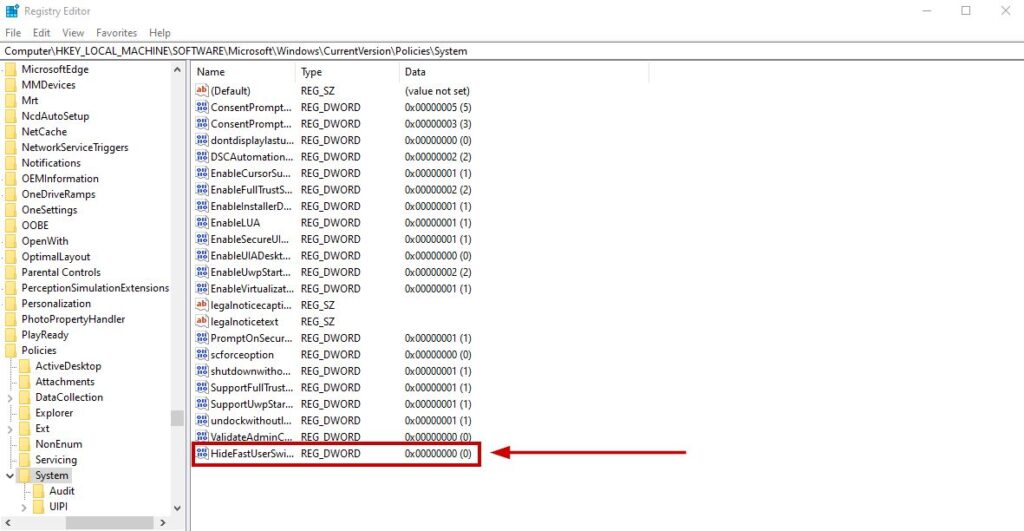
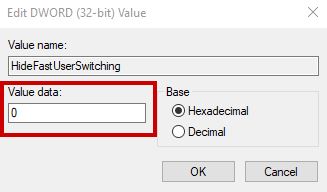
- Now double-click on it.
- Change the value data to 0 and restart your computer to activate Fast User switching.
- If it’s already 0, then the feature can be enabled from the Group Policy, so check the next heading to know more about it.
- Lastly, to disable Fast User Switching, change the Value data to 1.
Method 2: Using Group Policy
- Open the Run dialog box with the Win + R keys, type gpedit.msc, and press Enter.

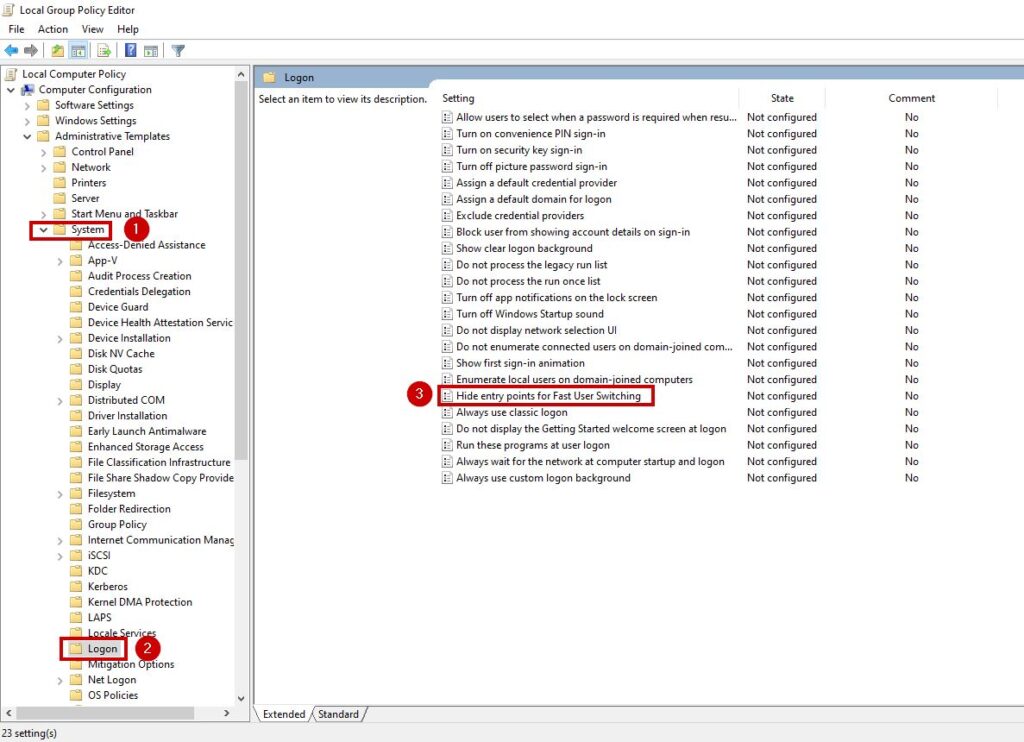
- In the left pane, select Local Computer Policy.
- Now go to Computer Configuration > Administrative Templates.

- Finally, expand System and select Logon.
- Double-click Hide entry points for fast user switching in the right pane.
- Select Enable, and then click Apply and OK.
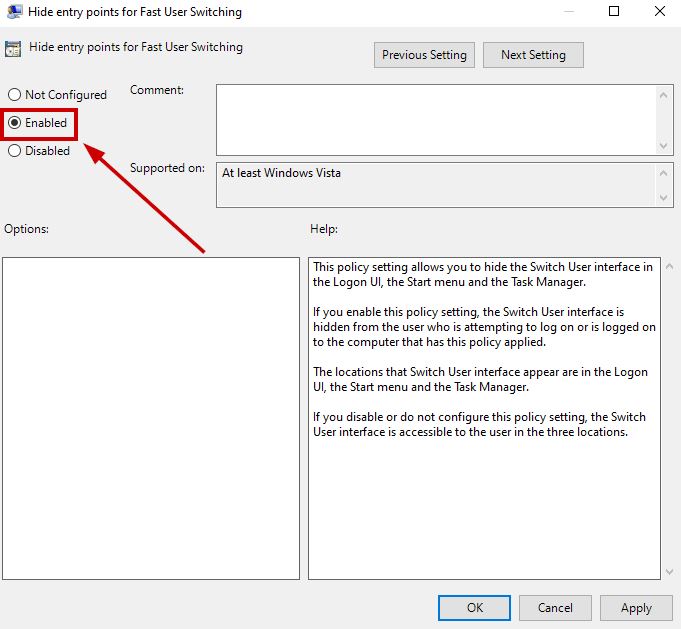
- To disable this option, simply select Disable and apply the settings.
And this is how you can activate and deactivate Fast User switching on your Windows 10 computer. If you’re unable to execute any step, then let us know in the comments, and we’ll look into the issue.