Disabling the Start Menu on Windows 10 using Group Policy Editor
The Start Menu in Windows is used to locate all the installed applications on your system. All of the application icons will appear in an alphabetical list on the left side of the Start Menu screen. The Start Menu settings in the Settings app provide options that the user can show or hide from the Start Menu. However, as an administrator, you can also keep the settings permanently the same and disable the access to the Start Menu settings for the standard users. In this article, we will tell you the methods that you can use to achieve this specific task.

Preventing Users from Changing Start Menu Settings
This setting will disable and gray out the settings for the Start in the Settings app. It will also disable the Taskbar settings (Taskbar properties) context menu option that you can access by right-clicking on the Taskbar.
However, it will not disable the Taskbar settings from the Settings app. The reason that it has a Taskbar included in this setting is that in the previous version of Windows, a user had to open the Taskbar and Start Menu settings by right-clicking on the Taskbar and choosing the properties option. By disabling that context menu through the previous version of Windows would have completely disabled the Taskbar and Start Menu settings.

Whereas in Windows 10 the settings appear in the Settings app, so it does disable the Start Menu settings but not the Taskbar settings. You can use it to at least disable some of the Start Menu settings. Some of the settings in the Local Group Policy Editor were designed for previous versions of the operating system, but it can still work on the newest versions.
Method 1: Using the Local Group Policy Editor
The settings for disabling the Start Menu settings can be found in the Local Group Policy Editor. It is listed under the User Configuration, and it’s not available for the Computer configuration. The policy settings in the Local Group Policy Editor also show the details about that setting that you clicked.
However, you can skip this method if you are using the Windows Home Edition because the Local Group Policy Editor isn’t available in that operating system.
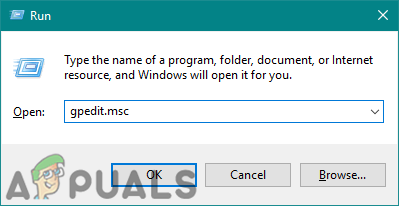
- Open a Run command dialog box by pressing Windows + R keys on your keyboard, then type “gpedit.msc” and press the Enter key to open the Local Group Policy Editor.
Opening the Local Group Policy Editor - In the Local Group Policy Editor window, navigate to the following category path:
User Configuration\Administrative Templates\Start Menu and Taskbar\
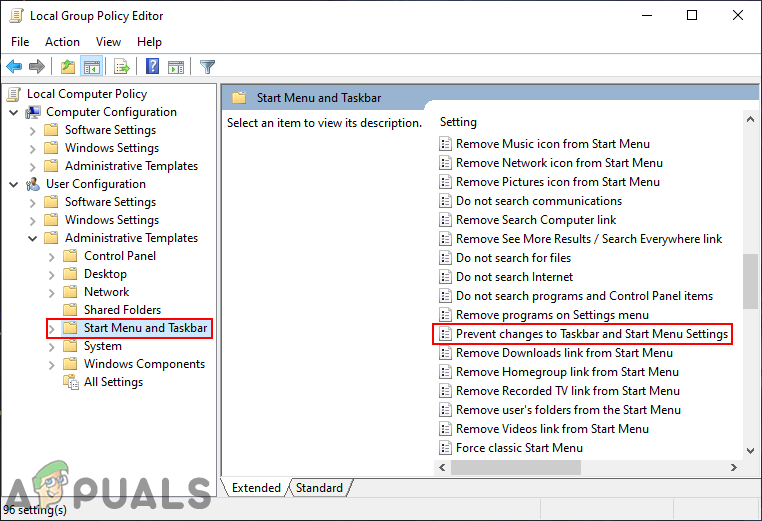
Navigating to the setting - Double-click on the policy-setting named “Prevent changes to Taskbar and Start Menu Settings” and it will open up in another window. Now change the toggle option from Not Configured to Enabled.
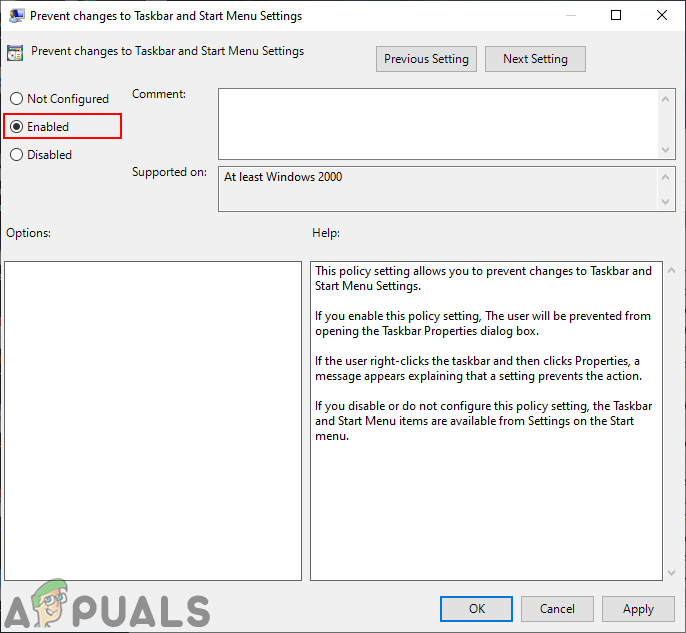
Enabling the setting - Finally, click on the Apply/Ok button to save the changes made. This will prevent users from changing the Start Menu settings.
- To enable the settings for Start Menu again, you need to change the toggle option back to Not Configured or Disabled.
Method 2: Using the Registry Editor
The Registry Editor is connected with the first method. Whenever you change the policy setting in the Local Group Policy Editor, it will automatically update your Registry. However, if you are using Windows Home Edition, then this may be the only method available for you. It requires a bit more steps than the first method, but it is not that hard. You can easily disable the Start Menu settings by following the below steps:
Note: We always recommend users to create a backup before making any changes in their Registry Editor.
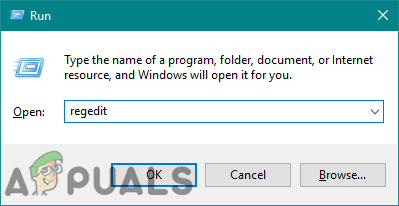
- Open a Run command dialog box by pressing the Windows + R keys on your keyboard, then type “regedit” and press the Enter key to open the Registry Editor. Choose the Yes button for UAC (User Account Control) prompt.
Opening the Registry Editor - In the Current User hive, navigate to the following key:
HKEY_CURRENT_USER\Software\Microsoft\Windows\CurrentVersion\Policies\Explorer
- In the Explorer key, right-click on the right pane and choose the New > DWORD (32-bit) Value option. Name this newly created value as “NoSetTaskbar“.
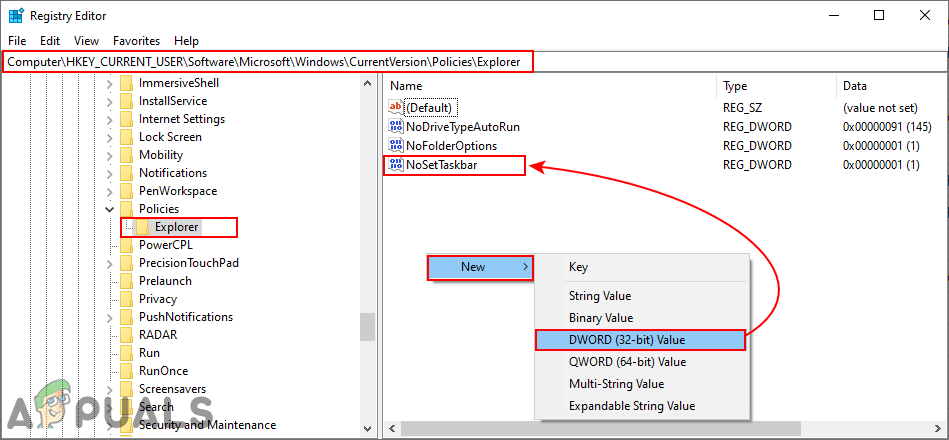
Creating a new value in Registry Editor - Double-click on the NoSetTaskbar value to open it and then change the value data to 1.
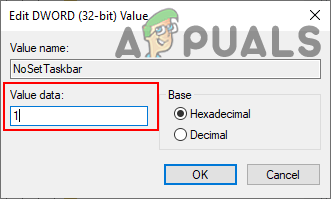
Enabling the value - Lastly, you need to restart your system to apply the changes to the system. This will disable the Start Menu settings for that specific user account.
- To enable it back, you need to open the NoSetTaskbar value again and change the value data to 0. You can also simply remove the value from the Registry Editor.


