Disable Context Menus in Windows 10 File Explorer, Start Menu & Taskbar
A context menu or a shortcut menu in Windows is a menu that offers a set of choices when the user uses a right-click operation. This menu will work differently and show different options depending on the application or area. Windows also have a setting for disabling and enabling the context menus. Some parents may want to disable the context menu for children that always mess the shortcuts on the desktop. Some other users may also have issues with the context menu not appearing upon right-clicking, so they can also check this article to see if their settings are correct and the context menu is enabled on their system or not.
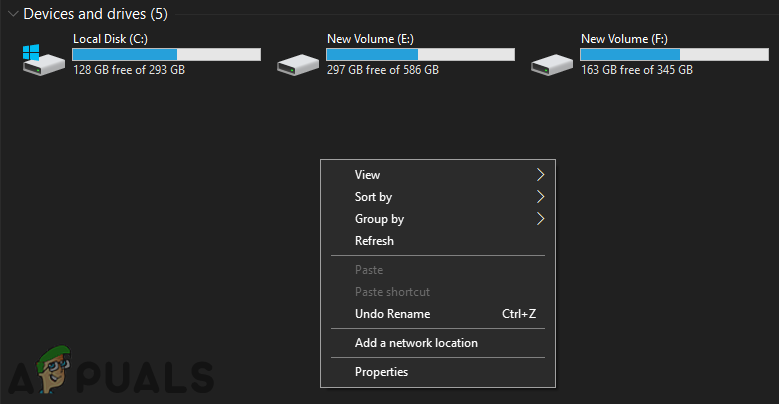
1. Disabling Context Menu from File Explorer and Desktop
This will only remove the context menu from the File Explorer and Desktop, but not the options that are available through the context menu. Users can still use the keyboard shortcuts and other methods to access those options. Copy and paste keyboard shortcuts will still work if that’s what you are missing from disabling the context menu. By using the below methods, you can disable or enable the right-click on both desktop and file explorer.
1.1 Using the Local Group Policy Editor
The setting for this specific task can be found in the Local Group Policy Editor. Group Policy has all those settings through which you can control your operating system. Each of the settings in the Group Policy Editor also provides additional information related to that setting. You just need to navigate to the setting and enable it to make it work.
However, if you are using the Windows Home edition, you will have to enable the Local Group Policy Editor.
- Open the Run dialog box by pressing the Windows and R keys together. Now type “gpedit.msc” in the box and press the Enter key to open the Local Group Policy Editor window.

Opening the Local Group Policy Editor - In the User Configuration category, navigate to the following path:
User Configuration\Administrative Templates\Windows Components\File Explorer\
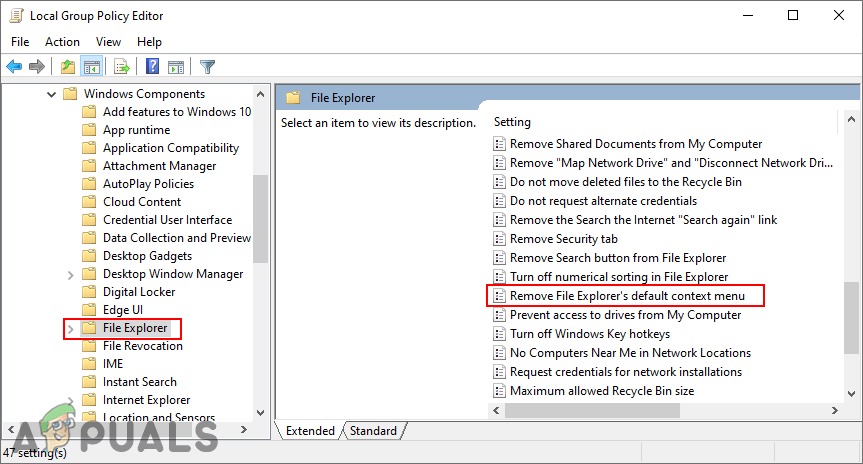
Navigating to the setting - Double-click on a setting named “Remove File Explorer’s default context menu” and it will open up in another window. Now change the toggle option from Not Configured to Enabled.
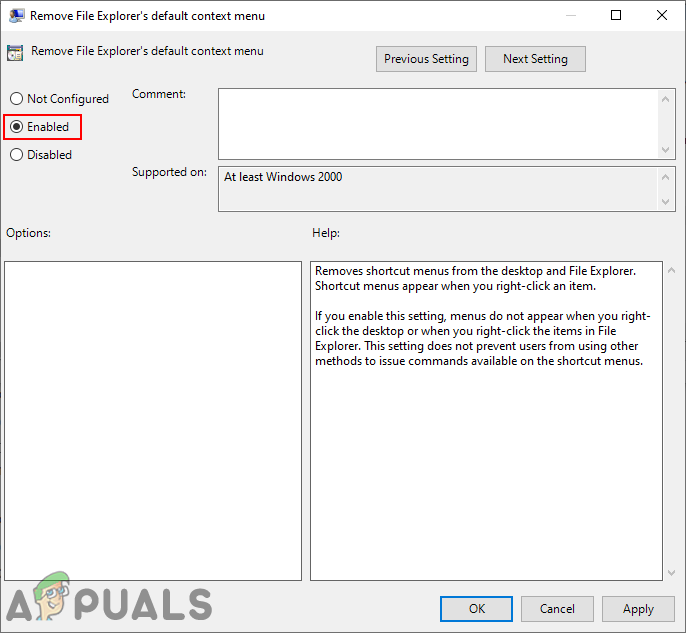
Enabling the setting - Lastly, click on the Apply and Ok buttons to save the changes. This will disable the context menu for Desktop and File Explorer.
- To enable the context menu back again, you just need to change the toggle option to Not Configured or Disabled in step 3.
1.2 Using the Registry Editor
Another method for disabling the context menu in File Explorer and desktop is through the Registry. This is also the only available option for Window Home users. It requires some of the technical steps from the users, unlike the Group Policy Editor. To enable this specific setting, the user needs to create the missing key/value in the Registry Editor. We also recommend users to create a backup before making any new changes in the Registry of their system. Follow the below steps to disable or enable the context menu:
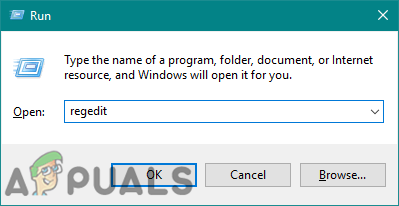
- Open a Run dialog box by pressing the Windows + R keys together on your keyboard. Then type “regedit” in that box and press the Enter key to open the Registry Editor. Click on the Yes button for UAC (User Account Control) prompt.
Opening the Registry Editor - In the Current User hive, navigate to the following path:
HKEY_CURRENT_USER\Software\Microsoft\Windows\CurrentVersion\Policies\Explorer
- In the Explorer key, right-click on the right pane and choose the New > DWORD (32-bit) Value option. Type the name for this value as “NoViewContextMenu” and save it.
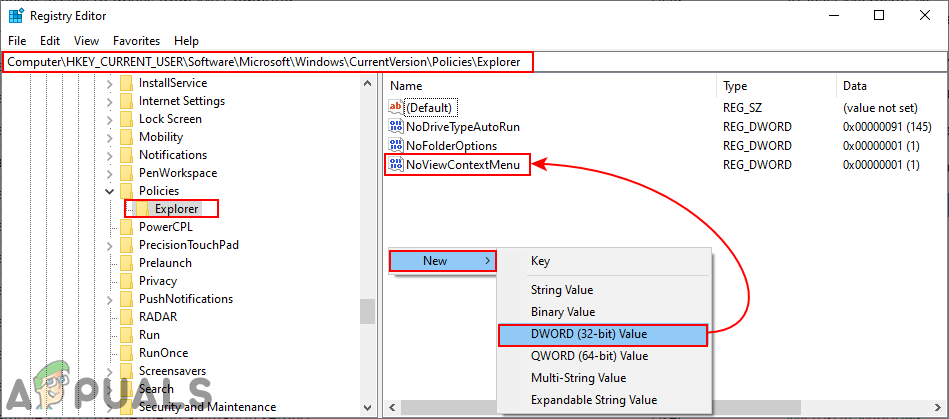
Creating a new value in the Registry - Double-click on this newly created value and change the value data to 1.
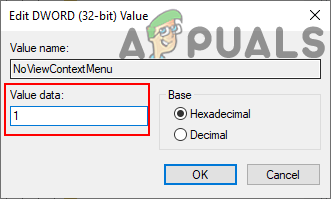
Changing the value data - After all the configurations, make sure you restart your system to apply these changes. This will disable the context menu for both the Desktop and File Explorer.
- If you want to enable the context menu again, change the value data to 0, or simply remove the value from the Registry Editor.
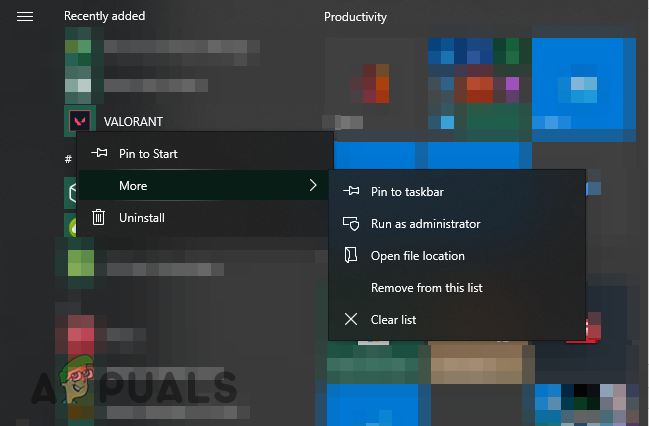
2. Disabling Context Menu from Start Menu on Windows 10
It is a pretty useful feature in Start Menu, however, as an administrator, you can disable these options from a standard user. If you only want them to use the application and not open any additional option for that application.
The default setting for this specific task can be found in the Local Group Policy Editor. Users just need to enable that and it will do the rest of the work. However, since the Local Group Policy Editor isn’t available in all versions of the Windows operating system, so we are also adding the Registry Editor method. All the below methods will work the same and disable the context menu from the Start Menu of your system.
2.1 Using the Local Group Policy Editor
The Local Group Policy Editor can be used to modify different settings of the operating system. Some of the settings may not be available in the default Windows Settings app. However, you can find most of them in the Local Group Policy Editor. This setting can be applied to both the computer and the current user. The path will be the same, but the category will be different in the Local Group Policy Editor window. Follow the below guide to disable the context menu for the start menu.
However, if you are using the Windows Home edition, you will have to enable the Local Group Policy Editor.
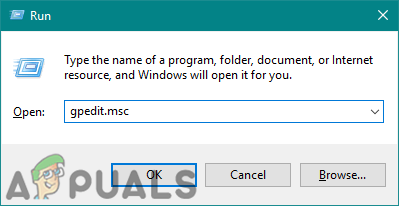
- Press the Windows + R keys to open a Run dialog and type “gpedit.msc” in it. Click on the Ok button or press the Enter key to open the Local Group Policy Editor window.
Opening the Group Policy Editor - In the Local Group Policy Editor window, navigate to this specific setting:
Computer Configuration\ Administrative Templates\ Start Menu and Taskbar\
Note: We are using the setting in the User Configuration, you can also set this in the Computer Configuration.
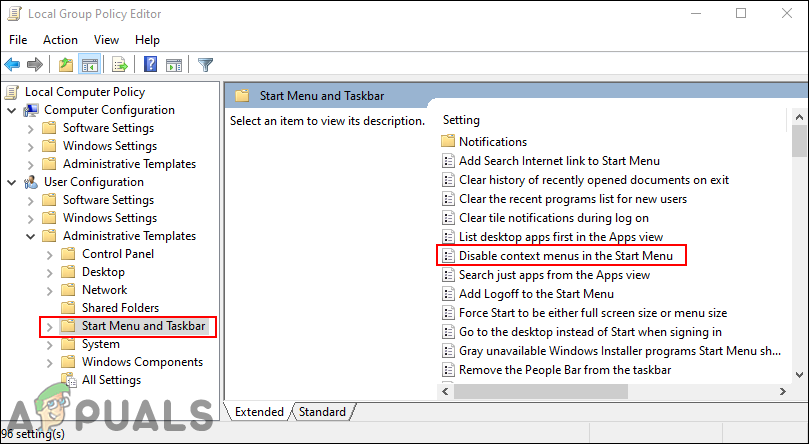
Navigating to the setting in the Local Group Policy Editor - Double-click on the “Disable context menus in the Start Menu” setting and it will open up in a new window. Change the toggle option from Not Configured to Enabled.

Configuring the setting - Click on the Ok/Apply button to save the changes made. This will disable the context menus in the start menu of your system.
- To enable it back, simply change the toggle option back to Not Configured or Disabled in step 3.
2.2 Using the Registry Editor
The Registry Editor is another method for this specific setting. If you use the Local Group Policy Editor method, then it will automatically update the key and value in the Registry Editor for that setting. However, if you don’t have access to the Local Group Policy Editor, then you will need to create the missing key or value for this setting. It is a bit technical method for beginners, but you can easily accomplish it by following the below steps.
Note: The path for the key in the Current Machine hive and Current User hive will be the same, but the hive will be different.
- Open a Run dialog by pressing the Windows + R keys on your keyboard, then type “regedit“, and press the Enter key to open Registry Editor. You can also open it through the Windows search feature.
Note: Click on the Yes button if prompted by UAC (User Account Control).
Opening the Registry Editor - In the Registry Editor window, you need to navigate to this key:
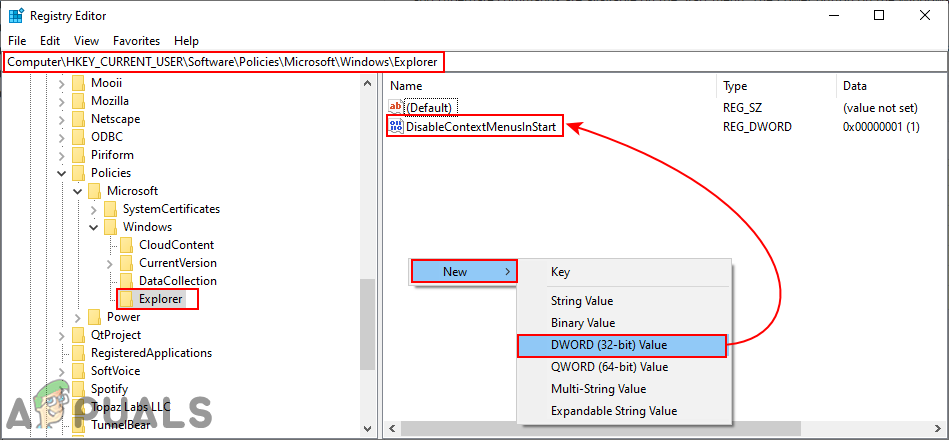
HKEY_CURRENT_USER\Software\Policies\Microsoft\Windows\Explorer
Note: We are using the Current User hive in this method, you can also use the Current Machine hive.
- Right-click on the right pane and choose the New > DWORD (32-bit) Value option. Name this newly created value as “DisableContextMenusInStart“.
Creating a new value in the Registry Editor - Double-click on this new value, it will open a dialog where you can change the value data to 1.

Changing the value data of the value - Once you are done with all configurations, make sure to restart the computer to apply the changes.
- To enable the context menus back to the start menu, you need to change the value data of the value to 0 or just remove the value from the Registry Editor.
3. Disabling Context Menu from Taskbar
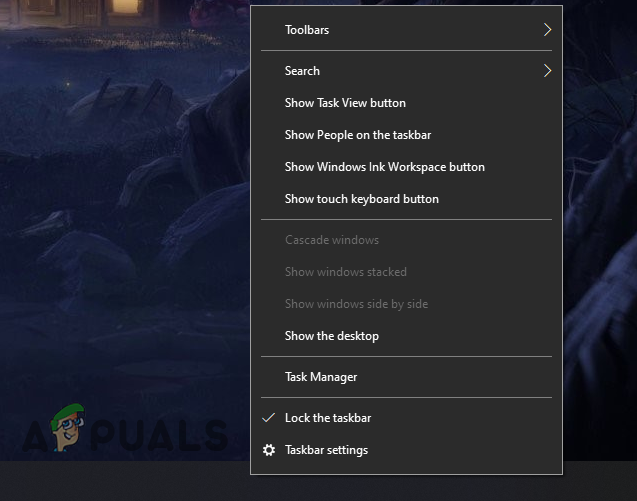
The context menu of the Taskbar allows users to show or hide several different options on their Taskbar. It shows all of the customization options and settings for the Taskbar. It is a pretty common and one of the most used features on the Windows operating system. However, if the PC is used by multiple users, then you can disable the context menu of the Taskbar from other standard users. This will prevent the users from changing the Taskbar options and they won’t be able to right-click on the Taskbar. We will show you methods through which you easily disable the context menus for the Taskbar.
3.1 Using the Local Group Policy Editor
Some of the settings may not be available in the Control Panel or the Settings app. The setting for disabling the context menu of the Taskbar can be found in the Local Group Policy Editor. It also provides details about this specific policy setting. Follow the below steps to check it out:
Note: If you’re using the Windows Home operating system, then skip this method. That is because the Local Group Policy Editor isn’t available for the Windows Home Editions.
- Press the Windows + R key combination on your keyboard to open a Run dialog box. Now type “gpedit.msc” and press the Enter key to open the Local Group Policy Editor on your system.

Opening the Local Group Policy Editor - In the Local Group Policy Editor window, navigate to the following path:
User Configuration\Administrative Templates\Start Menu and Taskbar\
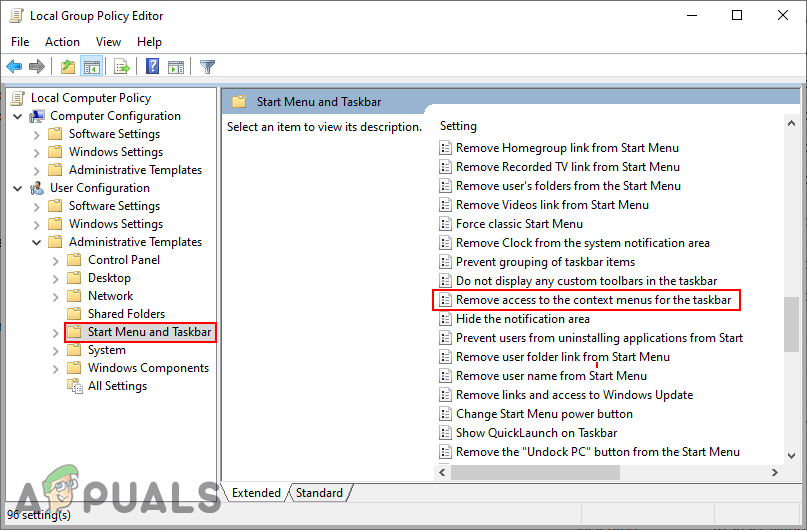
Navigating to the setting - Double-click on the setting named “Remove access to the context menus for the taskbar” and it will open up in another window. Now change the toggle option from Not Configured to Enabled.
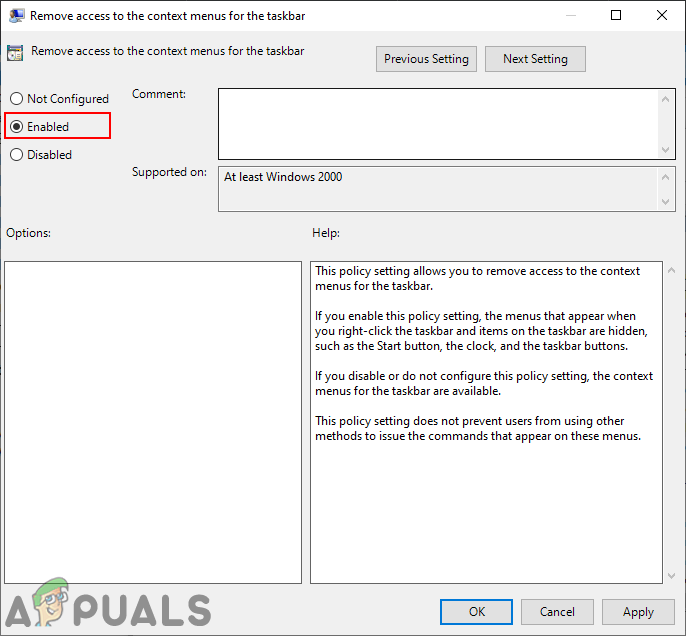
Enabling the setting - Lastly, you need to click on Apply/Ok button to save the changes. This will disable the context menu for the Taskbar. Users will be unable to right-click on the Taskbar.
- To enable it back, you will need to change the toggle option back to Not Configured or Disabled in step 3.
3.2 Using the Registry Editor
Another method for disabling the context menu of the Taskbar is by using the Registry Editor. If you already used the Local Group Policy Editor, then it will automatically update your Registry. However, if you are directly using the Registry Editor method, then you will need to create the missing value and then set the value data for enabling it. We always recommend users to create a backup before making any changes to the Windows Registry. Follow the below guide to disable the context menu:
- Press the Windows + R key combination on your keyboard to open the Run dialog box. Now type “regedit” in it and press the Enter key to open the Registry Editor on your system.
Note: If prompted by UAC (User Account Control) dialog, then click on the Yes button.
Opening the Registry Editor - In the Current User hive, navigate to the following Explorer key:
HKEY_CURRENT_USER\Software\Microsoft\Windows\CurrentVersion\Policies\Explorer
- In the Explorer key, right-click on the right pane and choose the New > DWORD (32-bit) Value. Name this value as “NoTrayContextMenu“.

Creating a new value in the Registry Editor - Double-click on the newly created value and then change the value data to 1.
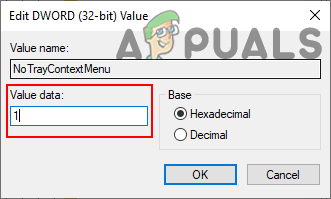
Enabling the value - After all the configurations, make sure you restart your system to apply the changes. This will disable the context menu for the Taskbar.
- To enable it back, you need to change the value data to 0 or remove the NoTrayContextMenu value from the Registry.


