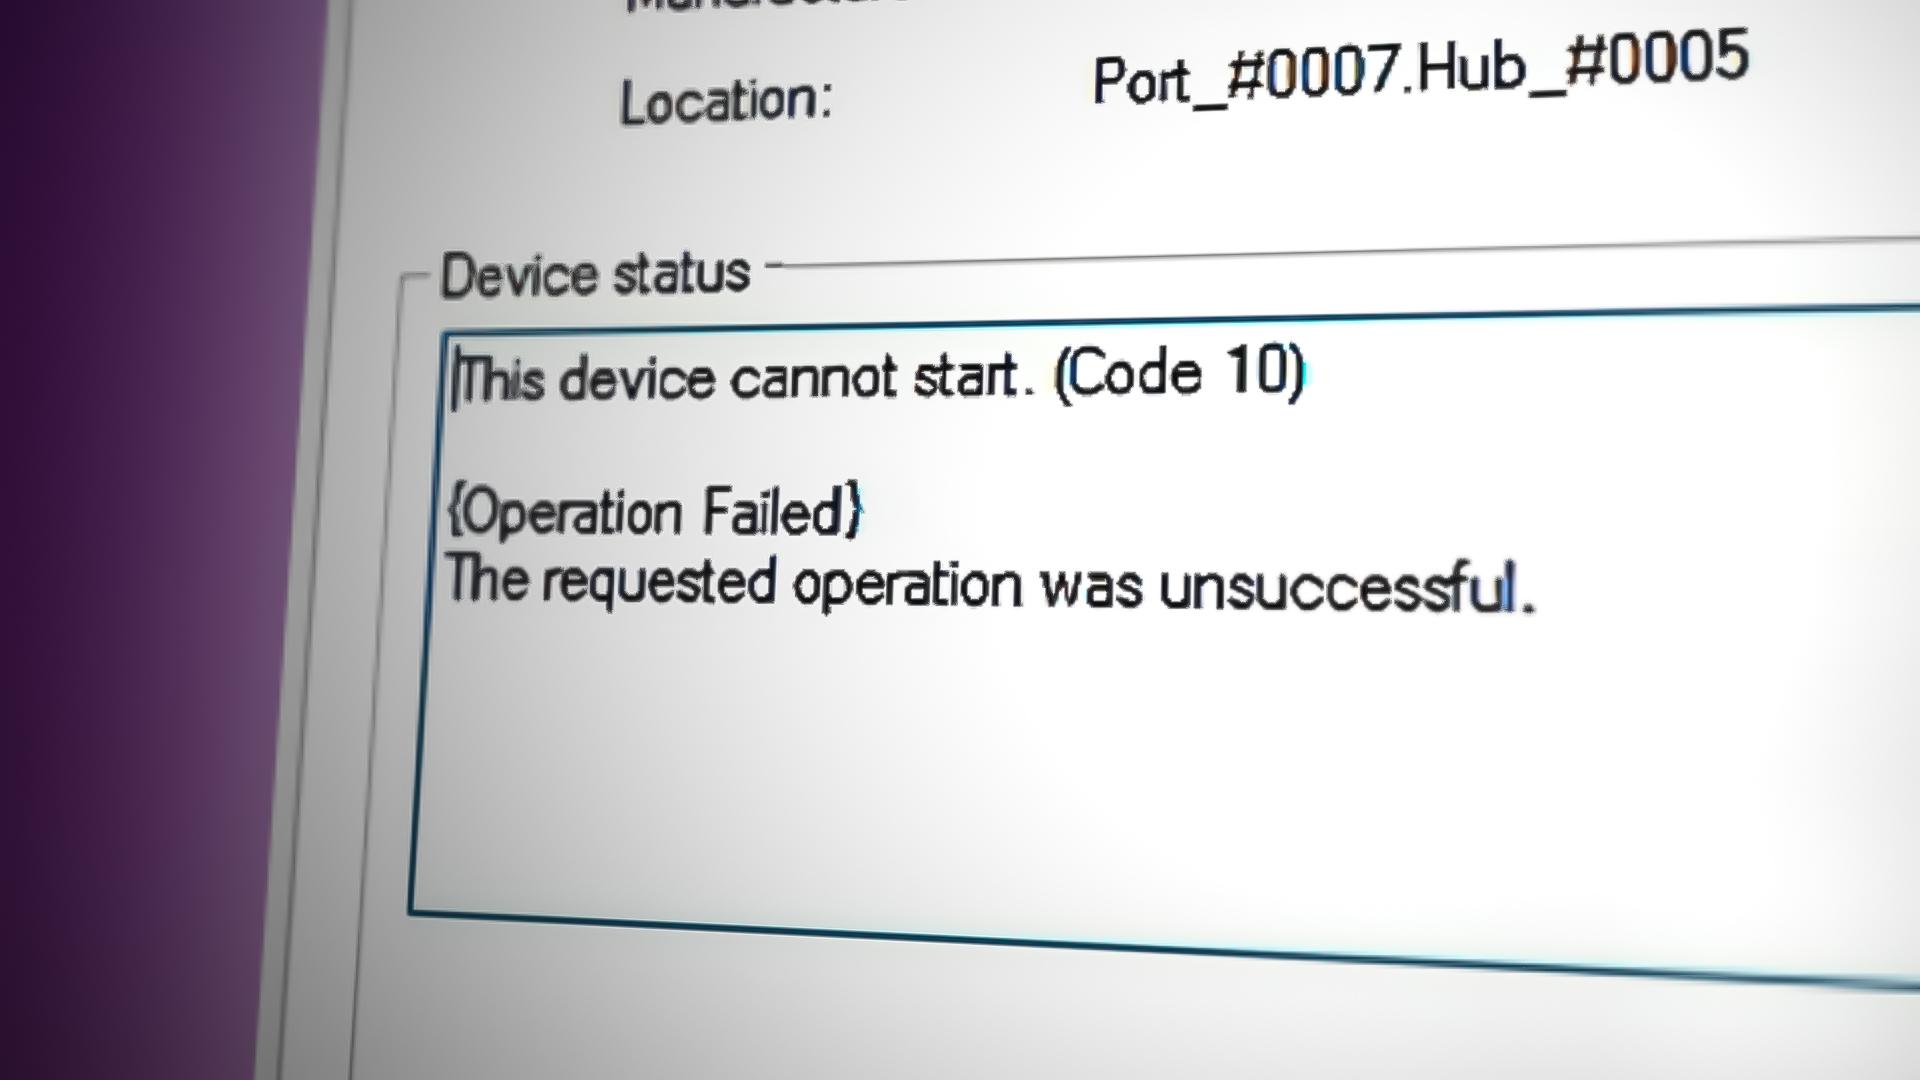
How to Fix “device cannot start (code 10)” Driver Error?
Error Code 10 is triggered when the motherboard recognises the device but cannot initiate or start it for the user. This can happen both with external and internal components attached to your motherboard such as GPU, Network Adapter, Sound Card or Removable Devices like Flash Drives, Printers and Keyboards. This is the result of an incompatible driver or a device that has malfunctioned.
If you installed a new hardware device and keep getting this error message, it is possible that the device has not started correctly. Besides, an incompatible or corrupted driver can also lead you to this error message, as incompatible drivers can be installed by the built-in Windows update when you connect a hardware device.
| Issue | This device cannot start (code 10) |
| Occurs On | Device driver internal or external |
| Outcomes | The device stops working. |
| Usually Caused by | Incompatible device driver Faulty Internal or External Hardware Compoenent |
| Fixes | Power Flush Your System Re-enable Device Driver Reinstall Driver Change USB Port |
Usually, the error occurs on wireless network adapters and audio devices. However, the following methods are compatible with any device showing you this error message.
1. Power flush your system (For Network Adapter)
When a device keeps getting disconnected or does not respond, you should first try to power flush your computer or laptop. This is the best way to revive any device that is unresponsive and not working.
Power flushing the computer fixes the devices that behave unexpectedly or unresponsively. To do so, follow the steps:
- Power off your laptop or computer completely.
- Unplug the power cables from the CPU. If you have a laptop with a removable battery, remove it.
- Hold the power button for 15 seconds.
- Then, plug the power cables back. For laptop users, connect the battery if you have removed it.
- In the end, turn on your computer or laptop the check if the error is fixed.
2. Re-enable the Device
If you installed a new device, that is showing you this error message, or it suddenly gets stops working. In both cases, you can try disabling and enabling the device, which actually has worked for the most affected users. When you disable the device from a device manager, that device’s driver gets unloaded from the memory (RAM). When you enable the device, the driver gets loaded into the memory so that Windows can use that device.
In simple words, it helps in restarting the driver, which will also restart the device. Below are the instructions to do that:
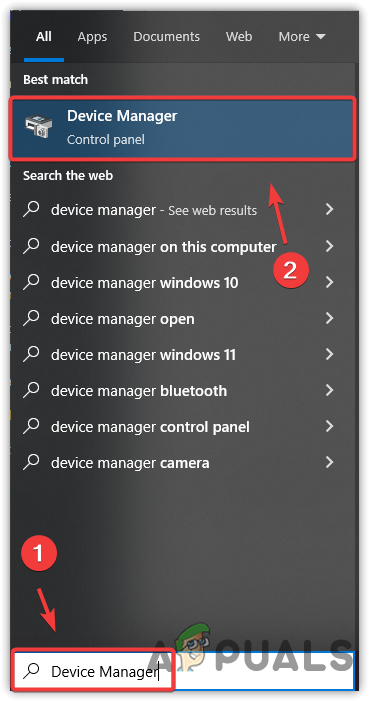
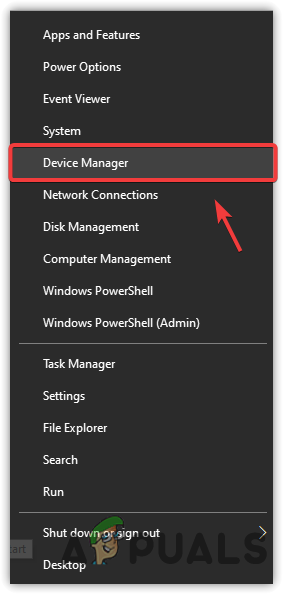
- Click the Start Menu and type Device Manager.
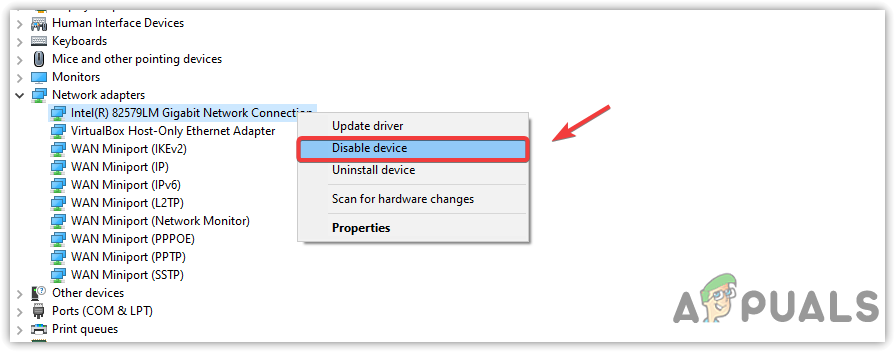
Opening Device Manager - Open the device manager, and right-click the causing driver.
- Select Disable device if the device is enabled.
Disabling Network Adapter from the device manager - Once the device driver is disabled, right-click the driver and select Enable device.
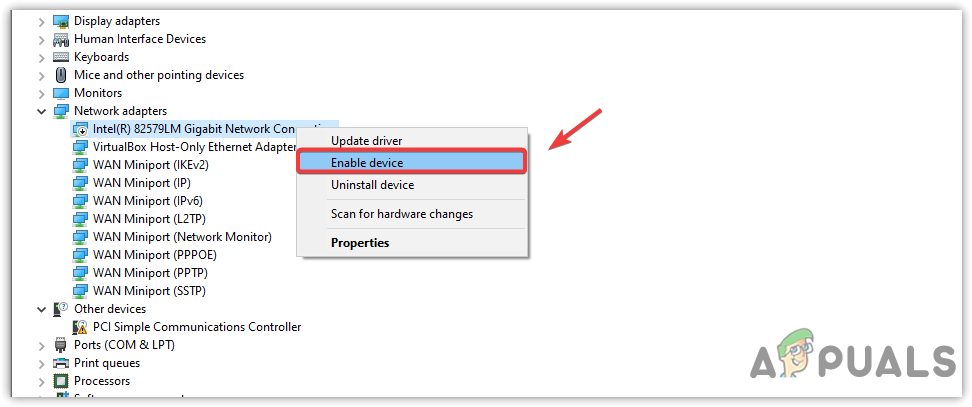
Enabling Network Adapter from Device Manager - Once done, go to the driver properties and check if the error is fixed.
3. Download the driver from the motherboard manufacturer’s site
The major reason behind any device that shows this error message could be an incompatible driver installed by the built-in Windows update utility. Windows always have the default drivers for the devices used a lot, such as the keyboard, mouse, and other input and output devices.
However, when Windows does not have a driver for the new device, it installs via the Windows update utility. Therefore, the installed driver can be incompatible, which is why the error is displayed. If that’s the case, downloading a driver from the motherboard’s manufacturer’s website will fix your issue.
To download a driver from the manufacturer’s site, you need to know the model number of your motherboard or laptop. For that, follow the steps.
- Press the Windows + R keys at the same time to open the Run program.
- Enter msinfo32 in the input box and click OK to open the System Information Window.

Opening System Information Window using Run Window - Note down the system model, then go to the manufacturer’s website.
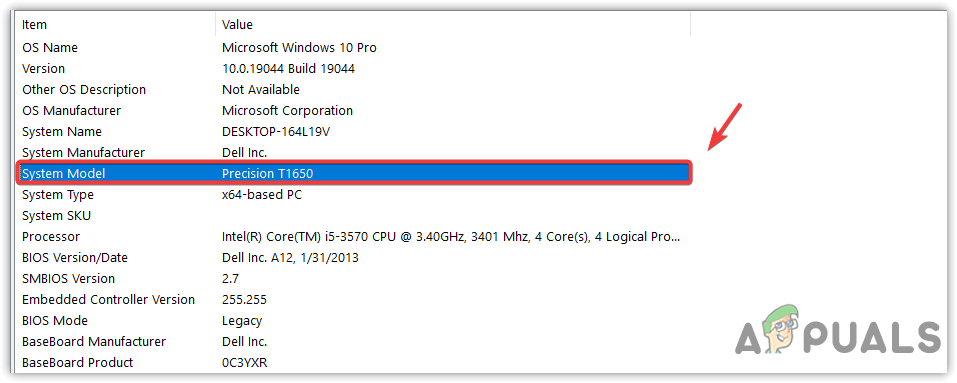
Copying system model number - Once there, search your motherboard model number to download the compatible drivers.
- Click the Download button to download the driver setup.
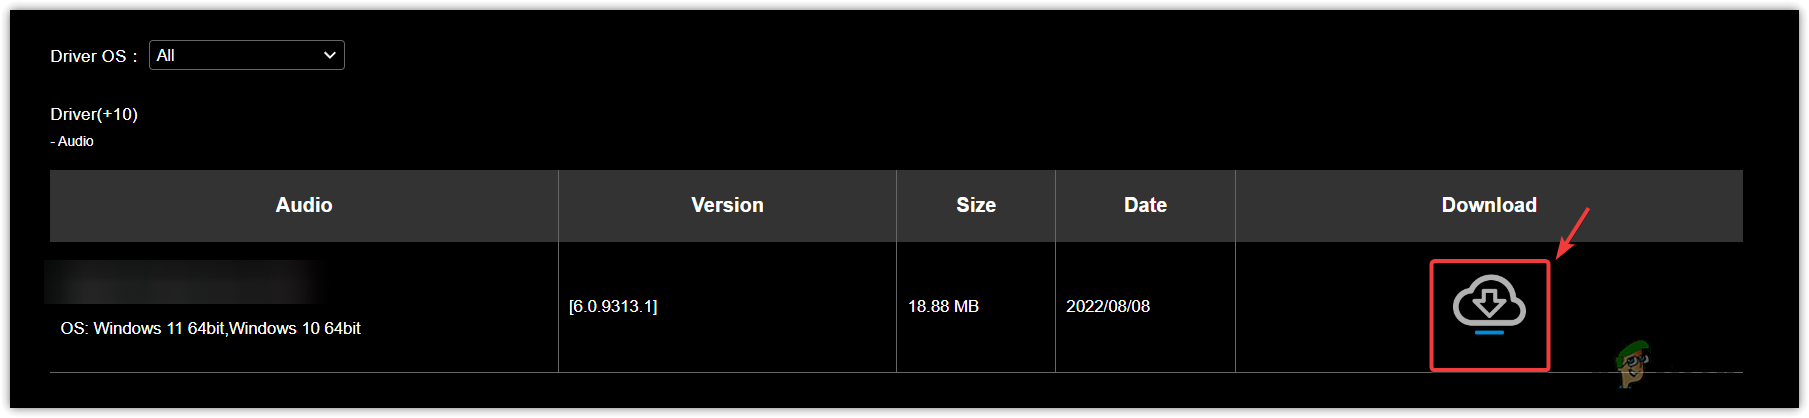
Downloading a driver from the manufacturer’s site - Once done, open the setup and follow the on-screen instructions to install the driver.
4. Reinstall or Update Driver
In the device manager, the last two solutions you can do is either update the driver or reinstall the driver. In most cases, users receive the message while updating the drivers, saying The best drivers for your device are already installed. If you receive this message, then proceed with reinstalling the driver.
If you are receiving this error on any device that has its own driver, which can be downloaded from the manufacturer’s website. In this case, you need to download the driver from the device manufacturer’s website before uninstalling it.
If you cannot download the driver as the error is showing on the network adapter, then use an ethernet connection or a second device to download the driver and then transfer it to your computer via USB or data cable. This method will only apply to devices that cannot use the Windows default driver. You can go to their manufacturer’s websites to confirm that.
Once you have successfully downloaded the driver, or if you don’t need to download it because you know that Windows will install it for you, follow the steps to start reinstalling and updating the causing driver through the device manager.
- Right-click the Start Menu and select Device Manager from the context menu to open it.

Navigating to the device manager - Once you have opened the device manager, find and right-click the driver causing the error.
- Select Update driver and then click Search automatically for drivers in the next Window.
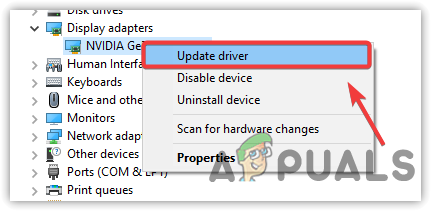
Updating Driver - If Windows has determined the latest driver, then close that Window.
- Again right-click the driver and select Uninstall device.
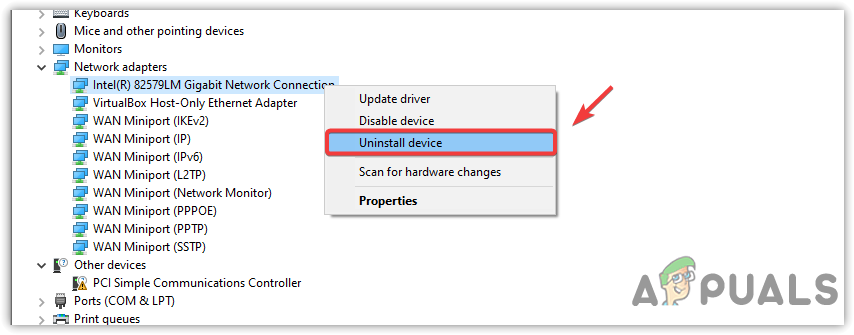
Uninstalling a corrupted driver - If the driver has its software, then tick Delete the driver software for this device and click Uninstall to remove the driver with the software.
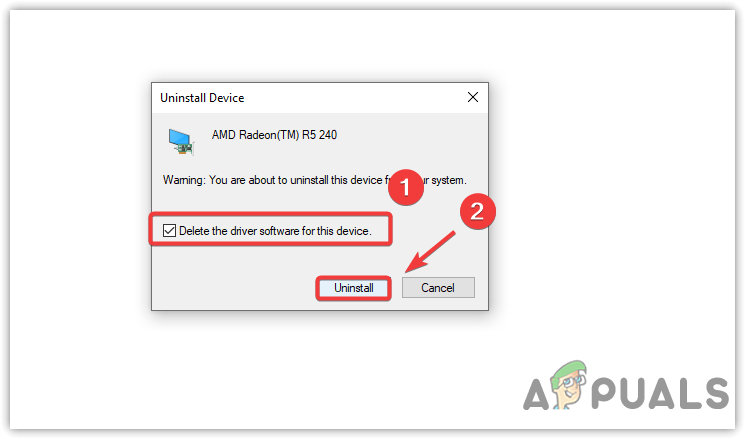
Uninstalling a corrupted driver - Once you have removed the driver, either download the driver from the device manufacturer’s website and install it or restart your computer to install a default Windows driver.
- Once done, now your issue should be fixed. If not, then continue with the remaining methods.
5. Run the Hardware and Component Troubleshooter
Another way to fix this error is to run the troubleshooter. Windows provides troubleshooters for the devices connected to the computer. Since every hardware device functions differently, troubleshooters also work differently at the backend.
For instance, if you are encountering this error on the audio driver, the troubleshooter will check if the device driver is enabled or not, then it will look for services as they might be stopped working, then some settings and the registry files. Now, this is the component troubleshooter. There is another troubleshooter called Hardware and Devices troubleshooter, an advanced version of an individual component troubleshooter that fixes the corrupt or misconfigured settings for all connected hardware devices. You can try running both to see if this helps or not.
First, we will run a hardware and device troubleshooter then we will go with a component troubleshooter.
- To run the hardware and device troubleshooter, press the Windows key and type Windows PowerShell.
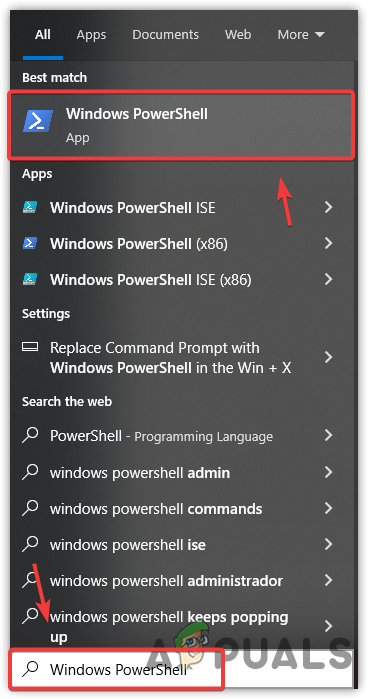
Opening Windows PowerShell - Open the Windows PowerShell and enter the following command, then press Enter.
msdt.exe -id DeviceDiagnostic

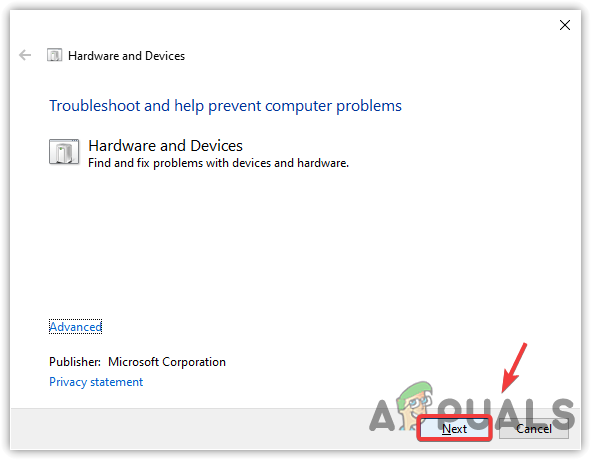
Running hardware troubleshooter command. - Click Next to start the hardware and device troubleshooting.
Clicking Next to proceed - In the next Window, you need to select the device showing you this error message.
- Once you have selected the device, click Next.
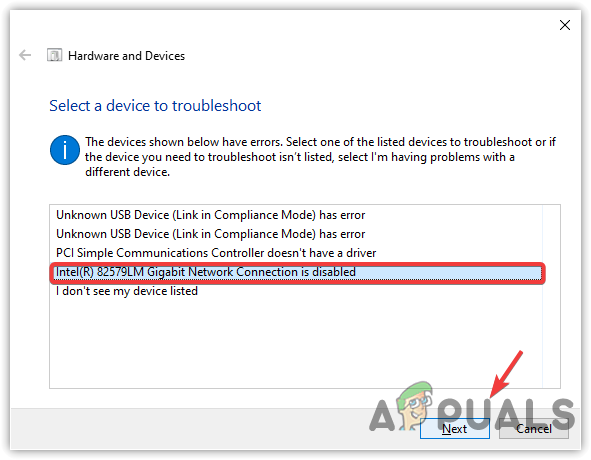
Clicking Next to fix problems on the driver - If the problem is detected, the troubleshooter will let you fix the problem. You just need to follow the on-screen instructions.
- If that does not work, try to run the component troubleshooter. For that, press the Windows key and type troubleshooting settings.
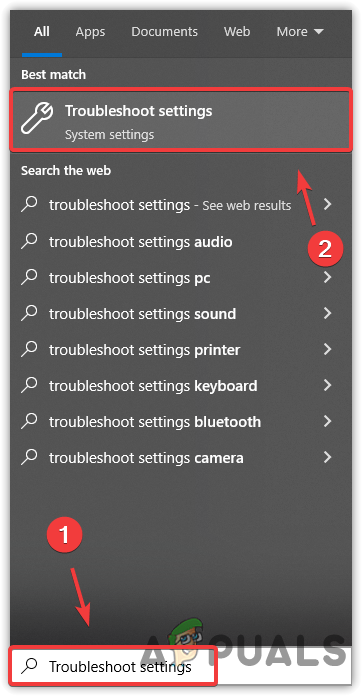
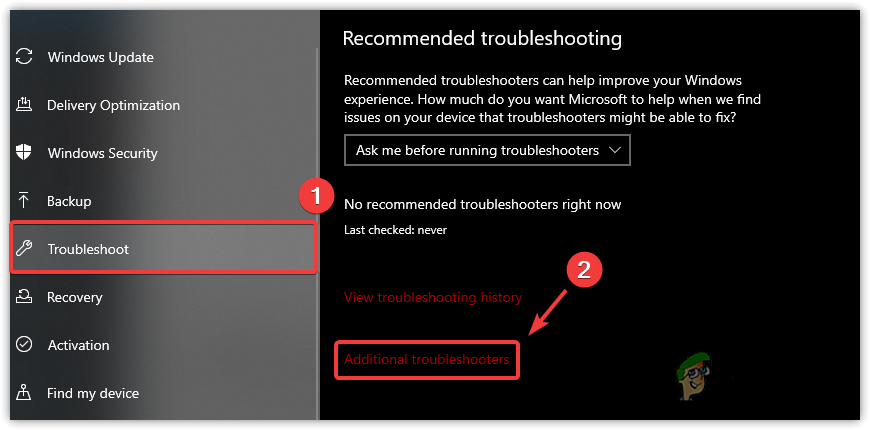
Navigating to troubleshooting settings - Open the troubleshooting settings, and click Additional troubleshooters.
Navigating to additional troubleshooters - Now here, select the troubleshooter in which you are getting the error. For example, Network Adapter.
- Click Run the troubleshooter and follow the instructions to fix the problems.
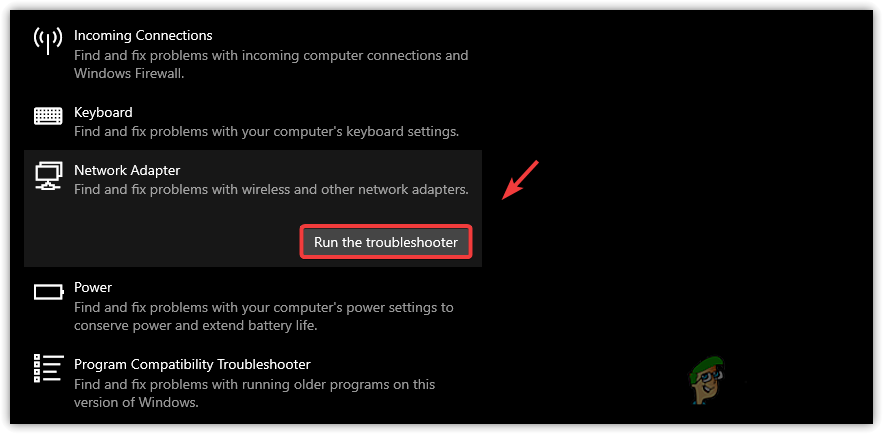
Running Network Adapter troubleshooter
6. Restart Windows Audio Service (For High Definition Audio Device)
If you are encountering this error on High Definition Audio Device, restarting the Windows audio service might help fix this error. Windows audio service manages the audio for Windows-based programs, meaning that if that service is not running, then the audio device and other services that depend on Windows audio service will not work. So give it a try and check if the Windows audio service is working properly with the help of the following steps.
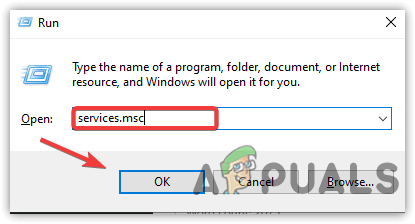
- To restart the Windows audio service, press the Windows + R keys together to open the Run dialogue box.
- Now enter services.msc command and hit Enter to open the Services Window.
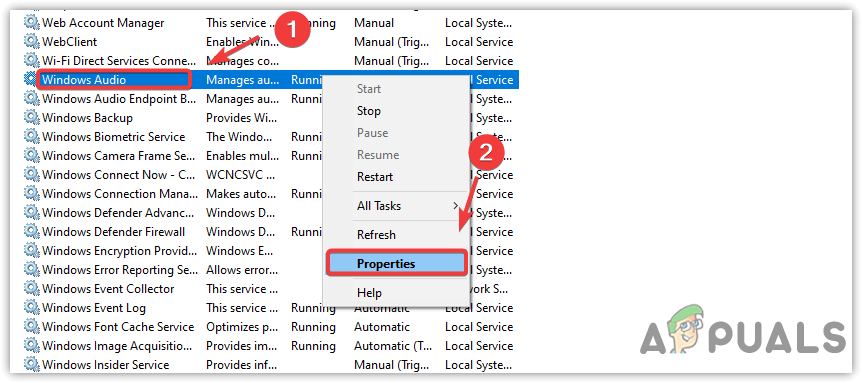
Opening Services Window - Find and right-click the Windows Audio.
- Select Properties from the given options.
Opening Windows Audio Properties - Now change the Startup type to Automatic.
- Click Apply and then click the Start button if the service is not running.
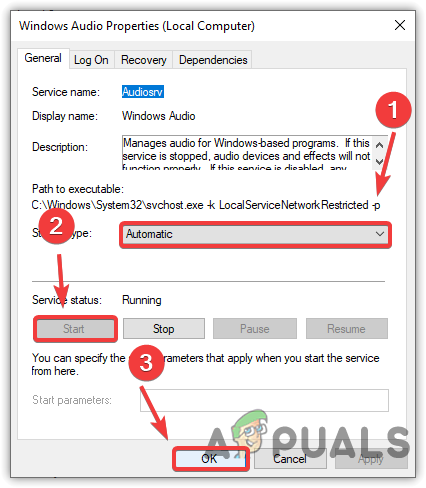
Restarting Windows Audio Service - Once done, close the Window and check if the error persists.
7. Plug your device into another port
If you are getting this error on an external device or any device that can connect via the USB port, try to change the USB port you used to plug the device. It is possible that the USB port cannot receive power from the motherboard for any reason. Hence, ensure that the USB port is working properly by plugging the device into another port. If the device starts working, the USB port is damaged.
8. Use Registry Editor to remove corrupted entries
UpperFilters and LowerFilters are the registry keys that help programs to communicate with device drivers. UpperFilters and LowerFilters are known to be causing This Device Cannot Start (Code 10) error. Every hardware device connected to the computer has a Global Unique Identification Number (GUID). In the Registry Editor, the UpperFilters and LowerFilters can be found under the Class Guid key.
You can skip this method if you cannot find the UpperFilters and LowerFilters.
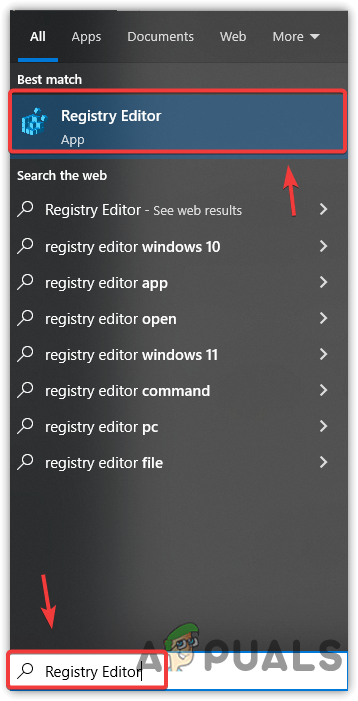
- Click Start Menu and type Registry Editor.
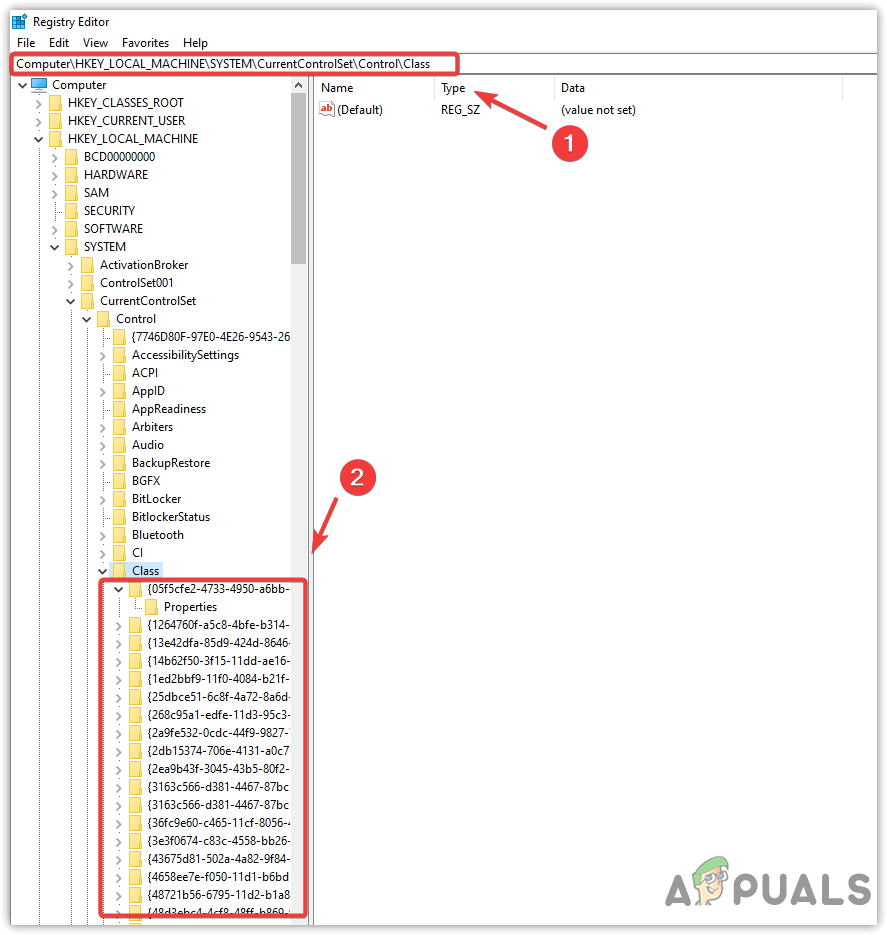
Opening Registry Editor - Open the registry editor and go to the following path.
Computer\HKEY_LOCAL_MACHINE\SYSTEM\CurrentControlSet\Control\Class
- Now you will see the sub-entries of the Class entry.
Navigating to the Registry location - You need to find one according to the Global Unique Identification Number (GUID) of your causing device driver. For that, follow the steps.
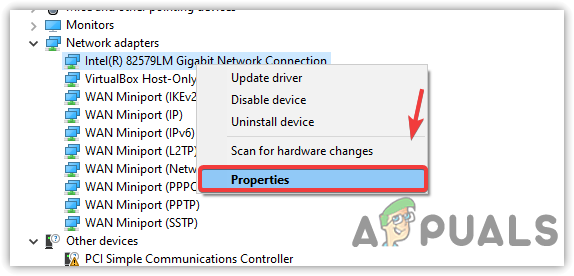
- Right-click the Start Menu and select Device Manager.
Navigating to the device manager - Then, right-click the causing driver and select Properties.
Opening device driver properties - Now go to the Details tab from the top.
- Select Class Guid from the Property Menu.
- Right-click the Class Guid and select Copy.
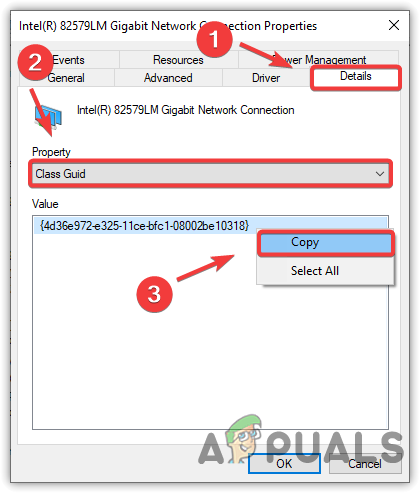
Copying Class Guid of the device driver - Once you have copied it, open the Registry Editor.
- Type \ and paste the copied Class Guid in the address bar.
- Press Enter to navigate into the registry entry.

Pasting Class Guid in the address bar - In the results on the right pane, find UpperFilters and LowerFilters and right-click on them one by one and select Delete.
Note: If you cannot find either of them, skip this method, but before that, make sure you are finding them on the right Class Guid. If you are sure, then move on to the next method.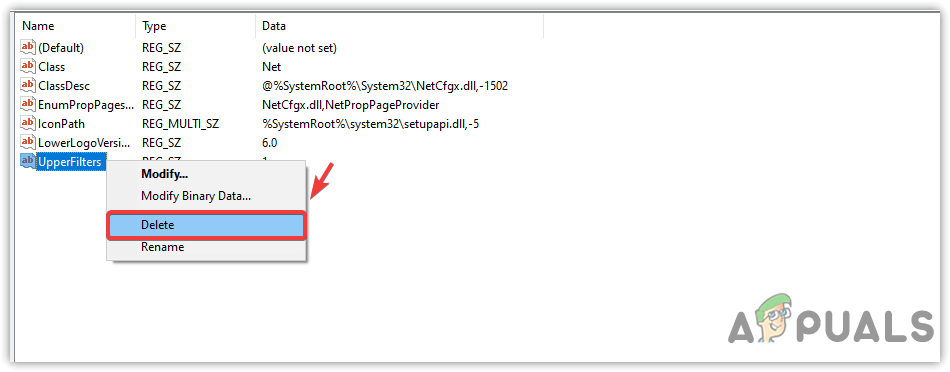
Deleting Registry string key - Once you have deleted the keys, close the Registry Editor and restart your computer to save the changes.
- Then, check if the error persists.
9. Use a System Restore utility
Since a corrupted or incompatible driver can cause the error, you can use a system restore utility to restore the previous state of Windows when the Windows was working fine. However, the utility needs a restore point that should be created when everything works fine.
System Restore utility takes a snapshot of Windows files and drivers along with registry files and then saves it to a restore point. So the user will be able to use it if something bad happens due to drivers, Windows updates, and third-party programs. Hence, if you have a restore point, then follow the steps. Otherwise, skip this method and move on to the last one.
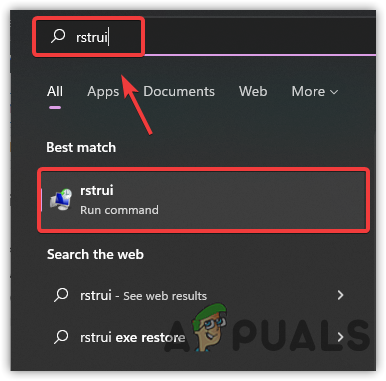
- To use a System Restore utility, click Start Menu and type rstrui, which is a system restore command.
Navigating to a System Restore settings with a command - Open the system restore settings and click Next to continue.
- Select the restore point and click Next.
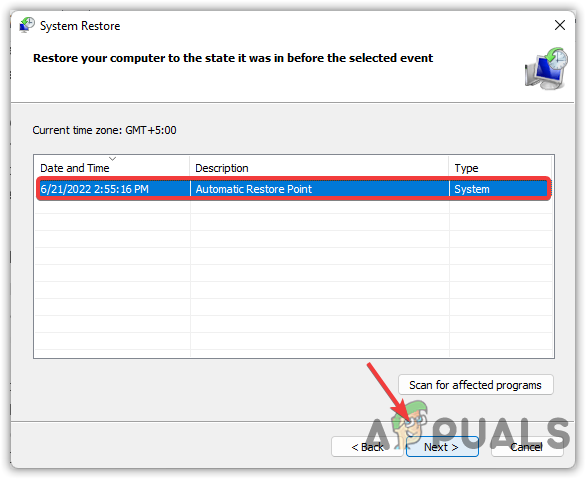
Selecting a Restore Point - In the end, click Finish to start the restore process. This will take some time, and restart your computer when Windows finishes the restore process.

Clicking Finish to restore Windows
10. Check for hardware problems
If none of the methods helped you to fix this error, the device might have a hardware problem preventing it from starting. For that reason, it shows the error code 10. However, there is no need to worry as you can easily check it by connecting the hardware to another computer. If you need a technician, we recommend you take your computer or laptop to a repair shop for a complete diagnosis.


