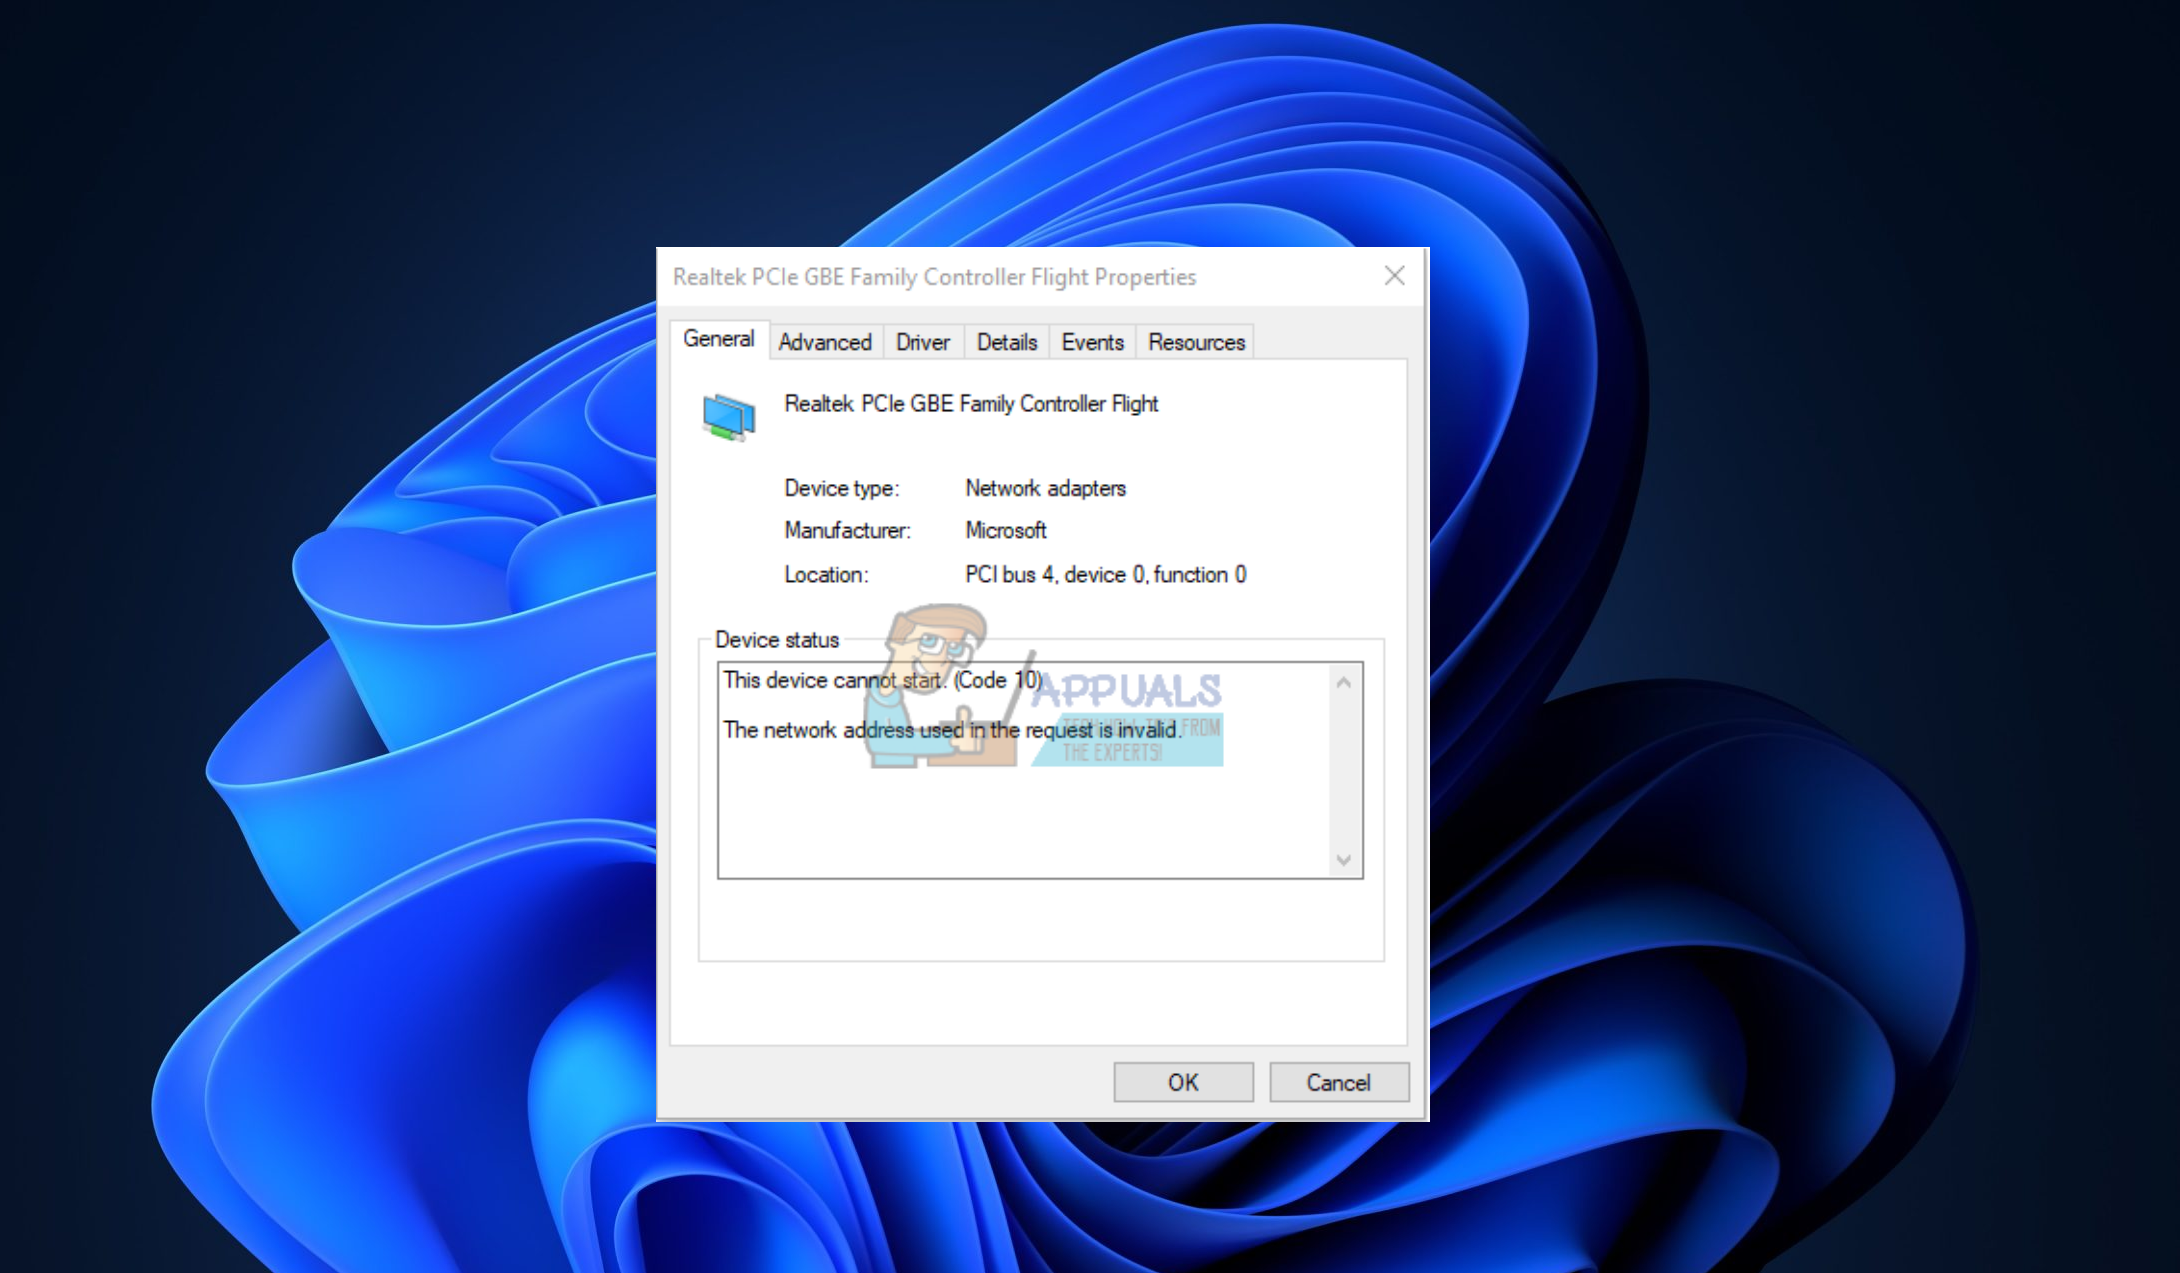
How to Fix Network Adapter ‘This device cannot start. (code 10)’?
The ‘This device cannot start. (code 10)’ message usually occurs when there’s a problem with the device’s connection to the computer or when the driver is not compatible or is malfunctioning. Network adapters are often affected by this error; in some cases, Windows may fail to recognize them, or they may cease to operate correctly due to driver issues.
1. Disable or Enable the Device
To resolve the error, try disabling and then re-enabling the malfunctioning driver in Device Manager. This quick reset can often restore functionality if a device appears enabled in Windows but isn’t working properly.
- Right-click the Start Menu and select Device Manager.

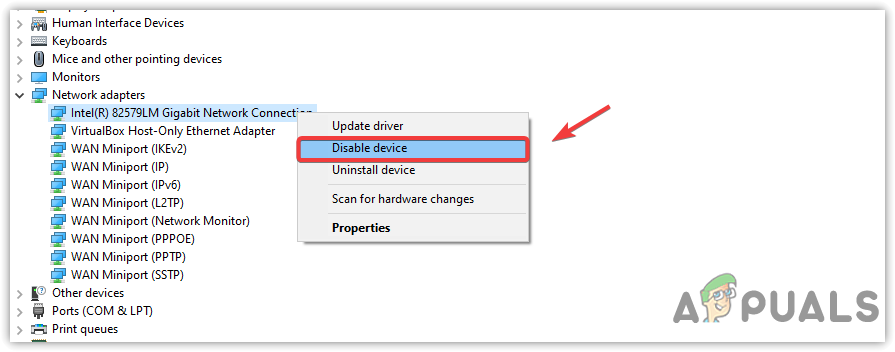
Heading to the Device Manager - In Device Manager, right-click the driver with the error and select Disable device.
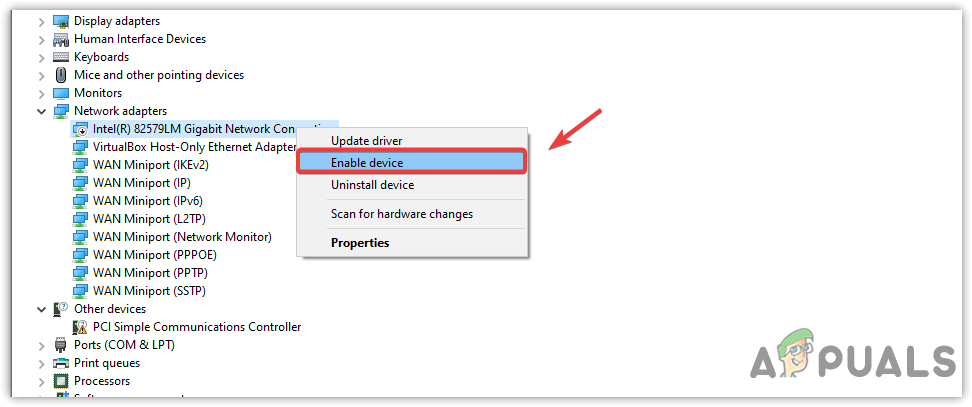
Disabling Network Adapter - After disabling, right-click the driver again and choose Enable device.
Enabling Network Adapter - Check if the error code 10 is resolved.
2. Power Cycle Your Machine
Power cycling involves a complete shutdown and restart of the computer to reset its state. When hardware like a network adapter stops working suddenly, this can clear temporary software glitches or malfunctions that might be causing the device to be unresponsive. Essentially, it refreshes the system’s memory and potentially resolves any driver or hardware issues interfering with normal operation.
2.1 Desktop
- Shut down your computer and disconnect the power cable along with other peripherals.
- Hold the power button for 15 to 30 seconds.
- Reconnect the power cables and turn on your computer, then check if the device operates correctly.
2.2 Laptop
- Turn off your laptop and, if possible, remove the battery.
- Press and hold the power button for 15 to 30 seconds.
- Power on the laptop and check if the error has been resolved.
3. Reinstall the Driver
Driver-related issues often come from corruption or incompatibility. Removing the problematic driver and rebooting the computer prompts Windows to automatically reinstall a fresh version of the driver, which can often resolve these issues. This process refreshes the driver software, fixing any errors and restoring device functionality.
- Press the Win + R keys to open the Run dialogue.
- Type devmgmt.msc and press Enter to open Device Manager.
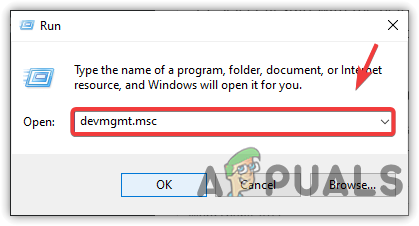
Navigating to Device Manager - Right-click on the malfunctioning driver and choose Uninstall device.
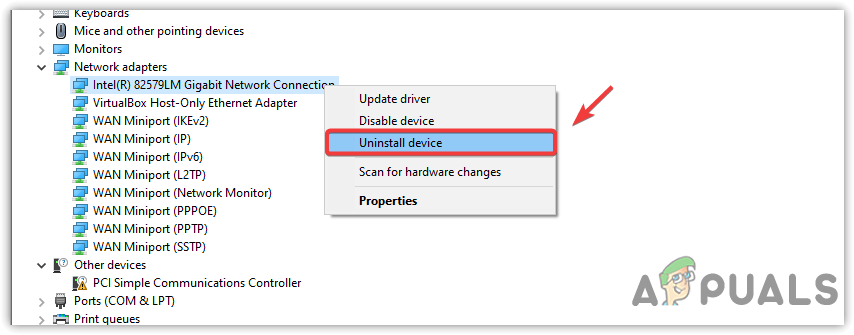
Uninstalling Network Driver - Confirm the uninstallation by clicking Uninstall.
- Restart your computer. Windows should reinstall the driver upon boot, which may solve the problem. If the issue remains, consider trying other methods.
4. Download the Driver from the Manufacturer
If the error persists, obtain and install the driver from the manufacturer’s website, as this ensures compatibility. For a network adapter issue, you’ll need to use a different computer to download the driver and transfer it to your affected computer using a USB drive.
Identify your system model number to locate the correct drivers:
- Press Win + R, type msinfo32, and hit Enter to open the System Information window.
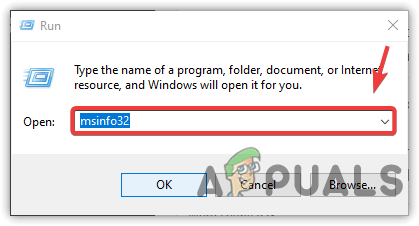
Opening System Information Window - Locate and copy your System Model information.
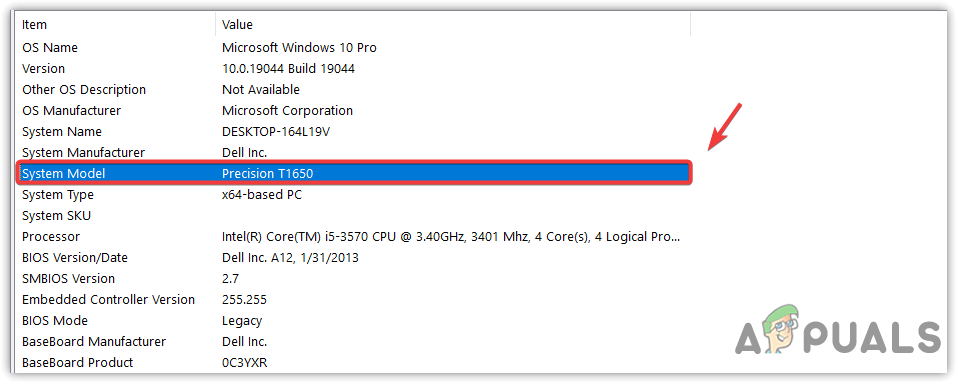
Copying System Model - Visit the official manufacturer’s website and search for drivers using the model number you copied.
- Download the appropriate driver.
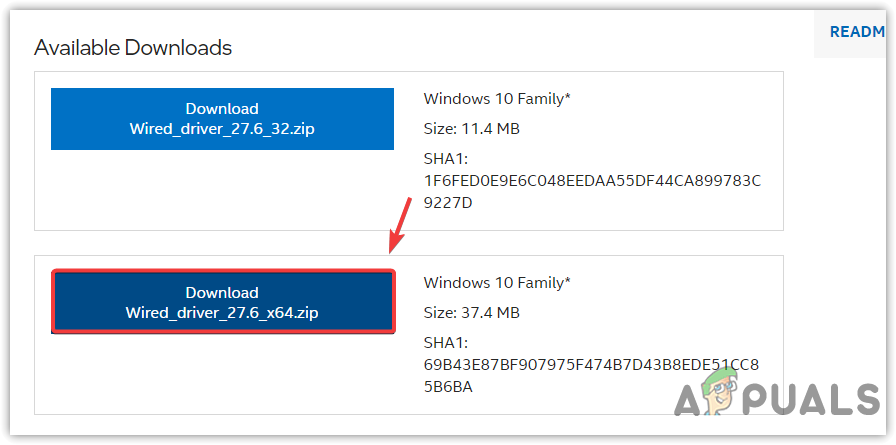
Downloading Network Driver - Return to Device Manager, uninstall the current driver, and then install the newly downloaded driver.
- Verify if the error has been corrected.
5. Run Hardware and Component Troubleshooter
Windows includes built-in troubleshooters designed to automatically identify and fix various technical issues. The specific troubleshooter you run will depend on the nature of the problem you’re facing.
- Open the Start Menu and type in Troubleshooting settings.
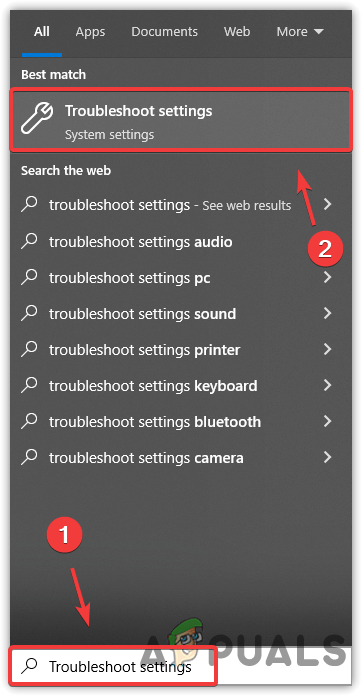
Opening Troubleshooting Settings - Open the Troubleshooting settings and click on Additional troubleshooters.
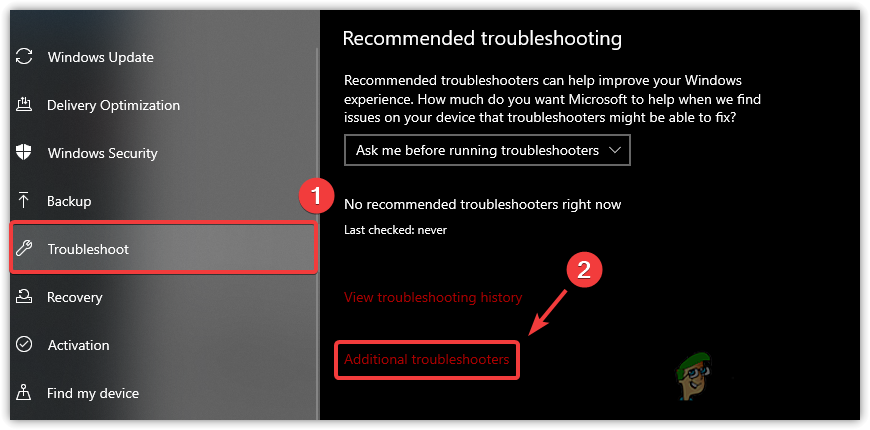
Navigating to Additional Troubleshooters - Choose the relevant troubleshooter and select Run the troubleshooter.
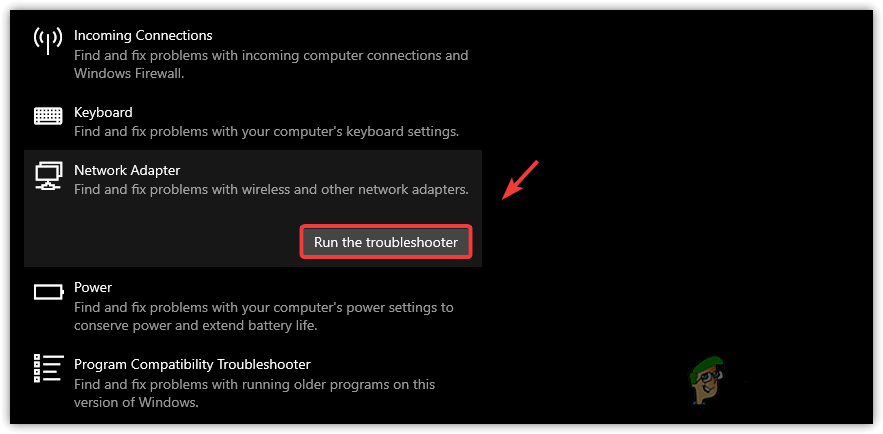
Running Network Adapter Troubleshooter - Follow the on-screen instructions to address the specific issue you’re facing.
- If the problem isn’t resolved, use the hardware troubleshooter by pressing Win + R and typing:
msdt.exe -id DeviceDiagnostic
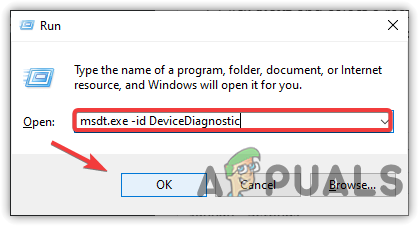
Running Hardware Troubleshooter - After detecting issues, the troubleshooter will provide solutions.
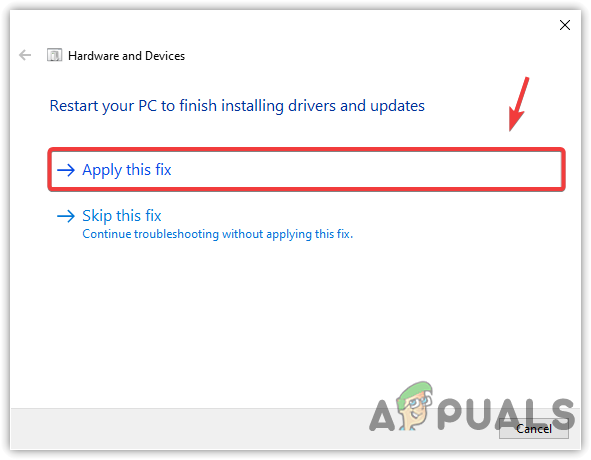
Applying a Fix to the Network Adapter
6. Use a System Restore
If none of the previously mentioned methods work, consider restoring your Windows using a system restore point that was created when the devices were functioning correctly. If no restore point is available, the next option would be resetting Windows. However, make sure that the device is correctly connected and free of any hardware issues before proceeding.
- Click the Start Menu and type in Rstrui.
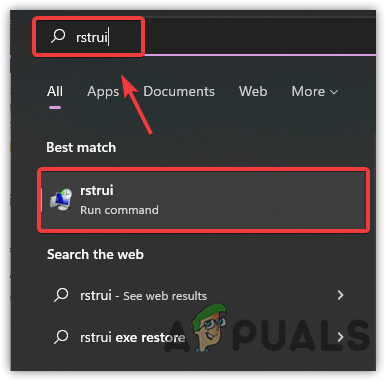
Opening System Restore with a Command - Open the System Restore settings by pressing Enter.
- Select Next and choose a restore point.
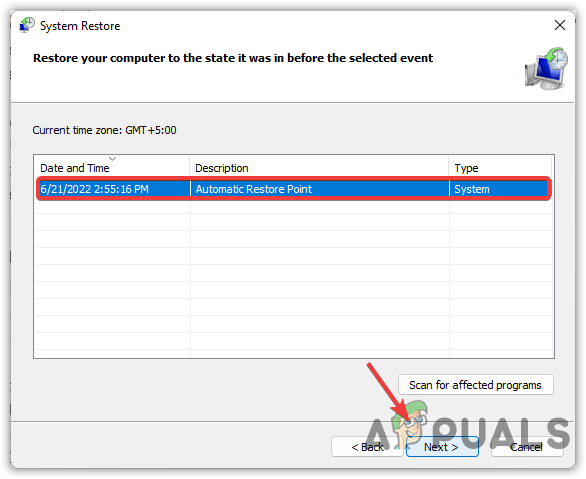
Selecting a Restore Point - Click Next, followed by Finish to start the restore process.
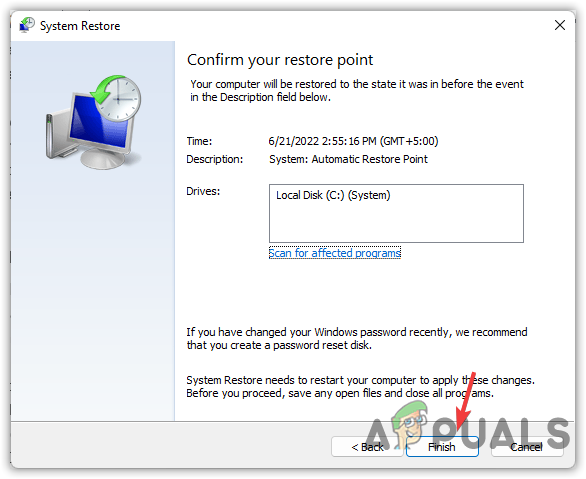
Clicking Finish Note: System restoration can take some time as it reverts Windows to a prior state and may require a computer restart.