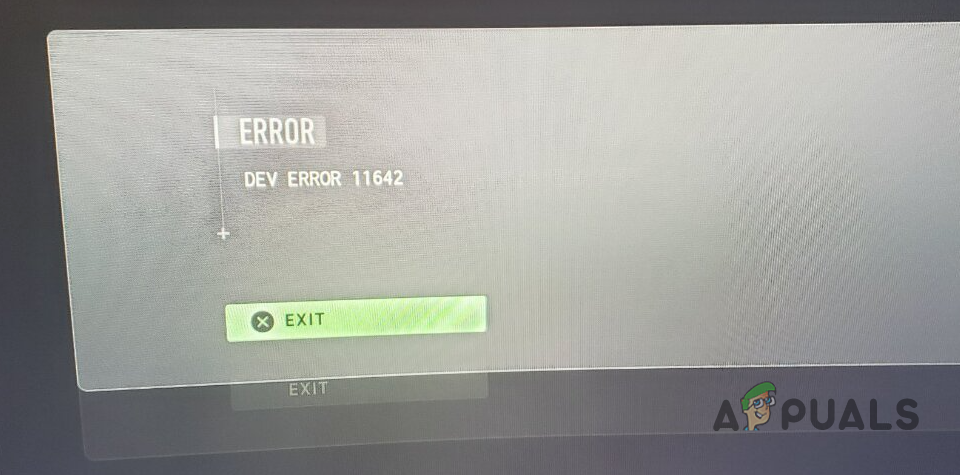
How to Fix ‘DEV ERROR 11642’ in Call of Duty MW2
The DEV error 11642 mostly occurs when you are trying to play in a custom lobby or practicing with bots. In some scenarios, the DEV error 292 might be encountered instead of 11642. This can often be caused by your in-game FPS settings or due to an inconsistency in your internet connection.
When trying to start a private match, you can also come across the DEV error 401. These error messages are correlated and can often be resolved via the exact solutions. We have compiled a list of different methods you can implement to eliminate such issues. Let us get started.
1. Change In-Game FPS
You can resolve the error code by changing your FPS settings from unlimited to a custom amount if this applies to you. Frames above a specific limit do not matter; the game simply takes advantage of your graphics card.
We have also found that the issue can arise if your FPS is set to a custom amount on some systems. In such a scenario, you will have to change your FPS limit to unlimited, and the problem should disappear. Follow the instructions below to do this:
- First, open Call of Duty MW2 on your computer.
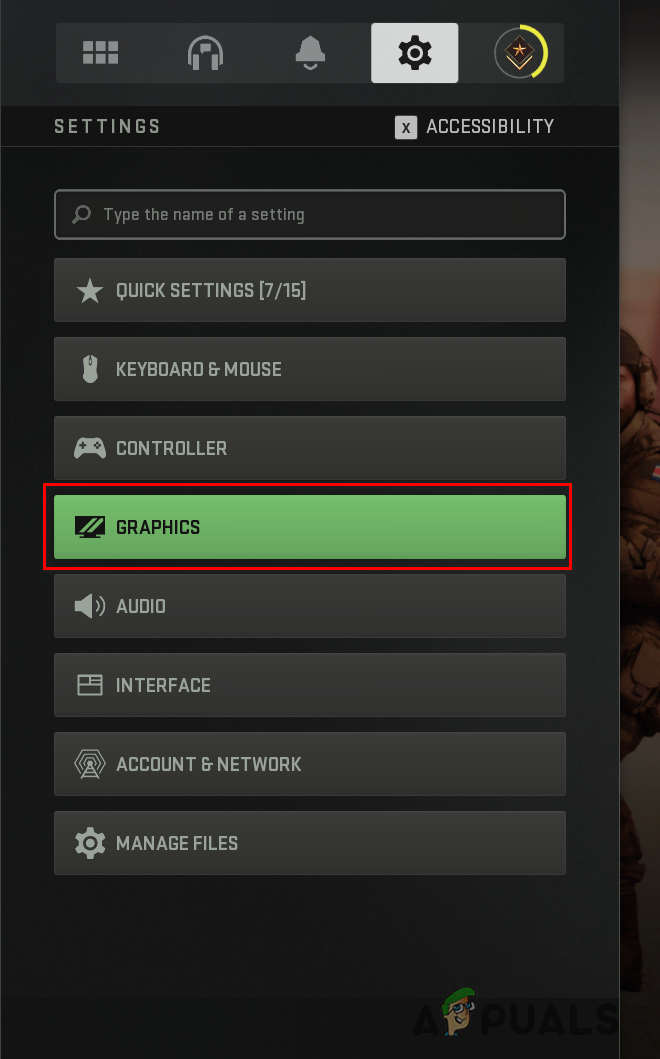
- Open the Graphics settings by going to Settings > Graphics.
Navigating to Graphics Settings - Locate the Custom Frame Rate Limit in the Display Settings menu.
- Change the Custom Frame Rate limit from Unlimited to Custom or vice versa using the drop-down menu next to it.
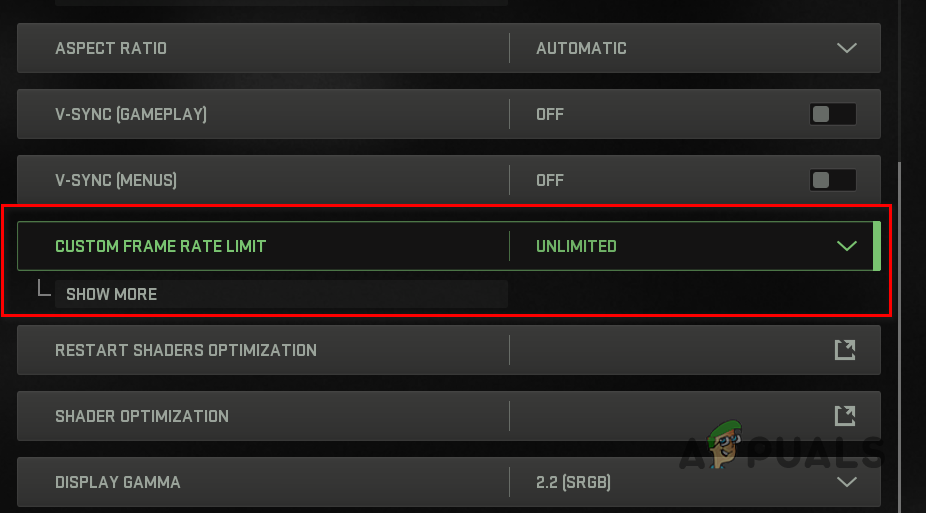
Changing Custom Frame Rate Limit - With that done, click the Apply Settings option and check if the error code still occurs.
2. Change Display Mode
In some scenarios, the error 11642 in Modern Warfare 2 can also occur due to the display mode you are using. This can happen when you use Windowed or Fullscreen Exclusive as your display mode.
You can resolve the problem by changing your Display Mode to Fullscreen Borderless if this scenario applies to you. This happens to be a bug with the game, and you will have to wait for it to be patched before changing your Display Mode again.
Fullscreen Borderless has become a standard for modern new games, and the difference in performance is not really noticeable either. On top of that, borderless allows you to switch to a different window without having to tab out, meaning you get the best of both worlds. Follow the instructions below to change your display mode:
- Open Call of Duty Modern Warfare 2 on your computer.
- Afterward, open the Graphics settings menu by navigating to Settings > Graphics.
Navigating to Graphics Settings - Change your Display Mode to Fullscreen Borderless via the drop-down menu once you are in Graphics settings.
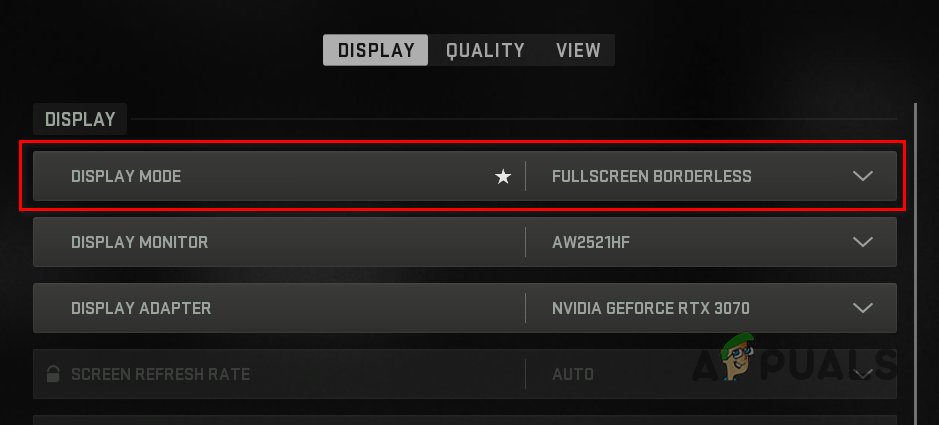
Changing Display Mode to Fullscreen Borderless - With that done, try playing a custom match to see if the problem still occurs.
3. Turn off Third-Party VPN
If you are using a third-party VPN, that might also trigger the error code 11642 in some scenarios. This can happen when your game is not able to send a request to the servers correctly because the VPN inhibits the internet connection.
In such a scenario, you will have to remove or turn off the third-party VPN to resolve the issue. If you have added a VPN connection to your Windows internet settings, follow the instructions below to remove it:
- First, open the Settings app by pressing the Win + I keys on your keyboards.
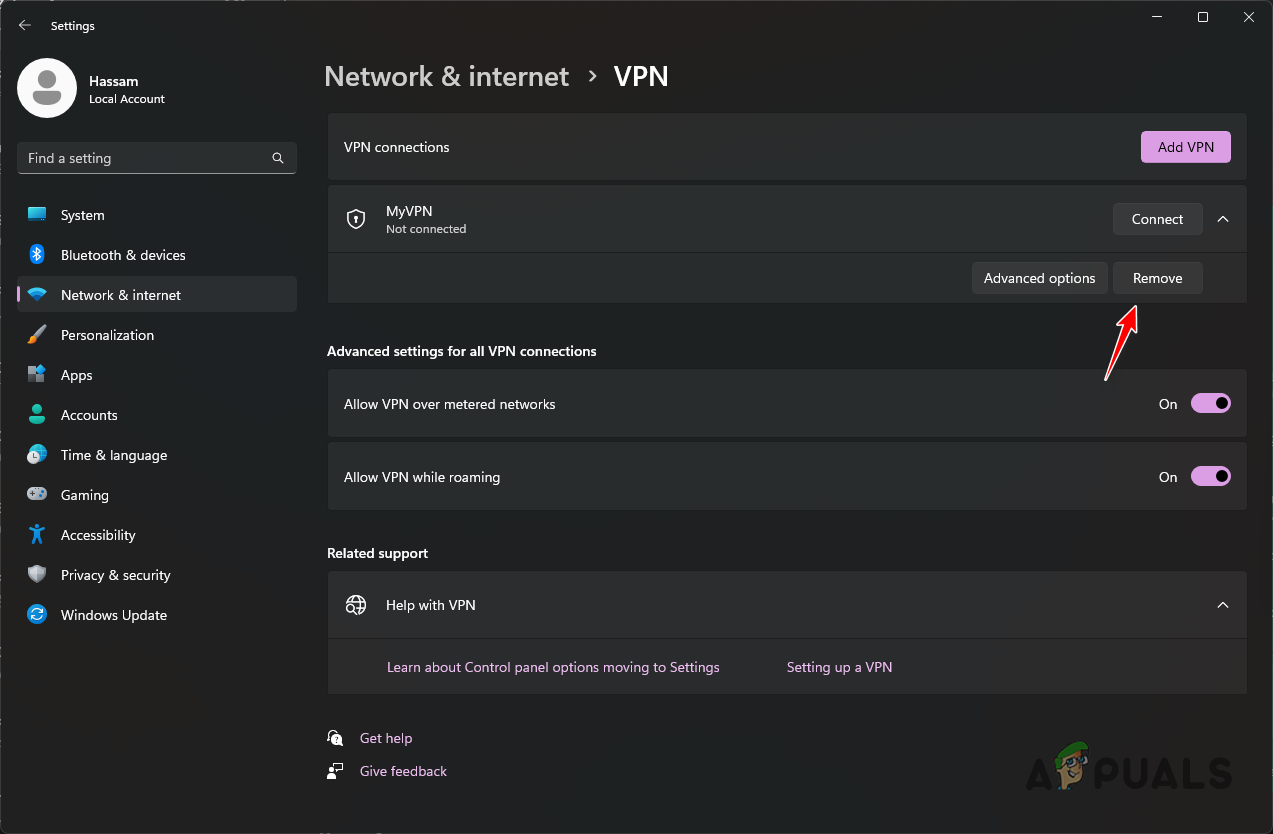
- Navigate to VPN settings by going to Network & Internet > VPN.

Navigating to VPN Settings - Reveal additional VPN connection options by clicking the down arrow icon next to your VPN connection.
- Finally, remove the VPN by clicking the Remove button that appears.
Removing VPN Connection on Windows - With that done, restart the game to see if the issue persists.
4. Rollback Graphics Drivers
In some scenarios, specific graphics drivers can cause certain issues due to compatibility, which prevents the game from working correctly.
If you have started encountering the issue recently, it might have been due to an automatic update to your graphics drivers. You can resolve the issue by rolling back your graphics drivers in such a scenario.
You will need to uninstall your current graphics drivers and then download an older version of the drivers available to install on your computer. We will use a third-party utility called Display Driver Uninstaller (DDU) to uninstall your graphics drivers, as it leaves no trace of the old drivers. If you have an AMD graphics card, you can use the AMD Clean Uninstall utility to remove your graphics drivers.
Follow the instructions below to do this:
- First, download the Display Driver Uninstaller utility from the official website here.
- Open the downloaded file and extract it to any location.
- Afterward, open the Display Driver Uninstaller.exe file by navigating to the extracted folder.
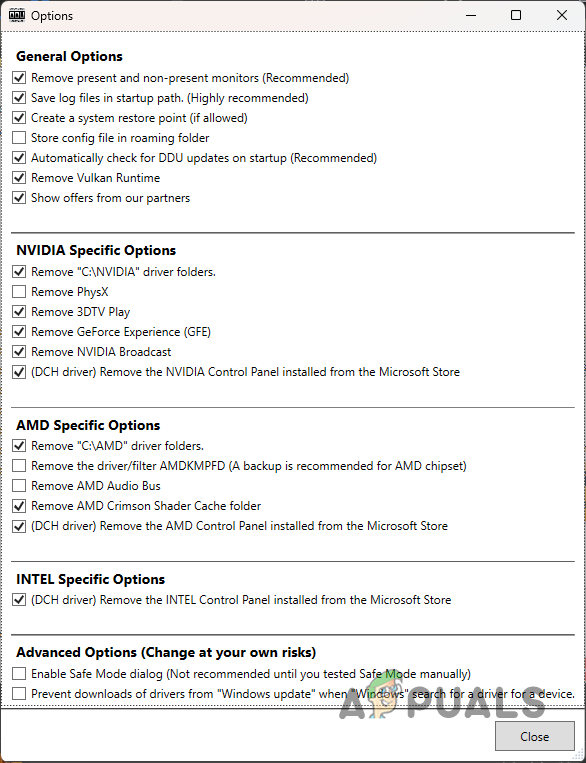
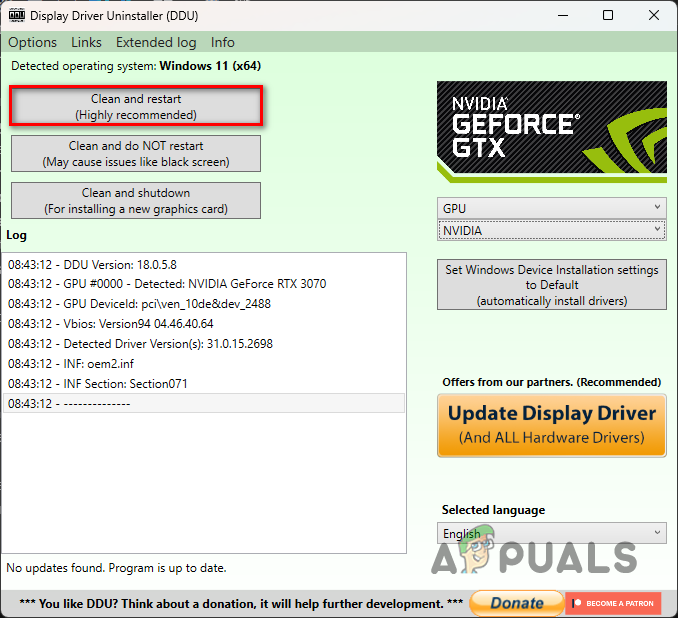
- A General Options window will appear when DDU starts. Click the Close button to proceed.
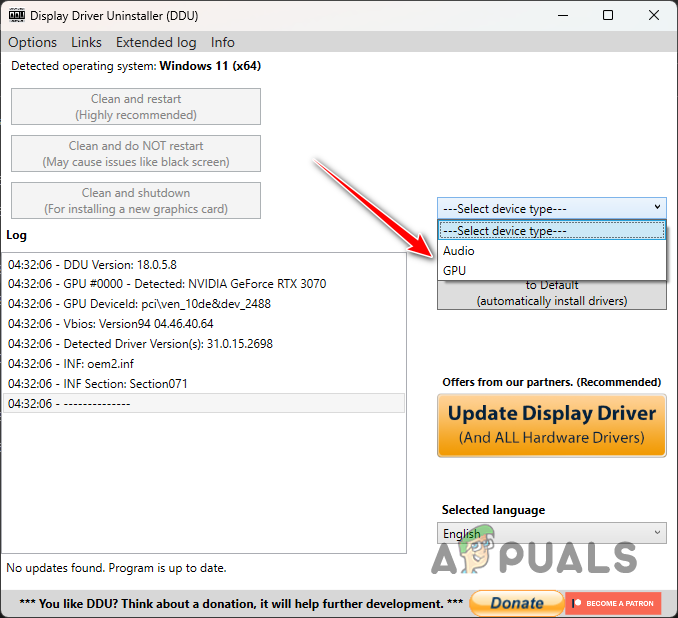
DDU General Options - Choose GPU from the Select device type drop-down menu in the DDU window.
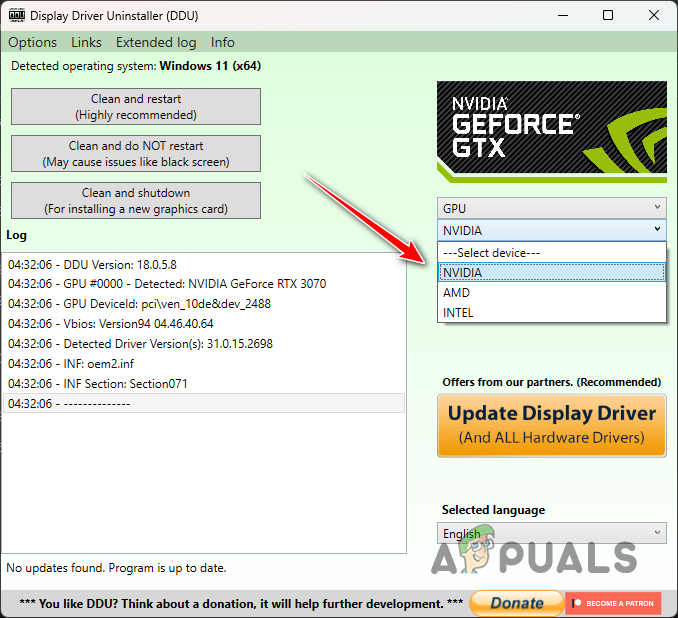
Selecting Device Type - Afterward, choose your graphics card’s manufacturer from the Select device drop-down menu.
Selecting Graphics Card’s Manufacturer - Finally, uninstall your graphics drivers by clicking the Clean and restart button.
Uninstalling Graphics Drivers - After uninstalling your drivers, head to your manufacturer’s website and download an older version of the drivers available for your graphics card.
- Install the drivers on your computer and open the game to see if the issue is still occurring.
5. Repair Game Files
Your game files might be causing the DEV error code on your computer. This can happen when you are either missing specific files or some of the game files are damaged and corrupted.
If this scenario is applicable, you can resolve the issue by verifying the integrity of your game files. Doing so will download and replace the corrupted or missing files on your computer. This can be done pretty quickly on both Steam and Battle.net. Follow the instructions below for your respective client.
For Steam
- Open the Steam client on your computer and navigate to Library.
- Then, open the Properties window by right-clicking Call of Duty Modern Warfare 2 and choosing Properties from the drop-down menu.
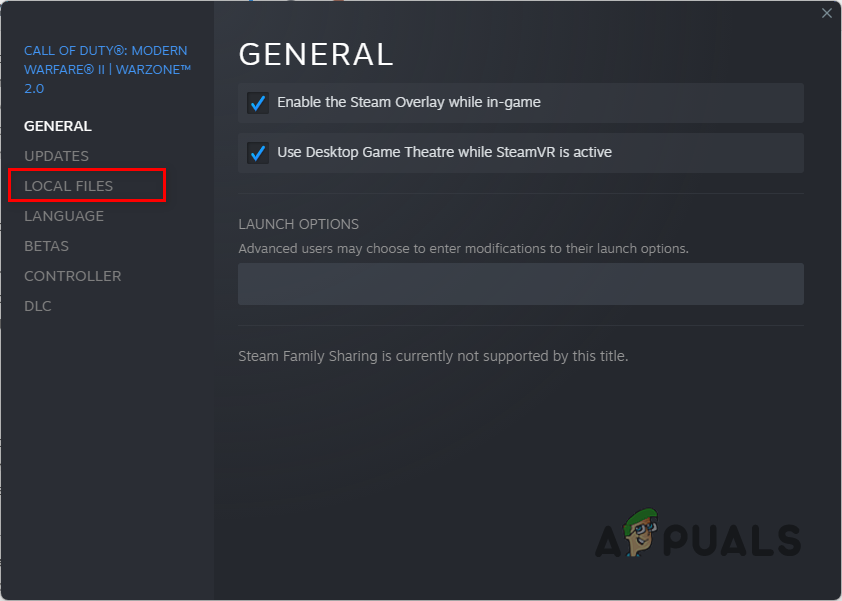
- Switch to the Local Files tab on the Properties window.
Navigating to the Local Files tab - Repair your game files by clicking the Verify integrity of game files option.
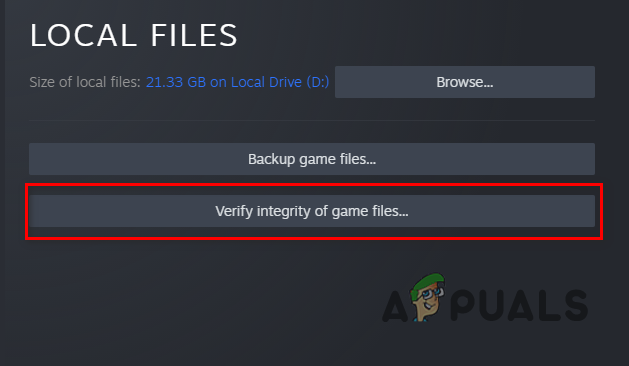
Verifying Integrity of Game Files - Wait for the scan to complete and check if the DEV error code still appears.
For Battle.net
- First, open the Battle.net client on your computer.
- Click on Call of Duty Modern Warfare 2 once Battle.net is open.
- Repair your game files by clicking the gear icon next to the Play button and choosing Scan and Repair from the menu that appears.
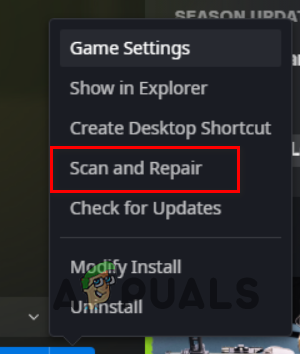
Repairing Call of Duty Modern Warfare 2 Game Files - Wait for the scan to complete and see if the error is still occurring.
6. Reinstall Call of Duty Modern Warfare 2
Finally, if none of the above methods has resolved the problem for you, it is very likely the issue is being caused by your game files which cannot be fixed by repairing the game files.
If this scenario is applicable, your only option is to uninstall the game from your computer and then reinstall it. This will download a fresh copy of the updated game files from the servers and should resolve the issue for you. To uninstall the game, follow the instructions for your respective client.
For Steam
- First, open the Steam client and navigate to Library.
- Uninstall the game by right-clicking on Call of Duty Modern Warfare 2 and choosing Manage > Uninstall from the drop-down menu.
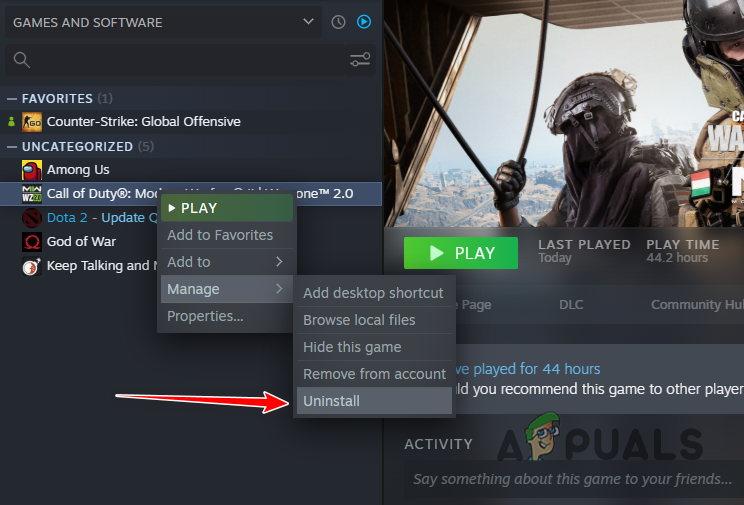
Uninstalling Call of Duty Modern Warfare 2 on Steam - With that done, reinstall the game on your computer.
For Battle.net
- Open the Battle.net client on your computer.
- Click on Call of Duty Modern Warfare 2.
- Uninstall the game by clicking the gear icon next to the Play button and selecting Uninstall from the menu that appears.

Uninstalling Call of Duty Modern Warfare 2 on Battle.net - After uninstalling the game, start downloading it again and wait for it to finish. The problem should no longer exist.


