How to Customize Support Contact Information in Windows Security?
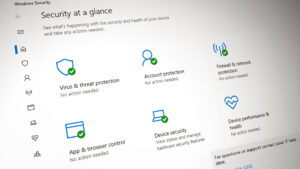
Windows Security is the home to manage all the tools that protect the device and data. By using these tools, users can customize how they want to protect their devices. Users can also add information about their organization in a contact card to Windows Security. The information can include company name, email address, phone number, and a support site. This contact information will also be shown in some notifications area. In this article, we show you methods through which you can add support contact information to the Windows Security app and its notifications.
Method 1: Customizing through the Local Group Policy Editor
The Local Group Policy Editor is an administration tool that is used to control the working of the operating system. The Group Policy has been improved with each version of Windows. It is much easier to find and configure the settings in the Group Policy Editor. However, some of the settings may not work on every Windows version.
The Group Policy Editor is only available for the Windows Pro, Windows Education, and Windows Enterprise editions. If you are using the Windows Home edition, then skip this method and try the Registry Editor method.
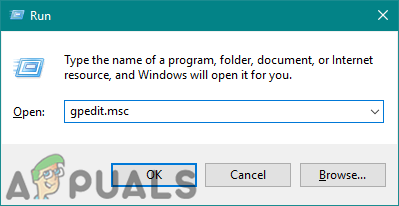
- Hold the Windows key and press R to open a Run dialog box. Type “gpedit.msc” in the box and press the Enter key to open the Local Group Policy Editor.
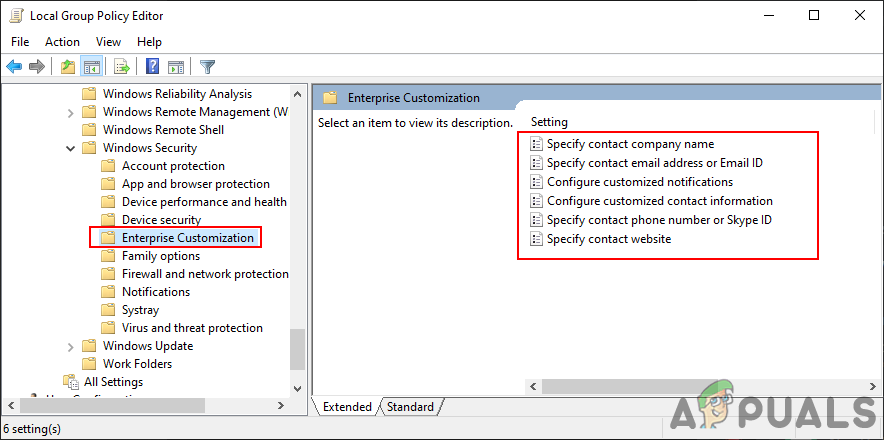
Opening the Group Policy Editor - Now navigate to the following location in the Local Group Policy Editor.
Computer Configuration\Administrative Templates\Windows Components\Windows Security\Enterprise Customization\
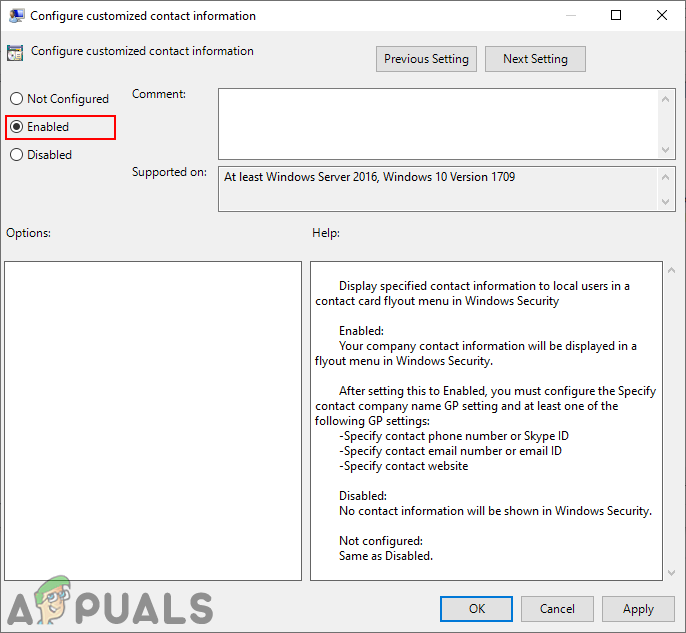
Navigating to the settings - To enable contact information, double-click on the setting named “Configure customized contact information” and that will open in another window. Then change the toggle option from Not Configured to Enabled. Click on the Apply and Ok buttons to save and close the window.
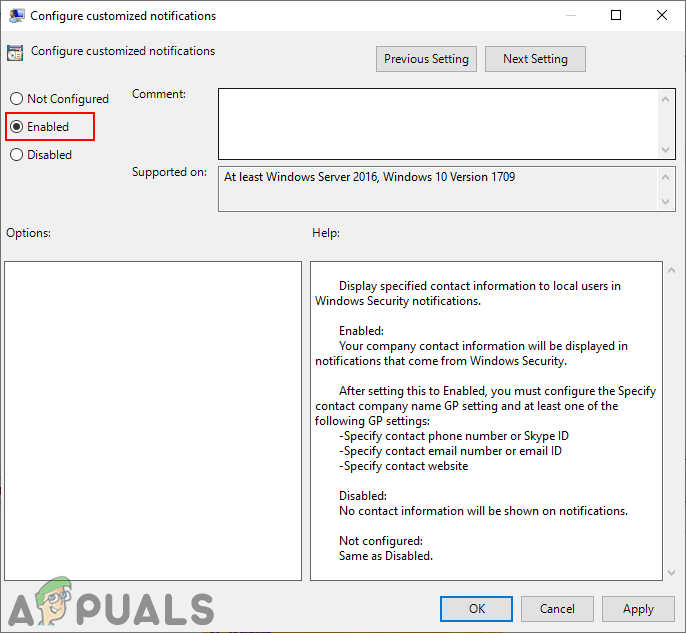
Enabling contact information - Now double-click on the “Configure customized notifications” settings to open it. Then change the toggle option to Enabled. Click on the Apply/Ok button to save changes.
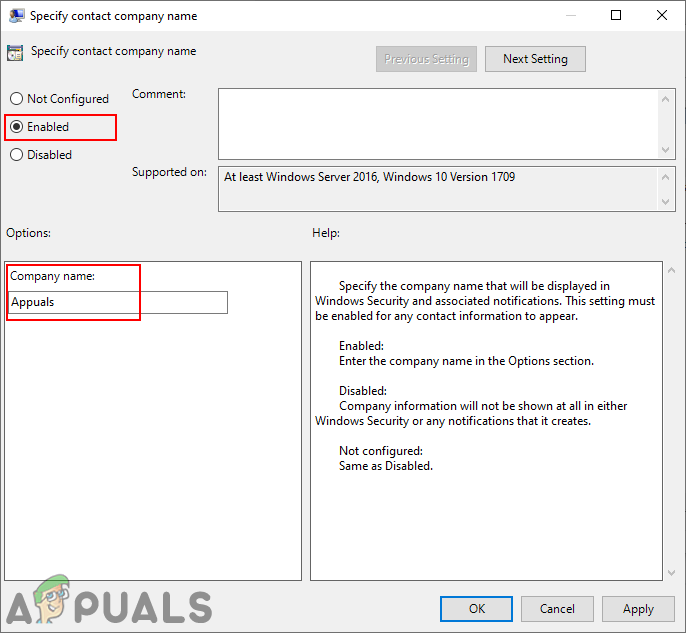
Enabling contact information notification - To add the company name, double-click on the “Specify contact company name” setting. Change the toggle option to Enabled and add the company name. Then click on the Apply/Ok button to save it.
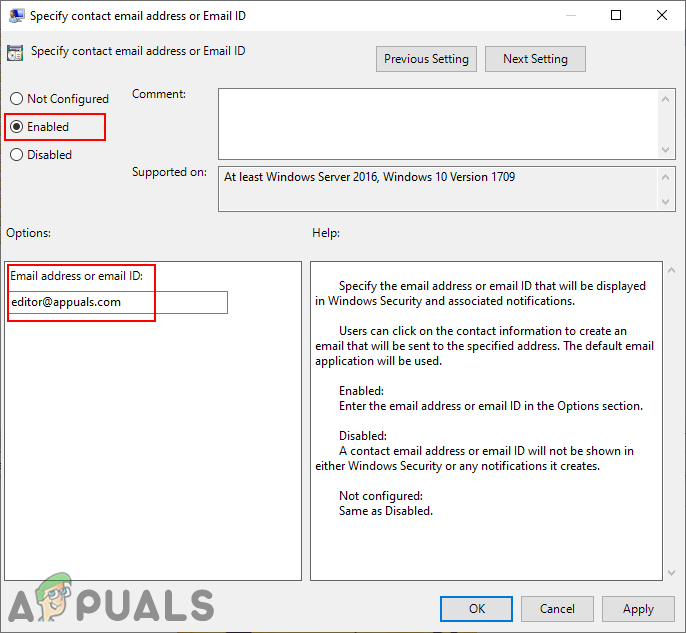
Adding company name - You can add the email address by double-clicking on the “Specify contact email address or Email ID” setting. Change the toggle option to Enabled and add the email address in the box. To save changes, click on the Apply/Ok button.
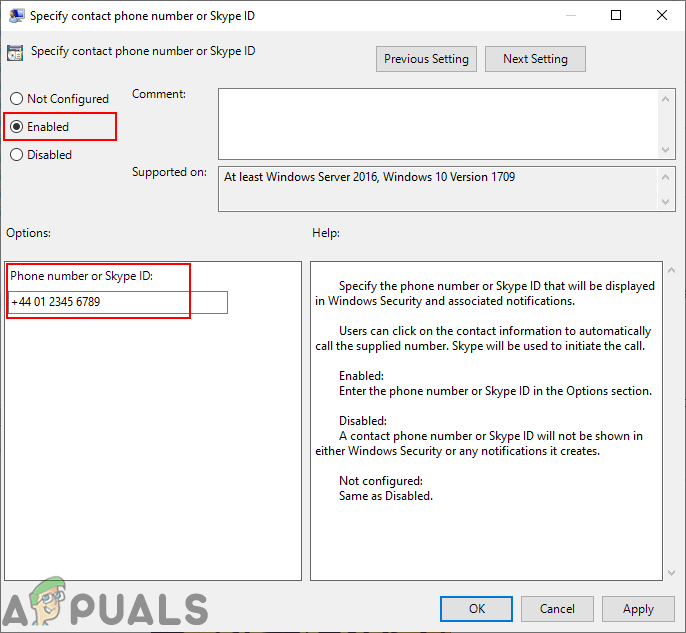
Adding the email address - Now to add the phone number, double-click on the setting named “Specify contact phone number or Skype ID“. Then change the toggle option to Enabled and add the phone number in the box. Click on the Apply/Ok button to save and close the window.
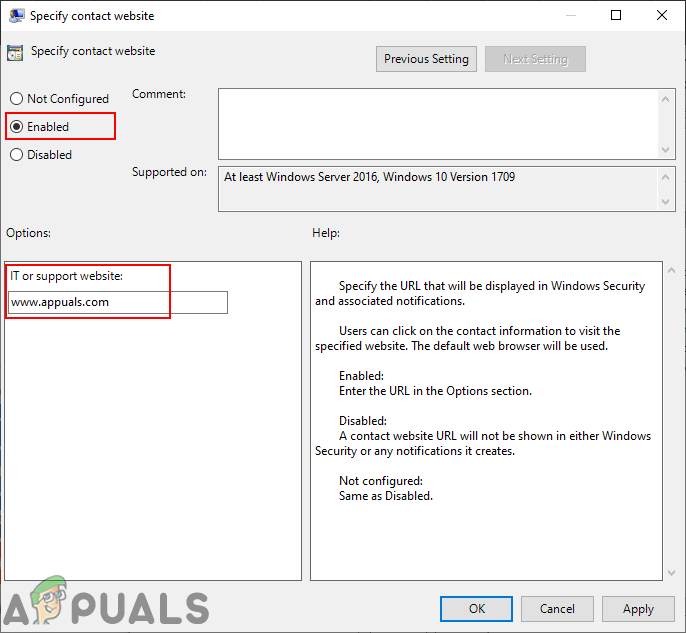
Adding the phone number or Skype ID - Finally, to add a website, double-click on the “Specify contact website” setting. Now change the toggle from the Not Configured to the Enabled option. Add the URL of the site in the box and click on the Apply/Ok button to save changes.
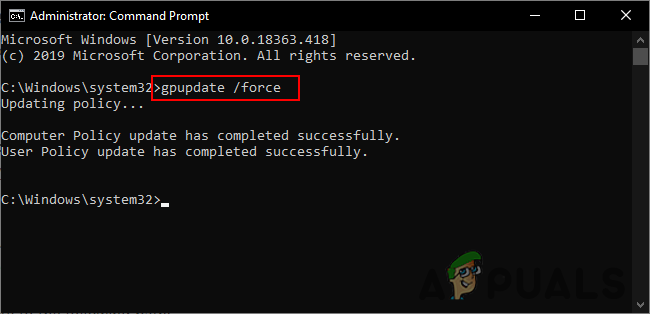
Adding the website URL - Basically, the group policy will automatically update the new configurations. However, if it doesn’t update automatically, then you need to force update it. Search for Command Prompt in the Windows search feature and run it as an administrator.
- Then type the following command in Command Prompt (Admin) window and press Enter key.
gpupdate /force
Force updating the Group Policy - You can always revert back to default settings again by changing the toggle option to Not Configured for all the settings.
Method 2: Customizing through the Registry Editor
If you used the Group Policy method, then the values will be automatically updated for your Registry. However, if you are using this directly, then you will need to create the missing key/value for this specific setting. Most of the users are already familiar with the Registry Editor. Follow the below steps to add the support contact information to Windows Security:
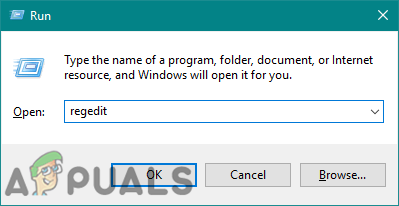
- Press the Windows and R keys to open the Run command box. Now type “regedit” and press the Enter key to open the Registry Editor window. If you get prompted by UAC (User Account Control), then choose the Yes button for it.
Opening the Registry Editor - You can create a registry backup before making any new changes in the Registry Editor. You need to click on the File menu in the menu bar and choose the Export option. Then name the backup file and choose the directory. Finally, click on the Save button to create the backup.
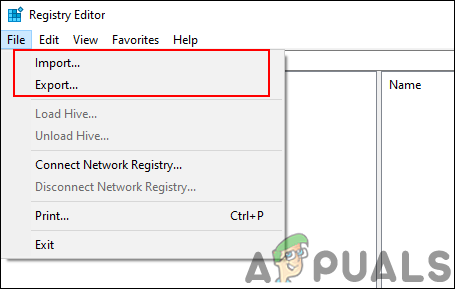
Creating a Registry backup Note: You can recover a registry backup by clicking on the File > Import option. Then, you need to select the backup file that you previously created.
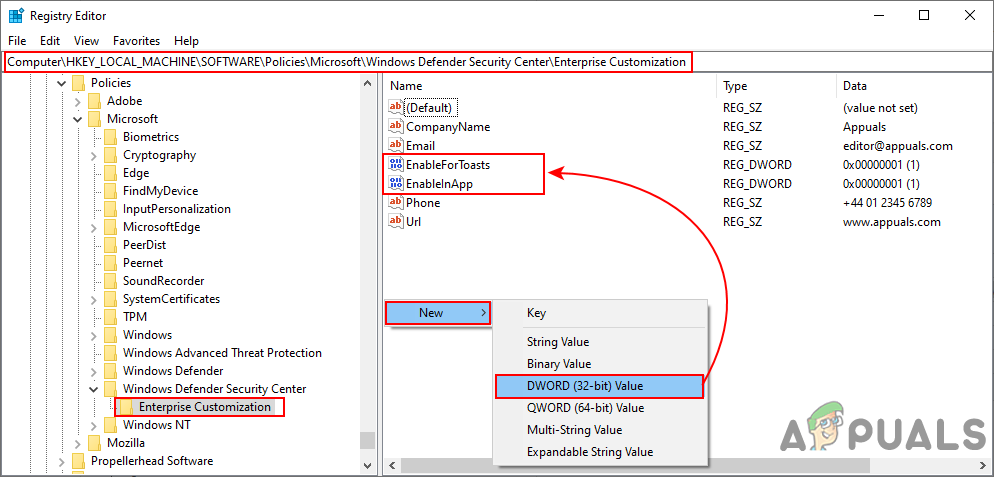
- Head to the following path in the Registry Editor window:
HKEY_LOCAL_MACHINE\SOFTWARE\Policies\Microsoft\Windows Defender Security Center\Enterprise Customization
Note: You can create an Enterprise Customization key if it is missing for you. Right-click on the available key and choosing the New > Key option. Then name the key as “Enterprise Customization“.
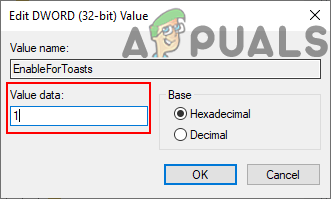
- To enable the support information option, right-click on the right pane and choose the New > DWORD (32-bit) Value option. Name the value as “EnableInApp“.
Creating the value to enable setting - Double-click on the value to open it and then change value data to 1.
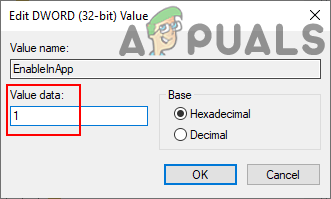
Enabling the value - You need one more value to enable, right-click on the right pane and choose the New > DWORD (32-bit) Value option. Now name the value as “EnableForToasts“.
- Double-click on the EnableForToasts value to open it. Change the value data to 1.
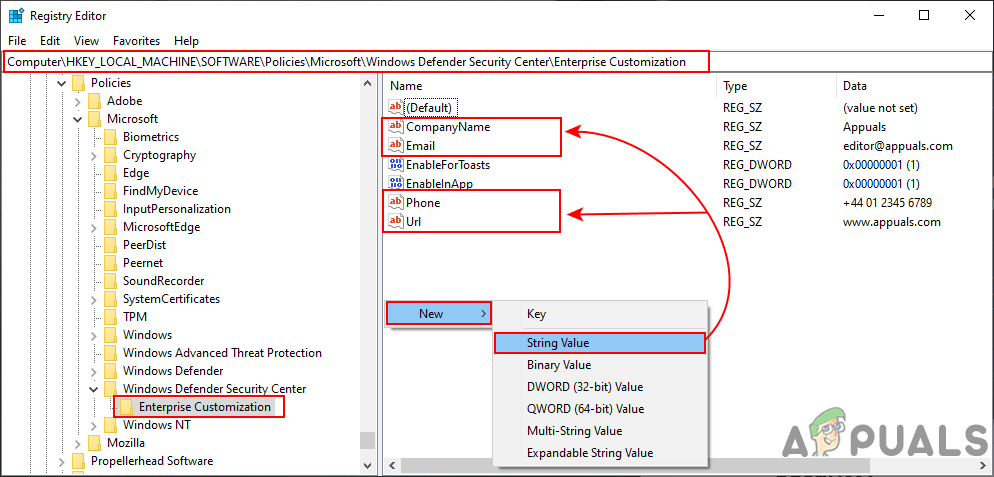
Enabling the notification value - Now to add contact information, right-click on the right pane and choose the New > String Value option. Name the value as “CompanyName“.
Creating the string value - Now double-click on the CompanyName value to open it. Change the value data to the company name that you want.
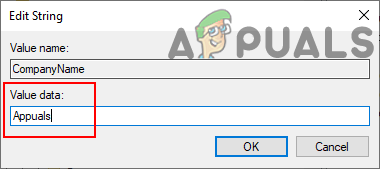
Adding the company name - To add the email, right-click on the right pane and choose the New > String Value option. Name this value as the “Email“.
- Double-click on the Email value to open it. Then add the email address in the value data.
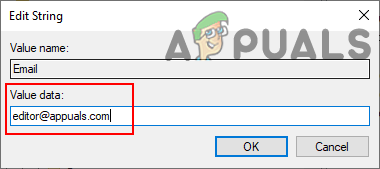
Adding the email address - You can also include the phone number by right-clicking on the right pane and choosing the New > String Value option. Name the value as “Phone“.
- Double-click on the Phone value and add the phone number in the value data.
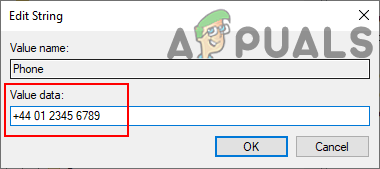
Adding the phone number - Finally, you can include the URL by right-clicking on the right pane and choosing the New > String Value option. Name the value as the “Url“.
- Double-click on the Url value to open it. Now add the URL of the site in the value data.
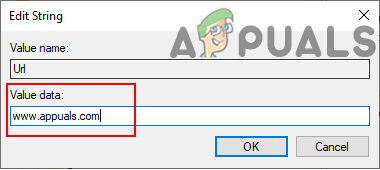
Adding the website URL - Now you can close the Registry Editor window. The changes will be applied instantly and you can view them. However, if it doesn’t apply, then you need to restart the system.
- You can revert back to the default setting only by removing all the created values from the Registry.


