How to Create a Jump Throw Bind in CS:GO
If you want to master your nade lineups in CS:GO, performing jump throws manually won’t get you far. When you attempt these difficult jump throws manually, there’s a chance that you’ll miss your lineup, as human error is always a factor that can be involved.

However, if you follow this quick guide and bind a key to the Jump Throw, your life will become much easier. Having a Jump Throw bind allows you to simply press a single key and automatically perform a perfect Jump Throw with the grenade you have in hand. Below, we will tell you exactly what you need to do to add a Jump Throw bind to CS:GO.
How to Create a Jump-Throw Bind in CS:GO.
There are two ways to make a Jump Throw Bind in CS:GO. The first way is to enter a command into the Developer Console. This method is a very quick and easy way to create the bind, and it can be done without closing CS:GO or even leaving your match.
The other method is to create a config file in your CS:GO folder (.cfg file) that contains the command and execute the file in the launch options. In this way, each time the game is launched, the command will be executed, and the bind will be created for you automatically.
While both methods work, using a config file is generally recommended because it ensures that the bind always remains active. Even if you unintentionally change the bound key to something else in the console, the config file will always override the bind when the game launches, ensuring your Jump Throw bind will never be deleted.
Another advantage that this method has over the console method is the ease of use and convenience it provides. You can use this one file to save all of your binds in one place, and you can easily view and edit them anytime you want.
Create a Jump-Throw Bind Using the Developer Console.
To create the bind this way, you first need to make sure that you have the Developer Console enabled.
If you do not have the Developer Console enabled, or do not know how to access it, follow the steps listed below to enable it in your game.
- Launch CS:GO.
- Click on the gear icon on the left side of the home page.
- Navigate to the “Game” tab in the settings menu.
- Set “Enable Developer Console” to YES.
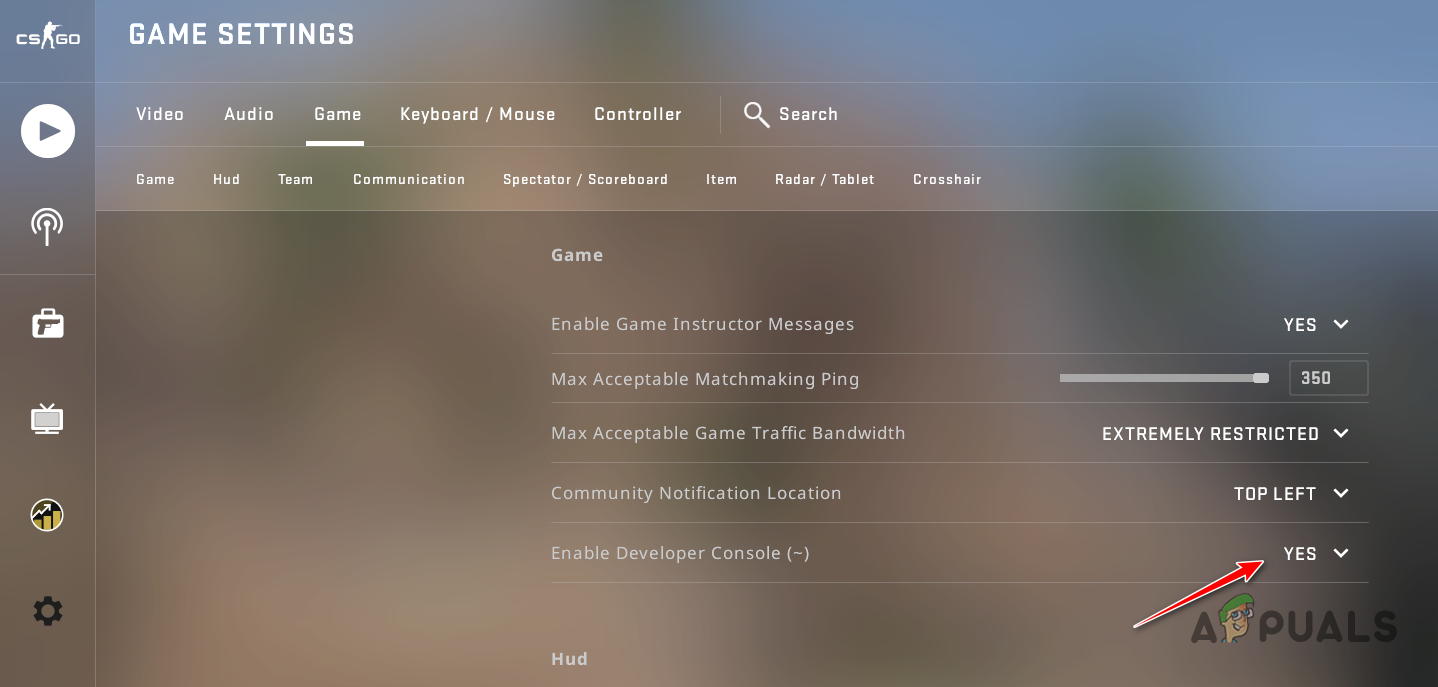
Enabling Developer Console
Once your Developer Console is enabled, press the “~” key on your keyboard to open it. This key is located right above the Tab key, or right below the Escape key, on the left side of your keyboard.
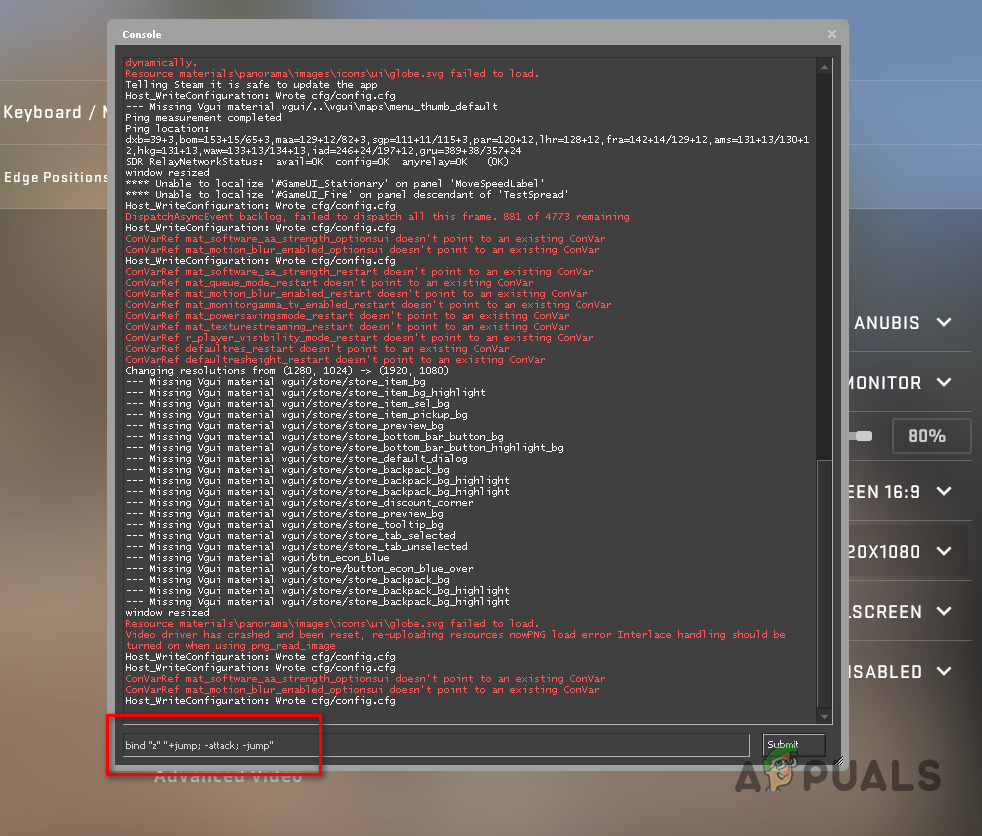
In the Developer Console, copy and paste the following command, then press Enter to execute it:
bind "KEY" "+jump; -attack; -jump"
In this command, you can substitute “KEY” with any key of your choice. For example, if you want to use the Z key for your Jump Throw, you should type the command like this:
bind "z" "+jump; -attack; -jump"
The key is not case-sensitive, so even if you enter an uppercase Z, the bind will still work. You can also use keys like the Alt key for this bind by simply typing “alt” in place of KEY in the command.
Create a Jump-Throw Bind Using a Config File.
If you want to ensure that your Jumpthrow Bind remains active at all times and never gets overridden by another bind, creating a config file is the way to go.
In this method, we will create a simple text file with the .cfg extension in your CS:GO folder, and we will place the command for the bind inside it. After that, we will use a Launch Option to automatically execute the file each time the game is launched.
To create the config file, follow the steps we’ve listed below:
- Open the Steam application.
- Navigate to your Steam Library.
- Right-click on CS:GO and select Manage > Browse Local Files.
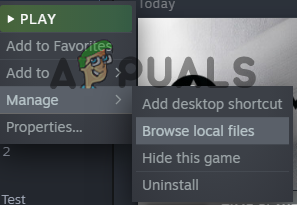
Opening Location of CSGO Game Files through Steam - In File Explorer, go to csgo > cfg.
- Right-click any CFG file, copy it, and paste it into the same folder.
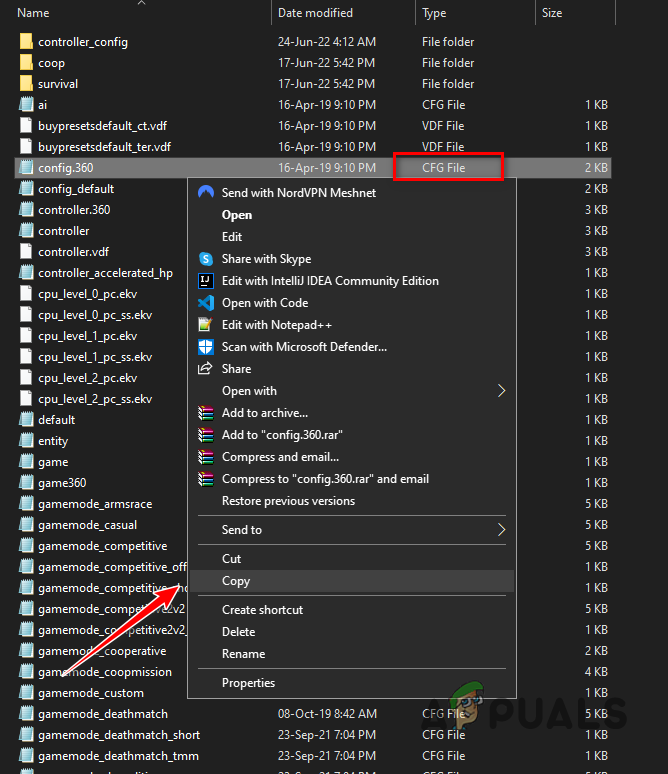
Creating a new CFG file - Rename the copied file to “autoexec” (you can choose a different name if you want).
- Open the new file and delete everything in it.
- Paste these commands into the new file and save it.
alias "+jumpthrow" "+jump;-attack"
alias "-jumpthrow" "-jump"
bind "KEY" "+jumpthrow
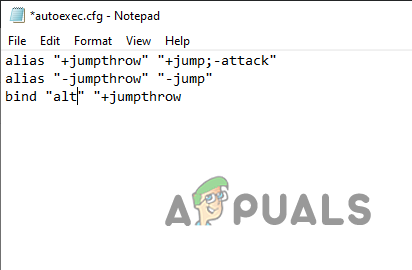
Creating the bind in the autoexec file
In this command, you can substitute ‘KEY‘ for any key of your choice (the key is not case-sensitive). Now that the command has been entered into the CFG file, we need to input an execution command into the CS:GO Launch Options to automatically run this file each time the game is launched. Follow the steps below to do so:
- Open your Steam Library and right-click on Counter-Strike: Global Offensive.
- Click on Properties.
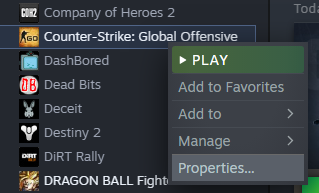
Opening CSGO Properties - In the Launch Options, enter the following command:
+exec autoexec
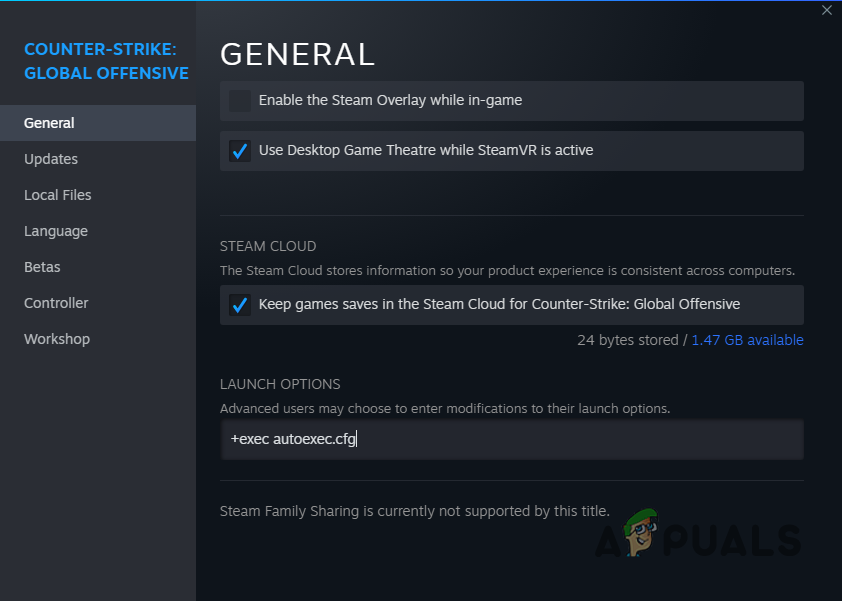
Adding the autoexec Launch Option
If you used a different name for the file, ensure you enter the same name in the Launch Options. You can now launch CS:GO, and the bind will be active.
Using the Jump Throw Bind.
Now that you’ve created the bind, the final step is to learn how to actually use it. Contrary to popular belief, the bind isn’t as simple as merely pressing the key and having it do all the work for you.
To use the bind, you must first hold down the left-click while holding the grenade, smoke, or flash in your hand. While holding the left-click, press the designated key for the bind to perform a perfect jump throw. If you do not hold down the left-click, the bind will not work.
One last thing to note is that using this bind is NOT illegal in CS:GO. If you’re nervous that it might be against the rules of Faceit, ESEA, or professional tournaments, it is usually not the case.
In most servers and tournaments, this bind is completely legal and allowed. However, if you’re participating in a tournament, check its rules beforehand just to be safe.


