How to Create a Basic Android App in PhoneGap
For most people, the idea of creating an Android app sounds as arduous as mountain-climbing. People spend months learning how to code and use the Android SDK to develop apps, and the average person, especially an online business owner, may not have this kind of time.
Fortunately, there is a simple shortcut to creating what is called a hybrid app, as opposed to creating a native app. A hybrid app basically utilizes Android’s built in WebView to present your app, with plug-ins available that allow your hybrid app to access the camera, messaging service, and other aspects of the Android system. A hybrid app can easily be built for multiple operating systems, since they mostly use Java, HTML5, and CSS to run.
This guide will teach you how to create a hybrid app using popular app-building platform PhoneGap. What we’re going to do is turn your website into an installable .apk (Android application) file that can be installed on any Android phone. When the app is launched, it will simply open your website in Android’s native WebView browser, but it will appear as a full-screen app – no URL navigation bar or any other clue that your website is simply being presented in a browser.
Requirements
Your own website (for the purpose of following this guide, you could simply start a free WordPress blog)
PhoneGap account
Notepad++ (or similar text-editing software that can recognize code)
Photo editing software for creating app icons (Photoshop, GIMP, etc)
Coding Templates
These are code templates you can use for the purpose of this guide – they are from my own app developed with PhoneGap, but I have stripped them of my personal information. Setting these up from scratch with all the correct parameters took me many days of troubleshooting, so I am providing these for your convenience. You’re welcome!
Getting Started
Create a folder on your desktop and call it “www:” without the quotes. This will be the project’s main directory, where the PhoneGap builder will expect to find all of the files for your project. Now we’re going to create an icon for your app.
Open your photo editing software and create a new image in .PNG format. Your image settings should look like this:

And now you can draw your icon, for example I’m just going to make a little button:

The size of the image depends on your personal phone screen, but if you intend to develop an app for multiple devices, you will of course make multiple sizes of the same icon. Here is a table of the image sizes used:
36×36 (120dpi / LDPI)
48×48 (160dpi / MDPI)
72×72 (240dpi / HDPI)
96×96 (320dpi / XHDPI)
144×144 (480dpi / XXHDPI)
192×192 (640dpi / XXXHDPI)
I don’t want to spend too long talking about screen sizes and DPI, just know that DPI pretty much correlates to screen resolution. A phone that uses 1080×1920 screen resolution will use 480dpi, but this does not necessarily correlate exactly with screen size. A phone could have a 5.2” screen or a 6” screen and have a 1080×1920 resolution. But this guide isn’t about smartphone screens, so let’s move on.
After you draw up your icon, save it as icon.png and move it inside your www: folder. This will become the default icon for your app. If you want to create icons in different sizes that will match the screen resolution of the user, you would save the icon in different sizes and names, for example Icon144.png, Icon192.png, Icon96.png, and so on. Then you would edit the Config.xml file to point to each individual icon. Let’s move on.
So now that you have an icon for your app, you need a splash image. This is basically a loading screen, like a wallpaper that displays before your app is loaded. Splash image sizes work on the same principle as icons, but are a bit bigger. Here’s the table:
- LDPI:
- Portrait: 200x320px
- Landscape: 320x200px
- MDPI:
- Portrait: 320x480px
- Landscape: 480x320px
- HDPI:
- Portrait: 480x800px
- Landscape: 800x480px
- XHDPI:
- Portrait: 720px1280px
- Landscape: 1280x720px
- XXHDPI:
- Portrait: 960px1600px
- Landscape: 1600x960px
- XXXHDPI:
- Portrait: 1280px1920px
- Landscape: 1920x1280px
So create your splash image in the resolution for your device, save it as Splash.png and then move it inside your project’s folder. Great, you now have your app’s icon and splash image, let’s move onto setting up your config and index files.
Index.HTML and Config.XML Explained
The config.xml file is what sets the build environment (Android, iPhone, Windows Phone), the icon and splash locations, and the Apache Cordova plug-ins you want to use in your app.
Open the template I provided in Notepad++ and you will see these lines near the top:

Update those fields with your information, but leave the “preference” fields alone. The rest of the config file is self-explanatory if you just look at the values. Preference name=”fullscreen” for example tells the app to launch itself as a fullscreen app. Leave everything alone, except for this last value at the bottom of the file:
<allow-navigation href=”http://yourwebsite.com/*” />
Change it to your actual website URL. This will allow the app user to completely navigate your website, and only your website – they cannot leave your website while using your app. Of course the app will not have a URL navigation bar, this isn’t even really a concern, but also makes sure that the user can access all the pages on your website. The * after the website URL is a wildcard, which in coding jargon means that it will accept anything that is entered in place of the * sign.
Of course, if you want to limit the user to only certain pages on your website, you would add separate values like this:
<allow-navigation href=”http://yourwebsite.com/” />
<allow-navigation href=”http://yourwebsite.com/page1.html” />
<allow-navigation href=”http://yourwebsite.com/page2.html” />
Let’s move on to the Index.html file, this is the bread and butter of making the app actually work. Open it inside Notepad++ and switch the document language to HTML. What index.html basically does is tell the Android browser how to display your website – in the template I provided, there are tags to remove the URL navigation bar from the browser, allow the phone’s “back” button to exit the app, and launch the app after the splash screen is displayed. The line you’ll want to change is here:
var url = ‘http://yourwebsite.com’
Building the App in PhoneGap Build
So log into your GitHub account, and navigate to the main page of your repository. Under the repository name, click “Upload Files”, and drag your project folder into the file tree screen. Now type a commit message at the bottom, like “my first app attempt”. Finally click Commit Changes.
Now go to the PhoneGap Build page and sign in. Now click the “New App” button on the build page. This will ask you to enter the path to your GitHub repository, so do so, and then click “Pull from .git reposity”.
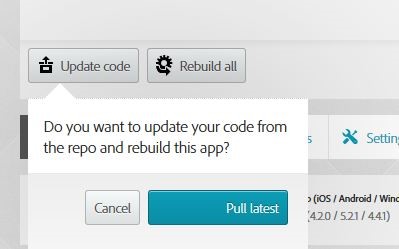
Now back on the main build page, click “Update code” and “Pull latest”.
Finally, click “Build”. It will compile your app into an .apk file, and then present you with the option of downloading the .apk. You can now download this .apk file to your computer and transfer it to your phone, then install it from there. Alternatively, you can use your phone to scan the QR code on your computer screen to automatically install the .apk file onto your Android device.
That’s it! Now, to explain to you a few important things:
- This was an extremely simplified guide that walked you through building the most basic of hybrid apps. People don’t generally go around wrapping their websites in a native browser and passing it off as an Android app on Google Play store. But now that you know how to do it, you can begin reading the PhoneGap documentation on how to customize your app and add a lot of flavor to it, so that you can hopefully create an actually useful app.
- Secondly, Google Play bans this sort of app-building method to create link-scheme apps for the sole purpose of revenue. So you cannot create an app called “Earn Money Today!” that opens a website absolutely full of ads and bank on ad revenue. You will get banned from Google Play store.